
How To Make Strong Glue Joints in Wood

Updated: Sep. 28, 2023
Joinery is a critical skill for every DIYer. Thankfully, learning how to make these joints isn't hard.
A half day
Beginner
$10 - $40
Introduction
Whether you're looking to elevate your DIY skills or to take on a simple project without needing power tools, knowing how to make a strong glue joint in wood will help you.
Making rock-solid joints in wood doesn't require any special tools or techniques, although you can continue improving your glue-up abilities once you get the hang of the basics. If you have an old toolbox lying around, there's a good chance you already have most of the tools you need. There's no reason to be intimidated by the absence of screws or nails, because you can create professional quality glue joints by following a few simple steps.
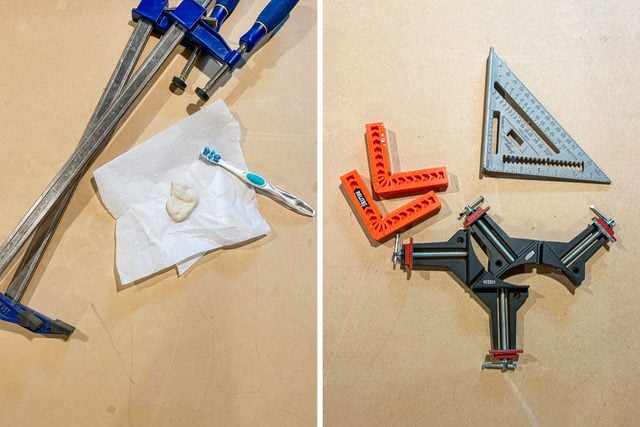
Tools Required
- Brush or rag or old toothbrush for application
- Carpenter/speed square
- Clamps larger than your project dimensions
- Jar for water
- Nail gun
- Pencil or other marking tool
- Power drill
Materials Required
- 100- to 120-grit sandpaper
- Painter's tape
- Paper towels or rags
- Something to cover work surface. Kraft paper or sheet or plastic etc.
- Tack cloth
- Wood (scrap if you are practicing or cut and measured if you are working on a project)
- Wood glue
Project step-by-step (10)
Prepare the space
- Choose a space you don’t mind getting some glue squeeze-out on, or protect your work surface with paper or plastic.
- Assemble your tools.
- Take stock of your project and the joint you want to make. Glue-ups are time sensitive because you need to get everything in place before the glue sets. Best to lay everything out in front of you while leaving ample room to maneuver around the project.
- Make sure you have the right wood glue for the task at hand. Although versatile glues like Titebond III will suffice for most projects, you may need something more specific, like outdoor wood glue.
- Fill a jar with water. This way you have it on hand to wipe up any mistakes with a damp rag. You’ll put your brush in that jar at the end of the glue-up process.
Inspect and prepare the wood
- The preparation is almost as important as the glue-up itself — taking stock of your stock, so to speak. Before advancing to the actual glue-up, it’s imperative to consider what type of joint you’re making, and with what materials. Researching the wood species you’re using can go a long way toward maximizing the long-term strength of your joint. Consider whether you’re gluing end-grain or not, and how much glue you’re going to need for the job.
- Check your material for any warps or twists that might interfere with the joint fitting together well. If you couldn’t get a good fit during the dry fit, fix that before going forward.
- Clean the area where you’ll apply the glue with a tack cloth or lint-free rag. Dust and debris, no matter how small, can interfere with a strong bind.
- Apply tape to any areas of the joint that will be difficult to access once the glue dries. If you’re gluing at a right angle, applying painter’s tape can save you time and effort when it comes time to remove the glue squeeze-out.
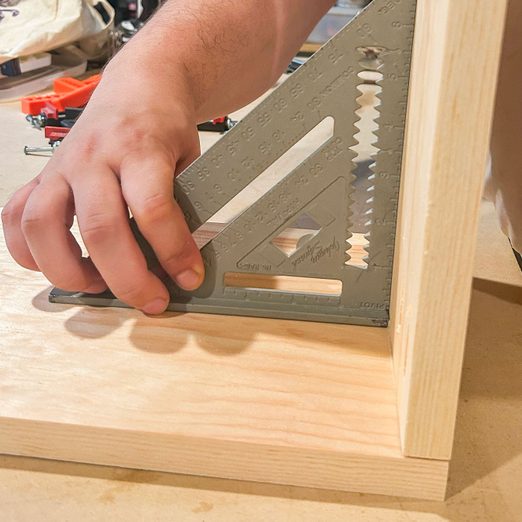
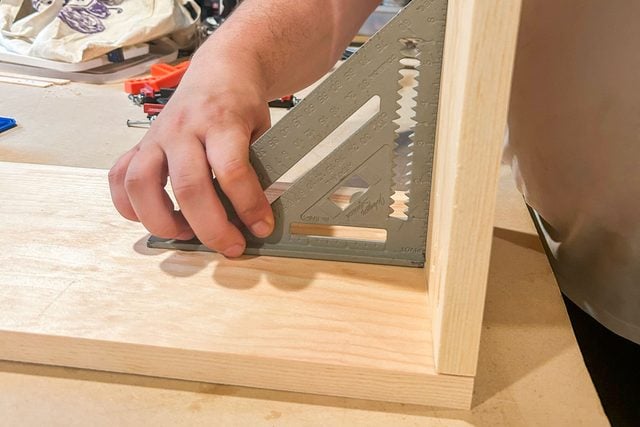
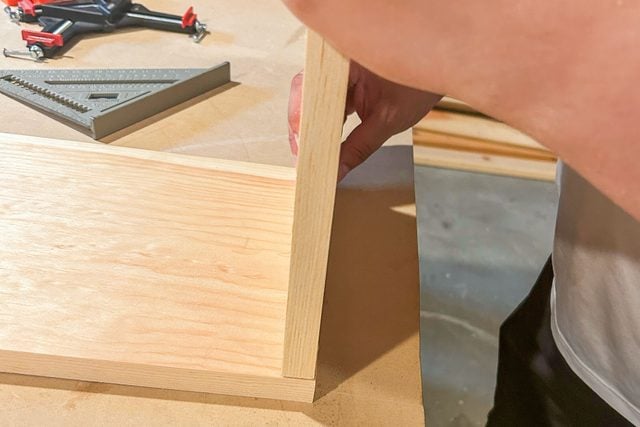
- Consider what angle, if any, will be created in the completed joint. If you’re making a right angle, a carpenter’s square can keep everything aligned during the glue-up.
Check the measurements
- Remember, unlike screws and nails, it’s difficult to reverse a glue-up once it’s done. Double or even triple-check your measurements before applying any glue.
- For proper glue-diligence, do a dry-fit of the glue-up before going any further.
- If you’re doing a simple end-to-end or edge-to-edge glue-up, you may need to use your clamps to hold everything together. Doing a dry-fit of the joint before gluing ensures you won’t have any unwelcome surprises when the glue-up is finished.
- Check that you have a good fit between the two glued surfaces.
- Wood glues won’t bridge gaps, so any joint with gaps will be weak. The parts should fit together snugly or flush.
Apply and spread the glue
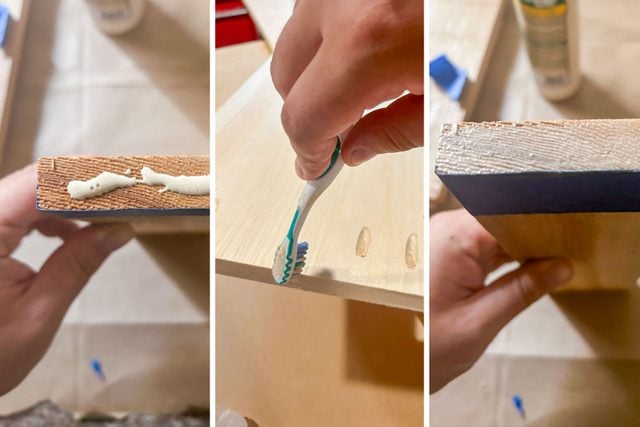
- Apply a thin bead of glue directly onto both surfaces of the joint.
- Spread the bead of glue around with your finger, an old toothbrush, a foam brush or anything of that nature. Make sure to cover the entire surface of the joint area. Getting complete and even coverage is key. Once you have a thin film covering the entire surface, you can stop spreading.
- If you’re gluing end-grain, repeat this step before moving on. The end grain of the wood will absorb more glue than the face grain, and using a first coat provides a sealant of sorts for the second.
Join the joint
- Bring the two surfaces with glue on them together firmly. Make sure to keep a steady hand and try to apply even pressure.
- Ensure there’s good contact between the two surfaces. Rubbing the surfaces against one another creates a tighter bond.
Secure the joint
-
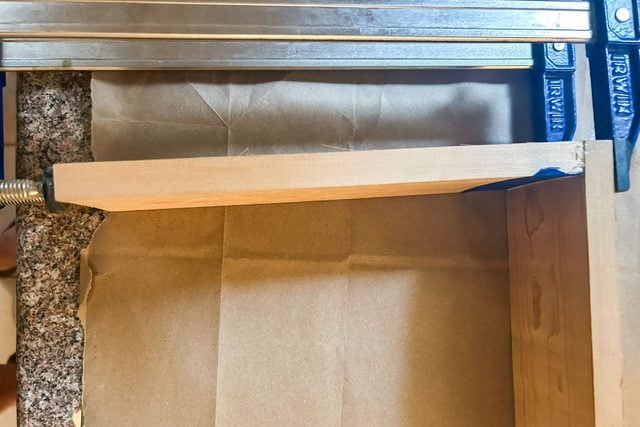
Maintain your desired shape while the glue cures by applying even pressure across the joint with clamps. You can tell if you’re applying uneven pressure because the joint will shift out of alignment.
-
Try using a piece of flat scrap wood as a caul, positioned between the clamp and your project. This will distribute the pressure from the clamp more evenly.
-
-
Adjust your clamps as needed until you see a small amount of glue squeeze out from the newly formed seam.
-
If you’re making a right angle, use a speed square to check the angle between clamp adjustments to make sure the end result isn’t slightly warped.
-
Set it and forget it
- Don’t clean up the squeeze-out now. It’s easier,and cleaner to remove chunks of dried glue than a thin layer of dried glue. That’s why it’s recommended to let the squeeze-out harden alongside the joint. It can be tempting to feel like you are getting ahead by wiping the squeeze-out while it’s wet, but you’re likely creating more work for yourself.
- Make sure all the clamps are tightly secured and let your glue-up sit for at least half a day before removing the clamps. Making adjustments while the glue cures can lead to misalignment at the end.
Clear the space
-
Clean the tool you used to apply the glue so you can save it for another use. If you don’t clean your application tool in time, it will quickly harden just like the joint. Use the same process as cleaning a paintbrush to clean a glue brush.
-
Close the bottle and clear the nozzle of any excess glue. There are few things more frustrating than clogging your own glue bottle.
Clean the seam
-
Once the glue has fully cured, remove any tape you applied.
-
Use sandpaper, or a card scraper if you have a long seam, to remove excess glue that remains after removing the tape.
-
Regardless of what method you use, going slowly and steadily is the best way to ensure an even look at the end. Avoid the temptation to rub at the little beads of glue as hard as you can. Before you know it, the wood will be marred.
-
Tips and tricks
-
Strong glue joints need pressure. If you can’t use clamps, screws or nails, even a set of weights or elastic cords can help. Any amount of stabilizing pressure is better than none.
-
Increasing the surface area of the joint enhances its strength. You can do this by adding biscuits, dominoes or splines inside of the joint itself, or by cutting your material to enhance the glue surface area. You can take your skills up a notch by trying out different joint techniques, such as lap joints or mortise and tenon.
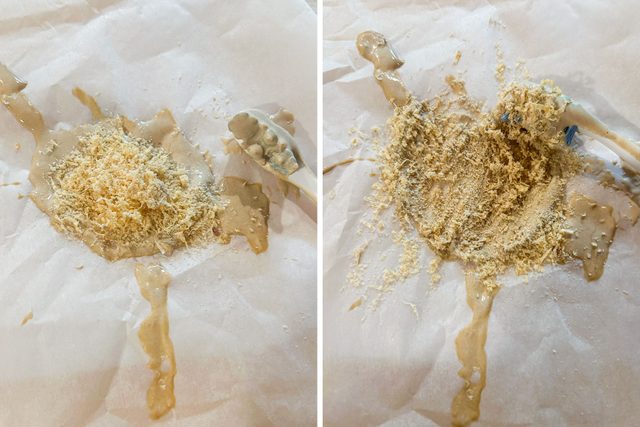
- If you have a few cracks in your joints, you can easily fill them by creating a mix of sawdust and glue. If you can, try to get sawdust from the wood you’re gluing for a good color match.
- Continue checking your materials throughout. Also, checking for square every now and then will save you a lot of time down the road.
Originally Published: July 16, 2019