
How To Build Your Own Christmas Tree Stand

Updated: Nov. 17, 2023
What better way to get in a festive holiday mood then by building a sturdy DIY Christmas tree stand?
An hour or less
Beginner
Less than $20
Introduction
This Christmas tree is easy to build, requires only a few materials and can be customized to fit trees of all sizes.Tools Required
- Allen wrench
- Drill/driver
- Impact Drill
- Miter saw
Materials Required
- 2 8-ft 2x4's
- 8 2-1/2-in. screws
- 8 8-in Wire Eye Lags
Follow our step-by-step guide for how to build a Christmas tree stand. Once you’re done setting up your Christmas tree, transform your tree into a work of art with stylish ornaments, garland, and other on-trend Christmas tree decorations.
Project step-by-step (6)
Step 1
Build the base
- Cut one of your eight-foot 2x4s into four 23-1/2-inch lengths on a miter saw or a circular saw.
- Build a square out of those four sections of 2×4, butting the ends together in a spiraling pattern so you end up with a square, 25-in. x 25-in. base.
- Pro Tip: You could also nail the base together, but it’s best to use screws so there’s no risk of it coming apart later and your fully-decorated Christmas tree toppling over.

Step 2
Determine how big of an opening you need
- The opening at the center of the stand needs to be big enough to accommodate the trunk of your Christmas tree.
- Note: We built this base with an opening of five inches so that it would fit the diameter of the average Christmas tree trunk, which is four inches, according to the National Christmas Tree Association.
- After you’ve decided how big of an opening you need at the center, you need to do some quick math to calculate the length you should cut the rest of your 2×4.
- Note: Take the width of your base and subtract the size of your opening. Divide that number by two and then add the size of your opening to it.
- For us, that calculation looked like ([25-inches—5-inches]/2) + 5-inches = 15-inches
- Note: Take the width of your base and subtract the size of your opening. Divide that number by two and then add the size of your opening to it.
- That final number is the length you want to cut four more 2x4s, which will be used to build the top of the stand.

Step 3
Mark the boards and pre-drill
- Make three marks on each of the 2x4s you just cut.
- One mark should be the length of your opening (five inches) away from the end of the board
- One should be exactly halfway between that mark (2-1/2-inches)
- The last one should be at the length of your opening plus 3/4-in. (5-3/4-inches).
- Once you’ve marked up your boards, it’s time to pre-drill some holes.
- First, drill two clearance holes for 2-1/2-inch screws at the furthest mark you just made (5-3/4-inches) and partially drive screws into each of these holes.
- Pro Tip: You also need to pre-drill two clearance holes for the wire eye lags that will hold your tree in place. Those go right at the middle mark you made earlier (2-1/2-inches).

Step 4
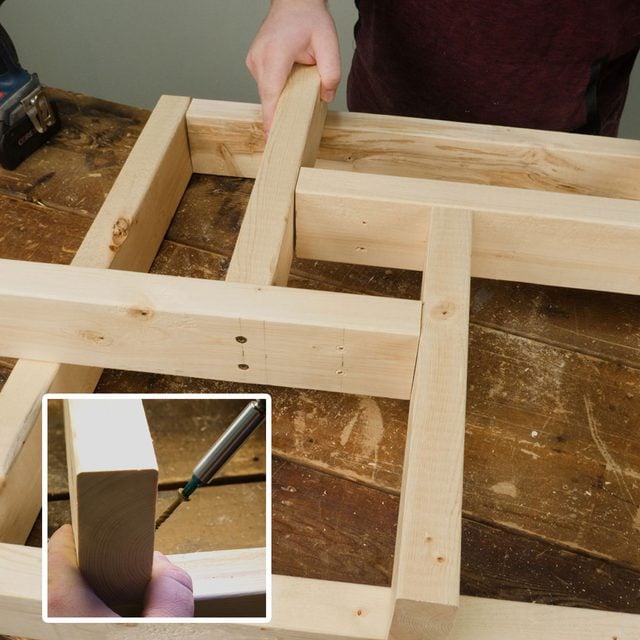
Assemble the top of the stand
- Assemble those four 2x4s together in a sort of pinwheel shape, lining each edge up with the five-inch mark you made earlier.
- The pre-drilled holes should be perfectly lined up. Finish driving the screws you started earlier to assemble the top of your stand.

Step 5
Attach the two pieces together
- Now it’s time to put together the base and top of your tree stand.
- Place the top of the stand on top of the base. Line it up so that everything is flush with the opening on your top piece at the center of your base.
- Toenail screws through the top of the stand and down into the base to secure it in place.
Step 6
Partially drive in the wire eye lags
- Partially drive the lag bolts into the pre-drilled holes you made earlier.
- Note: This will make it easier to quickly drive them into the tree once it’s in position.
- Pro Tip: The easiest way to drive screw eye bolts is to put an Allen wrench into the end of your drill/driver and use that to gradually spin the bolt in.
- Note: This will make it easier to quickly drive them into the tree once it’s in position.
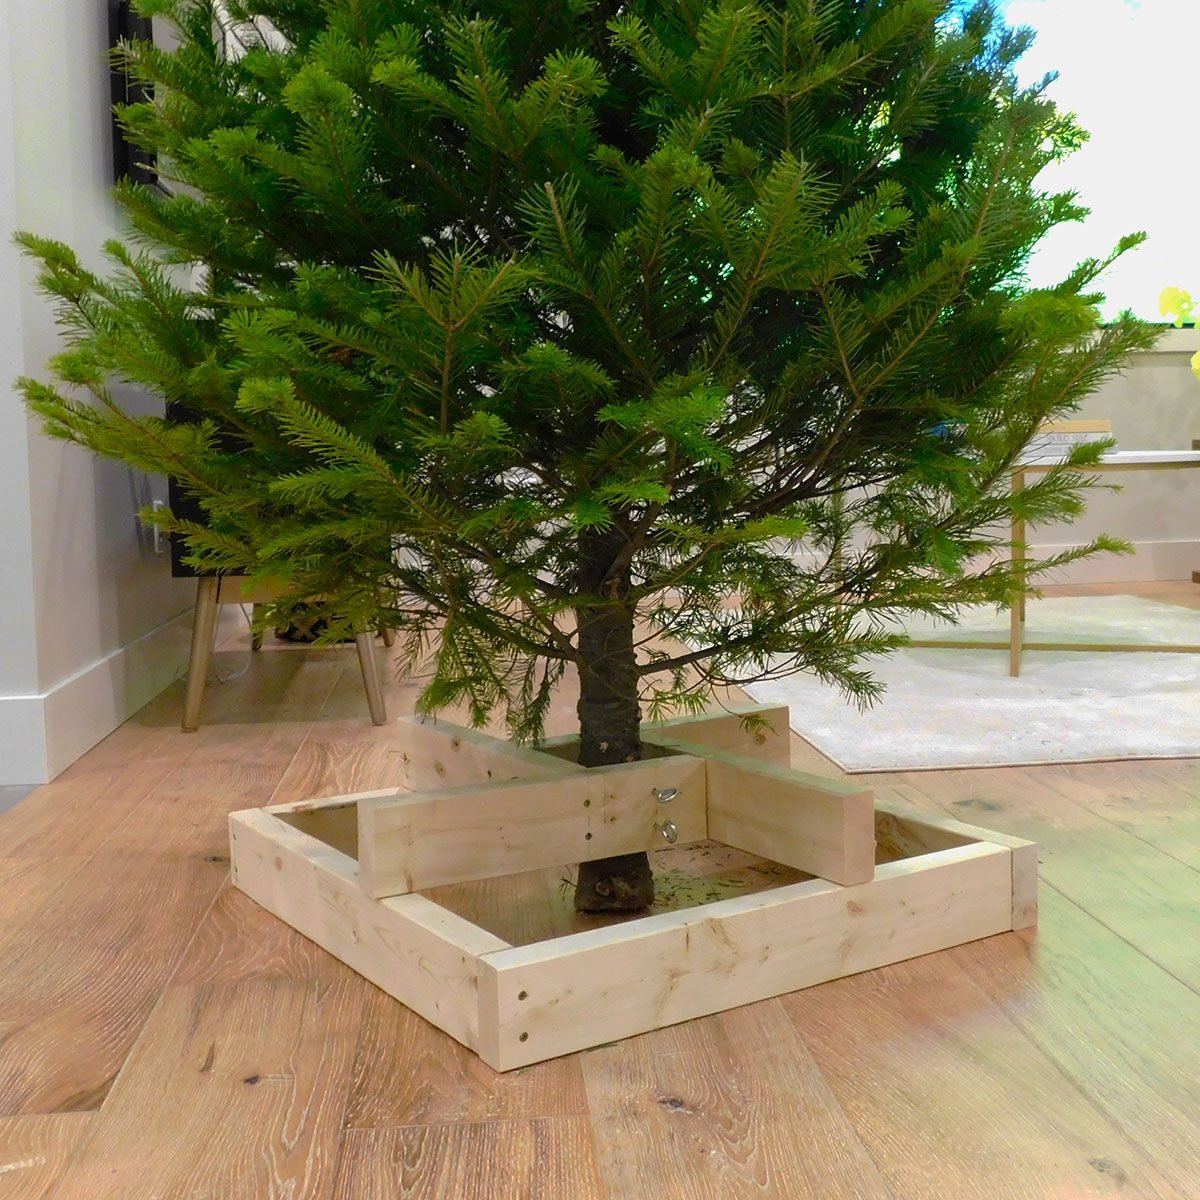
- Once that’s done, your new Christmas tree stand is ready to go and it’s time for you to do some tree shopping.
If you want to indulge your kids in more DIY projects this holiday season, teach them how to make their own Christmas crackers.
Originally Published: December 01, 2020