How To Build a Maple Taco Holder

Updated: Oct. 13, 2023
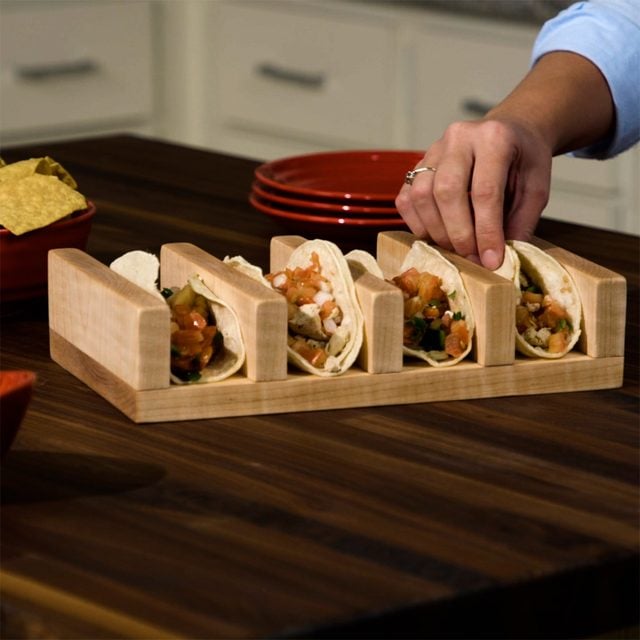
This easy-to-make taco holder features the same materials as a cutting board: hardwood, food-safe glue and a natural oil finish. Make one for yourself today!

1 - 2 hours
Beginner
Around $25
Introduction
Just a few materials and a couple of tools is all it takes to make this quirky serving tray. Whether you’re hosting a big fiesta or simply dishing up a weeknight dinner for your family, a taco holder is sure to spark conversation and compliments. Keep reading to learn how to build it.Tools Required
- Clamps
- Cutting board oil
- mitre saw
- Sandpaper
- Water-resistant food-safe wood glue
Materials Required
- 1 x 7-1/4 in. maple board (approximately 2 ft.)
Few nights of the week are capable of matching taco night in its deliciousness. In fact, it’s easy to make the case that tacos are the perfect food, customizable for all tastes and diets, fun to mix and match flavors and they’re handheld.
That last part intimidates some people. Handheld food can be a little messy, which can also mean more time cleaning the kitchen. To that end, the taco holder can be a big help, keeping the taco upright and its ingredients in place. It’s especially useful if you’re hard shells to make your tacos, and anyone doing the cooking will appreciate that it does make it easier to fill the tacos. But rather than go out and buy a handful of taco holders ahead of your next get together, why not spend an hour or so in the shop making your own?
Woodworking for beginners
Building things with your hands is an incredibly rewarding hobby, but for beginners, woodworking can admittedly be a little intimidating. This project is perfect if you’re just getting into it. There are no complicated joints to fuss with and the only tools you really need are a saw and a couple of clamps.
If you’re more advanced in your woodworking skills, you can definitely take this concept and kick it up a few notches to make something that might just command more attention than the tacos. But if you choose to keep it simple and follow the plan laid out here, you’ll have a nice handmade piece for your table and still give Taco Tuesday a little extra flair.
Project step-by-step (6)
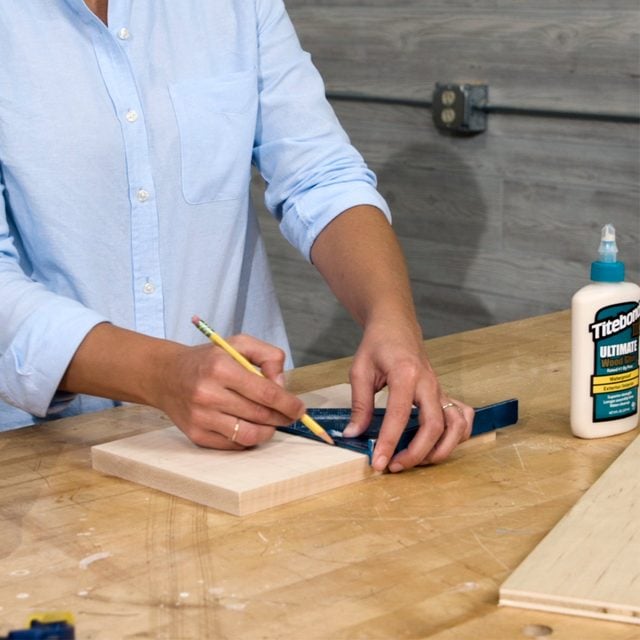
Cut the parts
I used a 1 x 7-1/4-in. maple board for this project, so 6-in. tortillas will fit nicely in each slot.
- Cut the bottom piece to 11-3/4 in. Then cut five 1-3/4-in. wall pieces.

- Lay out the bottom and wall pieces.
- Align the two end wall pieces to be flush with the edges of the bottom piece, and then space each additional wall piece 2 in. apart.
- Lightly mark the location of each wall piece.
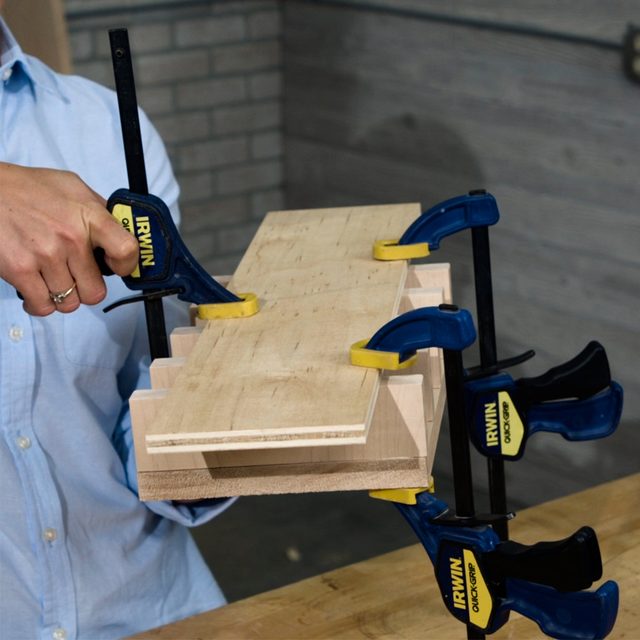
- Glue each wall piece to the bottom and clamp them in place.
- Allow the glue to dry completely before removing the clamps.
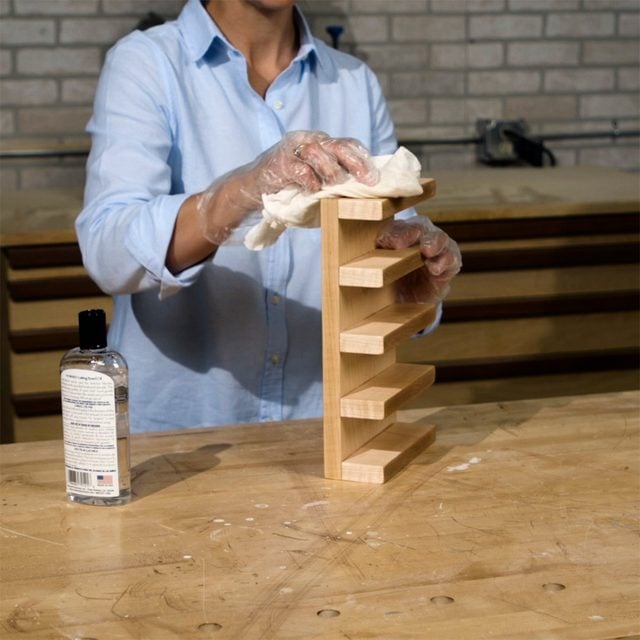
- Sand all edges and wipe off the dust.
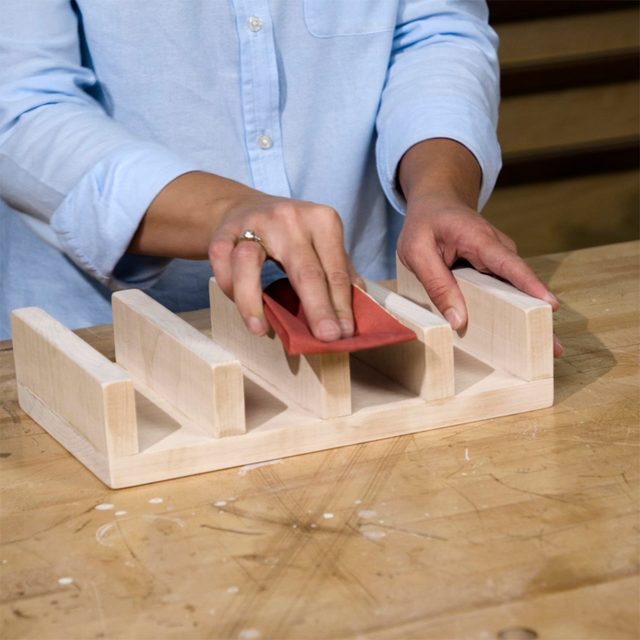
- Then apply a generous coat of cutting board oil to the entire piece.
- Let the oil soak in for at least 20 minutes before removing the excess with a clean cloth.
That’s it! Fill the slots with tacos and you’re ready for a fiesta!