
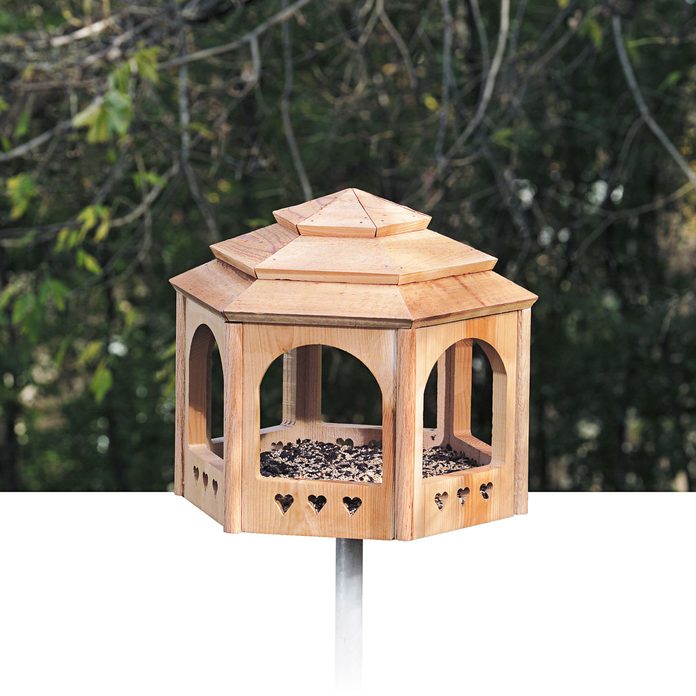
DIY Wooden Bird Feeder: A Gazebo for the Birds
Updated: Jan. 04, 2024This DIY wooden bird feeder is simple for people to build, easy for their feathered friends to love.
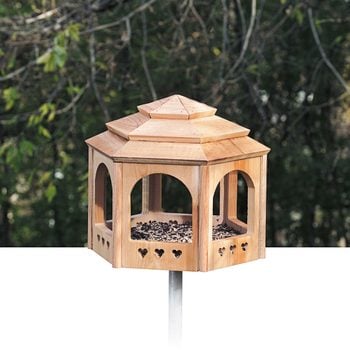
The materials for the gazebo for the birds cost under $20, and all of them are available at local home centers. It only takes part of an afternoon to build, without any fancy tools. If you want, you can build several assembly-line style. And for more bird house inspiration, check out these 16 seriously cool birdhouses.
DIY Wooden Bird Feeder Project Directions:
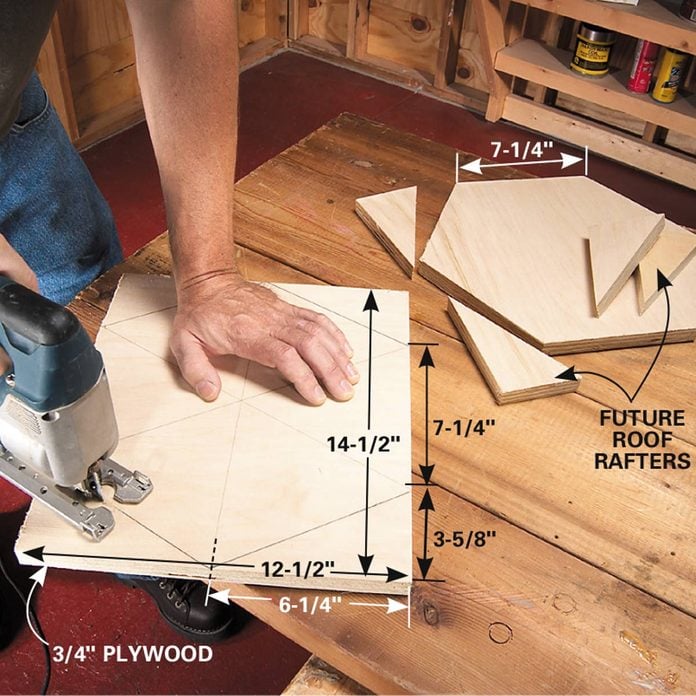
1. Cut Out Gazebo Pieces
Start by cutting the top and bottom panels and six walls. First cut two 12-1/2 in. by 14-1/2-in. rectangles out of 3/4-in. plywood. Most home centers will cut the plywood to size for you. Mark, then cut off the corners as shown in the photo with step 1 and Figure A (in Project PDFs below). Save six of the triangles, which will become the roof rafters a few minutes down the road. Use a jigsaw (or a circular saw) to cut six 10-in. wall sections from a 1×8 cedar board (actual width, 7-1/4 in.).

2. Make a Template
Next, make a template for the wall cutouts out of 1/2-in. plywood. It took a few minutes, but once it was finished it made cutting out the rest of the wall sections easy. To make your wall template, photocopy the pattern in Figure A and glue it onto a thin piece of plywood (or trace it on using carbon paper). Then use a 1/2-in. bit to drill pilot holes and the tops of the hearts, and a jigsaw to cut out the window opening and the tips of the hearts. Use two small nails to tack your template to one of the wall sections. Trace the window opening and use the template as a guide to drill the window pilot holes and the top-of-heart holes.
*Tip: Use a brad point or Forstner bit to drill the holes for the window corners and hearts. They’ll create a cleaner cut and stay on course better than a standard twist drill bit.
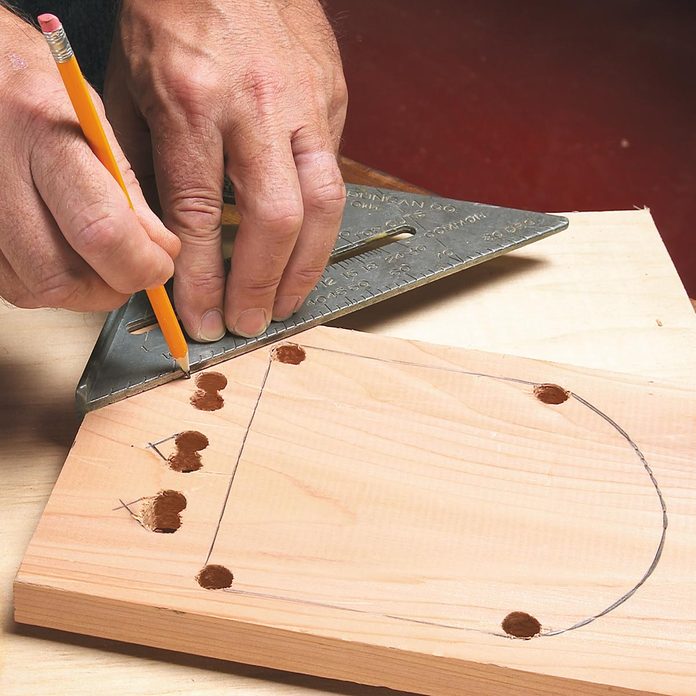
3. Draw the Hearts and Cut
Remove the template, mark the 45-degree angle heart tips with an angle square (they’re hard to mark accurately through the template). Finish cutting out the window openings and hearts with a jigsaw. Repeat this five more times!

4. Assemble Gazebo Walls
Since each side of the hexagonal top and bottom is 7-1/4 in. long and the 1×8 cedar sides are also 7-1/4 in. wide, the pieces fit like a glove. Use 6d (2-in.-long) galvanized nails to secure each wall section to the top and bottom panels.

5. Assemble the Rafters
Take the six triangular corner cutoffs you made earlier and glue and nail them to the top hexagon to serve as rafters. Center each triangle on the layout lines and make sure the outer tips meet the outer corners of the cedar walls.
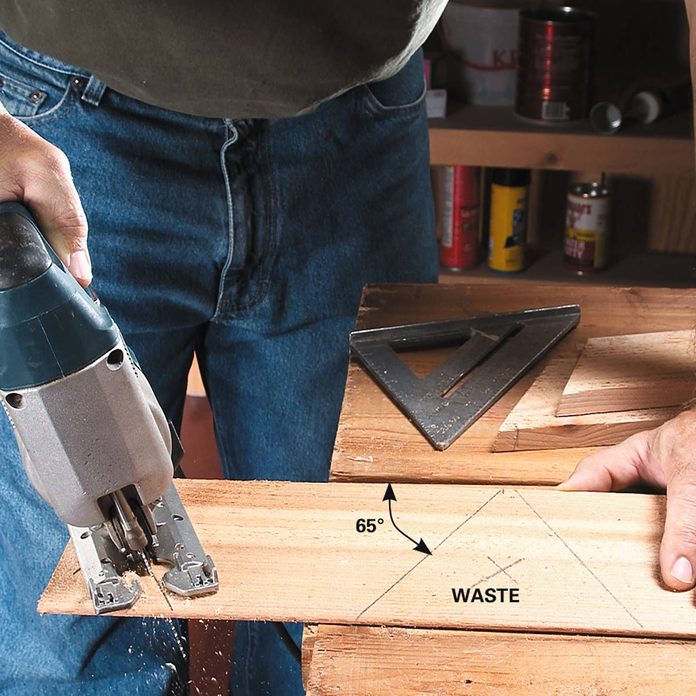
6. Cut Shingles
Use three overlapping layers of 1×6 cedar lap siding for the shingles. Use a protractor to draw the 65-degree angle on the siding, then a jigsaw with the bevel angle set at 10 degrees to cut the first six roof panels.

7. Shingle the Roof
Set the first row of siding in place, but don’t nail anything quite yet. Adjust the panels so they all hang over the walls the same distance and fit pretty uniformly on the rafters. Don’t worry too much about an exact fit since the plywood top will keep the water out. And with an open-air design, some wind-blown rain is bound to creep in anyway.
Use a $20 electric brad nailer to install the roof panels; 1-in. hand-driven brads work fine, too. Then cut, fit and nail on the second and third rows the same way.
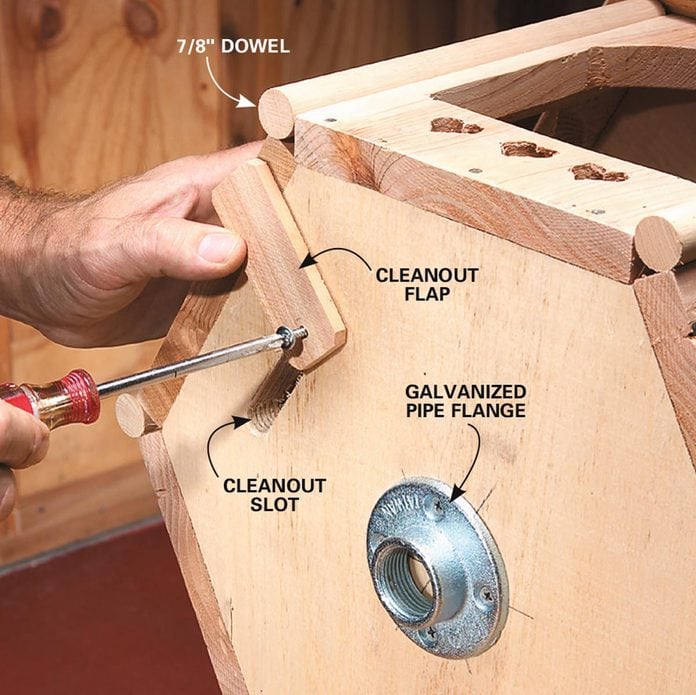
8. Add Trim and Hardware
Cut 7/8-in. dowels and nail them on the corners. Use galvanized screws to mount a pipe flange to the center of the base. Drill two more 1/2-in. holes about 3 in. apart and cut out the space between them to create a clean out slot. Make the flap for the clean out slot from a piece of scrap siding and secure it with one screw. Add a few 3/16-in. holes in the base for drainage.
Finally, bury a length of threaded pipe 16 in. into the ground, screw the pipe flange and bird feeder onto it and fill it up with birdseed. Dinner is served!
Now that your Gazebo for the Birds is done, check out these 12 great tips for landscaping your backyard! Adding walls and paths made of stone or brick to your landscape transforms it into something truly special.
Wood Bird Feeder Plans and Project PDFs:
Click the links below to download the construction drawing for this project.
