
Top Trim Carpentry Tools
Updated: Jul. 17, 2019A veteran trimmer reveals his secret weapons
Overview

In my 20 years as a contractor, I’ve become pretty good at trim work. But working alongside my friend Jerome makes me feel like a beginner. He manages to combine speed and perfection in a way few carpenters can match. That’s why I asked for his advice on trim tools. Here’s what he told me…
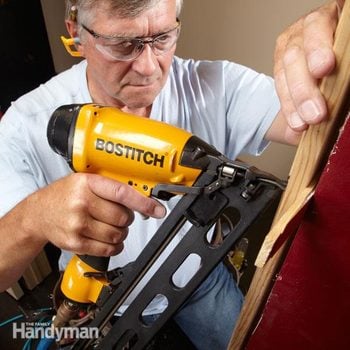
Brad nailer
Features to look for
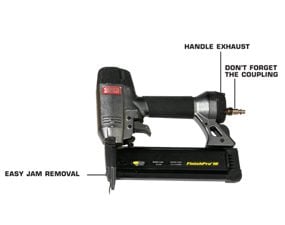
Whether you’re using a finish or a brad nailer, you’ll occasionally hit something hard (like a drywall screw) that will cause the gun to jam. This gun lets you clear jams just by opening the magazine. Others have a quick-release nosepiece. Without these options, you have to disassemble the nosepiece.
Some models exhaust through the handle, away from walls and trim.
Before you leave the store, check to see if the gun comes with a coupling. Many don’t. If it comes with a swivel coupling, buy a non-swivel version. Jerome says he’s never met a swivel coupling that didn’t leak.
A brad nailer is a small, lightweight tool that shoots skinny 18-gauge brad nails that are ideal for thin trim. A good selection of inexpensive, brand-name guns are available at home centers and online. Before you buy, check the maximum brad length. Many models shoot brads ranging from 5/8 in. to 2 in. long, but some max out at 1-1/4 in.
Finish nailer
Features to look for
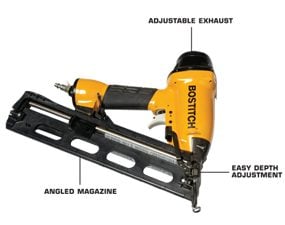
Finish nailers come in two shapes. On some, the magazine is parallel to the handle. On others, it’s angled. Angled is the way to go. It’s easier to get into tight spots.
A gun with a fixed exhaust port can leave oily stains on the wall. An adjustable port lets you aim the exhaust away from the wall.
The gun should countersink nails without driving them so deep that they split the trim or blast right through. The crude way to control depth is to adjust pressure at the compressor. A better way is to get a gun with a depth dial on the nosepiece.
For trim that’s 3/4 in. thick or more, you need a 15- or 16-gauge finish nailer, which shoots fatter, longer nails (up to 2-1/2 in.). A finish nailer is also good for hanging doors and installing windows and jamb extensions. Before you buy a gun, make sure the nails it requires are widely available—not just at one store at the other end of town.
Small compressors are big enough
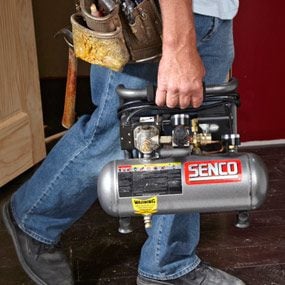
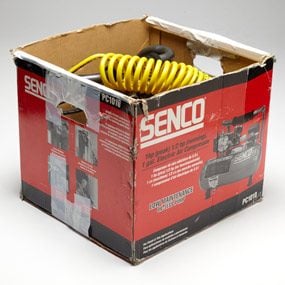
For most trim jobs, there’s no reason to lug around a compressor that weighs 40 or 50 lbs. There are lots of options in the 20- to 25-lb. range. And that’s big enough to keep up with a one-man trim crew. A little compressor can even power a big framing nailer if you give the compressor a few seconds to catch up after three to five shots.
Almost perfect air hose
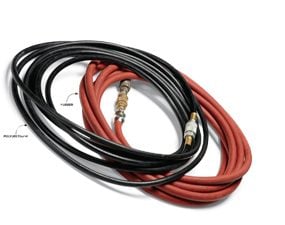
Polyurethane vs. rubber
Polyurethane air hoses are just plain better than rubber or PVC ones. They’re just as tough but much lighter (especially nice when you’re working from a ladder). Plus, they don’t leave those nasty skid marks on walls when you yank them around a corner. The downside is that poly hoses can be gangly, tangly and hard to roll up.
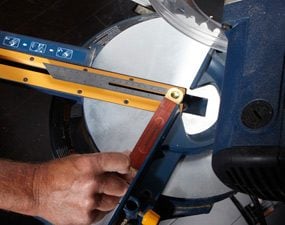
Odd-job solution
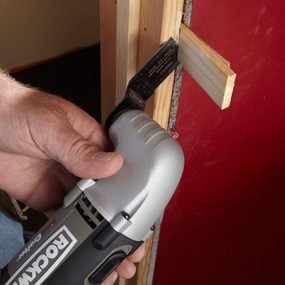
Oscillating cutter
You’ll never know how badly you need an oscillating tool until you try one. It’s handy for a litany of projects, including trim. The blade slips nicely behind trim to cut stubborn nails so you can remove trim without splitting it. It also lets you neatly trim shims—none of the slipping or cracking you sometimes get with the utility knife method. Jerome likes to hang a bunch of doors and then run around trimming them off. It’s almost fun. The sanding pad is good for trim work too, especially inside corners and around balusters.
Pry bar
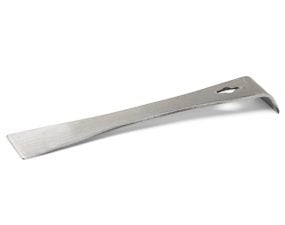
Must-have hand tool
There are a hundred kinds of pry bars out there, but this is the only one in Jerome’s tool pouch. What makes it unique is that the bend at the claw is less than 90 degrees. With that gentle bend, Jerome can slip the claw behind base trim from below and pry off trim without damaging the wall above the trim. This pry bar (Hyde 45600, available through our affiliation with Amazon.com) is also a favorite of painters, so look for it in the paint aisle, at paint stores or online.
Odd-angle calculator
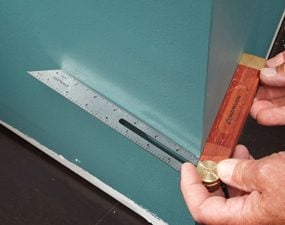
The bevel gauge has been around for thousands of years (give or take a millennium), and the beauty of the tool is its simplicity. It has lots of uses on trim jobs, but the most common use by far is for dealing with a corner that’s way out of square. A basic bevel gauge is inexpensive and will last a lifetime.
Terrific trim ladder
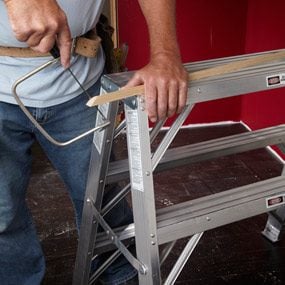
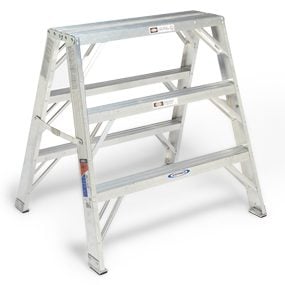
A 3-ft. ladder is perfect for trim work. That height puts you right where you need to be for crown molding or provides a perfect work surface for jobs like coping. This sturdy model (Werner TW373-30, available through our affiliation with Amazon.com) is a whopping 30 in. wide, so it also makes a great sawhorse or supports scaffold planks. Plus, it has steps on both sides.
Spot sander
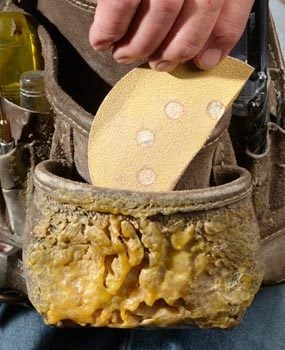
Trim carpentry produces sharp edges and splinters that need to be smoothed out one way or another. Some guys like sanding sponges, but Jerome prefers a 100-grit adhesive-backed sanding disc folded in half. It’s tougher than regular sandpaper, doesn’t eat up valuable tool pouch space and doesn’t tear on sharp edges the way sponges do. Pick up a pack of five discs at any home center.
Nail sets
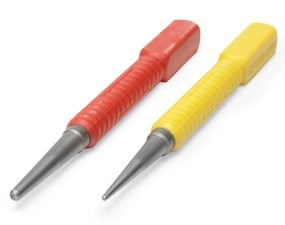
It takes two
Jerome always carries a nail set with a small tip. It’s good for setting nails with large heads and makes a good center punch to create starter holes for hinge screws. But a small nail set slips off the heads of brads, so Jerome also carries a larger nail set; one with a concave tip that locks onto tiny brad heads. Rubber-coated nail sets give you a better grip and—more important—the bright colors are easy to spot when you leave them lying around.
Required Tools for this Project
Have the necessary tools for this DIY project lined up before you start—you’ll save time and frustration.
- Air compressor
- Air hose
- Brad nail gun
- Coping saw
- Nail set
- Pry bar
- Safety glasses
- Stepladder
Required Materials for this Project
Avoid last-minute shopping trips by having all your materials ready ahead of time. Here’s a list.
- Adhesive-backed sanding discs
- Wood glue
