
How To Use an Electric Planer

Updated: Feb. 09, 2024
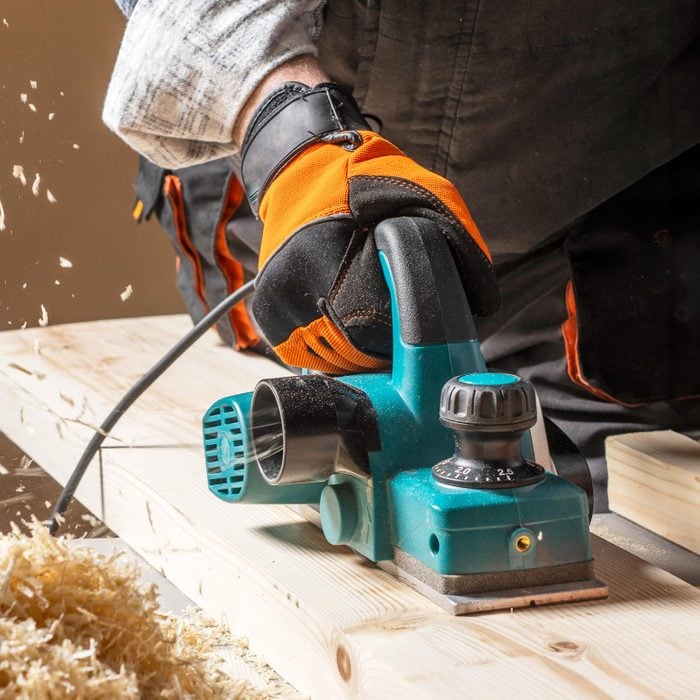
An electric planer shaves and shapes wood like a hand plane, a belt sander and a jointer all rolled into one.
Power planers are timesavers that have found their niche with such varied tasks as edge-smoothing and leveling framing lumber and chamfering handrails and posts.
With the proper skill and accessories, you can also use power planers for finesse work like beveling door edges, scribing cabinets and countertops, and shaping and tapering wood trim. We’ll show you five common applications, plus tell you how to use, maintain and work safely with this unique, versatile tool.
On This Page
How To Use a Handheld Electric Planer
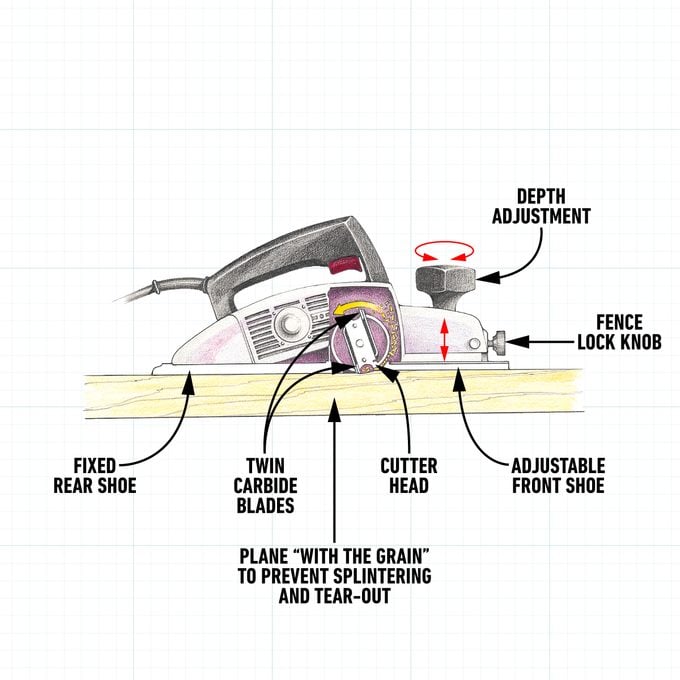
Like a hand plane, the power hand planer (or electric planer) rides on a shoe, or sole plate (Fig. A). Like a jointer, the planer has blades mounted on a cutter head or drum that spins at 20,000 rpm, removing wood equal to the difference in elevation between the front and rear shoes.
The front hand grip doubles as a depth-adjustment gauge. The gauge, with its built-in scale settings, turns back and forth to move the front planer shoe up or down, setting the depth of the cut. Depending on the depth you set, the planer removes lots of wood (1/8 in. per pass) or, like a belt sander, a little (1/64 in.).
Get the most out of the tool by mastering the right way to hold and push the planer. Properly balancing your body ensures safety and the best planning results.
Balance means standing with your feet apart in a position that you’ll find comfortable throughout the full tool pass on the workpiece. Each pass of the planer involves a rhythm of balance and hand pressure:
- Begin by resting the front shoe of the planer flat on the wood without letting the blade touch the work.
- Start the tool, let the motor reach full speed, then ease the plane into contact with the work and push it steadily forward.
- Keep your initial pressure on the front grip as the planer enters the workpiece.
- Balance hand pressure between the tool handle and front knob as both planer soles contact the work.
- As you push the tool off the work, apply greater control to “catch” the rear handle. Avoid overreaching at the end of a pass; the front shoe will drop off the wood and let the blades take an uneven bite off the end of the wood (called “snipe”).
The speed at which you push the tool and the depth setting you choose will affect the final smoothness of your work. For power-shaving dimensional lumber, bites of 1/8 in. per pass are OK. To obtain the smoothest results when you’re edge-planing hardwood boards, use a 1/64-in. or 1/32-in. depth setting, push the tool slowly and make more passes.
How an electric planer works
Two carbide blades spinning on a cutter head are the heart of a power planer. Using the depth adjustment knob, control the bite of your blades by raising or lowering the movable front sole plate (or “shoe”).
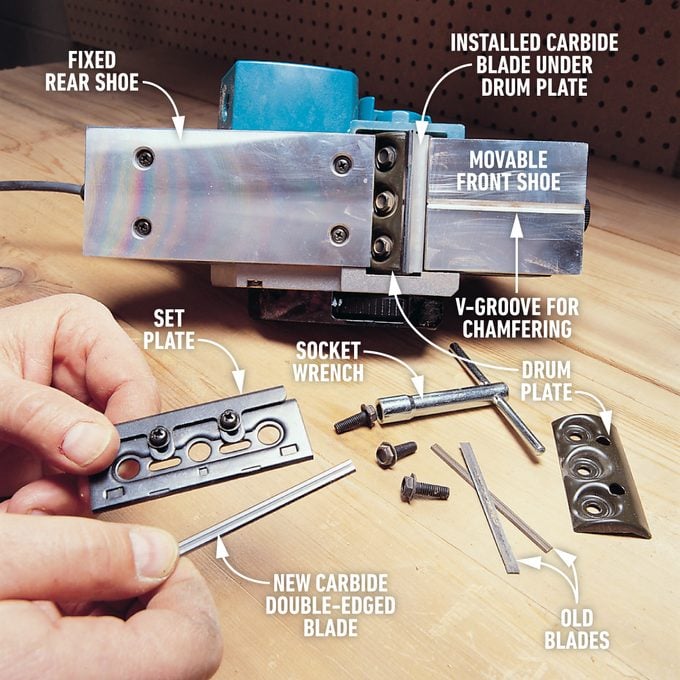
Electric Planer Blades
Some power planers have two full-sized blades that must be resharpened using a whetstone. However, most planers use two double-edged, carbide, disposable “mini blades.” Many planers come with plastic “gauge bases” that help correctly position both the mini blades and the set plate for mounting on the drum.
Change blades when they become dull or nicked. Nicked blades leave a groove in the smoothed wood. Before changing the blade, always unplug the power planer and read your tool’s instructions carefully.
Other tips about blade replacement:
- Unplug the power planer before you change blades or make any repairs and adjustments to the tool.
- Change blades before they get so dull that they create smoke or fine powder as you plow through the work. Forcing the planer like this harms the motor.
- Resharpen or replace both blades at the same time. This maintains cutter head balance and ensures quality cuts.
- Blades that aren’t mounted squarely on the cutter head cause the tool to vibrate. Double-check mounting bolts for tightness before running the planer.
Electric Planer Safety
As with all power tools, protect your eyes and hearing by wearing appropriate safety gear.
After turning the tool off, protect yourself and the work—and the blades—by setting the front shoe of the hand planer up on a wood block while the spinning cutter head stops.
Work safely above your head by placing walk planks between two ladders, in line with the direction you’ll be making your cuts.
Once your neighbors spot the speed and ease with which you use your hand planer, watch out! You’ll need a sign-out sheet to keep track of all the borrowers.
TK Ways to Use an Electric Planer
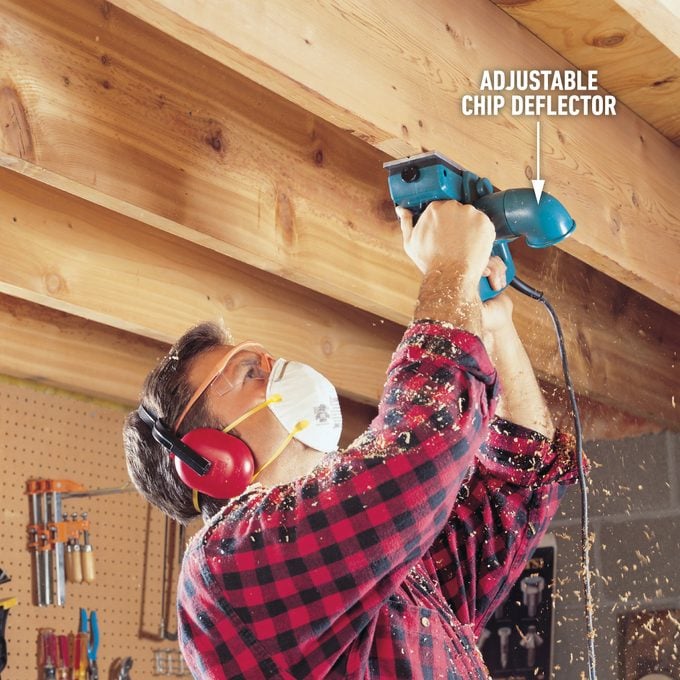
Shave low spots in floor joists
Level floor joists by using a straightedge to mark joist irregularities. Then label the low spots, set up a stable work platform and shave those spots till the joists are flat—ready for a new ceiling. The adjustable chip deflector is a valuable accessory for directing the stream of chips away from your face.
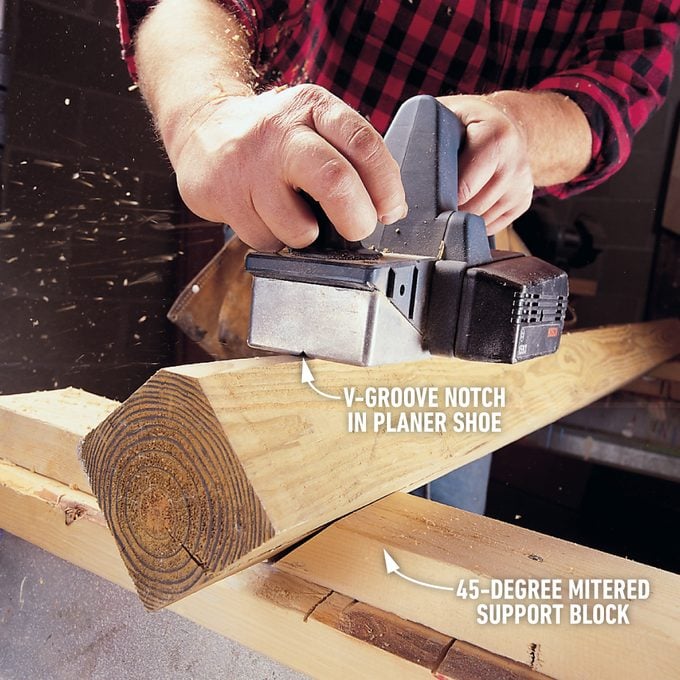
Plane post corners
Shape deck post edges quickly. First center the V-notch in the front shoe on the timber corner and make one long, continuous pass. Then continue to make long, smooth passes until you reach the desired depth.
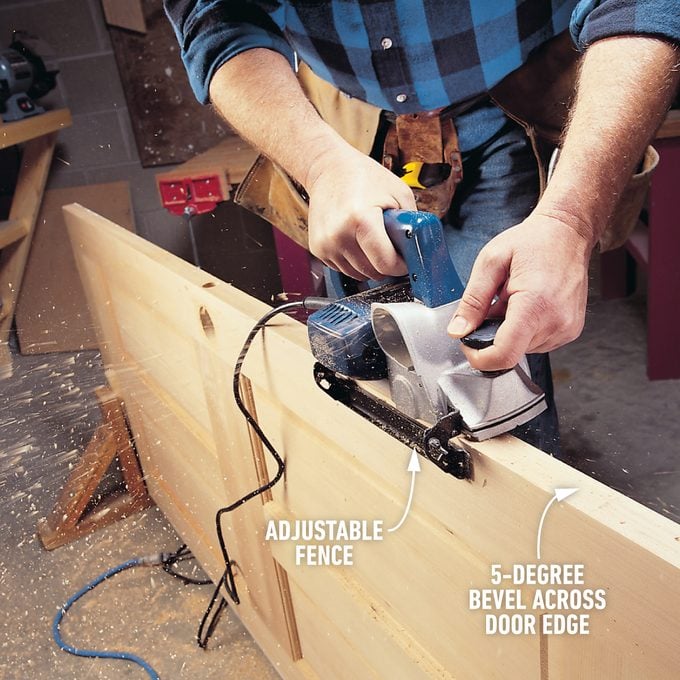
Plane a door edge so it’ll close easily
Bevel a door edge to a precise 5-degree angle using an adjustable fence on the hand planer. Bevel on the hingeless door edge so the door closes smoothly and the leading edge doesn’t “click” on the jamb. To achieve both a uniform bevel angle and a straight edge, stand where you can make long, smooth passes with the tool while keeping the fence snug against the door face.
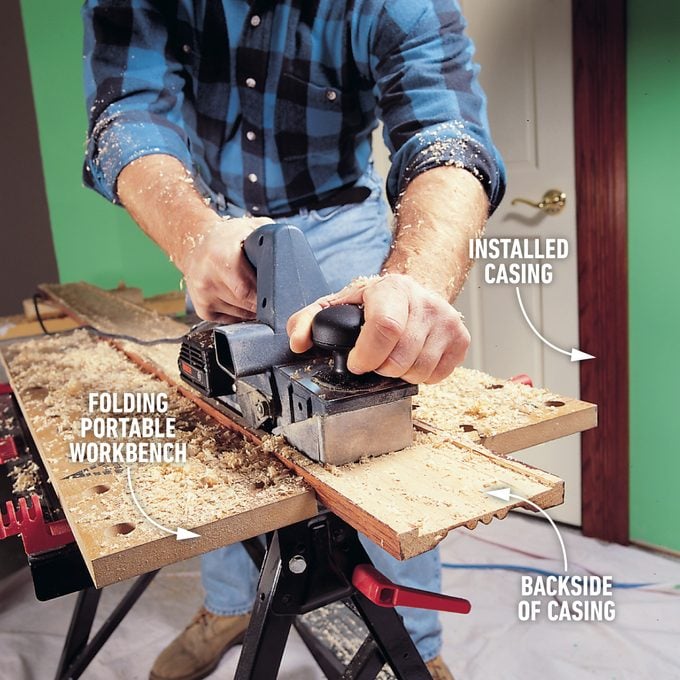
Remove the wood from the back of door casings
Hollow out the back of door casings so they’ll fit flat against both the wall and the door jamb. Drywall that protrudes from the edge of a jamb can cause casings to “tip.” The hollowed-out casing will step over this edge. Control the depth of your cut to avoid a too-thin casing face that will crack during nailing.
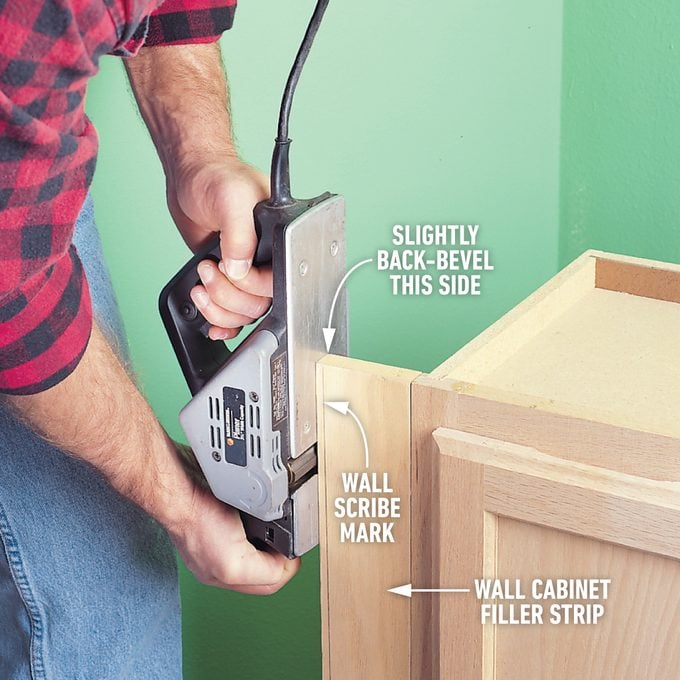
Plane filler boards for tight-fitting cabinets
Taper-cut filler boards so cabinets fit tightly against walls. Ensure this no-gap fit by carefully shaving to the wall scribe mark and angling the hand planer slightly to cut more wood off the backside of the board than is cut off the front. This is called “back beveling.” Plane the entire edge of the filler board by raising the cabinet high enough off the floor to allow the tool to complete its pass.
How Much Do Electric Planers Cost?
Most handheld power planers have blade widths of 3-1/4 in. Some are equipped with blades 6-1/8 in. or wider. Planers differ in cost because of blade width, quality of construction, amp power and standard accessories—like a carrying case.
Light-duty models will handle 90 percent of your tasks and cost between $100 and $200. Contractor grade planers are more rugged, have more accurate and easier-to-work depth gauges, include standard accessories and cost $300 or more.
Select tools or buy accessories with:
- Cast metal sole plates, which warp less than stamped metal plates.
- Power cords longer than 6 ft., because they’re less likely to hang up on the workpiece and interrupt a smooth pass with the tool.
- Adjustable fences that allow you to work accurately on door edges, wood trim and boards.
- Chip deflectors, which direct waste instead of “broadcasting” it.
Originally Published: February 09, 2024