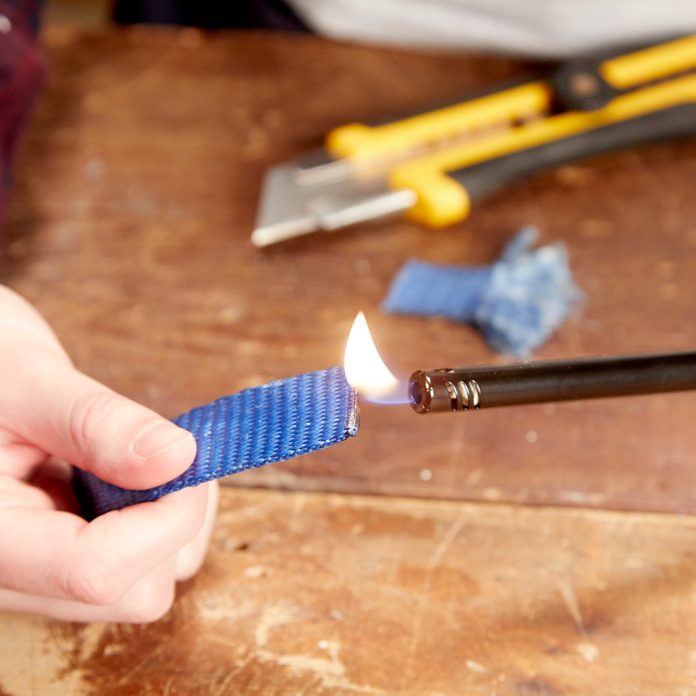
How to Fix Frayed Straps
Frayed straps are difficult to feed through ratchets. Here’s how to make the ends good as new.
- Cut the strap straight across a few inches down from the frayed end with a sharp knife.
- Wave a lighter under the freshly cut end.
- This melts the fibers together, preventing fraying. This method only works on synthetic material, not cotton. — Jared Tritle
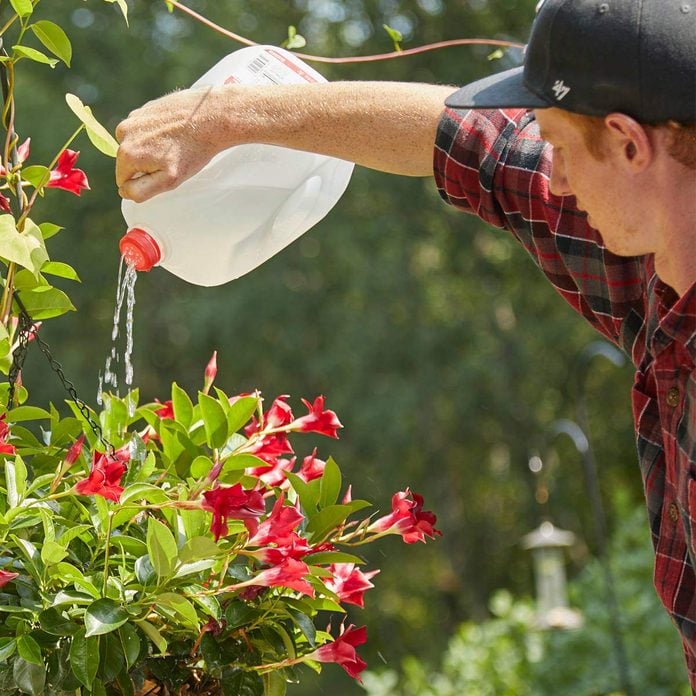
Turn an Empty Milk Jug Into a Watering Can
I only own one watering can, so I need to refill it four or five times to water all of the plants on my patio. Instead of buying more overpriced watering cans, I use old milk jugs. I drill a few holes in the caps, fill up the jugs with water and I’m good to go. — Harrison Berg
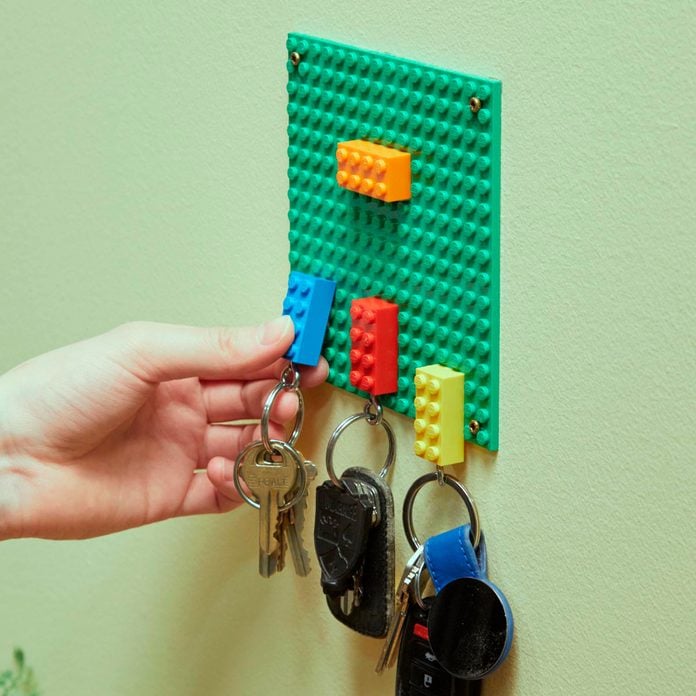
Remember Your Keys!
You’ll always know where your keys are with this handy hint!
To make Lego keychains:
- Start by drilling a hole into the base of a Lego that is slightly smaller than the screw portion of an eyelet screw.
- Next, wind the eyelet screw into the lego. Thread a split ring through the hole and use it to attach keys.
- Mount the Lego board to a surface using your preferred method. In this case, we mounted our Lego plate to the wall in our mudroom.
- Attach the Lego board to the wall by first marking the desired location for the board and making sure that it is level.
- Drill pilot holes in the four corners of the Lego board and into the wall.
- To finish, drill screws with small enough heads to fit in between the Lego pegs into the board.
You’ll be so excited to put the Lego on the Lego board that you won’t lose your keys (hopefully) ever again!
Plus, check out these 14 super fun DIY projects to do with kids, rain or shine. And don’t worry; these projects won’t break the budget!
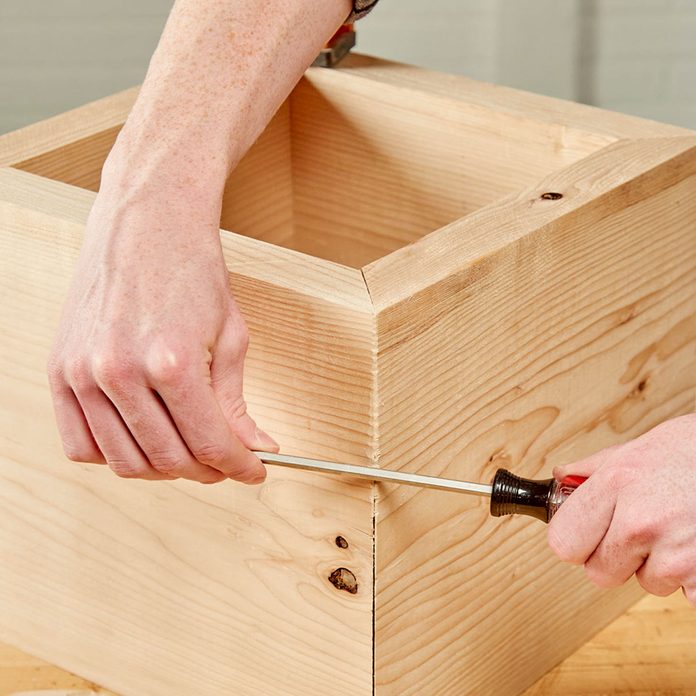
Quick Miter Fix
Cutting a miter joint that closes up perfectly and maintains a 90-degree angle is really satisfying. Unfortunately, it doesn’t always happen. Here’s a quick fix for a slightly open miter joint; rub the shank of a screwdriver along the miter at a steep angle, from both sides of the joint. Chances are, you’ll be the only one that knows it wasn’t perfect to begin with!
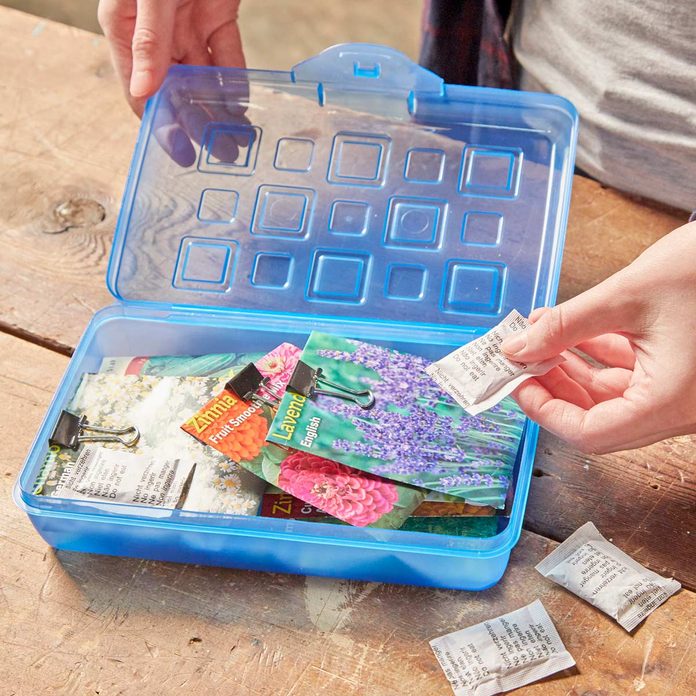
Keep Seeds Fresh
If you don’t use up all of your seed packets, store them in an airtight container with silica packets to keep them fresh for next year. The silica packets prevent the seeds from germinating or getting moldy. Plus, check out these 10 seriously useful gardening tips every beginner needs to know.
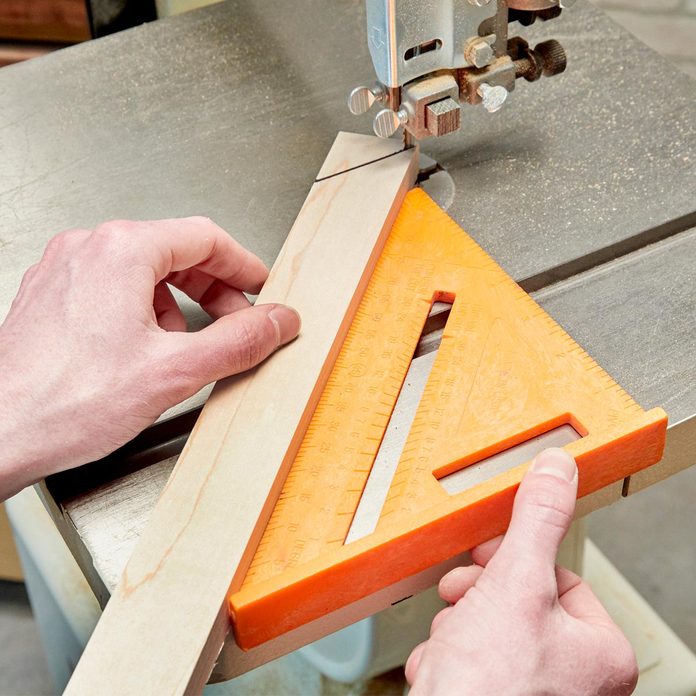
Make Picture Frames in Minutes
To cut a quick 45-degree angle on the bandsaw, I use my speed square. I hold the part against the square and slide the square along the fence. – Larry Cooper
The bandsaw can be a mysterious tool for some DIYers. Click here for the basics.
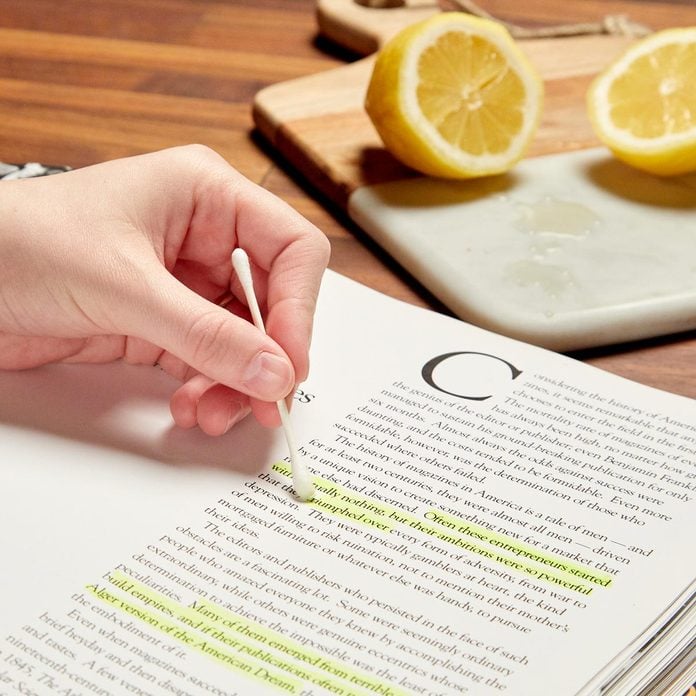
How to Remove Highlighter Stains
Ever wish you could remove highlighter marks from a book? Lemon juice fades highlighter enough to make it virtually undetectable. Cut a lemon in half and get some juice on a cotton swab. Run the swab over the highlighted text and watch the color fade.
Lemon juice from a container also seems to do the trick. Though not quite as well on the pieces we tested, and the older the mark, the more stubborn it is to remove. Plus, check out these secret cleaning tips from the pros.
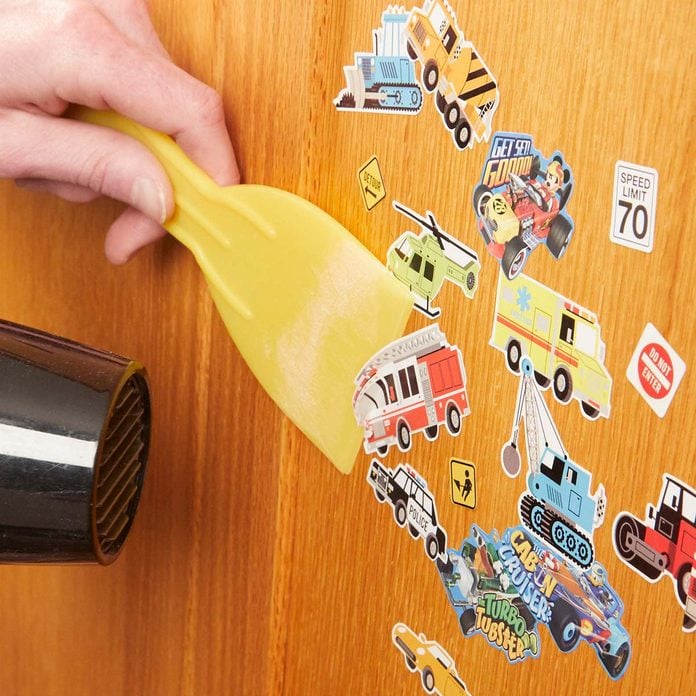
Easy Sticker Removal Trick You’ll Wish You Knew Sooner
My son plastered all of the furniture in his room with stickers from skate shops, arenas and gumball machines. Once he moved out, I wanted to use his furniture in the new guest room, without the stickers. I peeled off all the stickers using a putty knife in combination with hair dryer, to soften the adhesive. Some are harder to remove than others, but I had them all off in a couple of hours. – Steve Winter
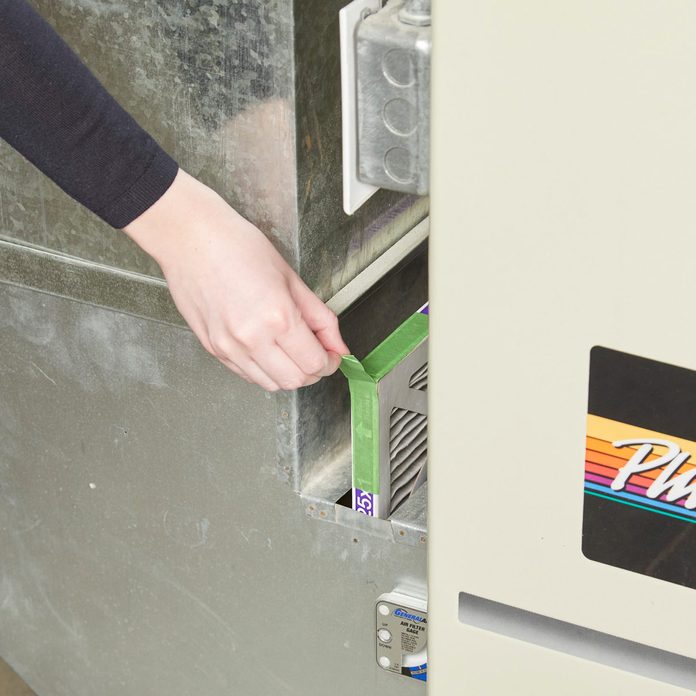
Furnace Filter Grip
“Furnace filters are often hard to get hold of. Before installing them, I make a ‘grip tab’ on the corner to make them easy to pull out and replace.” — Bill Williams
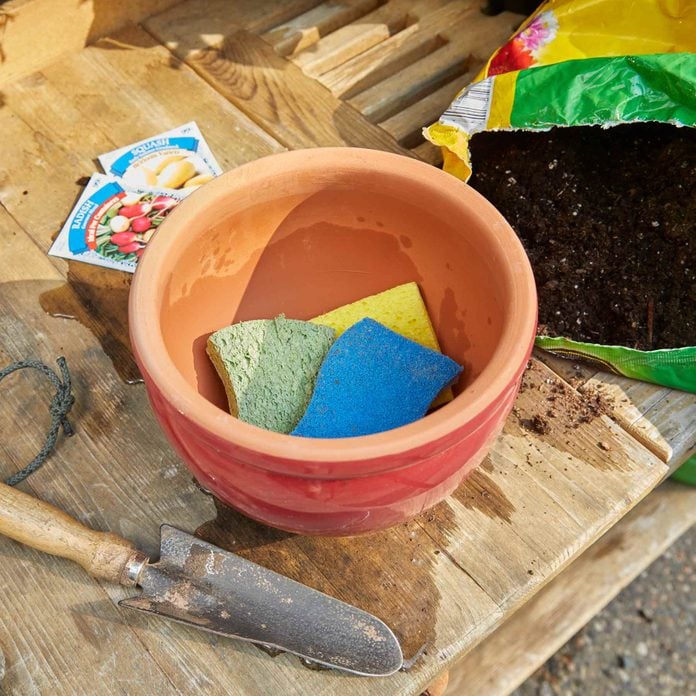
Healthy Plant Hydration
Water settling at the bottom of pots can lead to root rot. To combat this problem, cut up old sponges and put them in the bottom of the pot. The sponges retain moisture and create necessary air space. They also help prevent water from flushing out the bottom. The sponge acts as a water reserve and keep soil moist longer.
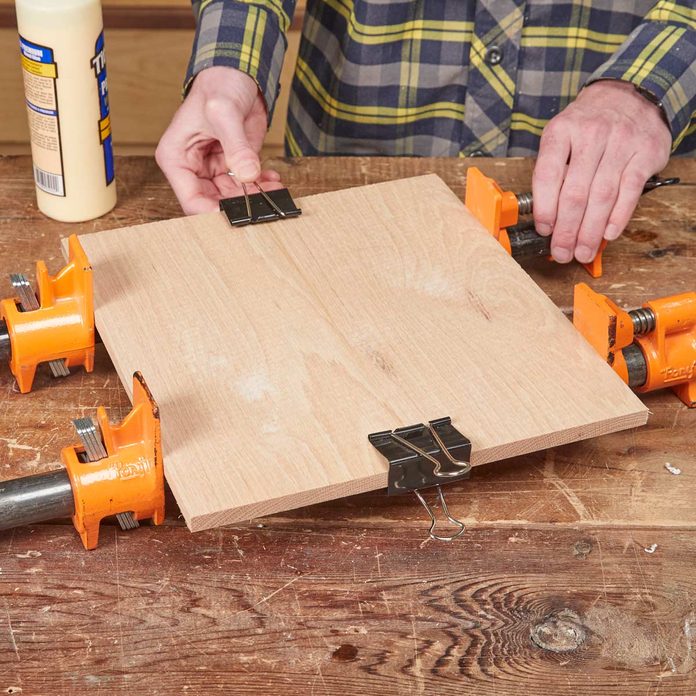
Binder Clips Make Perfect Mini Clamps for Glue-Ups
Glue-ups can be really frustrating if your boards start to wander out of alignment while you apply clamping pressure. If you don’t have any spring clamps to keep the boards aligned, large binder clips will suffice. I keep some near my workbench all the time for just this purpose. – Bill Segura.
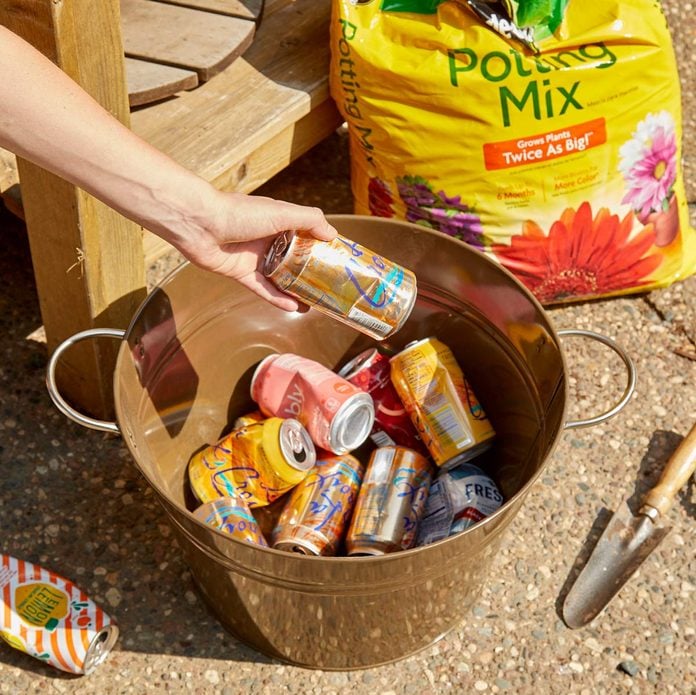
Saving Soil with Old Cans
Check out these Lawn and Yard Maintenance and Gardening Tips. Our experts weigh in with their best tips ever about how to get a healthy and beautiful lawn and garden.
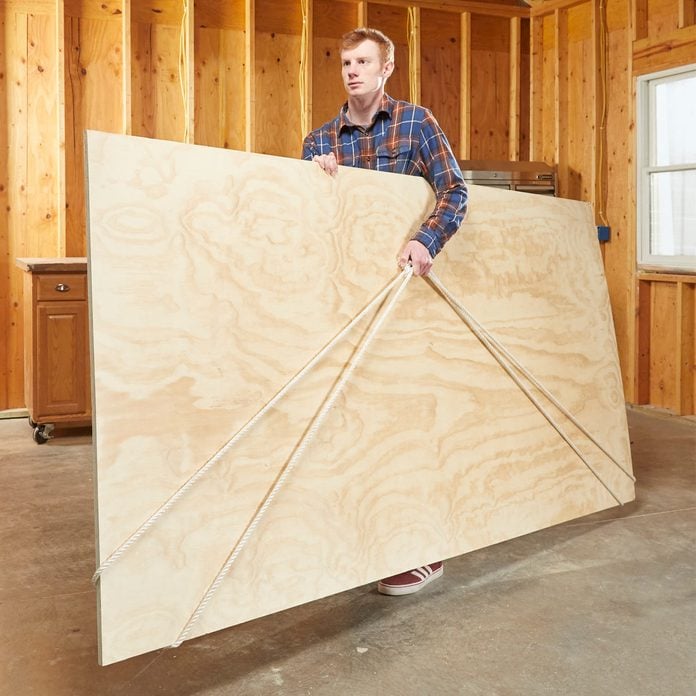
A Length of Rope is the Ultimate Extra Hand
Carrying a sheet of plywood by yourself is awkward and hard on your back. The best method I’ve found is to make a loop from an 18-ft. length of rope and wrap it around two corners. Now I can use the rope as a handle. – Ken Porter
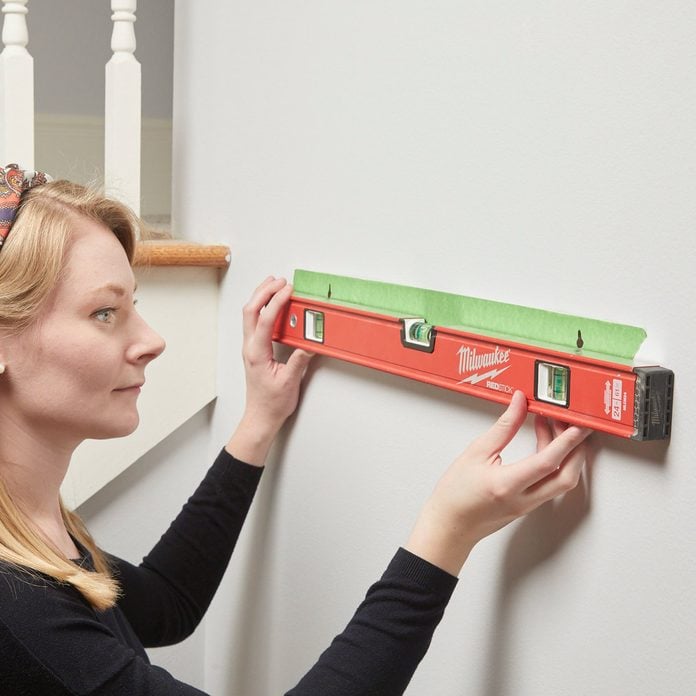
Hang Items Perfectly the First Time
Take the guess work out of hanging picture frames, shelves and other items with “keyhole” hangers. To begin:
- Stick a piece of masking tape over the keyholes, and then trace over the keyholes with a pencil, making a template.
- Making sure it’s level, stick the template on the wall where you want the shelf.
- Drill your anchor holes or screws into the template and remove it.
Even if you know your way around a tape measure, there’s sure to be some new tricks you haven’t seen in this list of 25 tips and tricks to take your measurement mastery skills to the next level.
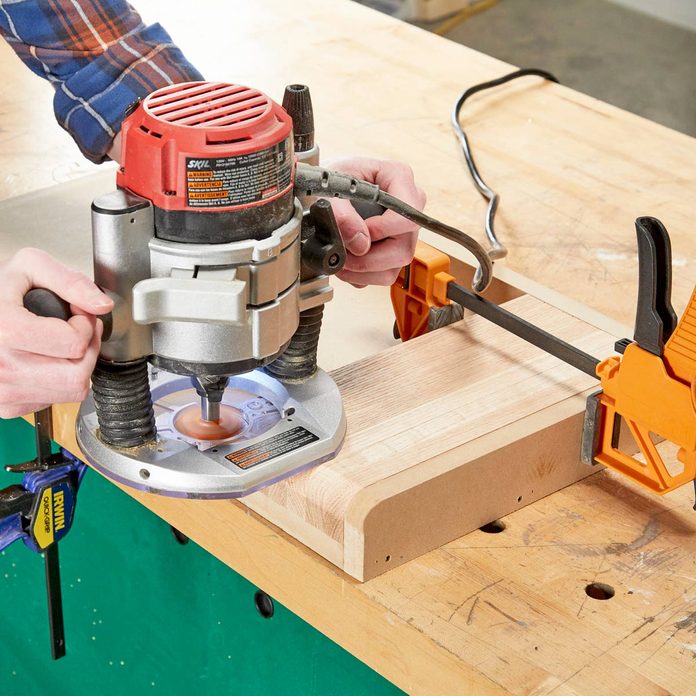
Save Time with this Simple Jig
The right jig or fixture makes work efficient and produces excellent results. I made this jig to round over the ends of a group of identical parts. It’s just a platform with two rails that hold the parts in place. The rails are the same height as the parts. This, along with the “dummy” part at the end, negates any tear out. Also, on a big roundover like this, don’t take it all in one pass. Taking several shallower passes decreases the chance of leaving burn marks on end grain. – Christian Frost
Check out some more easy woodworking jigs right here.
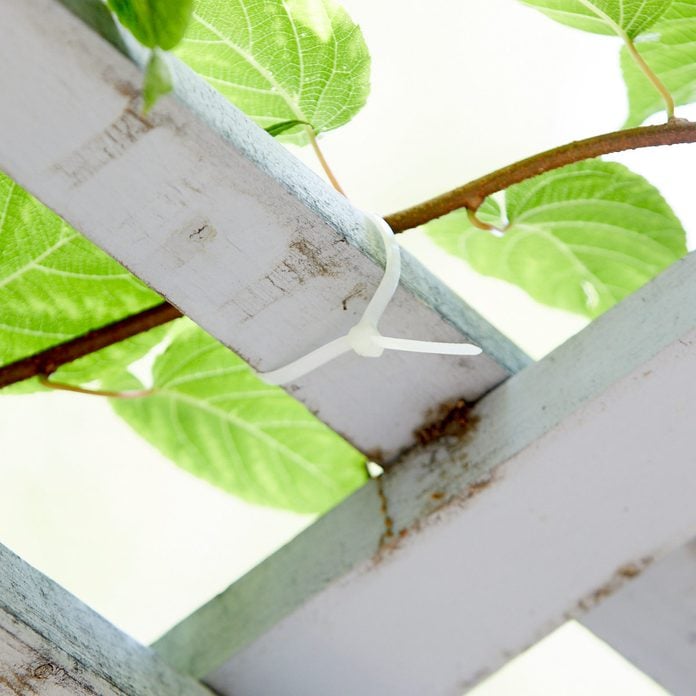
Control Your Climbing Plants with Zip Ties
Getting my vines to run up just how I want tricky. To direct the vines, I fasten zip-ties around the stalks, strapping them to anything stable. Don’t strap the vines too tightly. They need to be able to move and grow. — Craig Sullivan
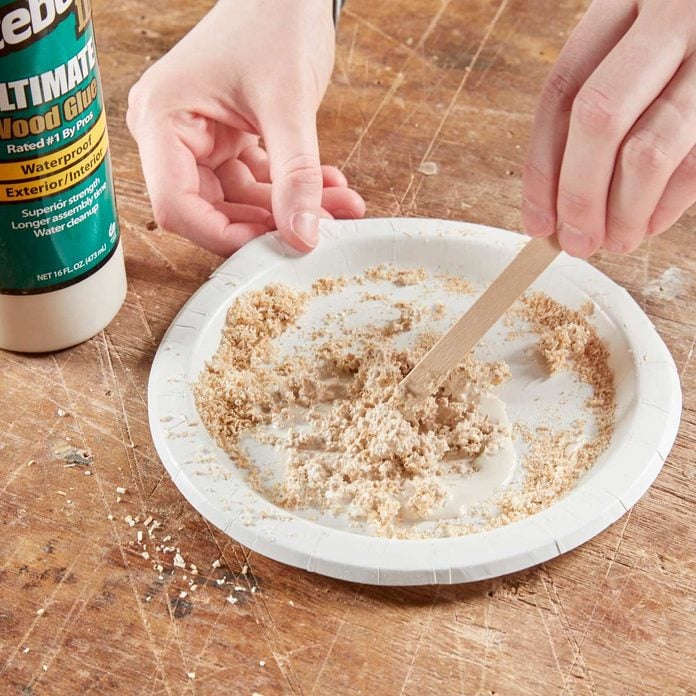
DIY Wood Filler
“To make a versatile wood filler for free, just grab a paper plate and combine Elmer’s or any other wood glue with sawdust. Like other wood fillers, you can stain or finish it, but the color will likely be a bit different than the surrounding wood. But, it’s sandable, paintable and long-lasting. I haven’t bought any wood filler in over 50 years.” — Dan Gola
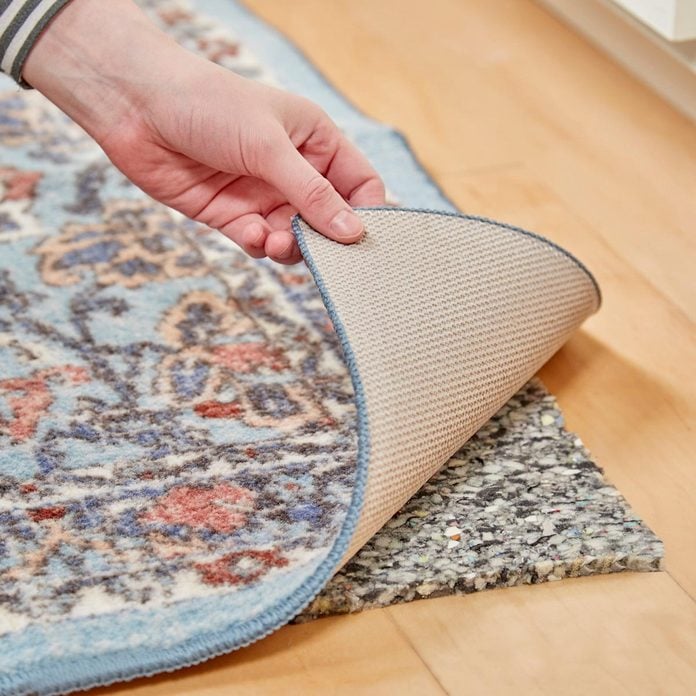
How to Add Cushion to Your Rugs
Want to make any rug feel extra plush and luxurious? Add a layer of carpet padding underneath your rug—it’s thicker and cheaper than a typical rug pad. The next time you wash that pile of dishes in the sink, your feet will thank you.
Check out these clever kitchen hacks you’ve never thought of before.
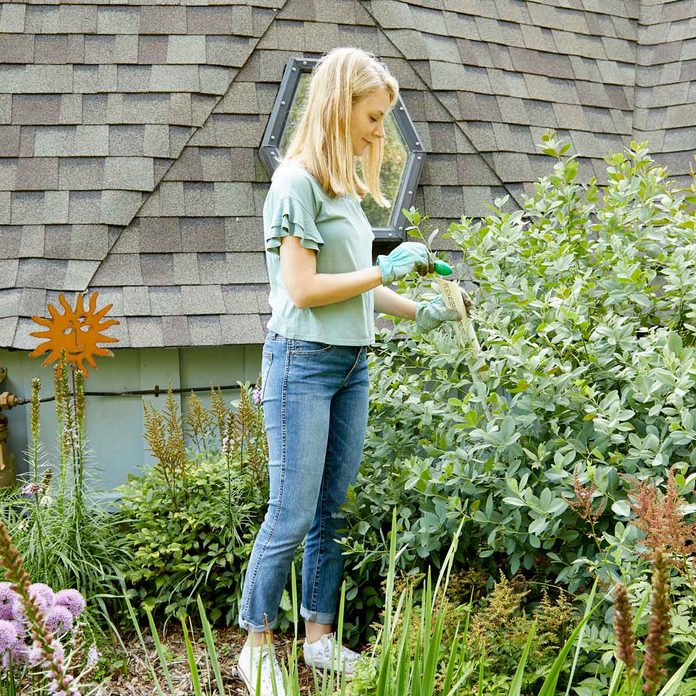
PVC Hack
Fertilizing bushes or other dense plants requires getting the fertilizer to the base of the plant, so I use a length of 2″ PVC. Slide one end down to the plant base and pour the fertilizer into the pipe. Cut the top of the pipe at 45 degrees to give yourself a larger opening to pour in the fertilizer. – Gordon R. Watson
Check out these 10 Lawn Care Myths You Really Need To Stop Believing.
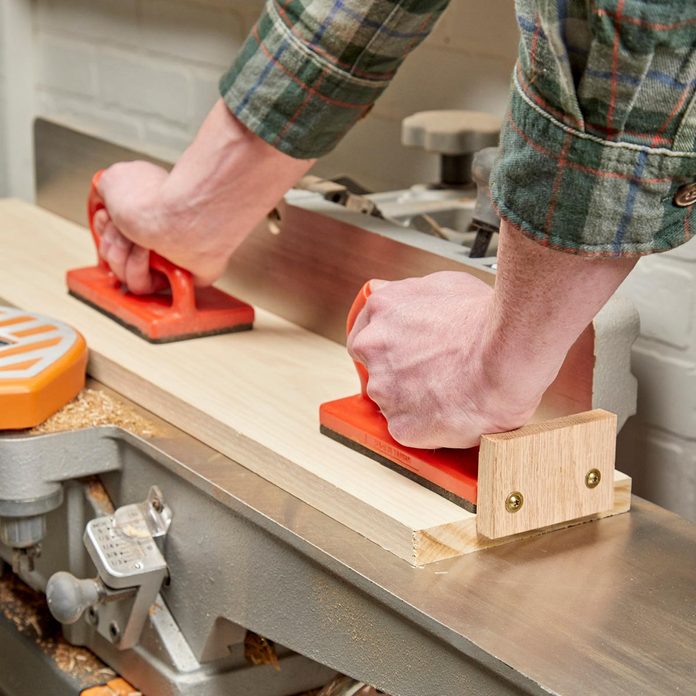
Push pad upgrade
Push pads for jointers keep your fingers away from the cutterhead. But when they get dusty, they lose their grip. This can cause your workpiece to kick back, potentially causing injury.
How to fix a push pad that slips:
You can clean the pads, but eventually, the grippy surface just won’t grip. I don’t throw them away, however. Instead, I fasten a small wood block to the back end of the push pad so that it overhangs about 1/4 in. The block hooks the end of my workpiece so it can’t slip. — Brody Parry Want a finger-saving push stick? Try this one.
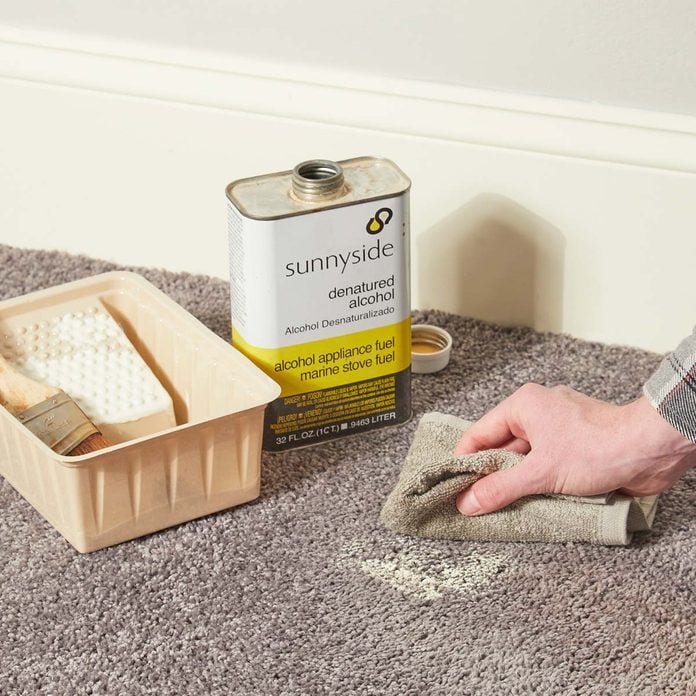
Spilled paint on your carpet? Don’t panic, do this:
I used to think dropping a loaded paintbrush on the carpet meant replacing the carpet until a former foreman told me this little tip. Pour some denatured alcohol onto a rag and scrub away the paint. Use a rag that is as close in color to the carpet, as the alcohol can transfer some of the rag’s color to the carpet. – Tom Gerdowsky
Need some denatured alcohol? Buy it from Amazon here
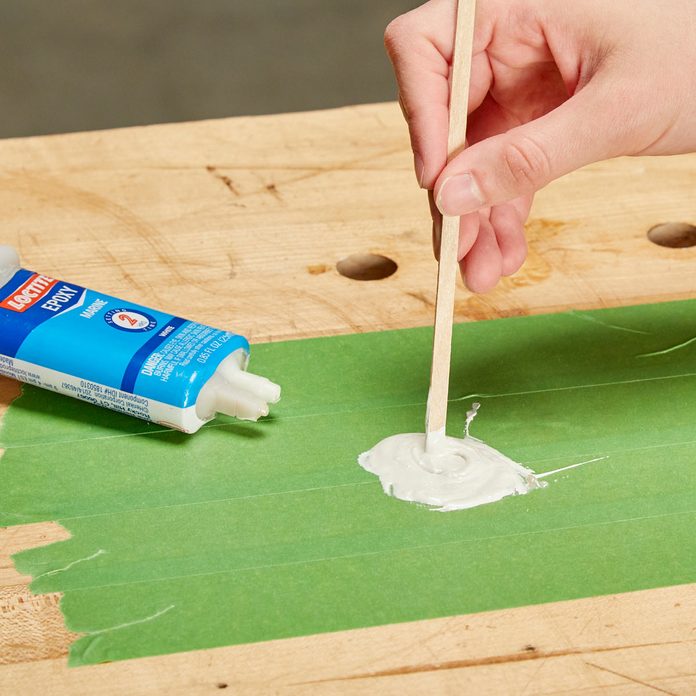
A Temporary Mixing Surface
Instead of using a container to mix a small amount of epoxy, just make a mixing surface on your workbench using painters tape. Simply lay down strips, overlapping the edges so the epoxy doesn’t get on your bench. When you’re done, peel off the tape and throw it away. This mixing surface will work for more than just epoxy, you can use it for wood glue or any other material you need easy access to while working on a project.
Check out 45 of the most clever gluing tips and tricks from editors and readers of The Family Handyman. You’ll definitely want to keep these in mind during your next woodworking projects!
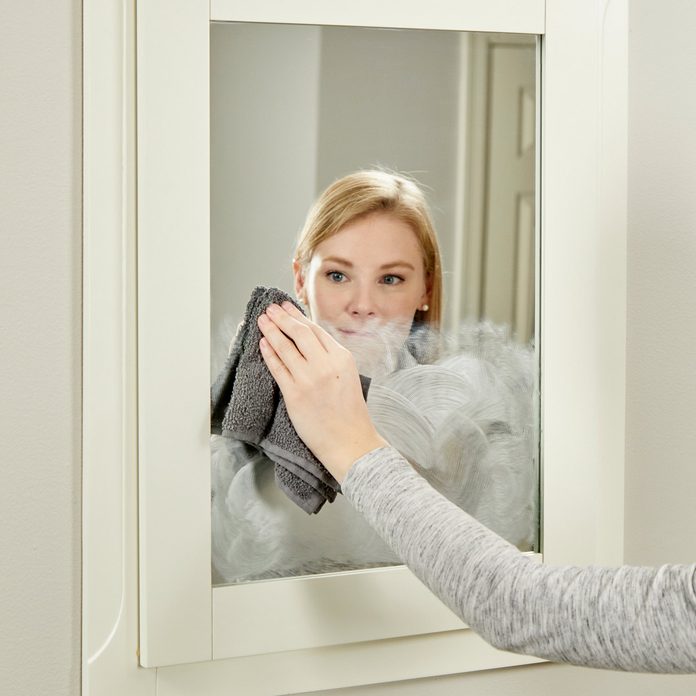
Fog-Free Mirrors
Prevent your bathroom mirror from fogging up after a hot shower with car wax. Apply a small amount of car wax to the mirror, let it dry, then buff with a soft, dry cloth.
Expert tips that add up to big savings on your next bath remodel.
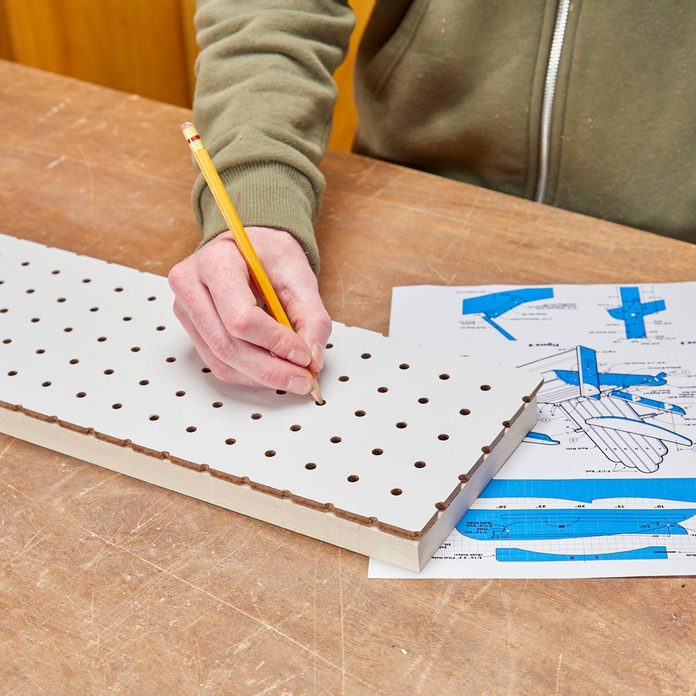
How to Use Pegboard to Enlarge Project Plans
Scale plans are often drawn on a grid so you can readily enlarge the original drawing. But enlarging means redrawing the grid to a larger scale—a tedious and time-consuming job. I’ve found a quick way to recreate 1 in. grid with 1/8 in. thick pegboard. Just place the pegboard on your workpiece and center a dot in each hole with a pencil. — Dean St. Clair
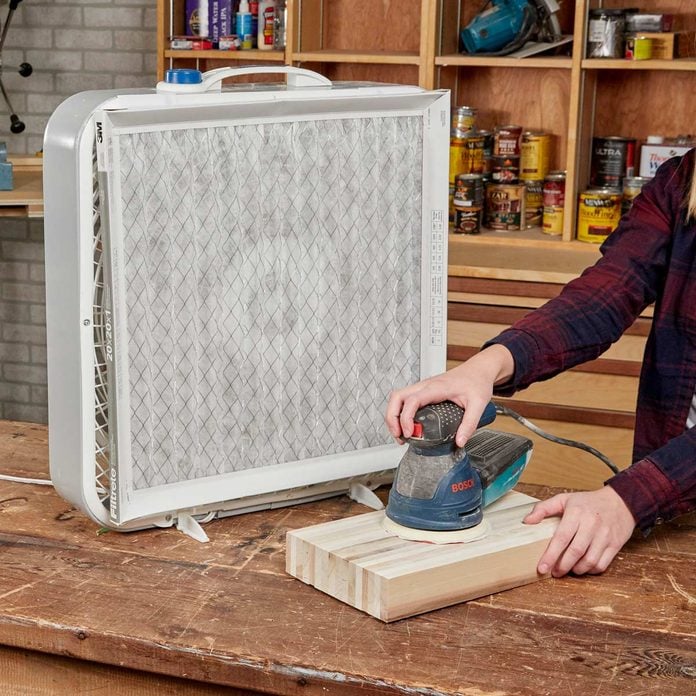
Saw Dust Filter Fan
My workshop doesn’t have air conditioning, and it gets pretty hot while I’m working. I used to blow a fan directly at myself, but it sucked in dust from around the shop and blew it at me. I had a few extra furnace filters lying around, so I tried attaching one to the back of the fan using hook-and-loop fasteners. This made a huge difference! Don’t use a super-high-performance filter, as it could cause the fan to have to work too hard to pull air through, resulting in an overheated motor. — Larry Brannock
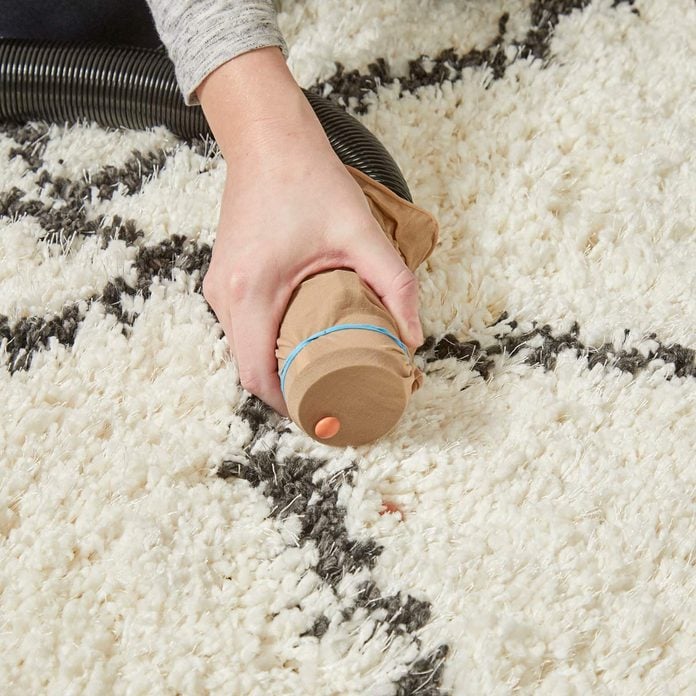
Find Your Lost Items
Everyone knows how annoying it is when you can’t seem to find a dropped pill or the back of an earring. So how do you find these items quickly and easily? Use your vacuum. Here’s the trick; before you turn the vacuum on, cut off the end of a nylon and secure it on the end of your vacuum hose with a rubber band.
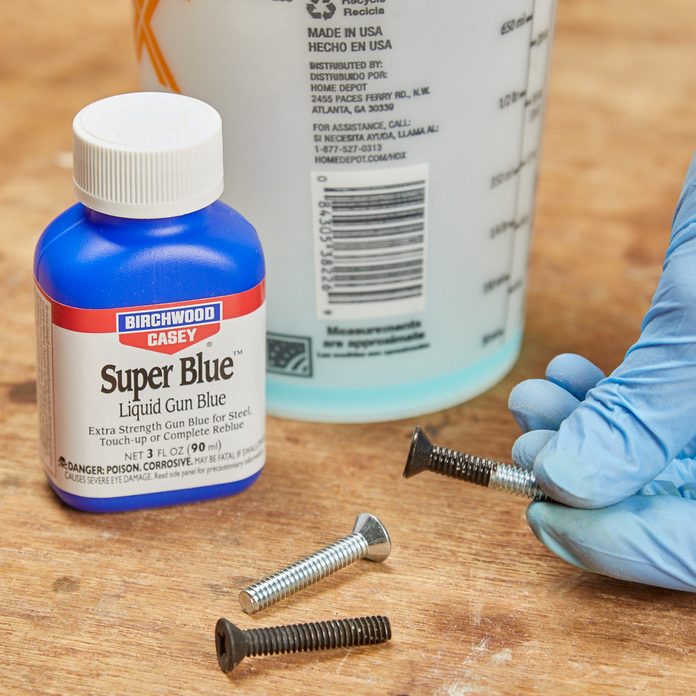
Get Instant Hardware Patina
I’ve found that using gun bluing ($10/3 oz. at sporting goods stores) gives off-the-shelf hardware an attractive, aged patina. Simply dip nuts, bolts, washers or other hardware in a cup of gun bluing. When the hardware turns black, rinse it with clean water and dry it with a paper towel. Be sure to wear rubber gloves and eye protection. — Matt Boley
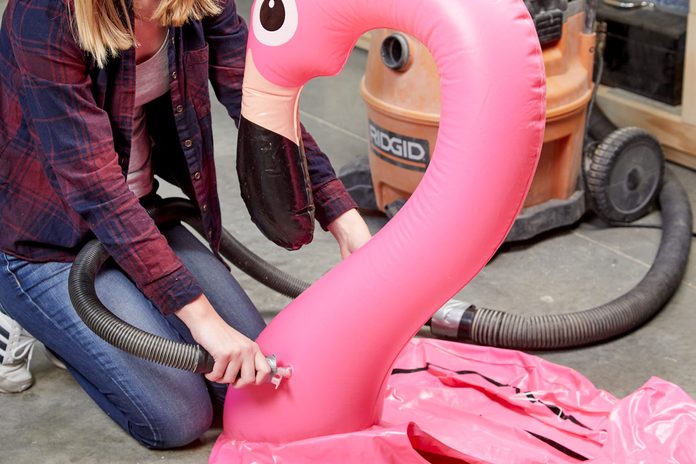
No Air Pump? No Problem! Use a Shop Vacuum
If you don’t have an air compressor to inflate your air mattresses or pool toys, you can use your shop vacuum instead. Just pop the top off a plastic squeeze bottle and fit the top to your vacuum’s hose. You may have to use duct tape. Once the top is secured to the hose, attach the hose to your vacuum’s exhaust port. It’ll blow up your inflatables in no time. To deflate, attach the hose to the vacuum port and suck the air out.
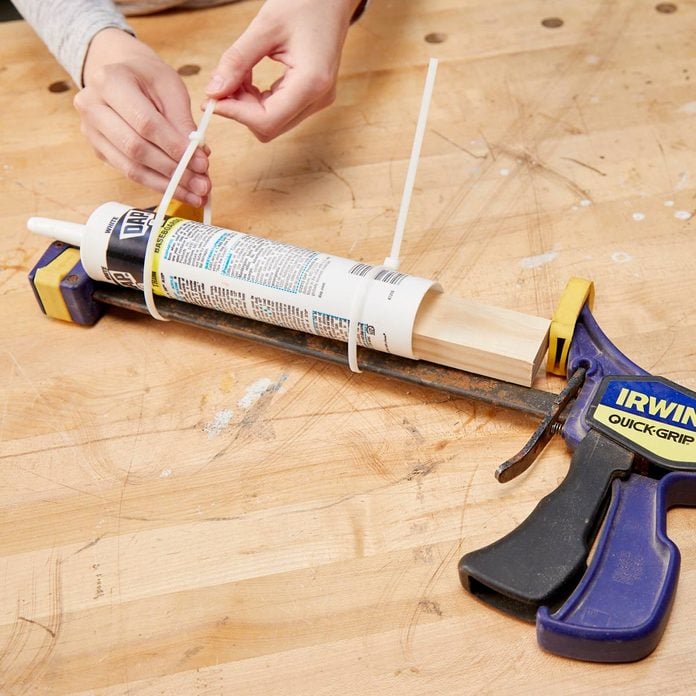
Improvised Caulk Gun
Over the years, I have accumulated quite the collection of caulk guns because I’m always forgetting to bring one along to the job site. This time, I improvised a caulk gun instead of buying yet another one. I zip-tied the tube of caulk to the bar of a trigger-style clamp and stuck a wood scrap in the tube’s end to act as a plunger, dispensing caulk as I squeezed the clamp’s trigger. — Frank McDonough
Check out our expert caulking tips to get perfect results every time!
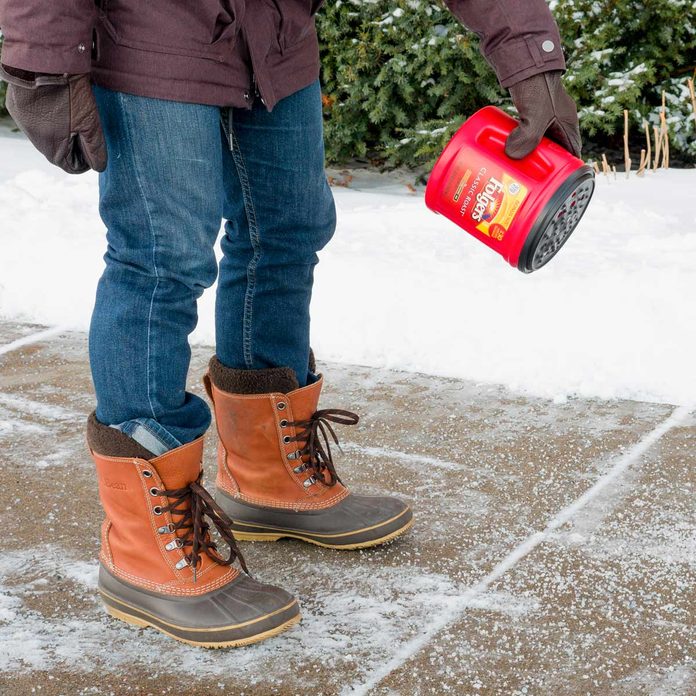
Save Those Coffee Containers
Lugging a heavy bag of deicer out to the sidewalk is no fun, and it’s tough to spread deicer evenly with a shovel or cup. You get a clump in one spot and none in another, so you’re wasting both time and deicer. Here’s a great solution. Make a “sidewalk salt shaker” from a big plastic coffee container with a handle. Poke 1/4-in. holes in the lid and fill it with sand, cat litter, deicer, or a mix of whatever you want and shake away! — Tony DeMarse. Check out these other clever hacks for removing ice this winter.
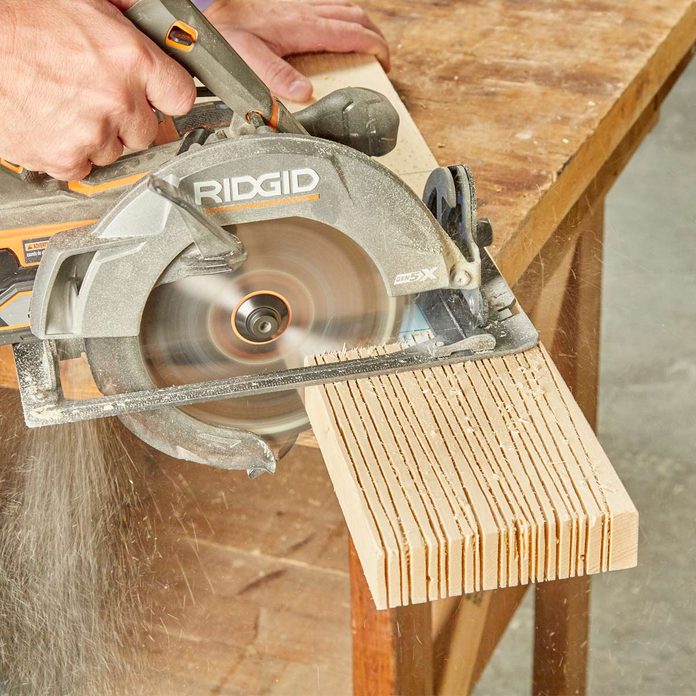
Make Your Own Shims
Run out of shims? Don’t panic. Just grab the nearest piece of two-by and start making alternating angled cuts down the length of the board. Then chop off the end of the board…There you go, a handful of perfectly reliable shims. — Harrison Kral
Next, learn how to use shims to hang your interior doors perfectly.
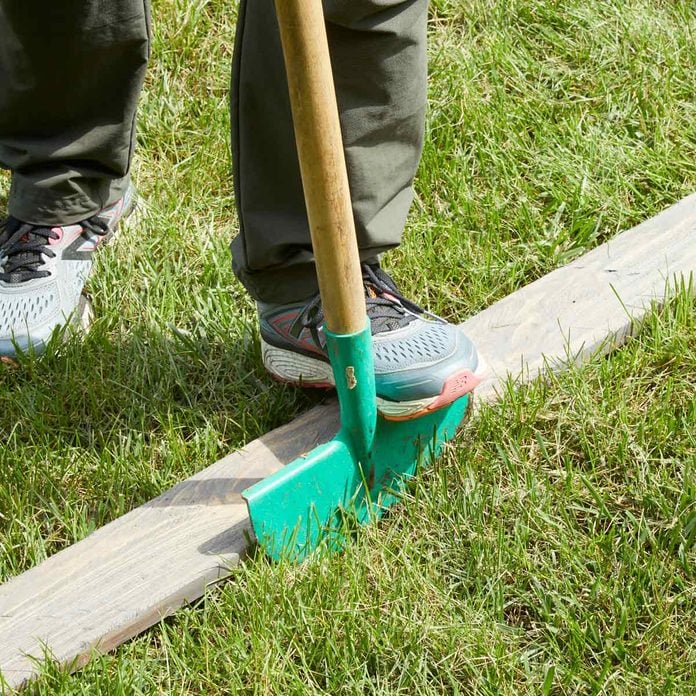
Simple Lawn Edging
To edge your lawn, garden, or flowerbed, lay down a 2×6. While holding the board with your foot, drive a flat spade along the board’s edge. Move the board as needed to create a clean, straight line.
Check out these 23 Yard Tool Hacks That’ll Make Your Life Easier. These simple and smart updates to everyday yard tools will make your outdoor chores a heck of a lot easier this season.
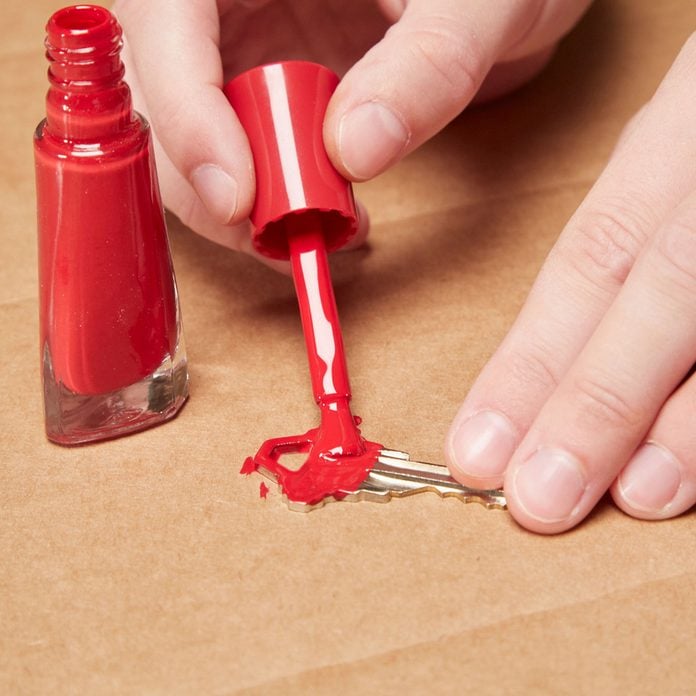
Identify Your Keys at a Glance
“It seems the older I get, the more keys I carry around. Between the car, house, shed and garage, I have a whole pocket full of keys. To make it easier to quickly find my most used keys, I paint both sides of the key head with brightly colored nail polish. I use a different color for each key. The nail polish is extremely durable and you’ll be surprised how much longer it lasts than spray paint.” —Joseph Grayson
Check out these other 14 Secret Tool Tips for DIYers from the Pros.
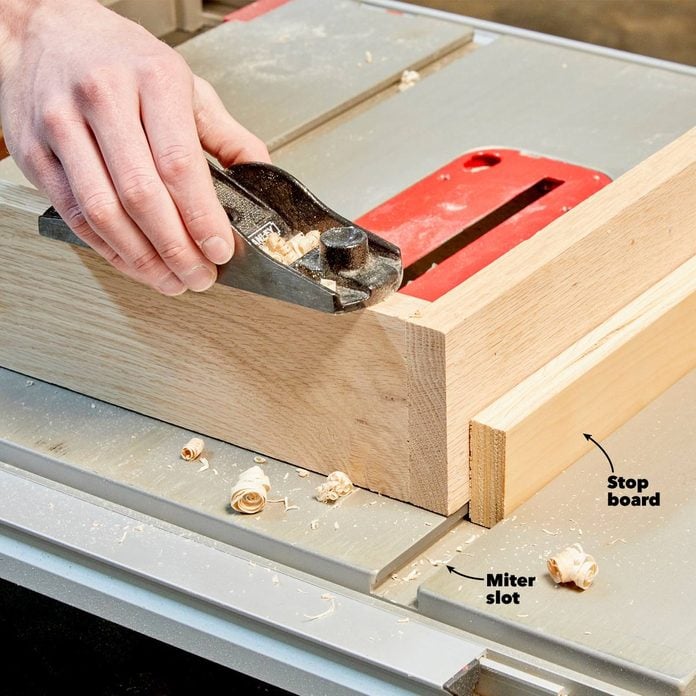
No Need for Clamps
Sometimes my table saw doubles as a workbench. To make it even more useful for sanding or planing, I drop scrap pieces into the miter slots to act as stops to keep boards from sliding. – Mike Berner
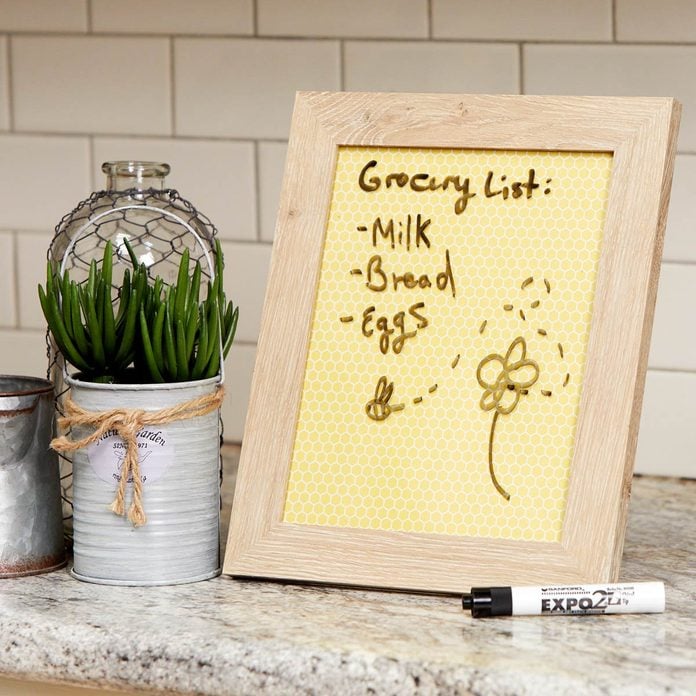
Picture Frame Message Board
I’m all for dry-erase message boards, but they’re usually pretty unattractive. So I make message boards using nice picture frames. To make these message boards, grab a picture frame and some paper. Cut the paper to fit the frame and set it in behind the glass. The glass makes an excellent dry erase surface! — Jessie Dawson
These 25 why-didn’t-I-think-of-that Handy Hints for the Home Cook will help you save time, get organized and work more efficiently in your kitchen.
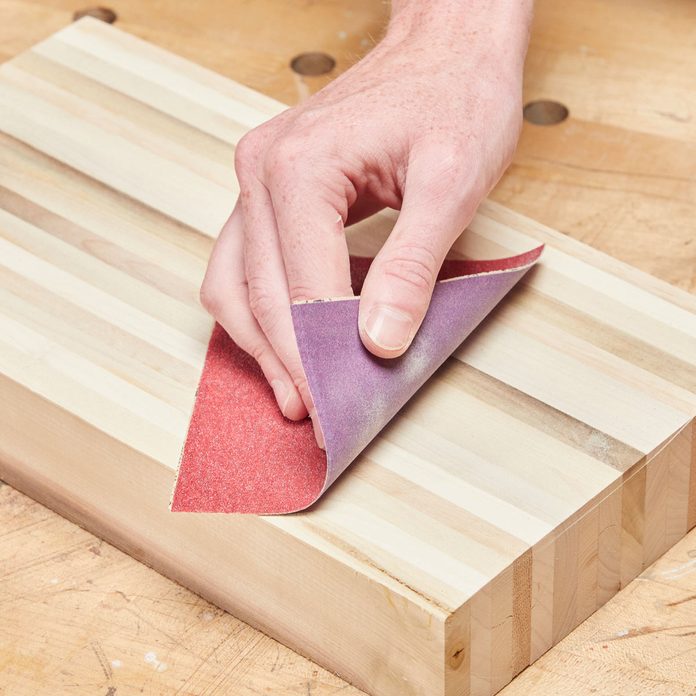
Double-Sided (and Double-Duty) Sandpaper
A single sheet of sandpaper is often too flimsy; the paper backing wears out before the grit. I like to use a double thickness instead, gluing two pieces back-to-back using spray adhesive. Sometimes I’ll even use two different grits so I can switch between grits quickly. – Brad Holden
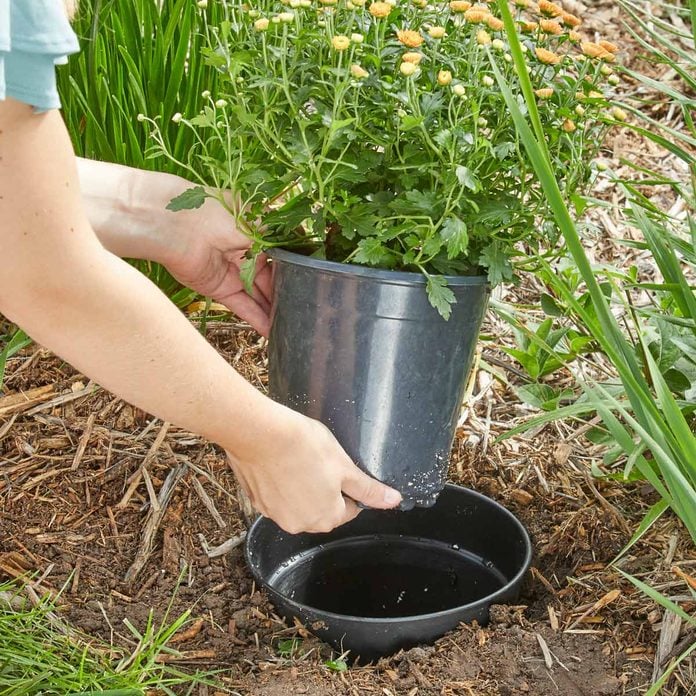
Plant-in-a-Pot Landscaping Design
Ever wish you could reorganize your garden after seeing how the mature plants look? Here’s a clever way to do it. You’ll need a bunch of pots of the same size, so they’ll nest in each other. Put your plants in doubled pots, and then bury them at ground level. Whenever you want a change, lift out the top pot and put in a different one. This method is also really slick for bringing plants indoors over the winter. This method is great for quickly changing out seasonal plants, and allows for easy experimentation with color and placement of plants and flowers.
Want to add more color to your landscape this season? Check out these 49 Colorful Plants to Brighten Up Your Landscape.
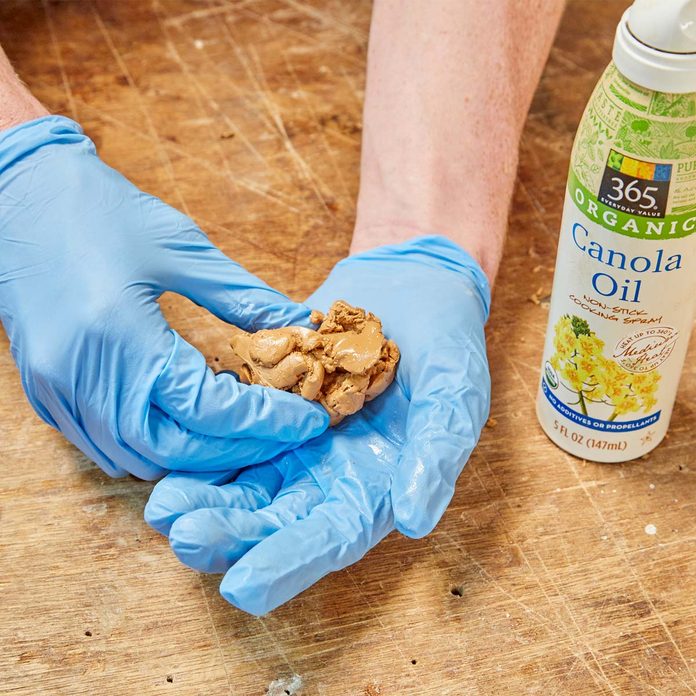
Get Wood Putty Back to Working Order
Coming to the final steps in a project and finding my jar of putty as dry as the Serengeti and hard as a rock is frustrating. My solution is to remove the putty with a screwdriver and knead it with canola oil until it’s a usable consistency. The putty isn’t quite as good as new, but it works in a pinch. It’s a messy job, so wear latex gloves. – Richard Ryder

Use Every Last Drop of Leftover Paint
I have several rental properties that seem like they’re always in need of repainting. Instead of throwing out leftover paint, only having to buy more later, I put it to use. I take multiple cans of interior latex, partially used paint and primer, any sheen, any color, and mix them all together. It doesn’t matter how much junk or debris is in the paint. Just pour it all in. I use a power mixer to blend them, and then dump all of the mixture into a bigger container. I did twenty gallons of paint once using a big round plastic tub. After all the assorted paints are in the vat are mixed, it usually ends up an off-white or antique white. The sheen is usually an eggshell to satin. If the color is too loud, I tone it down by adding a can of white paint. Now, I pour the paint into 5-gallon buckets with strainer bags inside. Lift out the strainer bags to remove any debris and pop on a lid to keep the paint fresh. This is a great way to use up leftovers when you do a lot of painting. — Tom Dvorak
Plus: These are the best-kept secrets of professional painters.
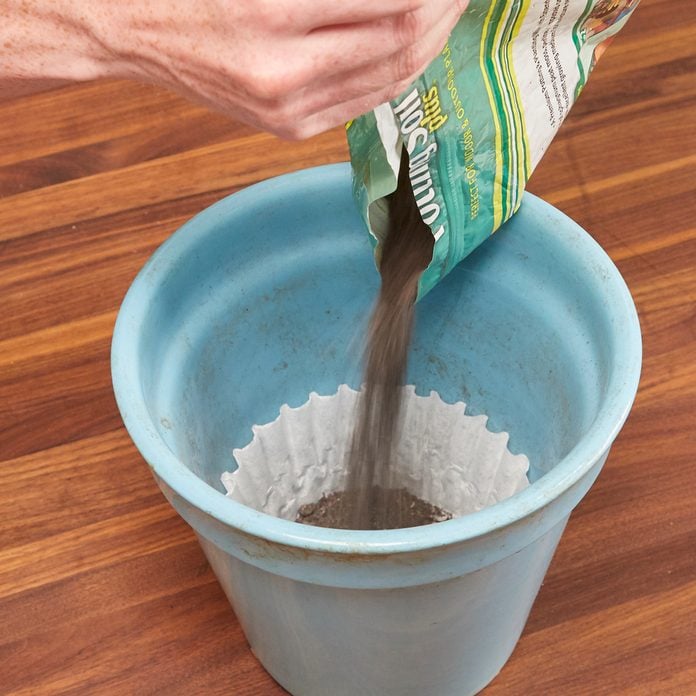
Coffee Filter Dirt Stopper
Every spring, I spend a lot of time adorning my deck with flowers. I love every part of it: potting the seedlings, daily watering and relaxing in my lounge chair relishing their beauty. But there’s one thing that drove me nuts. I used to have trouble keeping the dirt from flowing out the bottom of my potted plants when I watered them. I tried using larger stones in the bottoms of the pots, but that didn’t completely solve the problem.
The solution was to place a coffee filter at the bottom of the pot before filling with dirt. The coffee filter stops the dirt while still allowing the water to flow through and not waterlog the plant. Now I have solved one of my tiny pet peeves and can move on with my life! — Kevin Daniel
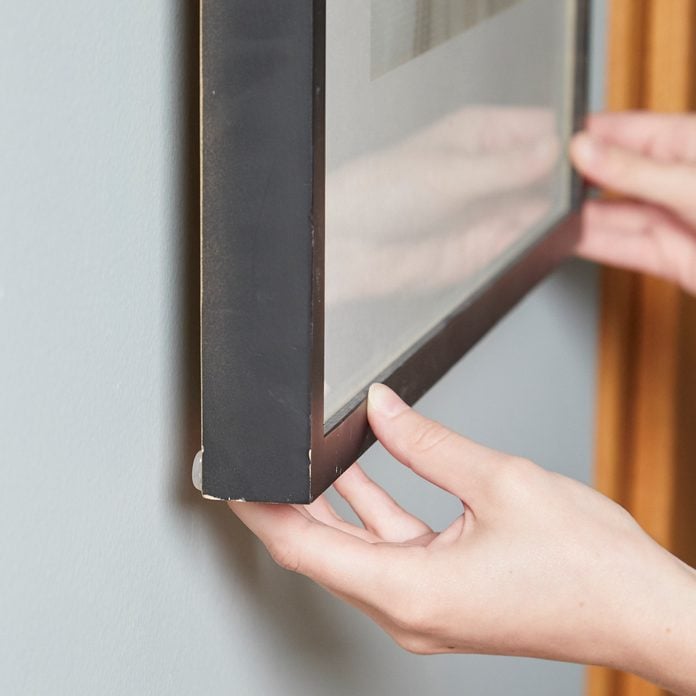
Instant Picture Frame Bumpers
Stop wall frames from slipping out of place and scratching the wall paint by putting small dots of hot glue on the back corners of the frame. The hot glue not only prevents movement, it also holds the picture away from the wall to prevent scratches and nicks.
Super-Secure Garbage Bags
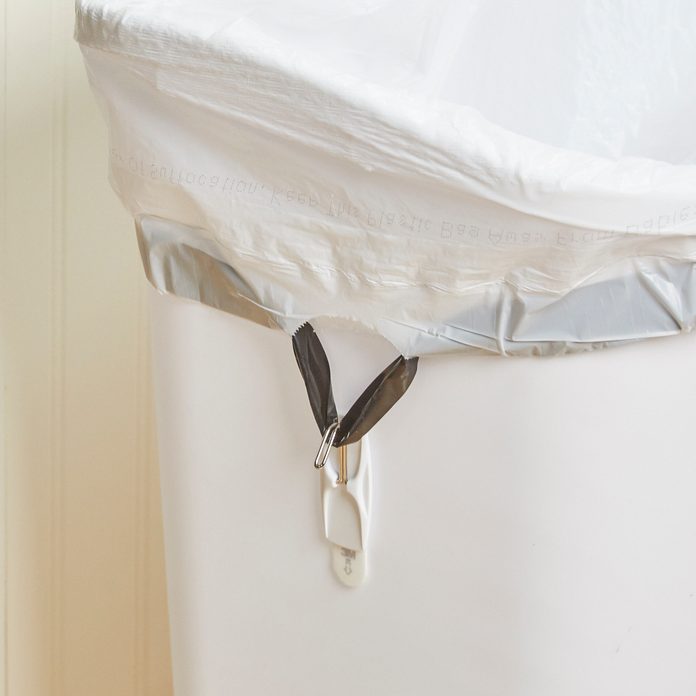
Trash bags and waste bins should work perfectly together, but that’s rarely the case. As trash bags start to fill up, the bag slithers into the bin and you have to dig it out. To keep handled or drawstring trash bags in place, all you need are two medium or large self-adhesive command hooks. Position the hooks at a location that allows full use of the bin. Plus: How to keep your trash can from flying in the wind.
Easy DIY Drawer Organizer
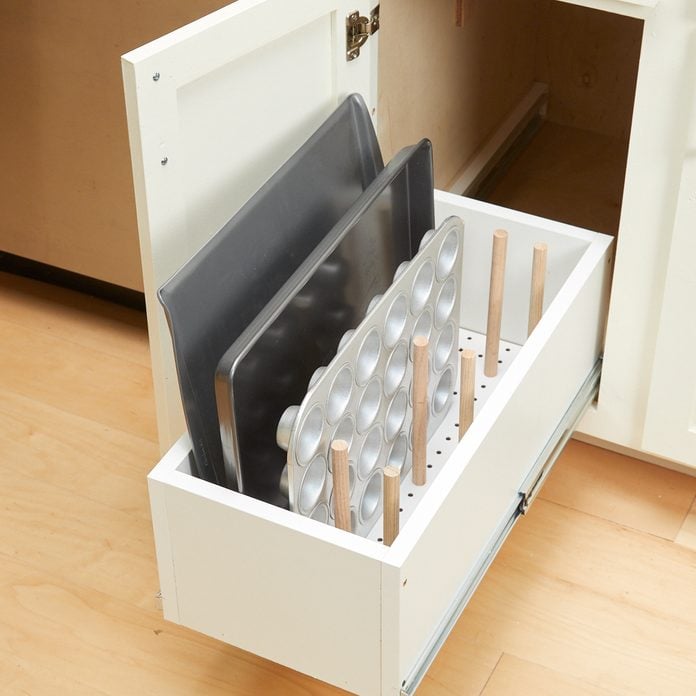
My kitchen drawers used to be an absolute wreck; pans and dishes crammed in however they’d fit. And nearly every time I needed something, it was always at the bottom of the drawer. My solution was to cut a piece of 1/8-in. pegboard to the size of the drawer bottom and attach dowels using screws from underneath. Now my pans are organized and easy to access. The 10 minutes it took to build was easily made up for with how much frustration it has saved me.
Simple Hack to Save Your Phone Charger
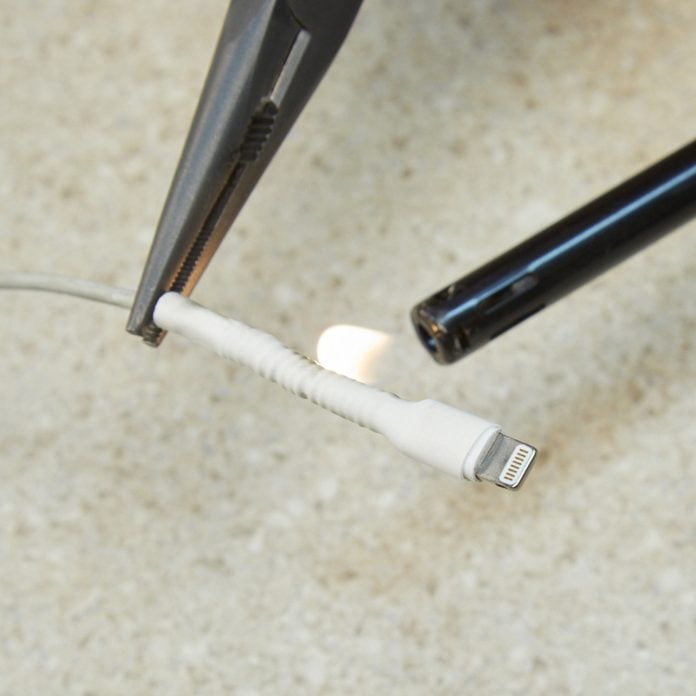
To make your otherwise fragile phone charger last for more than a couple of weeks, try out this simple hack! Start by removing the spring from a pen. Next, stretch one end of the spring out a bit so it can fit around the charger cable. You might need to use pliers for this. Now, wind the spring around the cable until it is completely on the charger cable. Next, take appropriately sized heat shrink tubing and slip it over the phone charger and spring. Use a lighter to warm the heat shrink tubing until it conforms around the charger and spring. This simple hack will keep the cord from breaking any further or from even breaking in the first place!
Plus, learn how to install a super easy USB outlet, it’s easy enough for a first-time electrician!
Sanding Station For Small Parts
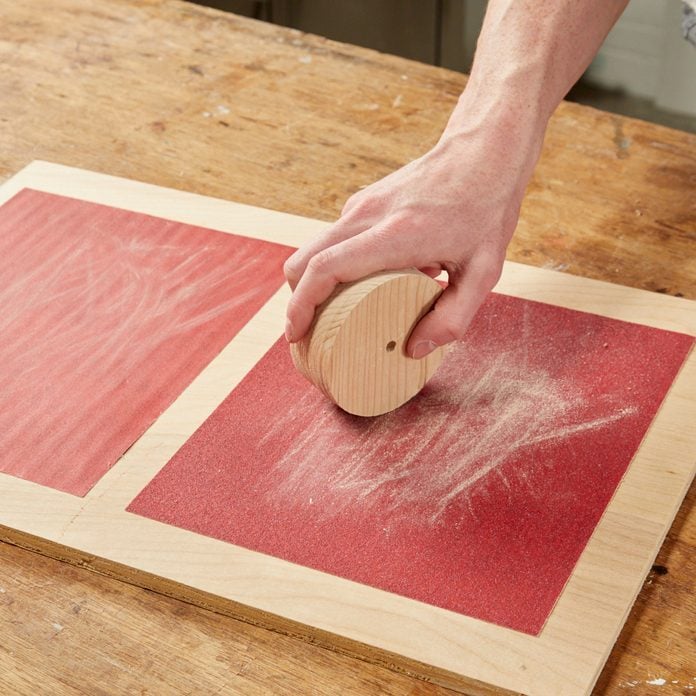
Sanding small items is tricky, as they’re hard to clamp in a vise to work on them. So instead of bringing the sandpaper to the workpiece, I bring the workpiece to the sandpaper. I glue sheets of sandpaper to a piece of plywood; 60 and 100-grit on one side and 150 and 220-grit on the other. Spray adhesive works well for this. Since there’s sandpaper on both sides, my sanding board doesn’t slide around on the bench.
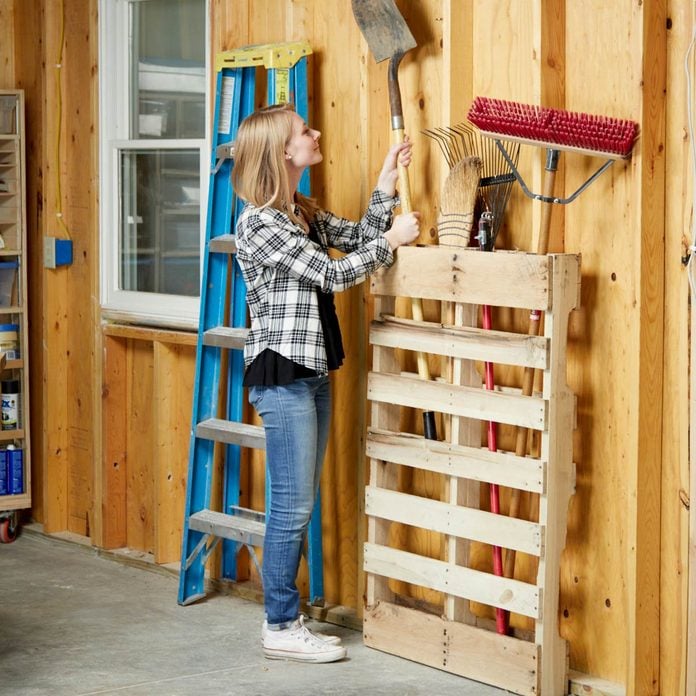
Use a Pallet to Store Lawn and Garden Equipment
If you have a yard or a garden, you know that there are a lot of long-handled tools involved. If you don’t have any pallets lying around, they are easy to get for free. This is a quick one-hour project and after you’re done, your tools will be organized and easy to reach.
You could easily attach this pallet to a fence, shed or to the exposed wall studs in your garage. No matter what you choose, you’ll want to make sure that your screws are long enough to go through both your pallet and the wall you are attaching it to. We drilled two screws into the pallet, one into each exposed wall stud. You won’t need a ton of screws or nails because the pallet isn’t all that heavy.
Looking for more ways to work smarter in your workshop? Here are 19 tips from a seasoned woodworker and do-it-yourselfer.
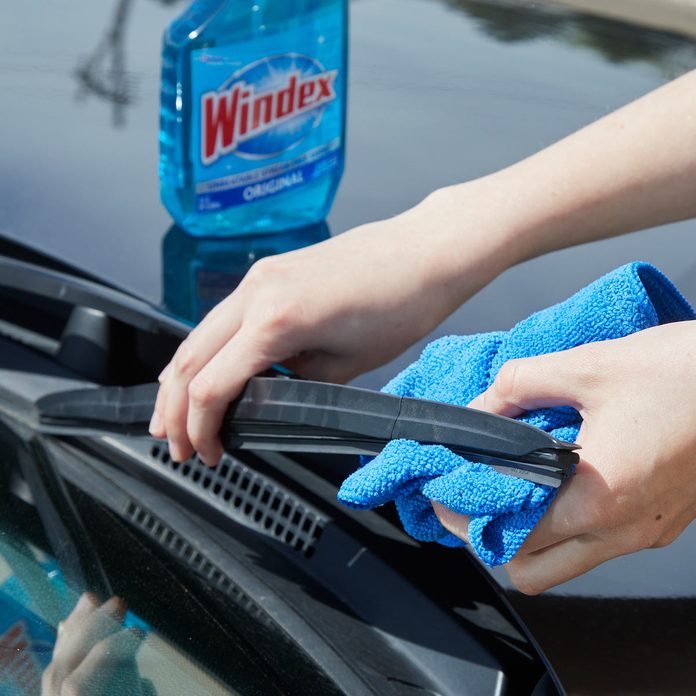
See Out of Your Windshield Better!
“When you’re behind the wheel, nothing is more crucial than good visibility. But like most other drivers, I usually procrastinate cleaning my windshield wipers or even replacing them if necessary. Windshield wipers are notorious for drying out and cracking in a short time. To help prolong their life and clean them, soak a clean white rag with your favorite glass cleaner. Wipe the rag up and down the length of your wiper blades. You’ll see the results on the rag, and you’ll see out your windshield much better in the rain.” — Jim Nobilione
We’ve all experienced screeching windshield wiper blades, so learn how to eliminate this noisy issue.
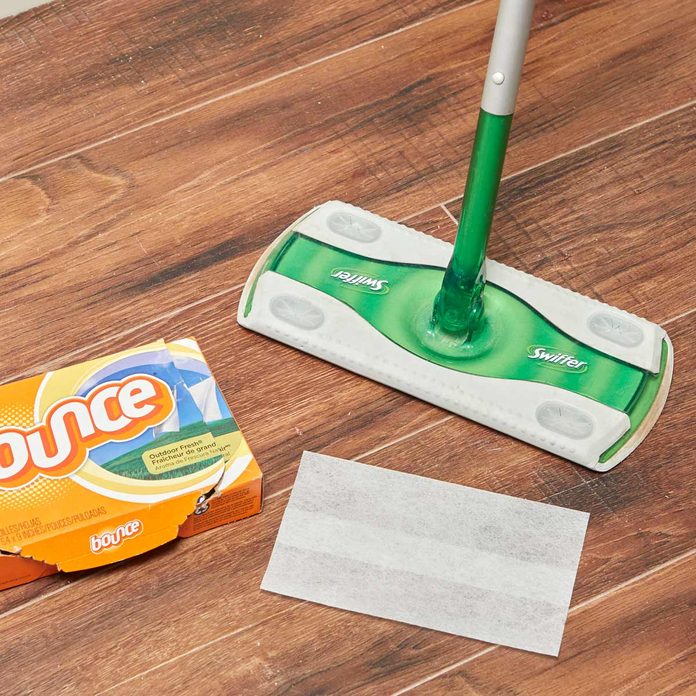
Use Dryer Sheets to Clean Your Floors
Don’t throw away used dryer sheets. There’s another use for them. Wrap a couple of dryer sheets onto the flat head of a sweeper. The dryer sheets pick up dust and hair just as well as name-brand sweeper refills. Say goodbye to those dust bunnies!
Over the course of a week, these cleaning ideas will make the whole house shine. Spend one day on each room, so nothing is overlooked.
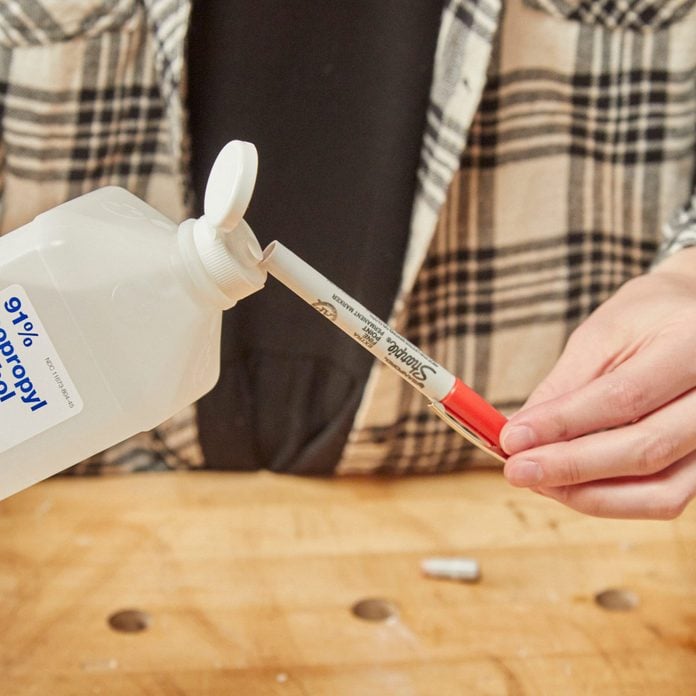
Bring Dead Sharpies Back to Life
When it comes to workshop problems, dried-out Sharpies aren’t major. But they are annoying when you can’t find another one to mark your measurements or project notes.
To bring your permanent marker back to life, simply remove the back from the maker. This will be different for each brand of permanent marker, for Sharpies simply remove the back nib. Next, deposit a few drops of isopropyl “rubbing” alcohol onto the felt material inside. Shake the marker a bit to ensure the rubbing alcohol is absorbed. It’s the solvent that the ink is mixed with that dries out first, making the pigment unable to flow. Once the felt absorbs the rubbing alcohol for a couple of minutes the marker will be practically good as new!
Did you accidentally draw on your dry erase board with a permanent marker? Here’s our magical handy hint to make it disappear!
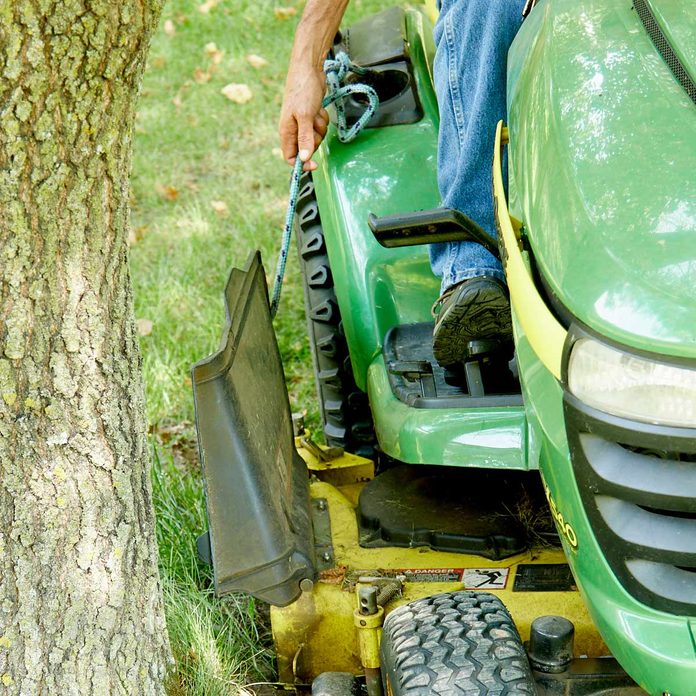
Lawn Mower Grass Chute Saver
To avoid a lot of string trimmer work, I like to mow as close as possible to trees and buildings. But the grass chute on my riding mower prevents it. So I drilled a hole in the chute and tied a rope from the chute to a handle on the side of the tractor. Now I can lift up the chute without missing a beat, and cut way down on string trimmer work. — Travis Larson
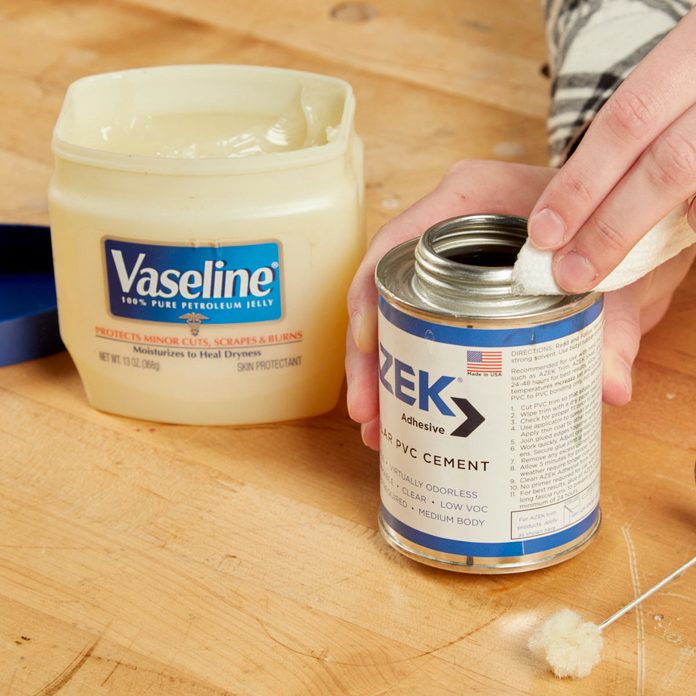
Lubricate Your Glue Caps and Lids
Caps on certain adhesives/glues, like rubber cement and super glue, have a habit of getting stuck or glued on no matter how hard you try and keep them clean. This can be prevented by simply smearing a little coating of petroleum jelly onto the threads of the tube or lid. You just need a small dab of the petroleum jelly to prevent even more of a mess. Be sure to smear a little bit on before putting the cap back on the glue and it should prevent the cap from cementing on over time. So the next time you go to use your super glue, you’ll be able to open it with ease and get right to work!
You can also get the same effect by spraying a little squirt of WD-40 inside the cap. Check out these 20 brilliant ways to use WD-40.
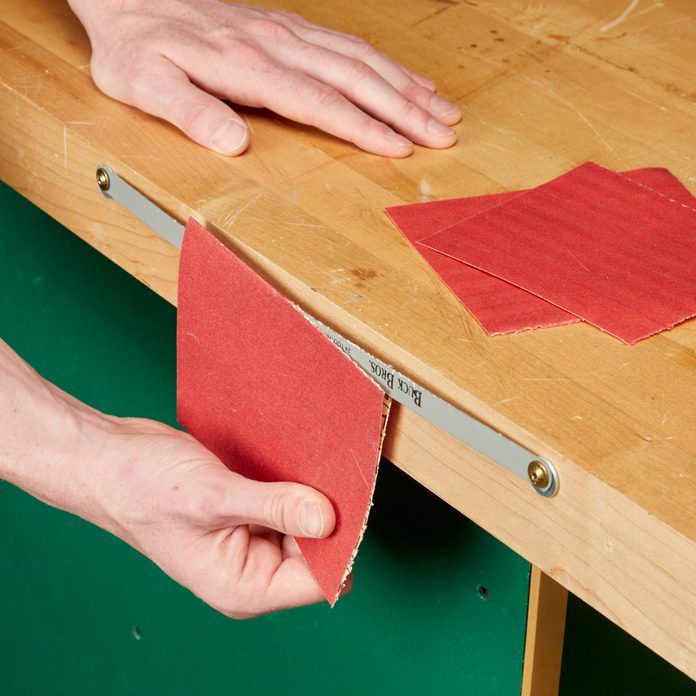
Sandpaper Cutter
Cutting sandpaper is a quick way to dull your scissors or utility knife blade. Instead, I fastened a hacksaw blade to the edge of my workbench. I slipped a washer behind the blade at each of the mounting holes so a sheet of sandpaper to easily slides in behind the blade. I fold the paper where I want to cut, just as a reference. — Kim Boley
Try some of these storage solutions!
Every product is independently selected by our editors. If you buy something through our links, we may earn an affiliate commission.