
How to Nail Vinyl Siding Correctly
Updated: Feb. 28, 2023Rule #1: Let it move

Diagnosing and fixing noisy siding
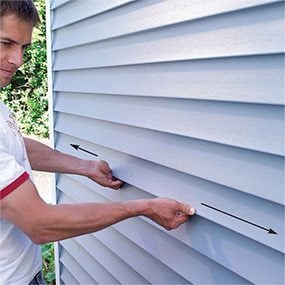
Photo 1: Test each piece
Each piece of siding should move back and forth at least 1/4-in. if it’s been nailed correctly. Test all the pieces on the noisy wall, and mark pieces that don’t move.
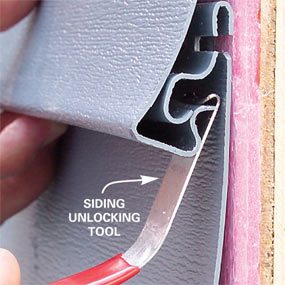
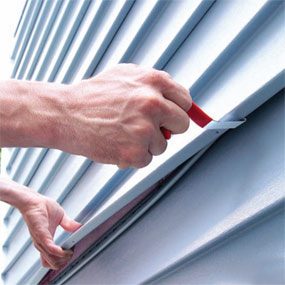
Photo 2: Unzip the siding
Unlock the course of siding above the tightly nailed piece, sliding the unlocking tool along underneath the lap.
If your siding sounds like rodents running inside the walls whenever the sun shines on it, you may have one or more pieces that were nailed too tightly. Vinyl siding tends to expand and contract considerably with temperature changes. For this reason, manufacturers design it to hang loosely on the nails rather than to be tightly nailed like wood siding. Learn how to replace vinyl siding.
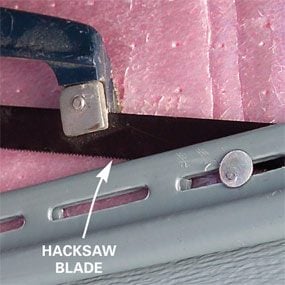
The problem should be easy to diagnose. Simply go outside, grab the lower edges of a siding course and try to slide it back and forth (Photo 1). Manufacturers require about 1/4-in. play at both ends, so if it’s nailed properly (loosely), you should be able to slide it 1/4 to 1/2 in. If all the siding is tight, it was installed wrong and should be redone. If only a few pieces are tight and you can’t find the contractor who installed it, buy an unlocking (“zip”) tool and unfasten the section above, exposing the nails (Photos 2 and 3). Find the tight nails and cut them (Photo 4). Renail right next to the old nail, leaving at least a 1/16-in. gap between the nailhead and the vinyl to allow easy movement.
Required Tools for this Project
Have the necessary tools for this DIY project lined up before you start—you’ll save time and frustration.
- Hammer
- Handsaw
- Pry bar
Required Materials for this Project
Avoid last-minute shopping trips by having all your materials ready ahead of time. Here’s a list.
- 1-1/4-in. roofing nails
