
Roofing: How to Install Step Flashing
Updated: Apr. 22, 2024Why step flashing works and how to install roof flashing against a wall
Best roof protection
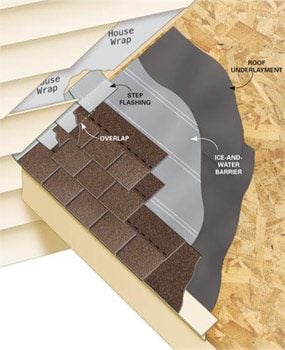
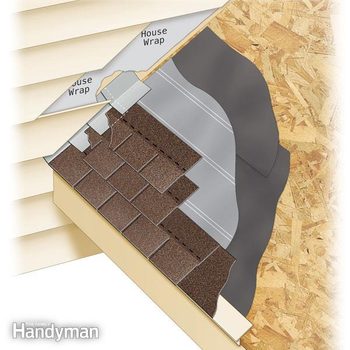
Continuous flashing against a sidewall is one way to install a roof, but it’s not the correct way. It may seem as if a single piece of flashing would offer more protection than many pieces of step flashing. But it doesn’t work that way. Once even a small section of roofing cement fails, you’ll have a leak. Each additional rain adds more water, and before you know it, you’ve got rotted wood.
Step flashing offers far better protection from leaks, because even if a single piece of step flashing fails, the water just hits the next lower piece. That flashing directs the water onto the shingle and the water drains down the roof.
Required Tools for this Project
Have the necessary tools for this DIY project lined up before you start—you’ll save time and frustration.
- Hammer
- Tin snips
Required Materials for this Project
Avoid last-minute shopping trips by having all your materials ready ahead of time. Here’s a list.
- Roofing nails
- Step flashing
