
Roof Flashing Techniques for Outside Corners
Updated: Jun. 30, 2017Make roof dormers and other outside corners leakproof
- Time
- Complexity
- Cost
- A full day
- Beginner
- $51–100
Wrapped corner method
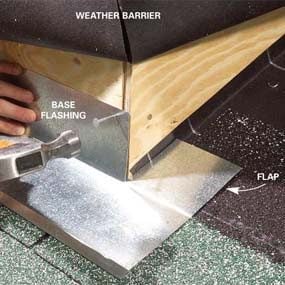
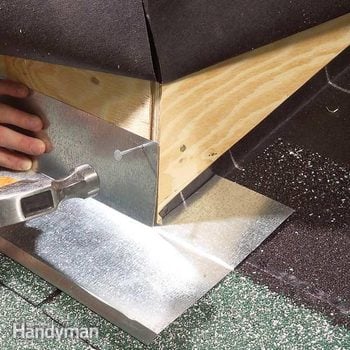
Photo 1: Bend a flap down
Run the base flashing 4 to 5 in. beyond the dormer and cut the top section along the dormer edge. Bend the flap down and nail along the top edge.
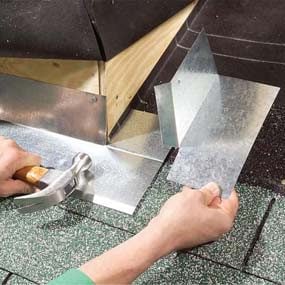
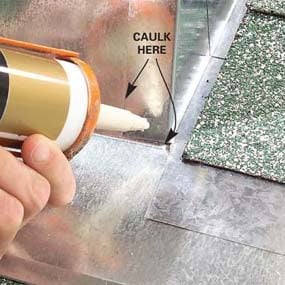
There are two good ways to handle corner flashing. The first, bending two pieces and caulking the joint (Photos 1 – 3), is the most common because you can do it on the spot with the flashing at hand. If you bend nice crisp corners and nail carefully, you’ll only leave a tiny hole to caulk at the corner (Photo 3). Remember to place the flashing under the weather barrier on the dormer. If you’re flashing a masonry chimney, nail the flashing to the roof as far up the flashing as possible. Cap flashing (counter flashing) inserted into mortar joints will cover the top edge.
Soldered corner method
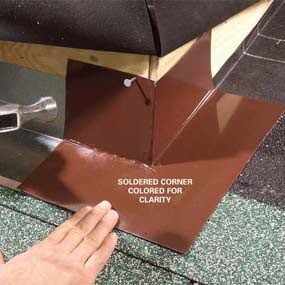
The second, forming and soldering a custom piece to fit the corner, is the best because it doesn’t leave any potential leak spots (at the caulked gaps). Unfortunately, you can’t solder aluminum flashing, and soldering galvanized steel is difficult. You’ll have to measure your roof slope and have a sheet metal or gutter-making shop make one for you. You may have to nail the lower edge to the roof to hold it flat. If so, cover the nail head with a dab of silicone.
Required Tools for this Project
Have the necessary tools for this DIY project lined up before you start—you’ll save time and frustration.
- Caulk gun
- Hammer
- Tin snips
Required Materials for this Project
Avoid last-minute shopping trips by having all your materials ready ahead of time. Here’s a list.
- Galvanized metal flashing
- Roofing nails
- Silicone caulk
