
How To Build a Simple Under-Cabinet Drawer for More Kitchen Storage

Updated: Nov. 28, 2023
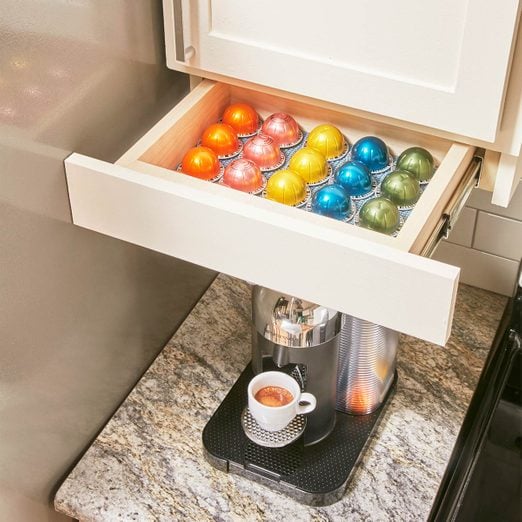
Extra storage right where you need it!
A few hours
Beginner
$50-100
Introduction
Tame countertop clutter with an under-cabinet drawer.Tools Required
- 18-gauge nailer
- Circular saw
- Cordless drill
Materials Required
- 1/4-in. plywood
- 1x3 board
- 1x4 board
Let’s face it, we could all use a little extra storage space in the kitchen. But I don’t really need an entire new layout, and my DIY skills aren’t such that I need to be ripping out and installing new cabinets. I just want something so I don’t have to jam even more utensils into the same drawer or squeeze one more spice jar into an overstuffed cabinet.
That’s what’s great about this under-cabinet drawer project. It’s simple to make and adds just enough space to give you some more flexibility in keeping your kitchen organized.
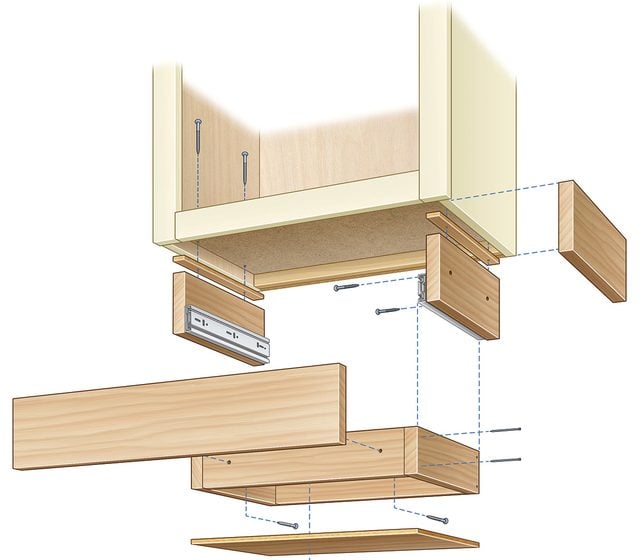
For lumber, you’ll need 1/4-in. plywood for each drawer bottom (see Figure A), 1×3 for the drawer box and 1×4 for the drawer supports, drawer front and trim board. (You’ll need two trim boards if the drawer is visible from both sides.)
We used poplar for all the parts because the exposed parts will be painted to match the cabinets. But if you have natural wood cabinets, choose your wood and finish to match. Paint or finish the drawer front and trim boards before installing them.
Matching your cabinets
Matching the finish on your existing cabinets can be tricky. Take a cabinet door with you to a paint store and get some help. Unscrew the hinges or, if you have European hinges, just unclip them. At the store they’ll be able to match up your cabinet paint colors, sheens and stain colors to get a finish that will make your new under-cabinet drawers look like they were built right along with the cabinets.
Side-mount drawer slides made easy
Ordinarily, installing drawers with side-mount slides is very challenging. But with this technique, everything is built around the drawer, making it very easy.
Most upper cabinets are 12 in. deep. If that’s the case with yours, you’ll need a pair of 10-in. side-mount drawer slides for each drawer. You won’t find 10-in. slides at home centers; you’ll have to search for them online or shop at a woodworking store. If you have unusually deep cabinets, you can create deeper drawers and use 12-in. slides, which are readily available at home centers.
Modifying the under-cabinet drawer
Peek under your cabinets and you’ll see the cavities. You can put several drawers under a row of cabinets if you wish, but each cabinet needs a separate drawer. If you’re putting in adjoining drawers, hold off on cutting the drawer fronts until all the drawers are installed so you can cut them to fit with even gaps between them. For single cabinet drawers, go ahead and cut the fronts the same length as the cabinet drawers face.
You won’t need any drawer pulls. Because the drawer front drops about an inch below the drawer, you’ll have a built-in lip on the underside for a finger pull.
Figure A
Project step-by-step (11)
Size the drawer
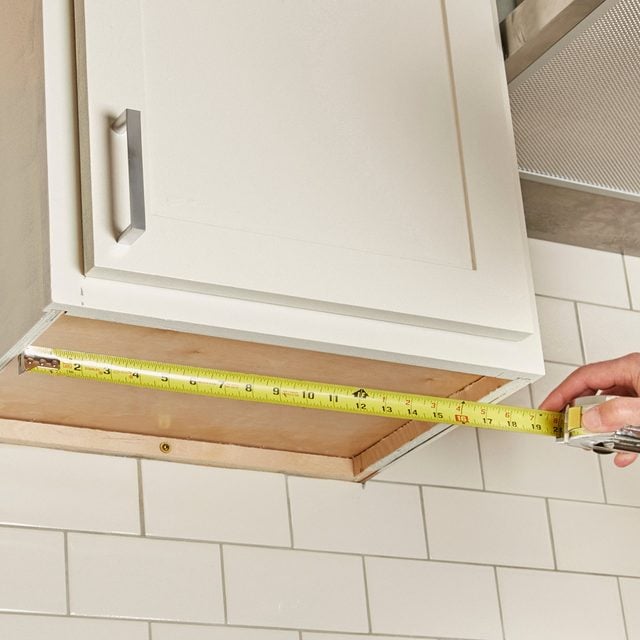
- Measure the cavity under the cabinet and cut a piece of 1/4-in. plywood 2-1/2 in. narrower and 1/4 in. shallower than those dimensions.
Build the drawer frame
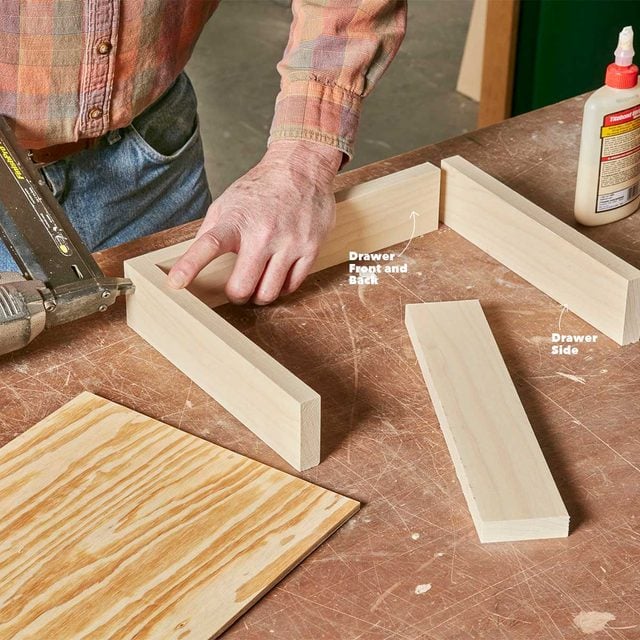
- Cut 1×3 frame parts to match the plywood dimensions.
- Then, glue and nail them together with 1-1/2-in. 18-gauge brads.
Add the drawer bottom

- Glue and nail the plywood to the frame using the plywood to square up the frame as you fasten it.
Attach the drawer slide
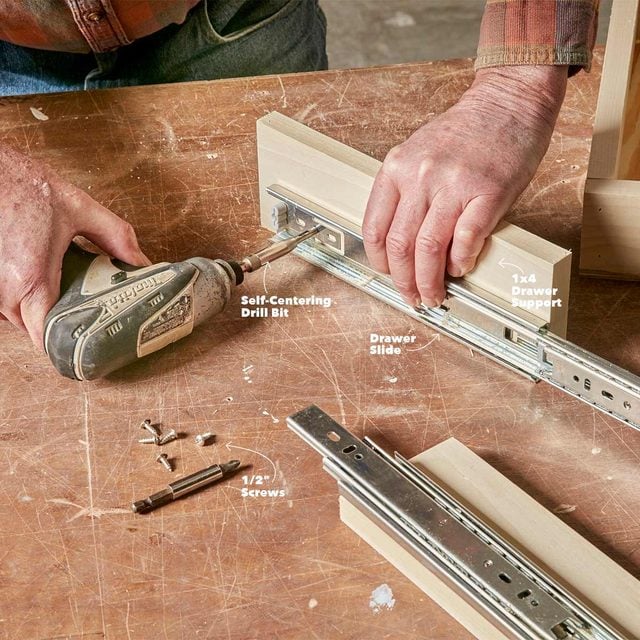
- Cut two 1x4s to the same length as the drawer sides.
- Attach the slides to the drawer supports, holding them flush with the bottom and the end.
- Use a self-centering drill bit in the round slide mounting holes before sinking the 1/2-in. screws.
Join the slide to the drawer
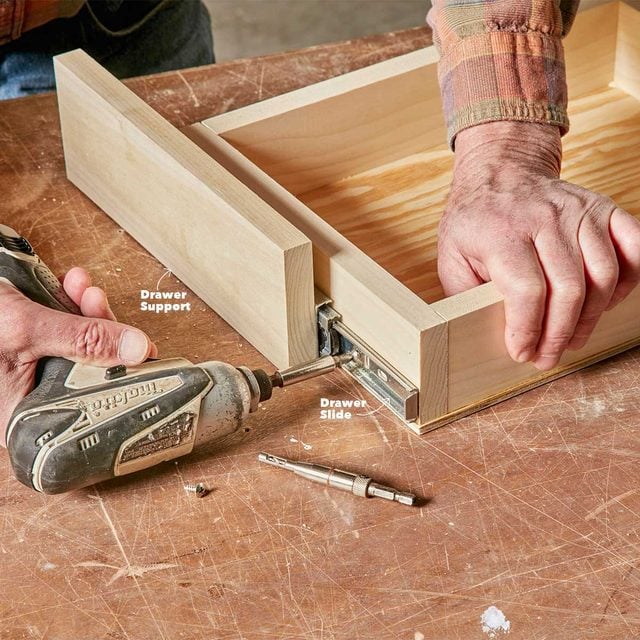
- Pull out the slide on each drawer support a few inches to expose the mounting holes.
- Then, pre-drill and screw the slides to the drawer sides flush with the front.
Finish attaching the drawer slide
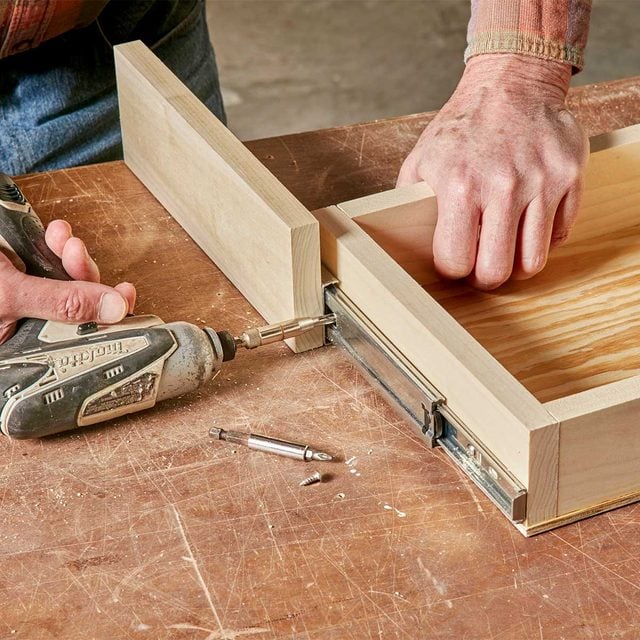
- Pull the slide out the rest of the way to mount the slide to the back end of the drawer.
Stick the assembly to the cabinet
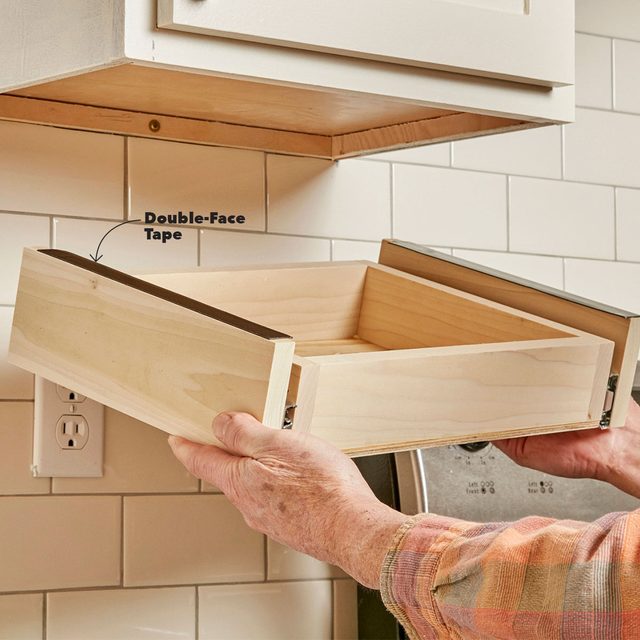
- Use double-face tape to temporarily stick the assembly to the underside of the cabinet. (Center it in the opening.)
Screw the drawer supports to the cabinet bottom
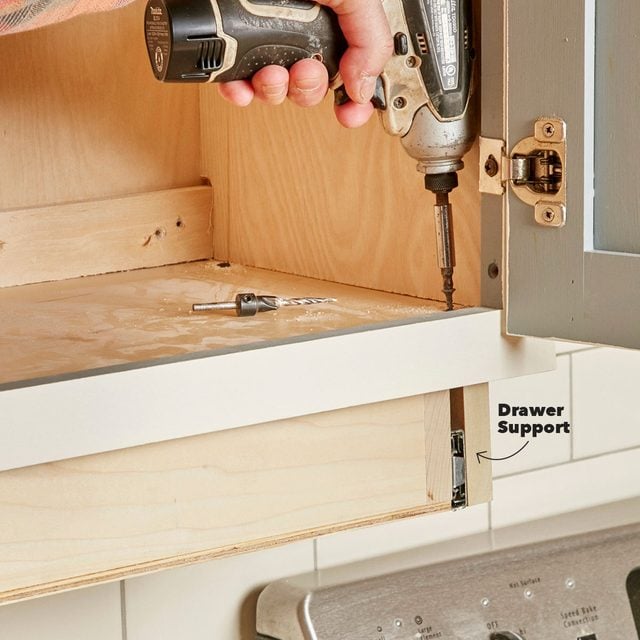
- Drill two 1/8-in. pilot holes through the cabinet bottom, then screw into the drawer supports.
Stick on the drawer front
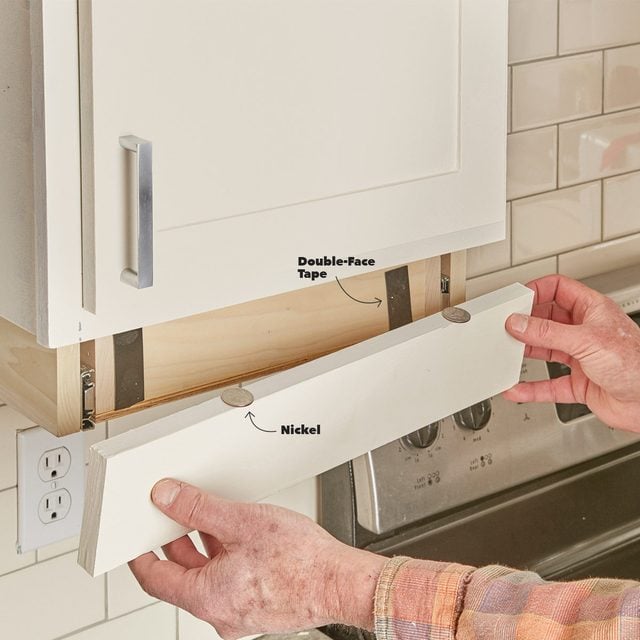
- Cut the 1×4 drawer front exactly the same length as the cabinet face frame.
- Use two nickels to space it from the cabinet frame while you attach it with double-face tape.
Attach the drawer front
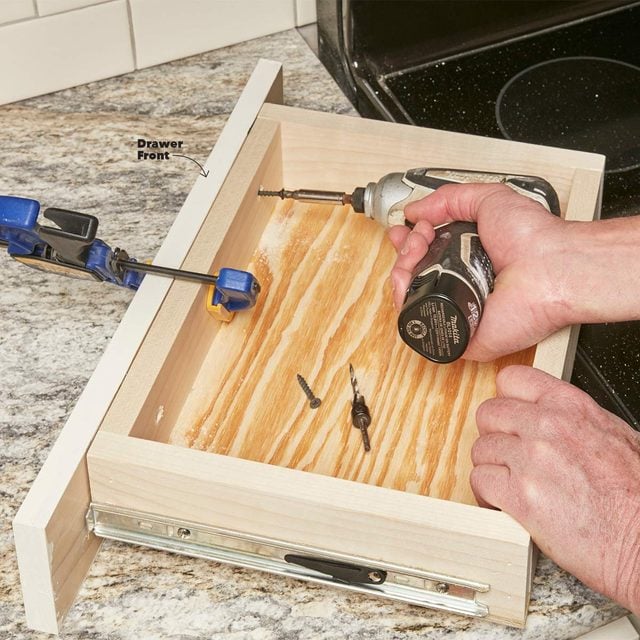
- Drill, then permanently attach the drawer front to the drawer frame from the inside with 1-1/4-in. screws.
Clamp and screw the side trim into place
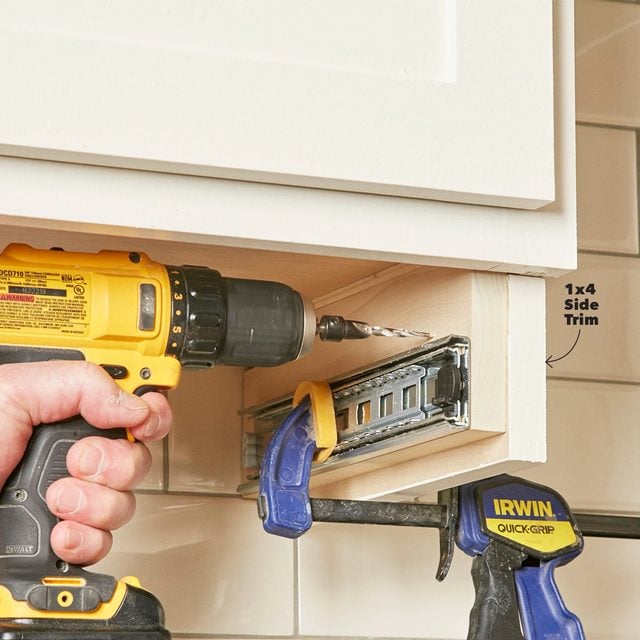
- Before you adhere and screw the assembly onto the cabinet, have someone help you hold it in place to make sure the drawer clears the cabinet face frame.
- If it doesn’t, rip 3/4-in. strips of 1/4-in. plywood for spacers (as many as needed) and nail them to the drawer support before mounting the assembly.
- Drill pilot holes above the drawer slide and attach the side trim with 1-1/4-in. screws.
Originally Published: April 24, 2019