How to Build a Birdhouse
Updated: Jun. 01, 2023
A fun-to-build DIY birdhouse project made with simple tools.

A full day
Beginner
Less than $20
Introduction
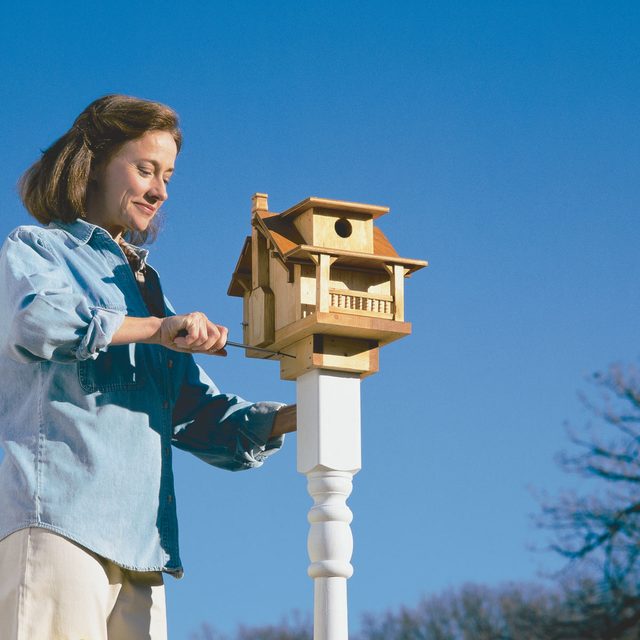
Want to attract more birds to your yard? Build this classic-looking birdhouse! You can do it in about a half day for less than $20.Tools You’ll Need:
- Clamps
- Combination square
- Drill bits
- Drill/driver – cordless
- Hammer
- Jigsaw
- Miter saw
- Table saw
Materials You’ll Need:
- 1 1-5/8″ x 36″ square dowel
- 1 1×4 x 2′ pine
- 1 1×8 x 4′ pine
- 1 7/8″ x 6-6/4″ corner castle block (specialty trim)
- 1 pkg. of 1/4′ x 1″ spiral dowels
- 1/2 pint bottle outdoor carpenter’s glue
- 4d galvanized finish nails
- 6d galvanized finish nails
- Wood glue
DIY Birdhouse Plans and Project PDF Files
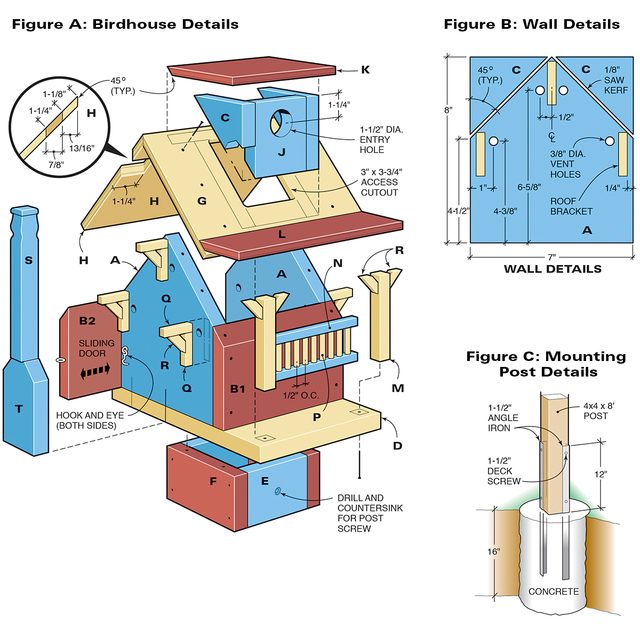
Project Drawings: Figure A, B and C
DIY Birdhouse overview: Materials, tools and design
Building a birdhouse is a fun project — so fun it’s hard to say who benefits from it more, the birds or the builder. You can follow the how-to photos and study the drawing and the cutting list to build our project exactly, or personalize it with any details you want, like a stone chimney, shutters or cedar shingles.
Most any softwood (pine, cedar, cypress, redwood, fir) will work for your birdhouse. We used pine for the walls and base, exterior fir plywood for the roof, and birch square dowels (available at home centers or hobby shops) as well as birch dowel pins for porch balusters.
Pro Tip: You’ll notice the 1×8 pine boards are actually 7-1/4 in. wide but need to be 7 in. wide for this project. If you don’t have a table saw to rip them to this narrower width, have the lumberyard rip them for you and then cut the lengths at home with the simple tools shown.
Project step-by-step (13)
DIY Birdhouse Plans: Sizing for Certain Birds
- The size of the entry hole and the interior room can make a huge difference in the type of bird your house will attract. We’ve sized this birdhouse to fit a variety of smaller bird species.
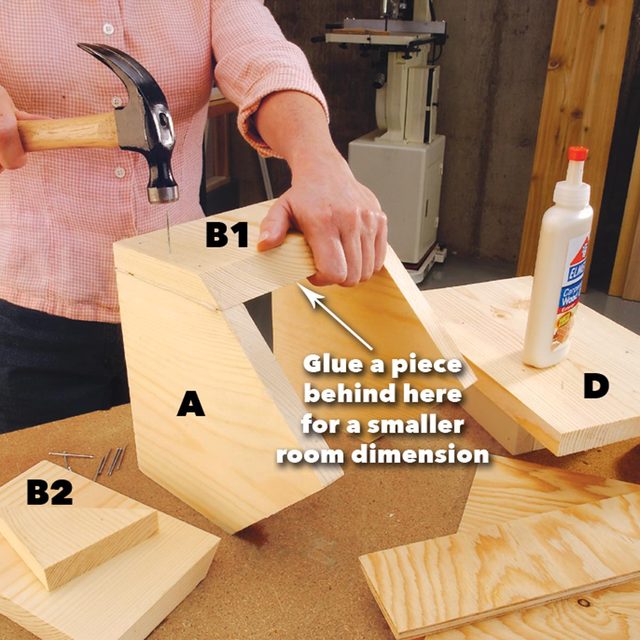
- To attract tiny birds like nuthatches, bluebirds or chickadees, you may want to make the floor area a bit smaller by gluing an extra piece of wood to the front interior wall of the birdhouse and another on one side. A smaller interior is not as hard for a bird to fill with nesting material.

DIY Birdhouse Plans and Details
- Keep in mind that you’ll need to clean your birdhouse after the nesting season. To make this as easy as possible, we’ve included a sliding rear door held in place with small hook-and-eye latches. Just lift the latch and slide the door to the side to remove the nest and wipe out the inside.
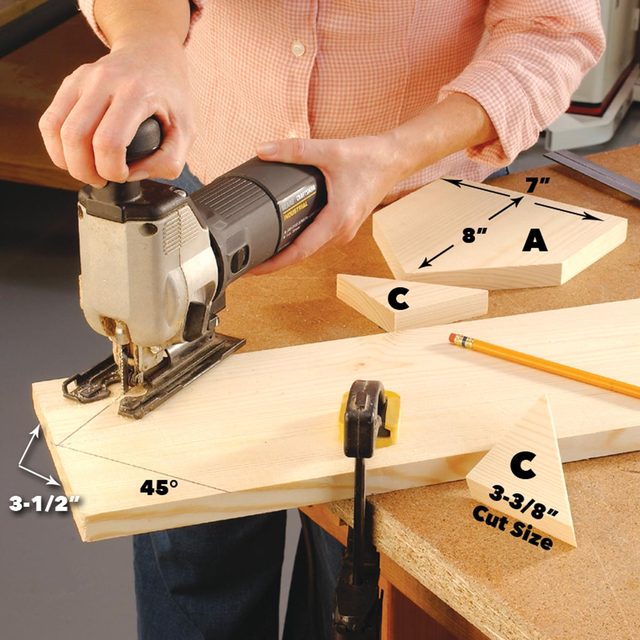
Cut Out the Pieces
- Cut out all the pieces in the cutting list (above) with a jigsaw. Rip the solid board to seven inches wide before cutting parts A, B and D.
Pro Tip: Use the cutting list to identify and keep track of all of your parts.
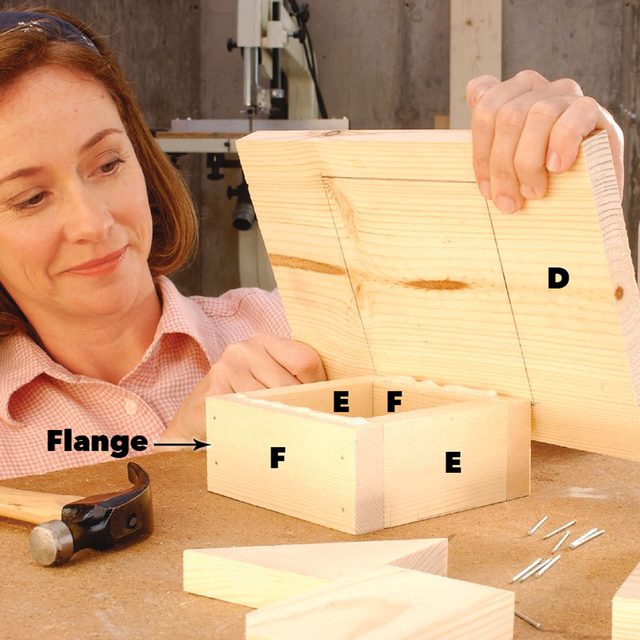
Assemble the Base
- Nail the wood flange assembly together with 6d galvanized finish nails.
- Glue and nail the base to this assembly.
- Pro Tip: Use outdoor carpenter’s glue for a stable, water-resistant bond.
Cut the Roof Pieces
- Set your jigsaw base at 45 degrees and cut miter joints for the roof pieces G and H. We made the roof angle 45 degrees to simplify measuring and cutting.
- Pro Tip: Use a straightedge clamped to the workpiece as a guide for a perfectly even cut.

Assemble the Walls
- Glue and nail the front piece (B1) to the side pieces (A). Use 4d galvanized finish nails.
- Don’t glue and nail the backside (B2). The back piece is 1/8 in. shorter so it can slide in place once the roof is in place and is removable for cleaning.
Cut a Roof Opening
- Cut an opening into the front roof panel (G) for access through the dormer.
- Drill a 3/8-in. starter hole in two opposite corners to start the cut easily.
- Cut the chimney opening in the rear roof panel with the blade set at a 45-degree angle.

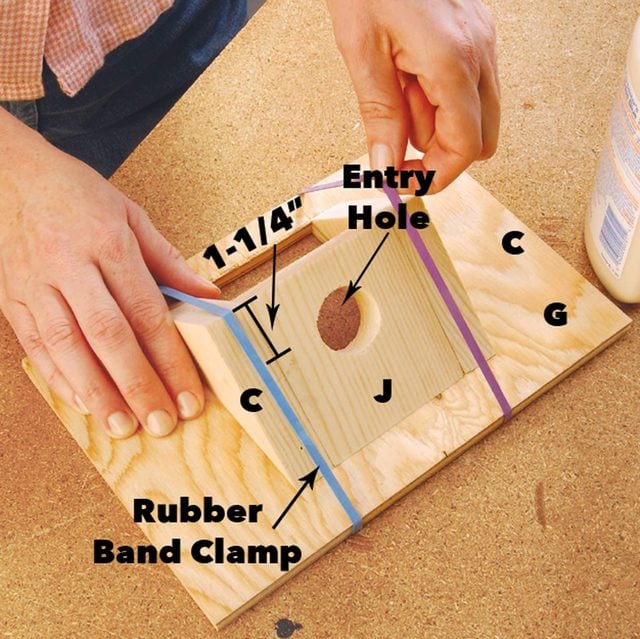
Assemble the Entry
- Glue and nail parts C to the center entry panel (J) once you’ve drilled the entry hole.
- Glue this assembly to the front plywood roof panel.
- Use rubber bands as clamps to hold the dormer assembly in place until the glue dries.
- Pro Tip: Make sure you size the birdhouse hole to match the species you hope to attract.
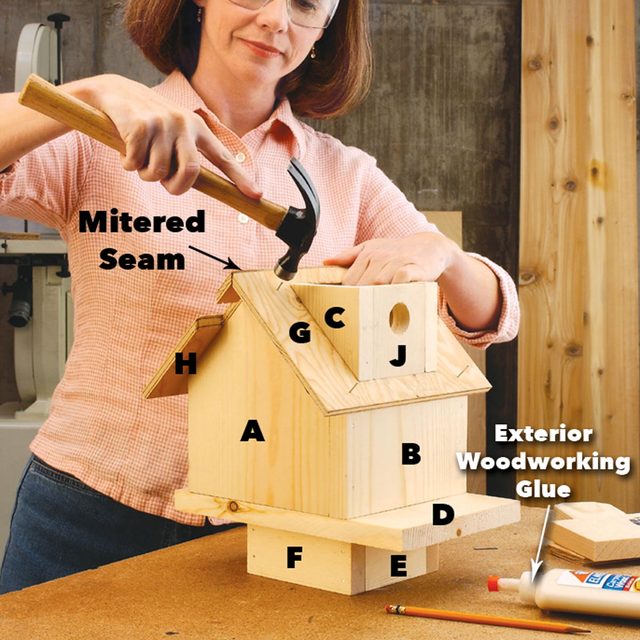
Attach the Entry
- Nail the roof panels to the side walls with 4d galvanized nails. Use glue along the mitered seam at the top.
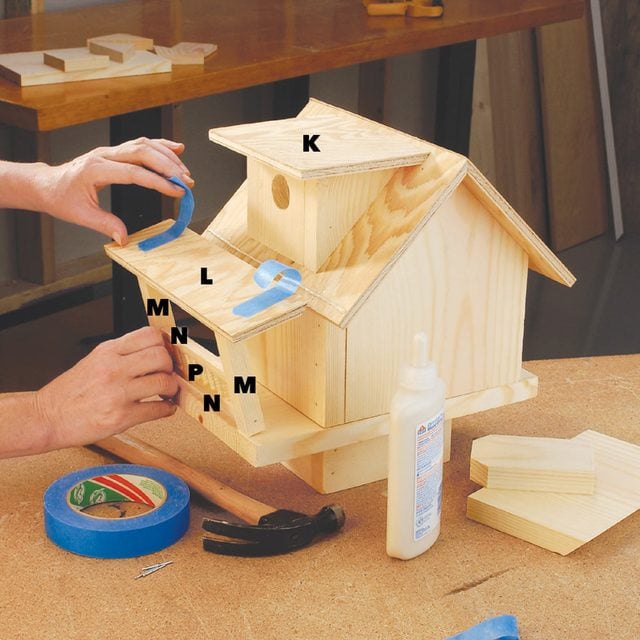
Glue and Nail the Railing
- Assemble the porch railing and nail it to the posts, then nail the porch roof (L) to the posts.
- Glue the seam along the roof and hold it in place with masking tape. Once the glue is dry, nail (use 4d finish nails and pre-drill a pilot hole) up from the underside of the base into each column.
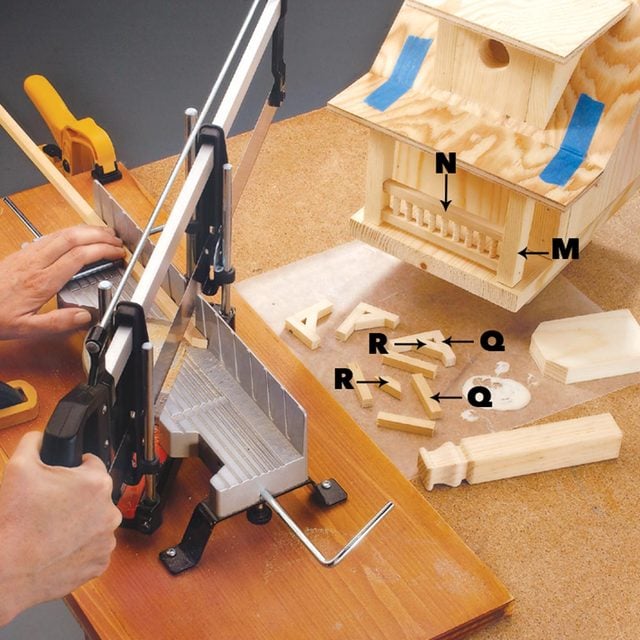
Add the Decorative Brackets
- Cut the small roof bracket pieces (Q and R) and assemble them using exterior wood glue.
- Pro Tip: Use wax paper under the pieces during assembly to keep them from sticking to the workbench.
- Once they’re assembled, glue the brackets to the sides of the birdhouse. Next, drill the vent holes to keep the birdhouse cool. Finally, select and apply an exterior finish.
Protect Your Birdhouse with an Oil Finish

Mount the Birdhouse Outdoors
- We made a wood flange to secure the birdhouse to a 4×4 fence post or decorative porch post anchored to a concrete base.
- To make the concrete base, mount the post to angle irons embedded in concrete and use a treated 4×4 so it won’t rot.
- You can also mount your birdhouse in a tree. Just eliminate the mounting flange and put screw eyes through the roof into the wall, then attach a chain hung from a tree limb.
- Pro Tip: Some bird species like to nest in houses in the open while others feel more protected near buildings or in a wooded area.