
How to Build and Install DIY Floating Shelves in Your Kitchen

Updated: Aug. 25, 2023
Hidden hardware makes for a clean look in these floating kitchen shelves.
Two days
Intermediate
Varies
Introduction
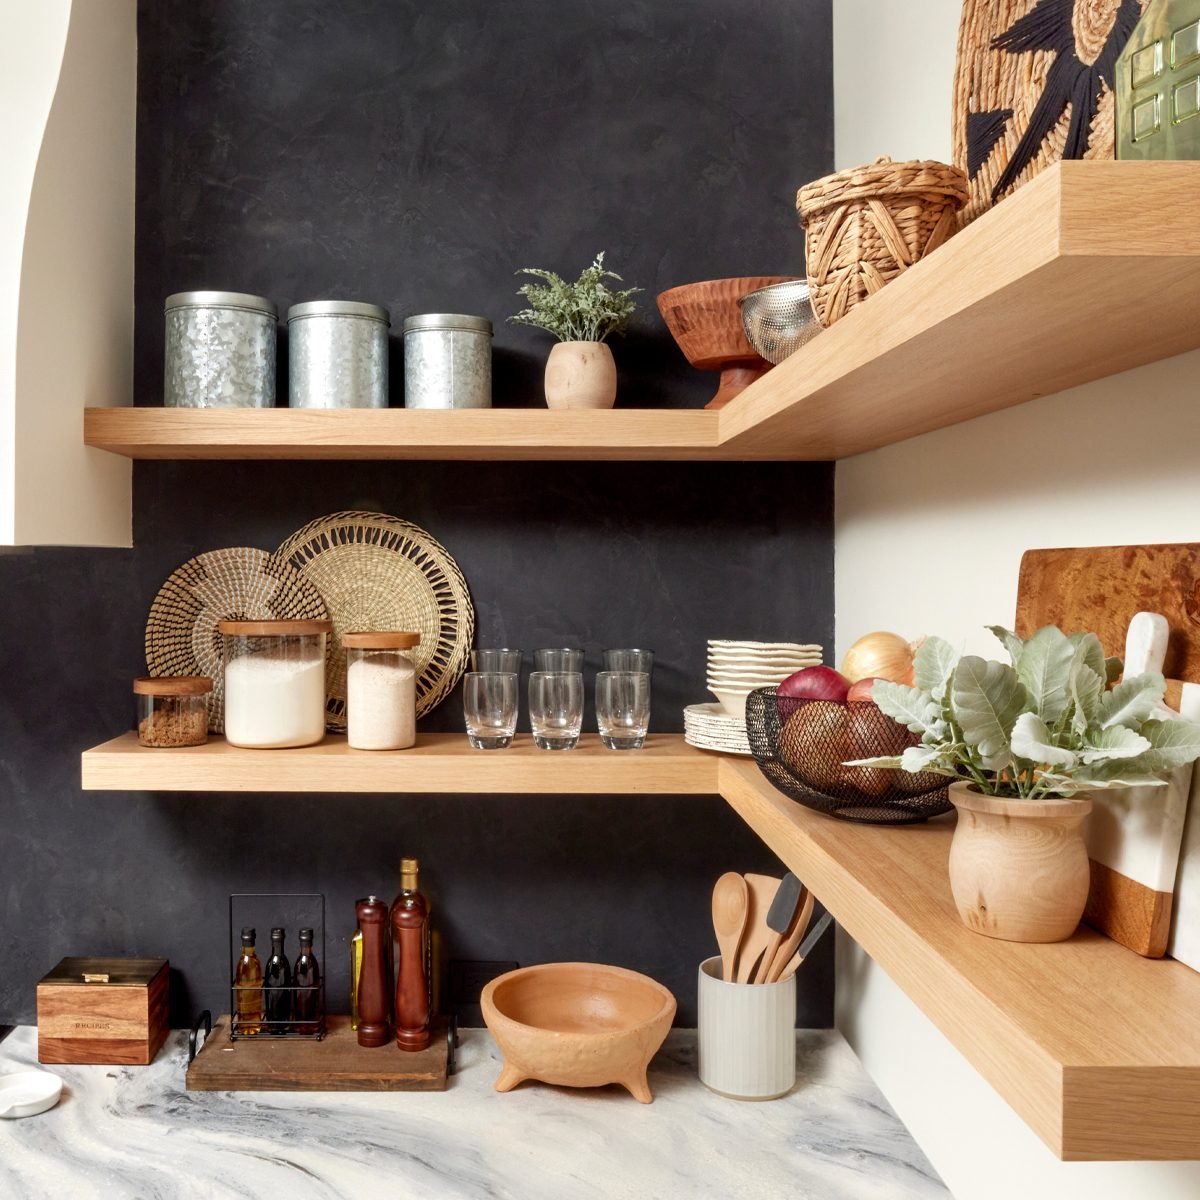
If you’ve been gathering inspiration for a kitchen remodel, there’s no doubt you’ve seen kitchens with open shelves. It’s a popular look since they make the room feel bigger and more open.
These shelves can be installed in several ways. After some research and testing, I found a slick system for adding open shelving that leaves no hardware in sight, giving the shelves a “floating” look.
Tools Required
- 18-gauge pneumatic nailer
- Basic hand tools
- Drill/driver
- featherboard
- Miter saw
- Table saw
Materials Required
- 1-1/4 16-gauge brad nails
- 3/4" x 4' x 8' sanded plywood
- 3/4" x 4' x 8' White Oak VC plywood
- 4' Hovr bracket
- 8' Hovr brackets
- Hovr Installation Bit Pack
- Hovr Installation Hardware Pack
- water-based polyurethane
- White oak pressure-sensitive adhesive veneer
- Wood glue

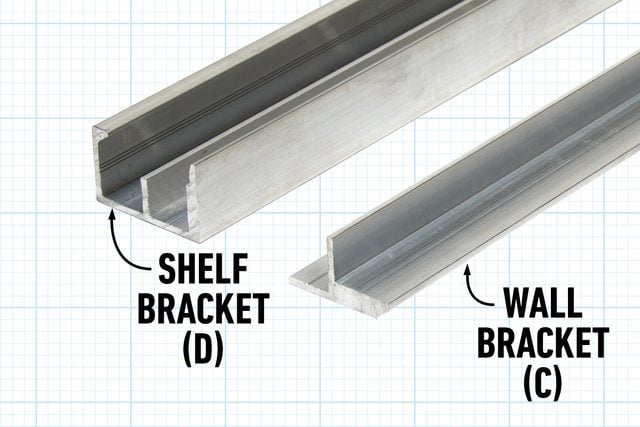
After looking into all the different ways to fasten open shelving, I settled on aluminum Hovr Brackets. They’re lighter and easier to cut and drill than the steel options I found. Hovr brackets claim to support up to 300 lbs., which is plenty for most kitchen supplies.
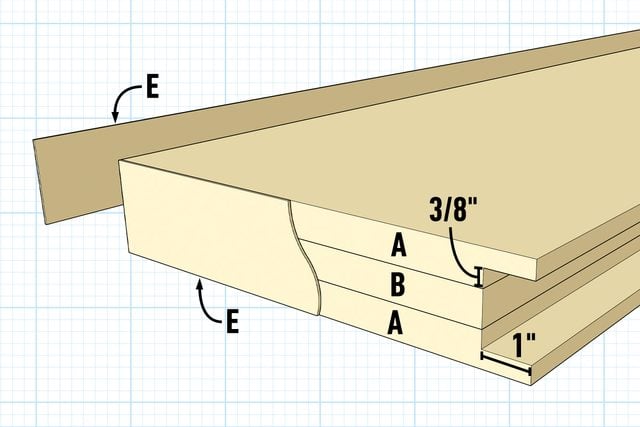
Figure A: Open Shelves
Cutting List
(per shelf)
| KEY | QTY. | DIMENSIONS | PART |
| A | 2 | 10-1/4″ x L white oak plywood | Top/bottom |
| B | 1 | 9″ x L sanded plywood | Filler |
| C | 1 | Cut to fit stud span | Wall bracket |
| D | 1 | Cut to fit wall bracket | Shelf bracket |
| E | 1 | 2-1/2″ wide white oak veneer to cover the edges of the shelf |
Project step-by-step (15)
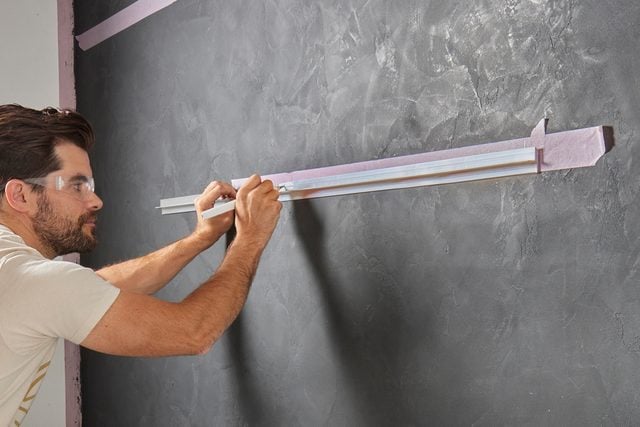
Determine the Shelf Placement
I marked the locations for the floating shelves (you can even convert these to box shelves) with painter’s tape. Once I was satisfied with the layout, I took shelf measurements and marked stud locations to determine the length of each mounting bracket.
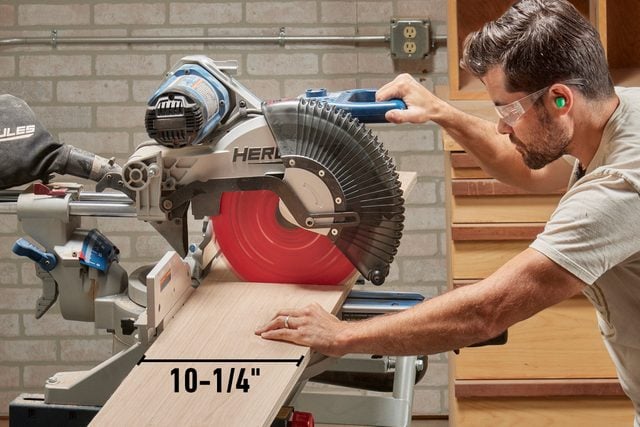
Cut the Shelf Parts
Each shelf has three parts: a top, a bottom and a filler. With the shelf lengths determined, rip the tops and bottoms for each shelf to 10-1/4-in. (1/4-in. wider than their final width). Rip the fillers one inch narrower than the tops and bottoms. Then cut the shelves slightly longer than their final dimension.
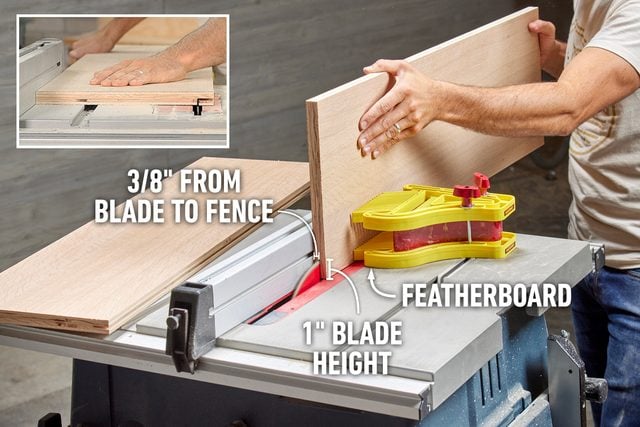
Cut the Rabbets
I cut a 1-in. x 3/8-in.-deep rabbet joint along the edges of the top and bottom shelf parts.
Because the first cut is made with the board on edge, I used a tall featherboard to push the plywood against the fence as I fed the boards through the saw blade. I made all the cuts this way, then adjusted the fence and blade to finish the rabbet with the board flat on the table.
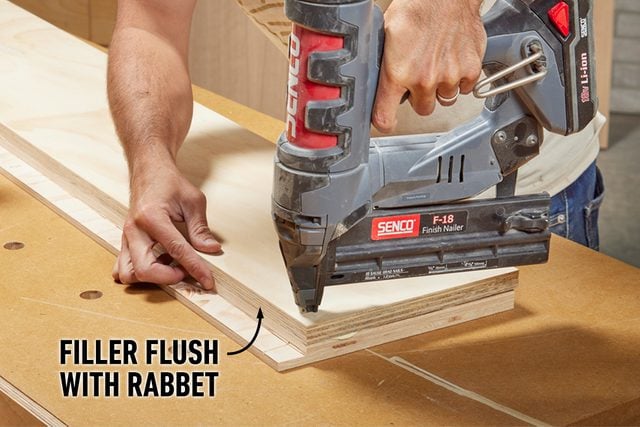
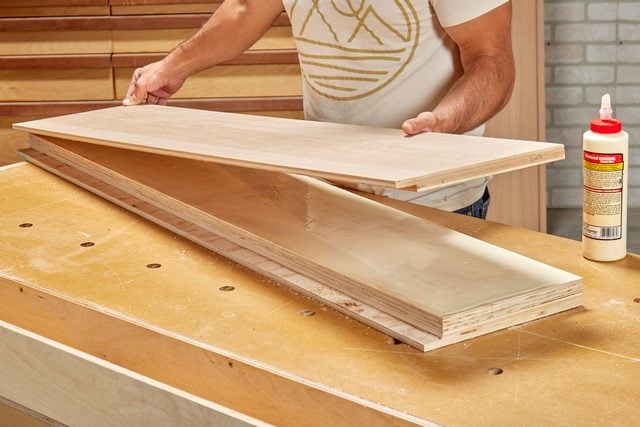
Add the Filler Pieces
Spread a thin layer of wood glue on the rabbeted side of the plywood. Align the filler pieces with the edges of the shelves, tack them into place with a few 1-1/4-in. brad nails and wipe off any excess glue. Be sure the back edges of the filler pieces are flush with the edge of the rabbets.
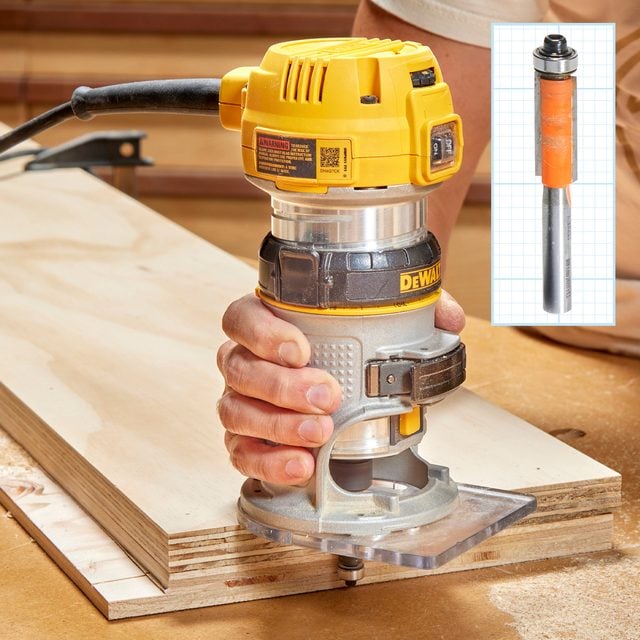
Trim the Filler Pieces
Using a flush-trim bit, trim the filler pieces flush with the rabbeted shelf pieces. It’s most important to get the front of the shelf perfectly flush, but trim the ends while you’re at it to make it easier to align the next layer.
Add the Other Shelf Face
Spread another layer of glue and place the top shelf piece, lining up the rabbet to the edge of the filler piece. Tack it down, then trim the front edge of the shelf flush with the rest of the shelf using a flush-trim bit. Cut the shelves to final length with a miter saw, then fill the nail holes and sand them smooth.
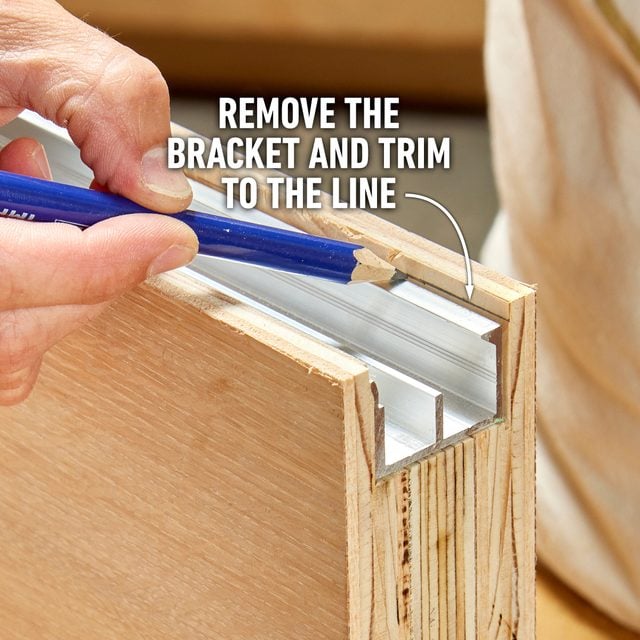
Test-fit the Shelf Bracket
Check the fit of the shelf bracket in the groove. My fit was a little tight, so I set up the table saw to trim one side of the groove. Because I had to trim all the shelves, I made sure to trim only the bottom side of the grooves so the shelves would still line up when installed.
Once the bracket fit the groove, I marked its depth inside. Then I removed the bracket and trimmed the back of the shelf to the line using the table saw. The bracket should end up inset by about 1/64-inch.
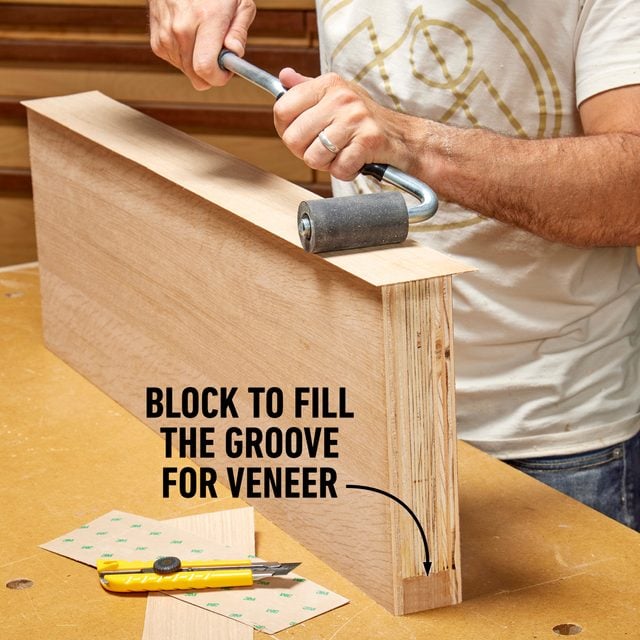
Veneer the Edges
With the shelves at their final dimensions and all edges flush, I applied white oak veneer backed with pressure-sensitive adhesive (PSA) to cover all the visible raw plywood ends. But before applying the veneer, I glued blocks in the ends of the grooves to support the veneer.
Be sure to cut your veneer a little oversized. Once it’s applied, firmly press it in place with a J-roller.
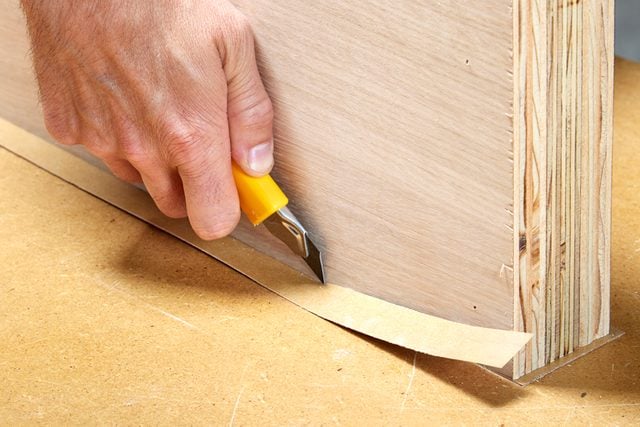
Trim the Edge Banding
You can buy special tools to trim edge banding, but here’s the method I like: Place the veneered surface face down on a flat surface, then cut off the excess with a utility knife. Cut lightly, carefully following the face of the shelf. It’ll take a few passes.
Install the Bracket
Set the bracket in the groove, positioned so it’ll catch the wall studs. Drill pilot holes and drive 1-1/4-in. washer-head screws through each of the predrilled holes of the bracket to secure it to the shelf.
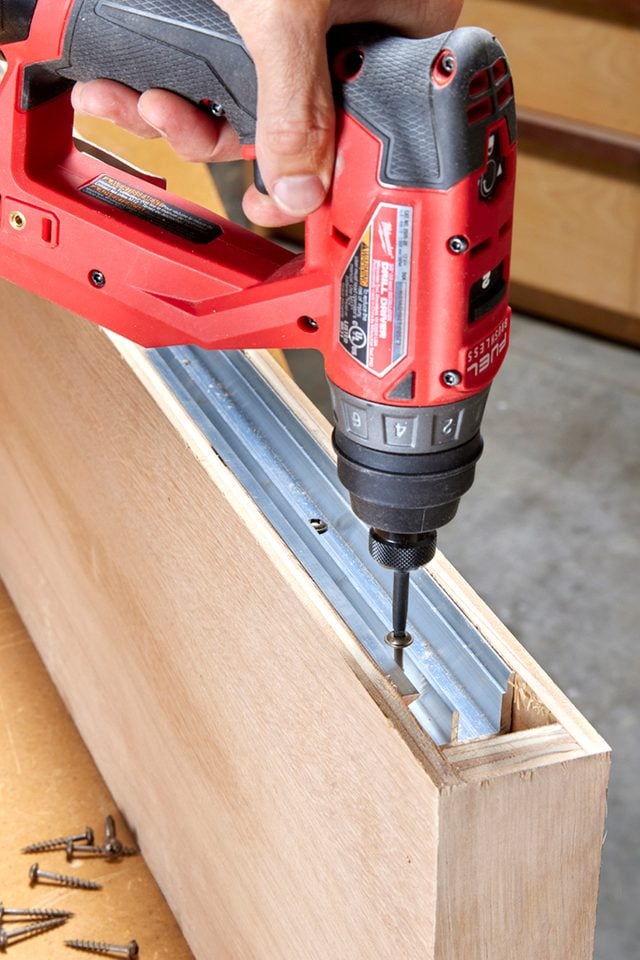
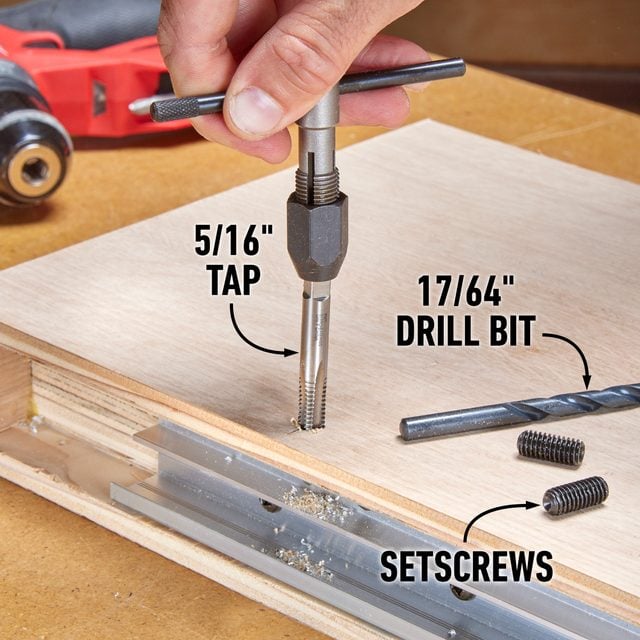
Tap Threads in the Bracket
Hovr recommends drilling and tapping holes for setscrews through the bottoms of the shelf brackets after installing them in the shelves. These screws keep the shelf and wall brackets together when the shelves are hung. The tap and drill bit are included with the bit pack you buy with the brackets.
After drilling the pilot hole, I turned the tap into the hole slowly, making a quarter turn clockwise. Then I backed it out slightly before making another quarter turn. I repeated this until the tap threaded through the bracket.
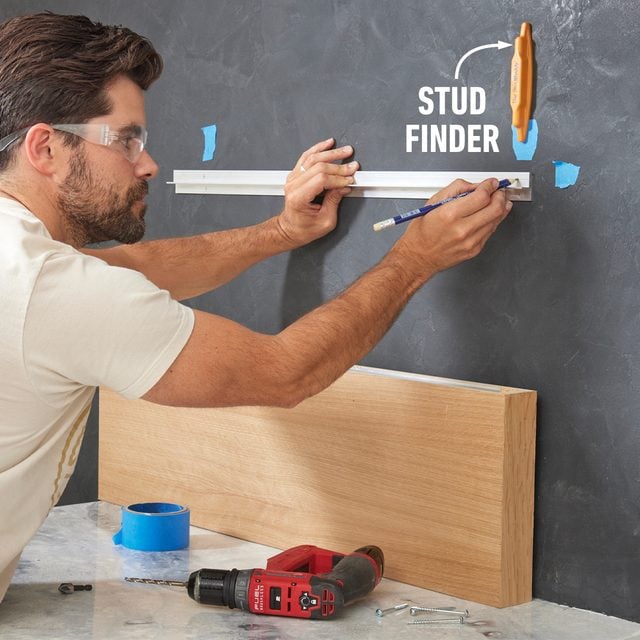
Prep the Wall Brackets
I cut the wall brackets to fit the stud spacing and marked the stud locations on the bracket. Then I drilled two 3/16-in. holes at each stud mark, one above and one below the center ridge.
Secure the Wall Bracket
Fasten the wall bracket to the studs with two No. 8 x 2-1/2-in. washer-head screws at each stud, screwing them through the holes in the bracket. Start with one screw, then level the bracket before fastening the rest.

Hang the Shelves
With the front of the shelf raised, hook the shelf bracket onto the top of the wall bracket, then lower the front of the shelf. If it feels as if it isn’t quite set, use your fist or a rubber mallet to seat the shelf firmly onto the wall bracket.

Tighten the Setscrews
With the shelves in place, tighten the setscrews to secure the shelf onto the wall bracket.

Originally Published: September 01, 2022