How to Install a Ductless Mini Split Air Conditioner
Updated: Mar. 08, 2024
Installing cooling is surprisingly easy with a mini-split system. Here, we'll show you how to do it yourself.

Introduction
Installing cooling is surprisingly easy with a mini-split systemTools Required
- Adjustable wrench
- Drill/driver
- Hole saw
- Level
Materials Required
- Condenser wall brackets
- Ductless mini-split system
- Plastic condenser pad
- Plastic line set cover kit
Adding an A/C system sounds like a job for pros only. And usually it is. But two non-pros handled this ductless air conditioner installation in a garage in one day.
The installation was fast and easy because of the special line set. It comes prefilled, or “precharged,” with refrigerant and includes connectors that don’t require special skills or tools. Just mount the two main units and connect the line set to the condenser. Some mini-splits include an easy-install line set, but most don’t.
A ductless mini-split system can be installed in a home, a garage, a cabin or a shed. Some offer heating as well as cooling, and some include multiple evaporators to serve multiple rooms. Depending on features and size, most DIY mini-splits cost from $700 to $2,000.
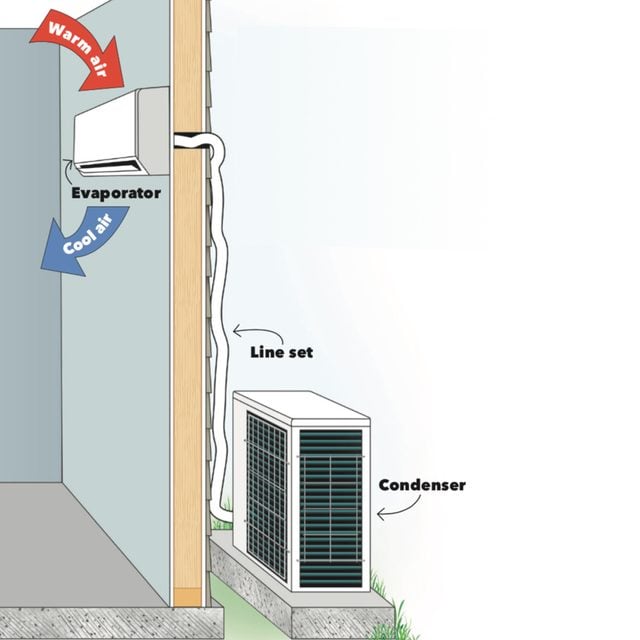
How Do Ductless Air Conditioners Work?
A mini-split system has two main components: an indoor evaporator, which cools the air, and an outdoor condenser, which dissipates heat. They’re connected by a line set, tubing that passes through a baseball-size hole in the wall, carrying hot refrigerant outside and cold refrigerant in. Our line set also included cable to power the evaporator and a drain line to carry condensation outside.
Choosing the System
Very few brick-and-mortar stores carry DIY systems, so online shopping may be your only option. Luckily there are many online suppliers. The size of the system is listed in BTUs (British thermal units). The higher the number, the greater the cooling capacity. To select the right size mini-split, calculate the heat loss of the room. Several websites simplify these calculations.
Don’t just guess; an undersized system won’t keep up, and an oversized system will cycle on and off too frequently, shortening the condenser’s service life. We installed a heating and cooling system that costs about $900. The other necessary materials totaled about $275.
Providing Power
In the steps below, you’ll see that ductless air conditioner installation is mostly basic DIY stuff: measuring, drilling holes, driving screws … Usually the biggest challenge is running power to the system.
With a small system, you may be able to draw power from a nearby underloaded 20-amp circuit. More likely, you’ll want to install a new circuit dedicated to the mini-split. That can be a small job or a major project depending on how easy it is to run cable from the main panel to the unit.
By cutting—and later patching—three small holes in drywall, we were able to run cable from the basement up through the garage wall, through the attic, then down and out the exterior wall and into a disconnect box. (The disconnect provides an easy, certain way to turn off power when servicing the unit.)
Power then runs from the disconnect to the condenser. Cable running alongside the line set powers the evaporator. Our bill for electrical supplies was about $160. A local electrician estimated that work at about $500.
If you have some electrical know-how but need extra guidance, don’t forget your local electrical inspector. It’s not an inspector’s job to act as a consultant, but most will give you some advice and outline code requirements. Expert help and certainty that the job is done right—not bad for the cost of an electrical permit.
Other Materials
You’ll need a few other materials for your ductless air conditioner installation. The condenser needs a level surface to rest on. You could pour a concrete pad, but a plastic condenser pad ($50 and up online) is instant and easy. We mounted ours on condenser wall brackets ($45 online).
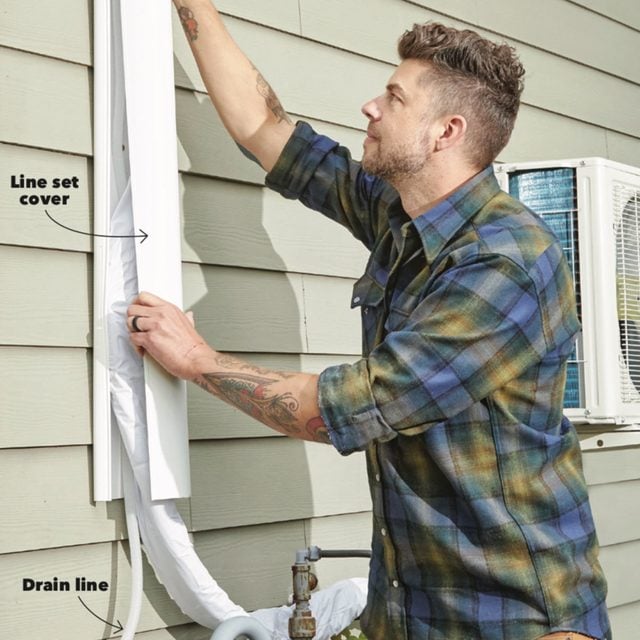
The fabric sleeve covering the line set isn’t attractive or easy to keep clean. The solution is a plastic line set cover kit, which costs about $55 online.
Remote Control
A handheld controller is used to adjust the room temperature. Some mini-splits offer Wi-Fi and Bluetooth control.
Project step-by-step (9)
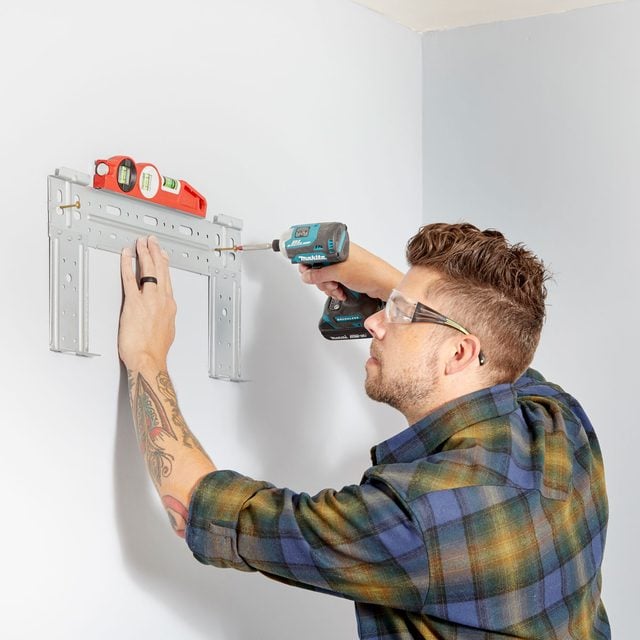
Install the Mounting Bracket
- Mount the evaporator inside the room on an exterior wall away from direct sunlight, doorways and sources of dust.
- Make sure this area of the wall is free of wires, pipes and ducts that would interfere with making a hole for the line set.
- Mark the stud locations and fasten the bracket to them with screws.
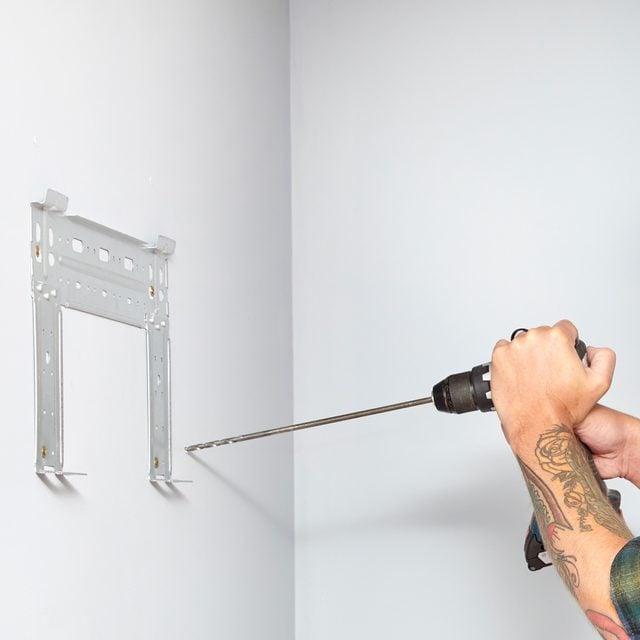
Drill a Pilot Hole
- The line set hole must slope slightly downward to the outside so condensate from the evaporator can drain outside.
- Begin by drilling a pilot hole from inside to outside.
- Then go outside and make sure no trim or other obstructions will complicate drilling the full-size hole.
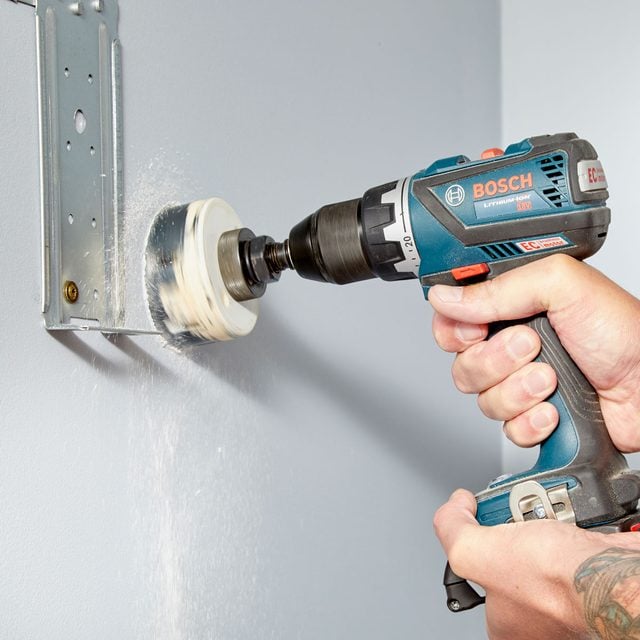
Bore the Full-Size Hole
- Cut with a hole saw from inside, move aside any insulation and inspect the wall cavity for obstructions. Here are a few tips for replacing rotting insulating A/C lines.
- Finish the hole by drilling from the outside.
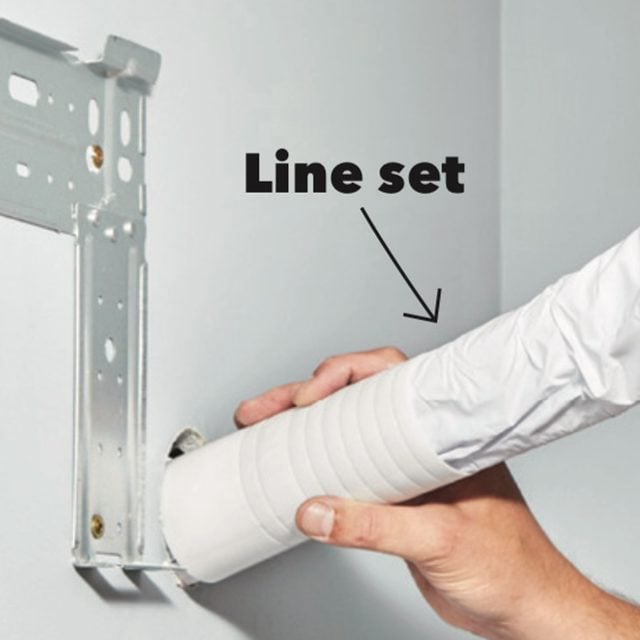
Run the Line Set
- Carefully uncoil the line set from the back of the evaporator.
- With an assistant outside, feed the line set through the hole.
- As it emerges, the assistant should gently bend the line set downward and to the side as needed to reach the condenser.
- Keep the rigid plastic collar surrounding the line set at the end that connects to the condenser.
- The drain line is shorter and goes through last, below the other lines.
- Add the drain extension and wrap the joint with electrical tape to keep it secure.
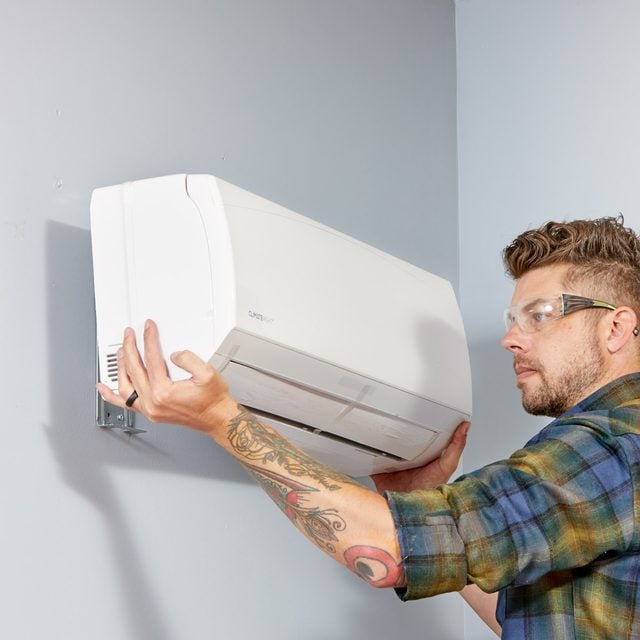
Install the Evaporator
- Wrap the foam sleeve around the section of line set within the hole and replace any insulation in the wall cavity that was disturbed.
- Then hang the evaporator on the mounting bracket.
- Pro tip: Your helper may need to feed a few more inches of the line set outside as you do this.
- On the outside, insert the two-piece plastic trim into the hole to prevent any rough edges from damaging the line set.
Install the Condenser
- Set the condenser on a pad on the ground or mount it on a wall bracket so that the refrigerant lines can reach it easily. Here are a few tips to fix a sinking air conditioner pad.
- Route the line set so it stays tight to the building exterior and doesn’t leapfrog any obstructions. This makes it easier to install a cover.
- Ensure the condenser has the recommended clearance from walls and bushes.
- Avoid placement where ice or packed snow could fall on it or where other appliances vent.
- A location on the east or north side of the structure maximizes cooling efficiency.
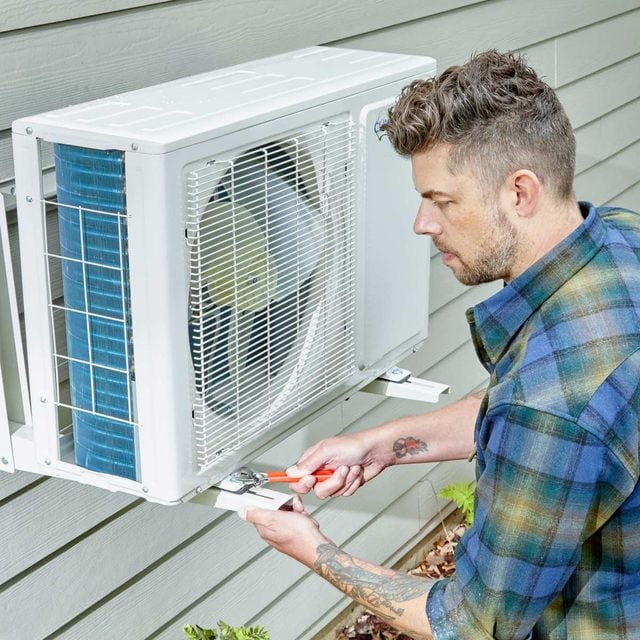
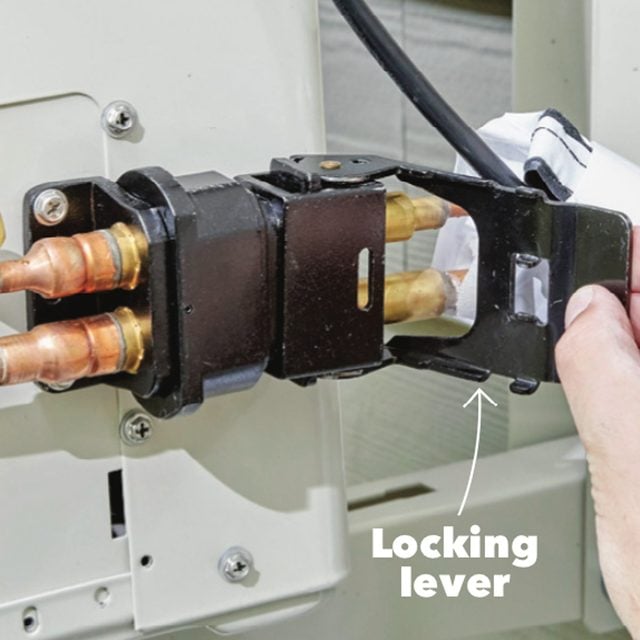
Connect the Refrigerant Lines
- This step varies by manufacturer.
- With this system, a locking lever presses the line connections together.
- Before powering up, inspect the refrigerant lines for kinks and verify the electrical connections.
- Then go inside and set the temperature using the handheld controller.
Cover the Line Set
- Insulate and seal the hole in the outside wall, then cover the line set using sections of plastic or metal channel cut to length.
- Place the back half of the channel behind the line set, plumb it and anchor it to the wall with self-tapping screws.
- Our line set travels horizontally to the compressor, so when we added the channel corner, we drilled a hole in it to allow the drain line to exit straight down.