
How to Build a Recycling Bin That Fits Into Your Cabinet

Updated: Apr. 09, 2024
In this project, we will show you how to DIY a pull-out for storing trash, compost and recycling inside a kitchen cabinet.

Two days
Beginner
$300
Introduction
Here's the best way to keep the trash in your kitchen out of sight, out of mind.Tools Required
- Clamps
- Drill
- Jigsaw
- Level
- Miter saw
- Multi Tool
- Pocket hole jig
- Safety glasses
- Table saw
- Tape measure
- Track saw or circular saw w/ guide
Materials Required
- #8 x 1-1/2-in. Wood screws
- 1 – 3/4 in. x 4 ft. x 8 ft. Maple plywood
- 1 Indoor composter bin
- 1-1/4-in. Pocket screws
- 180-grit sandpaper
- 22-in. Soft-close side-mount drawer slides (set of 2)
- 3 Waste containers
- Foam brushes
- General Finishes Oil Based Gel Topcoat
- Wood glue

Tired of takeout containers piling up on the kitchen counter? Wish you could hide your trash can? Then this project may be the long-awaited way of organizing your kitchen you’ve been looking for.
It’s not that hard to build an in-cabinet station that holds not only your garbage, but also recycling and compost. The convenience will make you wish you did this sooner.
Start by calculating the size of your pull-out. Remove the cabinet doors and measure the inside of the cabinet — height, depth and width.
For the pull-out height, allow at least two inches at the top so the bins will clear. Subtract an inch from the width for the drawer slides. The depth of your pullout should be about 1/4-inch less than the cabinet’s depth.
These don’t have face frames. If you have face frame cabinets, add a build-up strip behind the frames for mounting the drawer slides. Cut these strips to be flush with the inner edge of the face frames.
Figure A
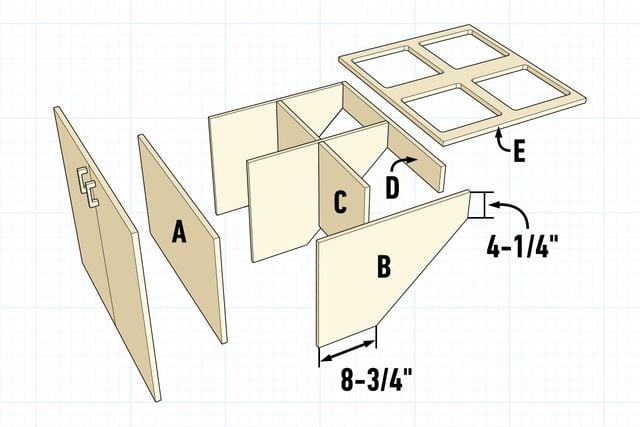
Cutting List
| KEY | QTY. | PART | DIMENSIONS |
| A | 1 | Front | 3/4″ x 17-3/8″ x 27″ |
| B | 3 | Partition* | 3/4″ x 22-1/4″ x 17-3/8″ |
| C | 2 | Inside Divider | 3/4″ x 14-5/8″ x 12-7/16″ |
| D | 1 | Back | 3/4″ x 27″ x 4-1/4″ |
| E | 1 | Top | 3/4″ x 27″ x 23-3/4″ |
*Angled cut — See Figure A.
Overall dimensions: 18-in. H x 27-in. W x 23-3/4-in. D.
Project step-by-step (17)
Make the Cuts
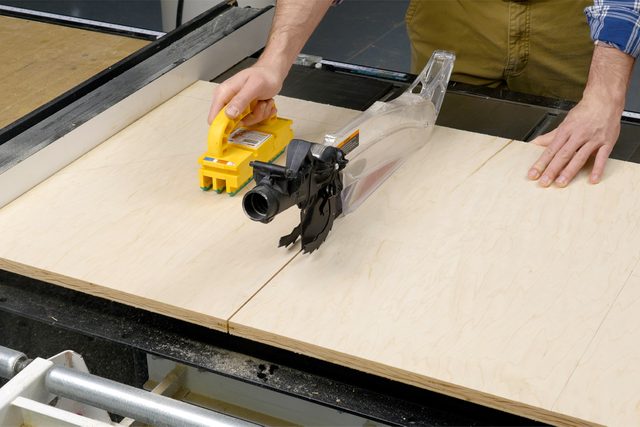
Cut the parts (A through E) with a table saw, track saw or circular saw and a guide. Finish smaller cuts on the table saw.
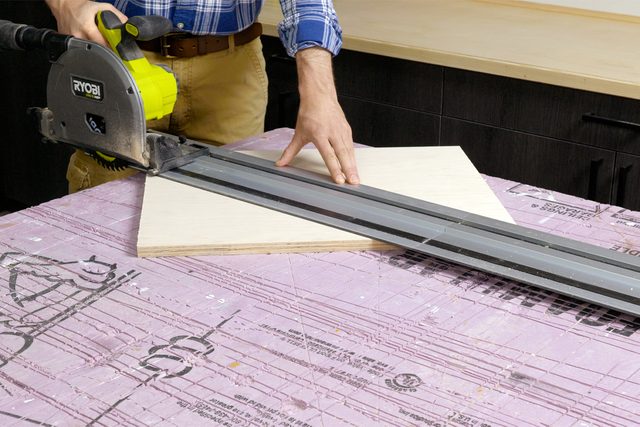
Cut Your Angles
Cut the partition angles (B) with a track saw or a circular saw. Refer to Figure A above for dimensions.
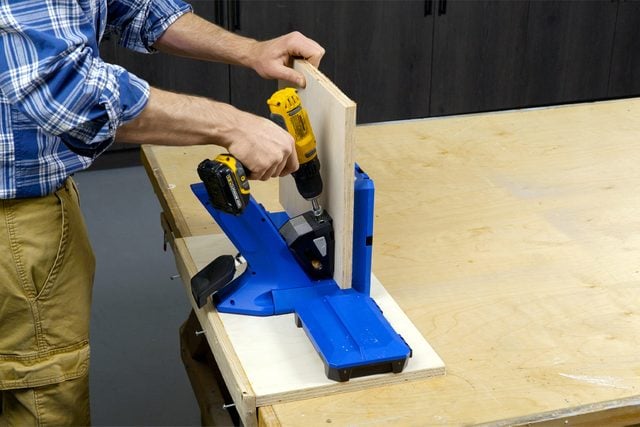
Drill Pocket Holes
Drill pocket holes on the two sides of the inside dividers (C) as well as the top inside edge of the front (A), back (D) and all three partitions (B).
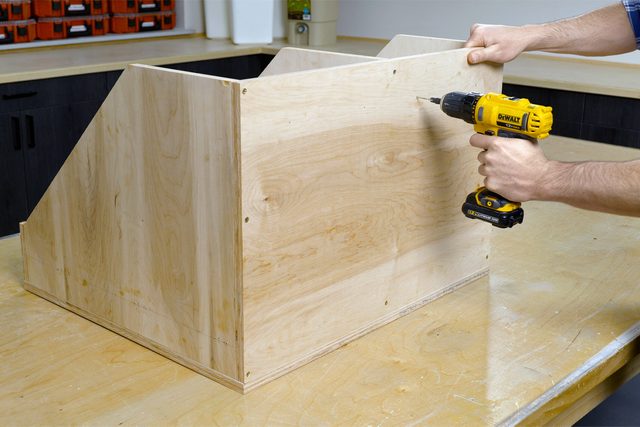
Attach Partitions
Mark the partition locations on the front (A) and pre-drill holes for screws. The two outer partitions should be flush with the front sides, and the third directly in the center. Fasten them to the front using wood glue and #8 x 1-1/2-in. wood screws.
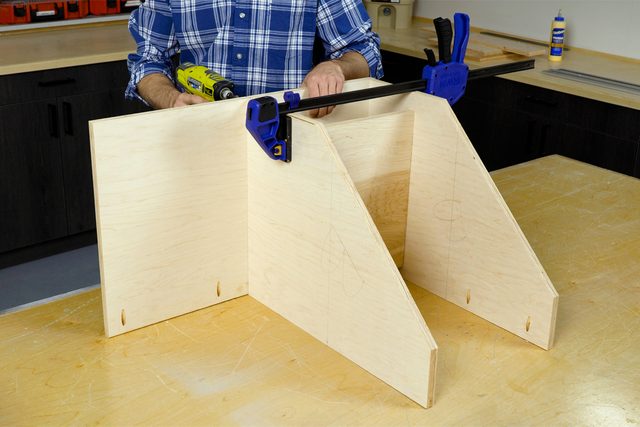
Attach the Back
Attach the back (D) to the partitions in the same way you attached the front.
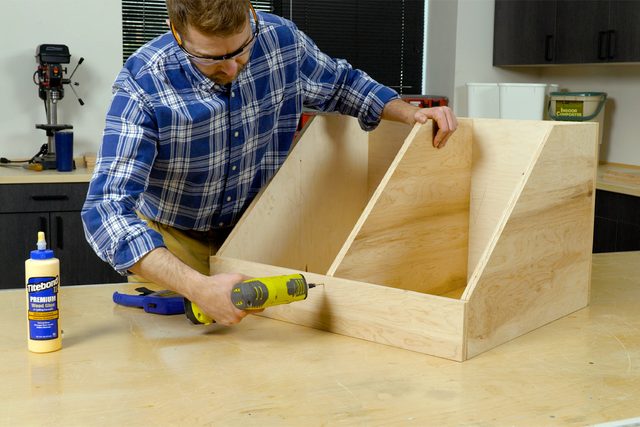
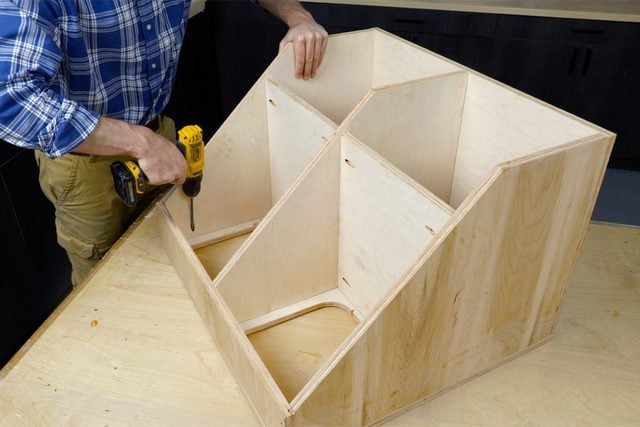
Fasten Dividers
Center the dividers (C) between the partitions (B) and attach them with glue and 1-1/4-in. pocket screws.
Layout the Bin Locations
On the underside of the top (E), lay out the bin locations and trace the top lip of each bin. Measure the inside of the bins to determine what the cutout size should be. This will ensure there’s enough overhang to support the bins. The amount you reduce your traced ring depends on the overhang.
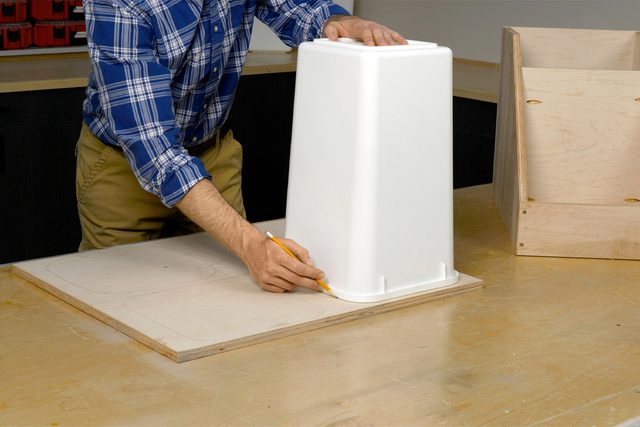
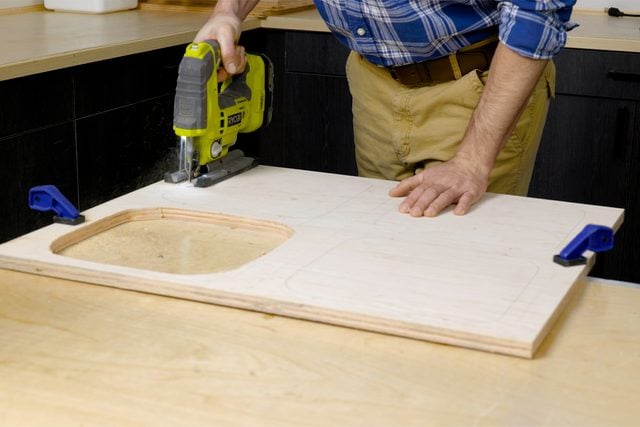
Cut Rib Kerfs
If your bins feature stiffening ribs like ours do, make marks on the top to show their location and cut a kerf for each rib.
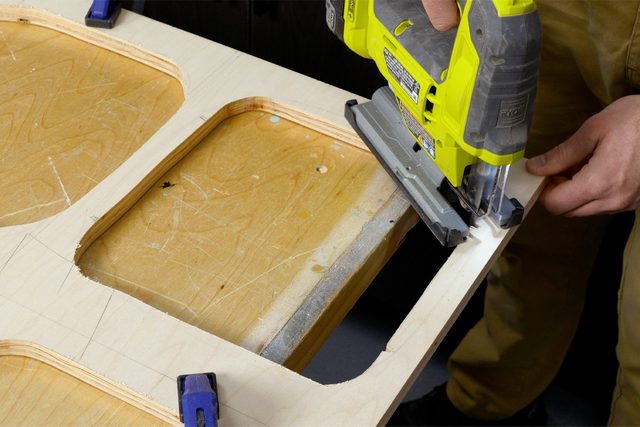
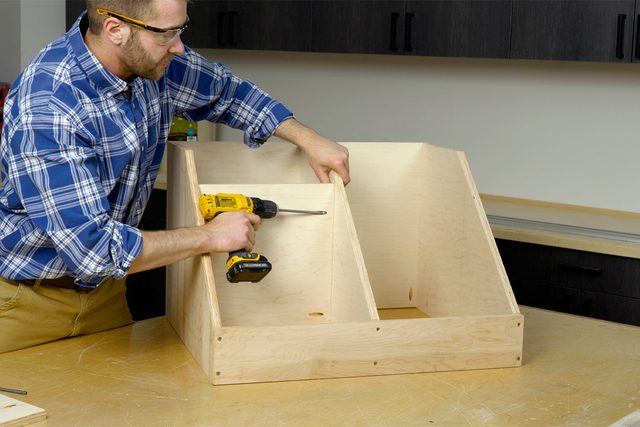
Attach the Top
Lay the top upside down with the pullout framework upside down on top of it. Through the pull-out’s open bottom, attach the top with wood glue and 1-1/4-in. pocket screws.
Pre-Drill Holes for Cabinet Doors
Mark and pre-drill holes at the top, center and bottom of the front (A) to attach the cabinet doors.
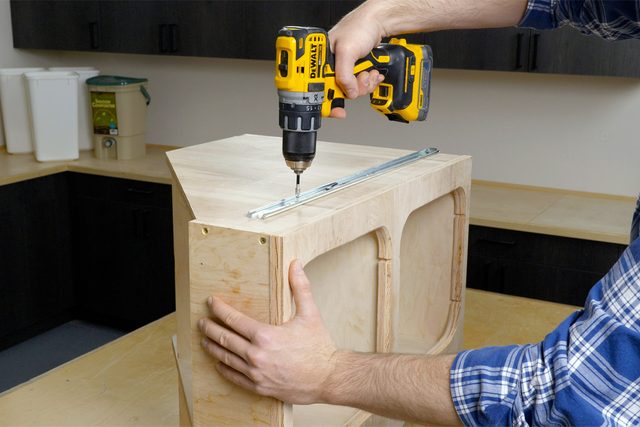
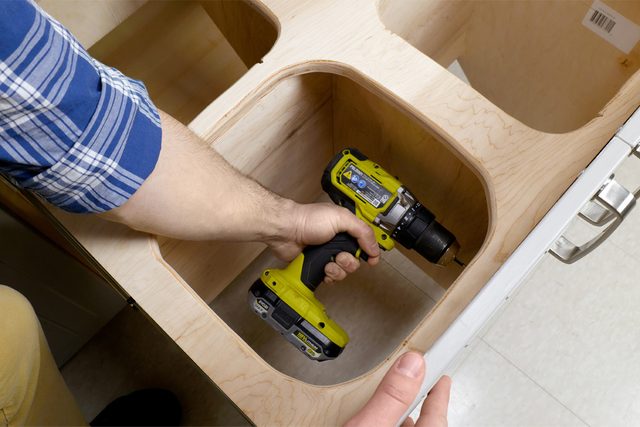
Install the Drawer Slides
Attach drawer slides to the assembled pull-out. Mount them to the outside partitions (B) 2-3/4-in. down from the top edge, and flush with the front face of the pull-out.
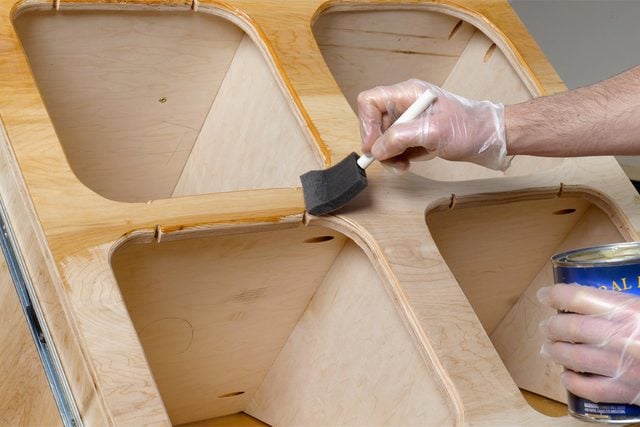
Apply Topcoat
Use a foam brush to apply three thin coats of a gel topcoat to the top (E). Allow each coat to dry 12 to 24 hours. Use 220-320 grit sandpaper to sand between coats.
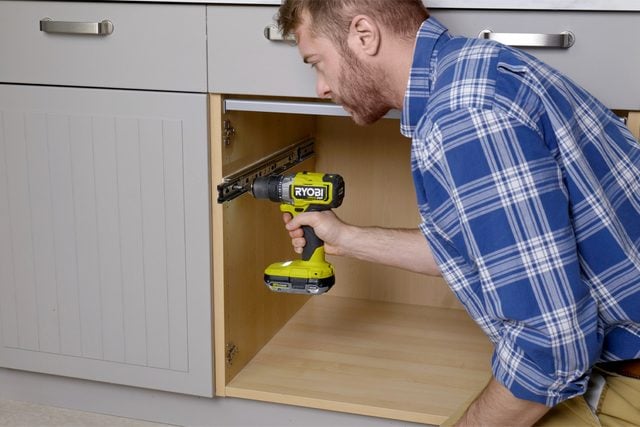
Install Drawer Slides to Cabinet
Install the drawer slides 15-3/4-in. up from the cabinet bottom. Pre-drill the screw holes. Make sure the drawer slides are level and flush with the cabinet face.
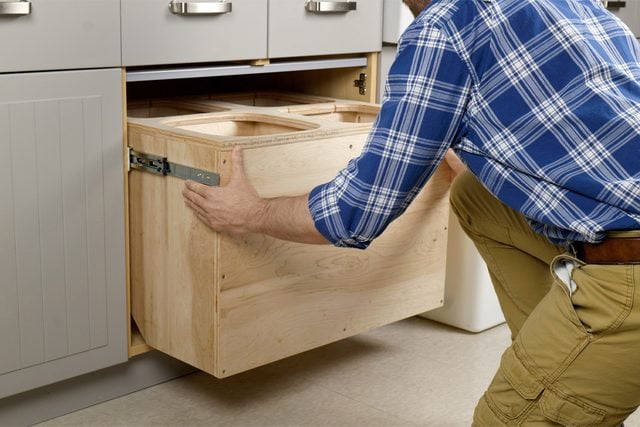
Insert Assembled Pull-Out into Cabinet
Insert assembled pull-out into draw slides in the cabinet. Push the pull-out completely in until you hear a click of the slides locking into place.
Attach Cabinet Doors
Drive screws into the pre-drilled holes from the inside of the pull-out, just far enough so their points poke through the outside. With the pull-out all the way in the cabinet, hold each door in place and push them into the screw points.
With the pull-out extended, locate each door on its screw indentations and drive two screws. Close the pull-out and adjust the door alignment. You can do this by loosening one of the screws, adjusting the door and driving in a different screw.
Compost Bin
We included this All Seasons Indoor Composter Bin because it’s convenient for homeowners new to composting. This five-gallon bin is a great size for our recycling station and comes with an airtight lid.

Originally Published: May 23, 2023