
Electric vs. Hydronic Radiant Floor Heating Systems
Updated: May 10, 2023
Heated floors are luxurious and affordable. We'll tell you how to select the best floor-warming system for your home.
Choose the best infloor heating system. We cover the pros and cons of electric systems and hot water (hydronic) systems for comfort and space heating. Electric are easier and usually cheaper to install. Hydronic are ideal if you already have a boiler.
On This Page
The Benefits of Infloor Heat
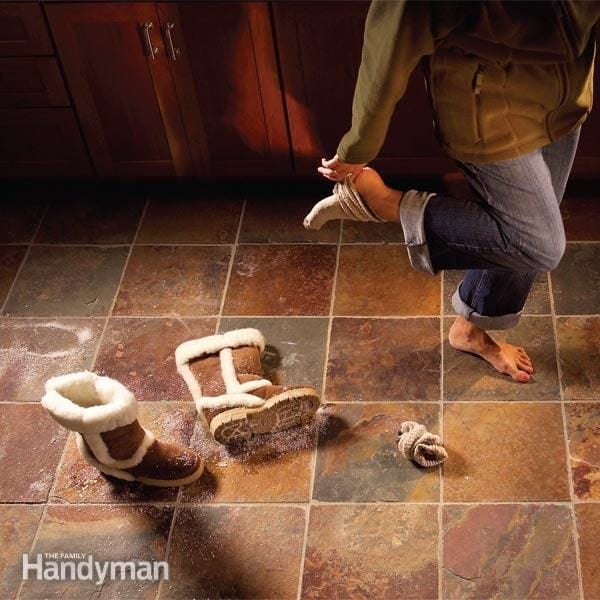
Once you shed your fuzzy slippers and discover the comfort of warm floors, you’ll be sold. Heated floors, often called radiant floors or a radiant heat system, offer benefits beyond foot comfort. They keep entry and bathroom floors dry and provide space heating in cold rooms. You can even turn down the thermostat for your central heating system and still keep some rooms warmer.
In this article, we’ll walk you through the types of radiant floor systems you can install in your home. We’ll tell you the pros and cons, and show you key installation techniques. This will help you decide whether to take on the project yourself or hire a professional. These heating systems are most often installed under ceramic tile in bathrooms, but keep in mind that you can add heat under any type of flooring material. All floor heating systems warm the floor with either electricity or hot water.
Electric Systems are Simple and Affordable
Electric floor systems work just like an electric blanket: Electricity runs through “resistance” cable and creates heat. Because electricity is fairly expensive, relatively few homes are entirely heated by in-floor electric systems. However, these systems are great for making especially cold floors foot-friendly. They also boost the temperature in an otherwise chilly room by a few degrees. The warm floor in a bathroom makes getting out of the shower a cozier prospect on a cold day. That’s the payoff.
Electric systems have three components: heat cable, a thermostat and a temperature sensor. The thermostat is connected to the home’s power supply and turns the heat on and off according to the floor’s (not the room’s) temperature. A sensor installed in the floor along with the cable tells the thermostat how warm the floor is. (Most people prefer a floor temperature of 80 to 90 degrees F.) The thermostat and sensor are packaged together; cable is usually sold separately. Don’t use a thermostat from one manufacturer with cable from another.
The electrical connections require only basic wiring know-how, and laying the floor cable is a DIY-friendly project. Because of this easy installation—and the lower cost of materials—an electric system is usually the best choice for small-scale projects like heating a kitchen floor or warming up a cold bathroom. Adding electric heat to a typical bathroom when you install a new floor adds only $200 to $300 to the cost of the project. Operating costs are typically about a half cent per square foot per day.
Often the biggest challenge is “fishing” electrical cable through finished walls to the thermostat and cable. Since these systems generally draw only 10 to 15 watts per sq. ft., you can usually connect them to an existing circuit to heat a typical bathroom. For a larger room, you may have to run a new cable to the main panel and pay an electrician about $120 to connect the new circuit there.
If you’re installing heat over a wood-framed floor, place fiberglass insulation between the joists to drive the heat upward. The system will work fine without insulation but will be more efficient with it. Before you install an electric system over a concrete floor, check the manufacturer’s instructions— they may require a layer of foam insulation over the concrete before the heat cable is installed.
Tip: When you estimate the square footage of a room, include only the areas where you can walk; it makes no sense to heat the floor under appliances or behind the toilet.
Electric system #1: Loose cables
The cable comes on a spool, just like any other wire. Loose cable is by far the cheapest way to heat a floor and it’s just as effective as the other systems. The drawback of loose cable is installation time; you have to position the cable in a serpentine pattern, fasten it with lots of hot glue or staples, and then “embed” it.
Most loose cable systems include end channels that guide spacing. You can place cables close together to make the floor heat up faster and reach a higher temperature or farther apart to use less cable. Manufacturers offer various cable lengths to suit the floor’s square footage. You can’t splice sections of cable together to serve a larger room or repair damaged cable (this is true of all electric systems). Fasten the cable every 6 in. so it can’t shift or float while you embed the cable.
Caution: Work carefully with your trowel. If you nick the cable, the entire system won’t work.
There are two ways to embed cable: You can install the cable over tile backer board and then cover it with “thin-set,” the mortar adhesive used for ceramic tile. The thin-set shrinks as it cures, so you may have to add a second layer after the first hardens to level it out. But creating a perfectly flat, smooth surface with thin-set is difficult. You can make it smooth enough for ceramic tile or a floating floor but probably not smooth enough for vinyl flooring. For a faster, smoother surface, install the cable without backer board and pour on “self-leveling compound,” or SLC. SLC is a cement-based powder that you mix with water and then pour over the cable. It becomes rock hard in a few hours. Reinforce the SLC with plastic lath; metal lath can cut the cable. Covering your floor with a 1/2-in.-thick layer of SLC costs about $2 per sq. ft., including the lath. You can then lay tile, carpet, vinyl or a floating floor directly over the SLC.
Electric System #2: Mesh Mats
The cable comes already woven into a plastic net. The pre-positioned cable installs quickly—in less than half the time for loose cable. You simply staple or hot glue the mesh to the floor. As with loose cable, you then embed the cable and mesh.
Mats are available in lots of different dimensions. You can cut the mesh into sections to cover your floor or fit around corners. But you can’t cut or splice the cable itself. Some manufacturers recommend combing thin-set directly over the mesh and setting tile all in one operation. But this is difficult. Most tile setters prefer to embed the mesh first with thin-set or SLC just as with loose wire. The mesh tends to “float” as you embed it, so fasten it to the floor every 6 in.— even if the instructions recommend less fastening. After embedding it, you can lay tile, carpet, vinyl or a floating floor.
Electric system #3: Solid mats
Solid mats are often the most expensive electric system, but they’re also the easiest to install. The cable is completely enclosed in synthetic fabric, plastic sheeting or metal foil. The big advantage is that you don’t have to embed it as you do loose cable or mesh mats. With some versions, you simply smooth the mat onto a bed of thin-set. Then you spread more thin-set over the mat and set ceramic or stone tile as you normally would. Some solid mat systems are even easier to install; you just roll out the mats, tape them together and you’re done. You can then lay a floating wood or laminate floor directly over it.
Mats are available in various dimensions, and you can combine mats of different sizes to cover your floor. Some mats are sized to fit between joists, so you can heat the floor from below — a big advantage if you don’t want to replace an existing floor. However, don’t install electric heat under a subfloor unless the system is specifically intended for that method.
Floor Coverings and Heated Floors
Any flooring material can cover a heated floor, but some work better than others.
- Ceramic and stone tile are the most common. Heat doesn’t harm them and they hold and conduct heat best.
- Solid wood floors can develop gaps if they dry and shrink when heated. If you opt for solid wood, leave the installation to an experienced pro who will test the moisture content of the wood to avoid shrinkage.
- Floating floors made from wood or plastic laminate don’t develop gaps because they’re not fastened directly to the subfloor. But you’ll have to limit the floor temperature. Flooring warranties often limit the temperature to 85 degrees F.
- Vinyl floors have similar temperature restrictions, whether they’re sheet vinyl or tile.
- Carpets or rugs can go over a heated floor, but they act as insulators and reduce heat flow to your feet and to the room as a whole. If you choose electric heat under hard flooring and plan to use an area rug, consider installing the cables only under the flooring that won’t be covered by the rug.
Hydronic systems heat space as well as your toes
Hydronic radiant floor heating installation:
In a hydronic system, heated water from a boiler or a water heater runs through loops of flexible plastic tubing called “PEX.” (PEX can be used for household water supply lines too.) The hot tubes then heat the floor. The main advantage of hydronic systems is that they generally deliver more heat at a lower operating cost than electric systems. That’s why hydronic heat is usually a better option than electric systems to heat large floor areas or even an entire house. However, because they usually involve a boiler, a pump and gas lines, hydronic systems are more complex than electric systems. You can install hydronic floor heat yourself, but you need basic electrical and plumbing know-how as well as professional design help.
Hydronic radiant floor heating installation cost:
The materials for a small-scale hydronic project will cost at least $600.
The easiest—and least expensive—way to install PEX is to run it under a subfloor between joists using transfer plates and insulation. This method costs less than $2 per sq. ft. for tubing, plates and insulation. To install PEX on top of a wood-framed or concrete floor, you need to lay a grooved channel system over the floor or embed the tubing in self-leveling compound. Covering PEX requires more SLC than you can mix yourself; leave that to pros who have special mixing and pumping equipment (at least $2 per sq. ft. for the SLC only). With a concrete floor, you may have to lay foam insulation over the slab before installing PEX. In new construction, the tubing is often installed over insulation and the concrete slab is poured over it.
A hydronic system requires several expensive components. But several rooms share the components, so the more area you heat, the lower the cost per square foot. If you want to heat 200 sq. ft. or more of floor, a hydronic system may cost less to install than electric heat.
The heat source for a hydronic system can be a boiler or a standard water heater. If your home is already heated by hot water radiators or baseboard units, there’s a good chance that your existing boiler can handle the hydronic system as well. If you don’t have a boiler, a water heater can heat one room or several, depending on the size of the water heater. If you’re building an addition, you may find that installing a water heater–powered hydronic floor is less expensive than extending your existing central heating system.
Aside from PEX, a heat source and a pump, a hydronic system may require components such as electric zone valves. It may also require additional pumps. You can install these components yourself, but don’t try to design a system yourself. Look for a company that specializes in helping homeowners plan and install hydronic systems. Before you choose to install a system yourself, get bids from professionals. It will help you decide whether the money saved is worth your time and effort.