
Water Heater Repair: How to Replace the TPR Valve
Updated: Nov. 28, 2019Fix water heater leaks
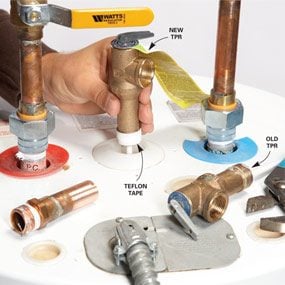
Replace the TPR valve
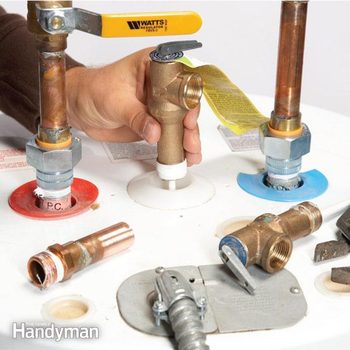
If you’ve had the heater for a long time and the problem just started, chances are the temperature pressure relief (TPR) valve is bad. The TPR is a safety device that releases water pressure when it becomes dangerously high within the water heater. But before you run out and buy a new TPR valve, check with your local water utility to see if it has made any changes to the system that would boost water pressure. If not, go ahead and replace the valve. Shut off the gas valve or flip the breaker to your water heater. Wait three hours for it to cool down, or run the hot water until it’s lukewarm. Then shut off the water and bleed the pressure by opening a hot water faucet near the heater.
Add an expansion tank
If the new valve leaks, add an expansion tank
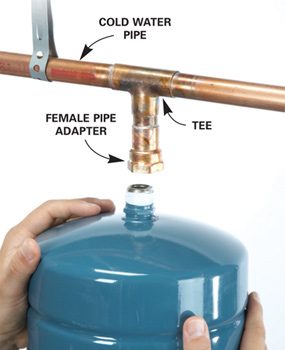
If a new TPR valve didn’t solve the problem, solder in a “tee” and a female-threaded fitting on a horizontal cold water line near the water heater. Then wrap the tank threads with Teflon tape and screw in the tank.
NOTE: Toss the saddle tee that comes with the expansion tank and install a tee and threaded fitting instead. Saddle tees always leak over time.
If a new valve doesn’t solve the problem, it’s time to install an expansion tank. The tank has an internal air bladder that acts like a shock absorber to prevent overpressure in the system. Consult the chart at the home center store for proper tank sizing. Install the tank on the cold water line and support the line with metal strapping.
Required Tools for this Project
Have the necessary tools for this DIY project lined up before you start—you’ll save time and frustration.
- Hacksaw
- Pipe wrench
- Pliers
- Plumbers tape
- Soldering torch
- Tube cutter
Required Materials for this Project
Avoid last-minute shopping trips by having all your materials ready ahead of time. Here’s a list.
- Copper tee
- Expansion tank
- Propane
- Solder
- TPR valve
