
How to Properly Mix Concrete
Updated: Jun. 14, 2023
Learn how to mix concrete so you get the right strength and consistency every time.

A full day
Beginner
Less than $20
Introduction
How to hand mix concrete so it delivers maximum strength and durability. Mixing isn't complicated and when done well, the concrete should last a lifetime.Tools Required
- Bucket
- Dust mask
- Hoe
- Rubber gloves
- Safety glasses
- Stiff bristle brush
- Wheelbarrow
Materials Required
- Concrete mix
There are a ton of DIY projects that call for concrete, from building a sidewalk to pouring a concrete slab for a patio. Projects like these can add curb appeal to your home or make your backyard a little more comfortable.
Concrete is a strong, durable material that, when properly taken care of, lasts for generations. The best part is that concrete is relatively easy to work with, even for beginners.
The first step in working with concrete is learning how to mix it properly. Here, we’ll show you what the perfect mix looks like. We’ll also show you a mixing technique that will ensure thoroughly mixed concrete with a minimum of effort.
What’s the Difference Between Concrete and Cement?
Cement is an ingredient in concrete. Concrete is essentially made from two basic components: cement and an aggregate of sand and stones. Smaller stones fill the gaps between the larger ones, and the sand fills the gaps between those. The cement is the glue that holds it all together.
Cement itself is mostly made from limestone that’s been ground up and heated at extremely high temperatures. Adding water causes a chemical reaction that binds the cement together with the aggregate.
And that’s why mixing concrete properly is so important.
Bagged Concrete Mix
For most small jobs around the home, bagged concrete mix is the most convenient and least expensive way to go. You can use it for fence post footings, deck footings and even small concrete pads. For jobs requiring more than about 30 bags, consider ordering “ready-mix” concrete from a truck instead.
Sixty- or 80-lb. bags of concrete mix are readily available at home centers, lumberyards and hardware stores. Don’t confuse concrete mix with sand mix or mortar mix. They don’t contain the aggregate (stones or gravel) that’s necessary to make a pour thicker than about 3/4 in.
Why Use a Wheelbarrow for Mixing Concrete?
Whether you hand mix concrete in a plastic tub, homemade mixing tub or wheelbarrow, the technique is the same to find the right concrete mix ratio. However, it’s easier to move and dump concrete that’s mixed in a wheelbarrow. For larger jobs, you can rent a mixer, but it may be more economical to simply order ready-mix concrete.
In addition to a mixing container, you’ll need a sturdy hoe and a large bucket as well as a stiff-bristle scrub brush to clean the equipment. Wear waterproof gloves and safety glasses because the cement mixing in the concrete mix is caustic and can burn skin. Wash it off with water if it gets on your skin.
Concrete Mix to Water Ratio
Mixing bags of concrete isn’t complicated. You add some water, stir it up and pour it out. But to get the most strength from the concrete, you have to recognize when it has just the right amount of water mixed in.
Too little water and the particles in the mix won’t stick together. Too much water weakens the concrete.
Project step-by-step (10)
Open the Bag of Concrete Mix
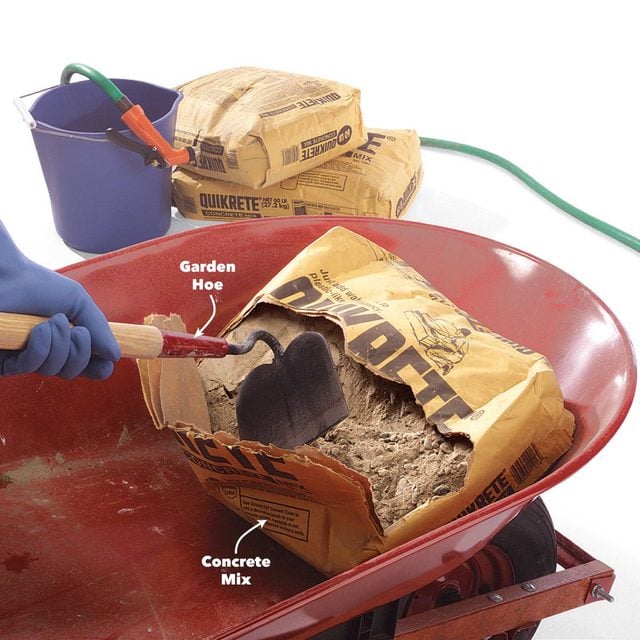
- Set the bag of concrete mix in one end of the wheelbarrow and slice it open with your hoe.
- Dump the mix from the bag and pull out the paper bag.
Add a Measured Amount of Water to the Concrete Mix
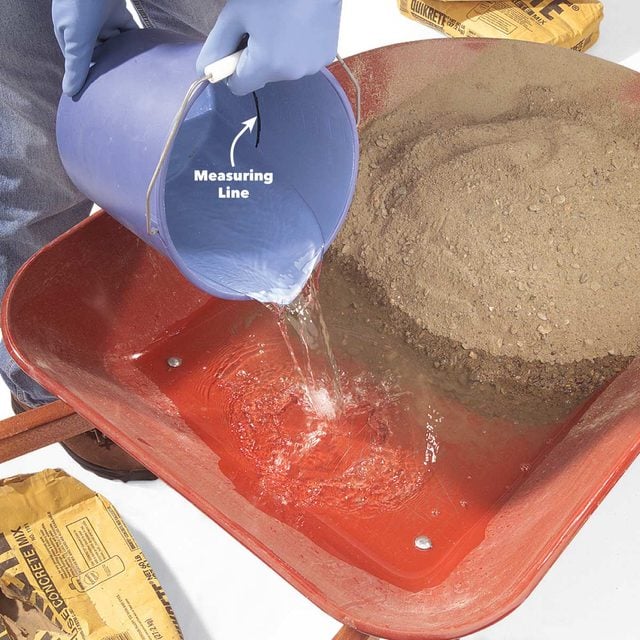
One of the most common mistakes beginners make is to add too much water and end up with concrete that’s thin and soupy. Here are a few tips to avoid the problem and find the right concrete mix ratio.
- First, pour a measured amount of water (amount varies with bag size) into the mix from a bucket rather than squirting it in with a hose.
- For future reference, mark the water level with a permanent marker.
- Pour the water into the opposite end of the wheelbarrow, reserving about 4 cups to add later if needed.
- Continue mixing for a few minutes after all the water is absorbed because the concrete will often get soupier as you mix. If you add more water right away, it may end up runnier than you’d like.
- Finally, keep at least a few cups of dry concrete mix handy just in case your mix gets too thin.
Gradually Wet the Concrete Mix
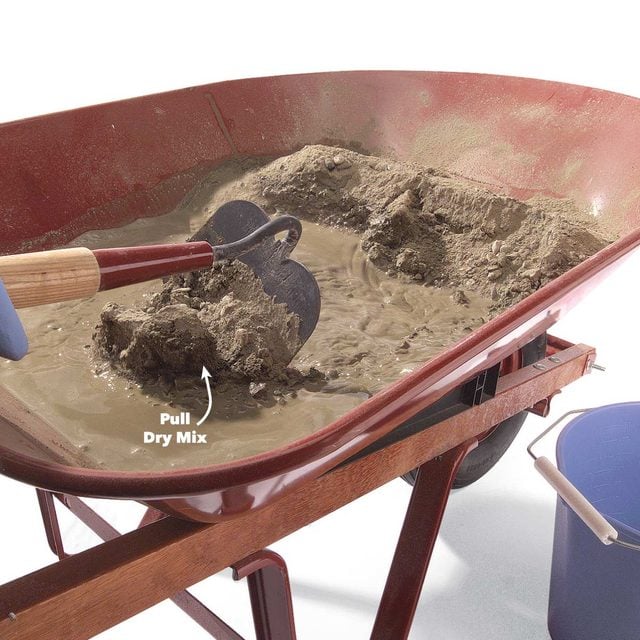
- Pull a small amount of the dry mix into the water with a hoe and mix it completely. A hoe makes a great mixing tool. A flat shovel or spade works too.
- Continue pulling and mixing until all of the powder is wetted and the mix is piled at your end of the wheelbarrow.
- Continue mixing by going to the other end of the wheelbarrow and pulling the mix back toward you. This method ensures that all the dry particles are completely wetted.
Technique for Mixing Concrete
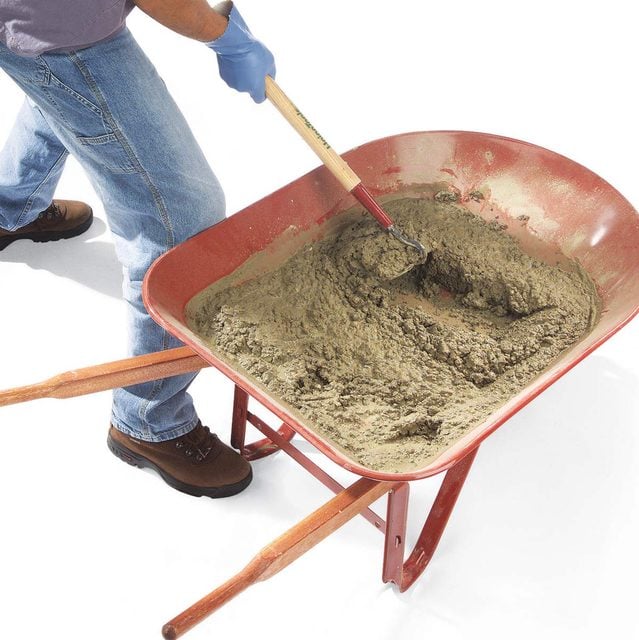
- Use a sturdy wheelbarrow to mix your concrete. And make sure it’s on a level surface.
- Brace the wheelbarrow with your knee when you’re mixing from the side.
Work It to the Perfect Concrete Mix Ratio
It’s tempting to just squirt water into the dry concrete mix with a hose and mix up a soupy batch of concrete. After all, it’s quicker and the runny concrete is easier to pour. The trouble is, soupy concrete is only about half as strong as a proper mix and is more likely to crack. That’s why we recommend spending a little extra time measuring the water into a bucket first and adding only as much as is needed. Even though the thicker mix is a little harder to place, it’ll be worth the extra effort. We’ll show you how to get the best consistency.
- When the mixed concrete looks like the mix in step 8, it’s ready to pour.
- If not, mix in additional dry mix or water until you get the right consistency.
Concrete Mix That Is Too Dry
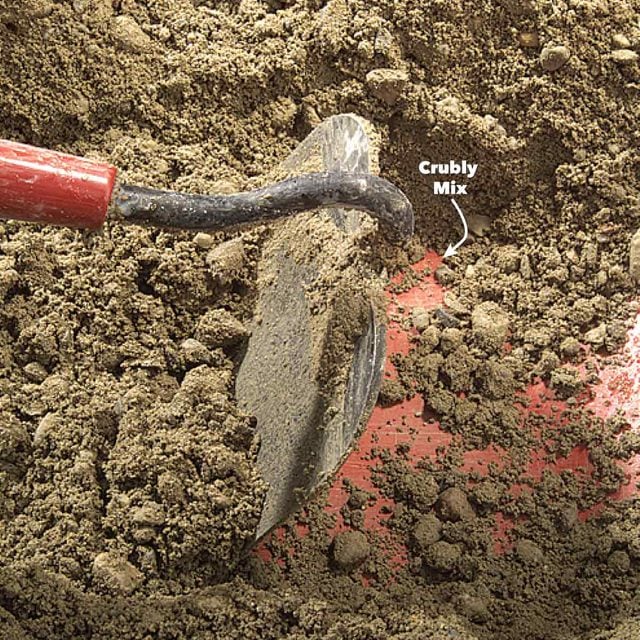
- Drag the hoe through the mix to make a trough. The mix is too dry if the sides of the trough are crumbly and the concrete falls in chunks when you disturb it.
- Add water one cup at a time, mixing between each addition.
Runny Concrete Mix
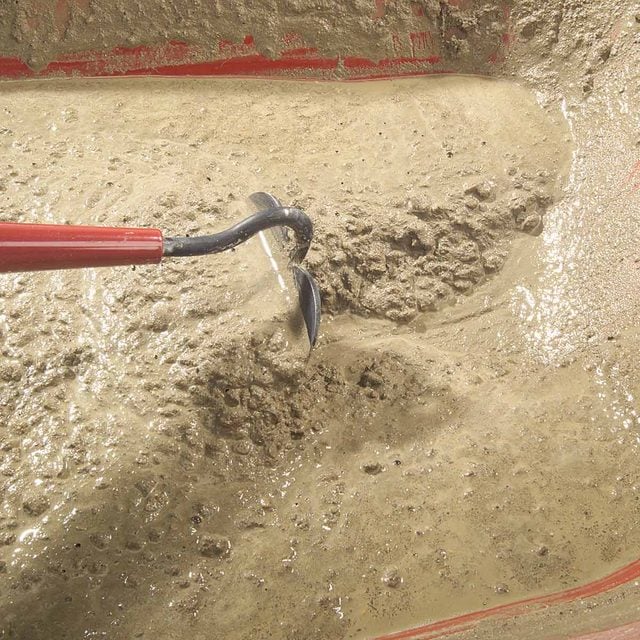
- Add more dry concrete if the mix is too wet and soupy and sags into the trench.
Just Right Concrete Mix
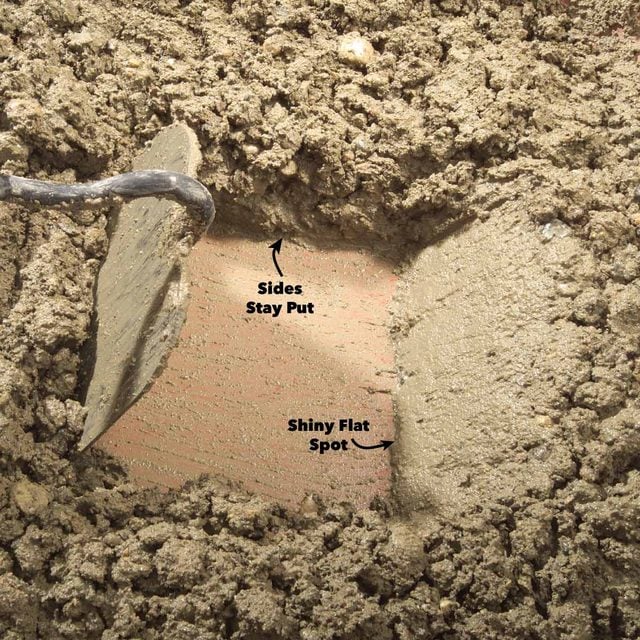
- The mix is just right when the sides of the trough stand and the ingredients are thoroughly wetted.
- A hoe patted against the concrete will leave a slightly shiny surface.
Clean Up Concrete Mix Immediately
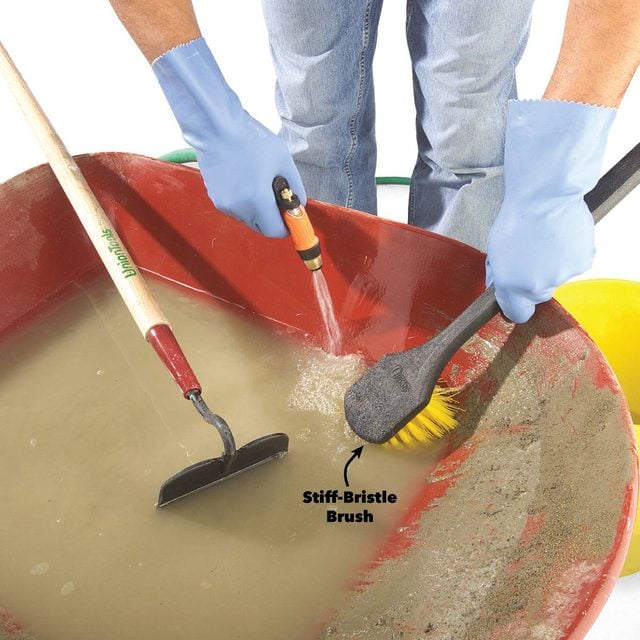
Remember to clean your equipment right away. Once the concrete hardens, it’s a bear to get off the things where you don’t want it.
- Scrub the wheelbarrow and tools with a stiff-bristle brush before the concrete starts to harden.
- Scrape excess concrete from the wheelbarrow and pile it on a piece of plastic. If it’s a big pile, break it up into manageable chunks before it fully hardens.
- Dump the rinse water in an inconspicuous corner of your lot (it can kill grass). You can even dig a depression to contain the water and then cover the residue after the hole drains.
What’s the Best Type of Bagged Concrete Mix to Use?
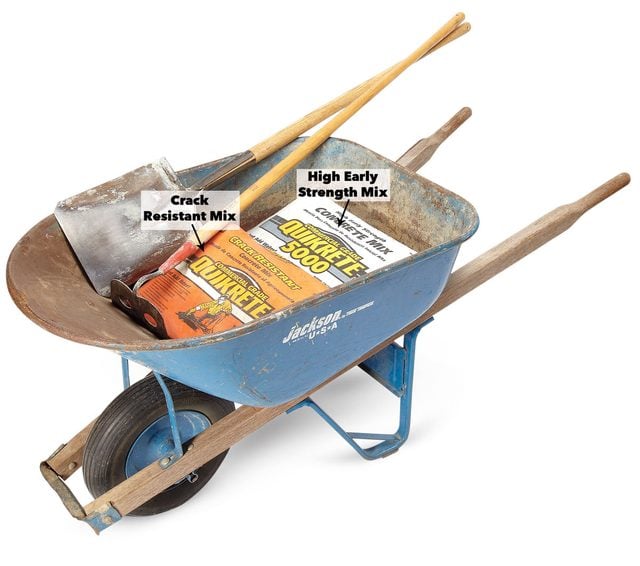
“If you want to get your walkway back into service fast,” says concrete expert Frank Owens, “your best choice is ‘high early strength’ concrete.” This type of concrete has a higher percentage of cement in the blend so it sets up faster than standard concrete mix. You can walk on it within 10 to 12 hours, compared with several days.
It also generates more heat than standard bagged concrete mix, which means you can tackle your walkway project earlier or later in the season, in temperatures as low as 35 degrees F, with less chance of setting and hardening problems.
However, if your walkway has many steps or landings with exposed edges, Owens recommends fiber reinforced crack-resistant concrete mix. It contains thousands of little plastic fibers to make it more resistant to shrinkage cracks, edge chipping, impact damage and scaling during freeze/thaw cycles. Crack-resistant concrete takes three days to set up, so your walkway will be out of commission that long, but it can make concrete steps more durable under harsh conditions.
“The right concrete for a project is a matter of tradeoffs,” Owens says. “Consider setup speed, surface durability and the amount of weight the surface will bear.” No matter which product you choose, Owens recommends using as little water as possible. “The lower the water-to-cement mixing ratio, the stronger the concrete and the better the shrinkage resistance.”