NuDeck by UGL: Concrete Application
Updated: Jul. 25, 2018
The NuDECK coating makes my stairs pop! The paint will also protect my concrete from deterioration from Minnesota winters. A win-win for me.
Sponsored by UGL
Concrete Stairs Before
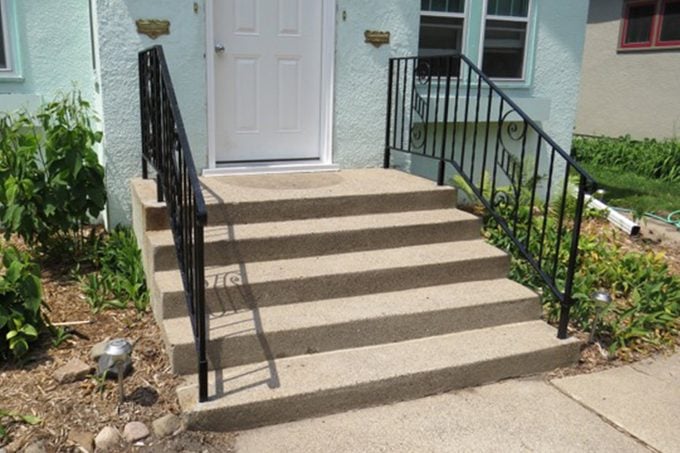
New concrete is expensive, and new concrete stairs are really expensive. That’s why I was anxious to try NuDECK by UGL—the same folks who make DRYLOK masonry waterproofer—to improve not only the aesthetic appeal of my aged concrete stairs, but also to seal the concrete from the freeze/thaw cycles of Minnesota winters. These stairs were showing the initial signs of deterioration, so the time was right for a NuDECK coating.
I went online to the NuDeck website to study the prep and application instructions. It looked really straightforward, so I assembled my tools and got to work.
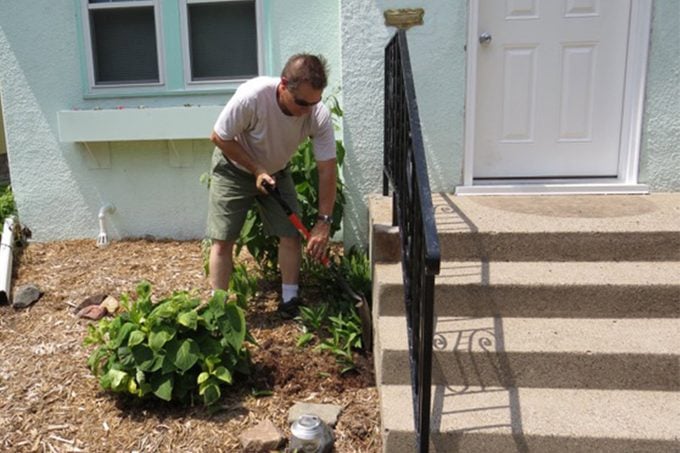
Prep is everything in a quality coating project. First, I cut back any plants that were in the way, and shoveled away any dirt that would interfere along the sides of the stairs.
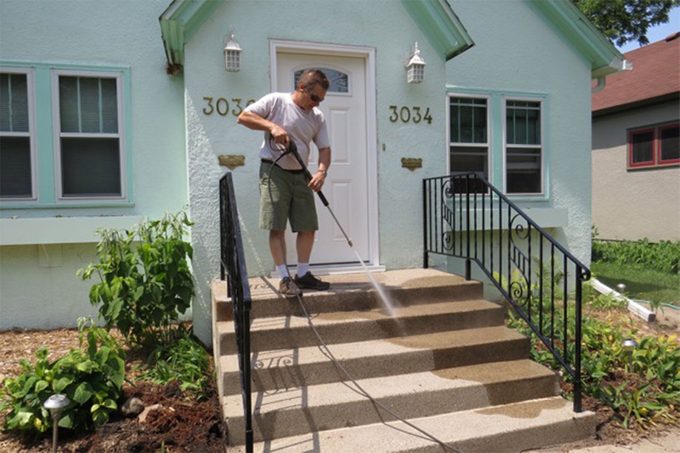
Once this was complete, I used a pressure washer to thoroughly clean all the concrete surfaces on the landing, steps, and sides. My concrete didn’t have any grease or oil stains. If it had, I would have used a cleaning product that is recommended on the UGL site.

I gave the concrete about a week to thoroughly dry. During that time, I filled any deep pockmarks with a concrete patch and trowel.

I did have a crack between the first tread and riser, but I had caulked it previously with a polyurethane concrete caulk. If not, now would have been the time to do that as well.
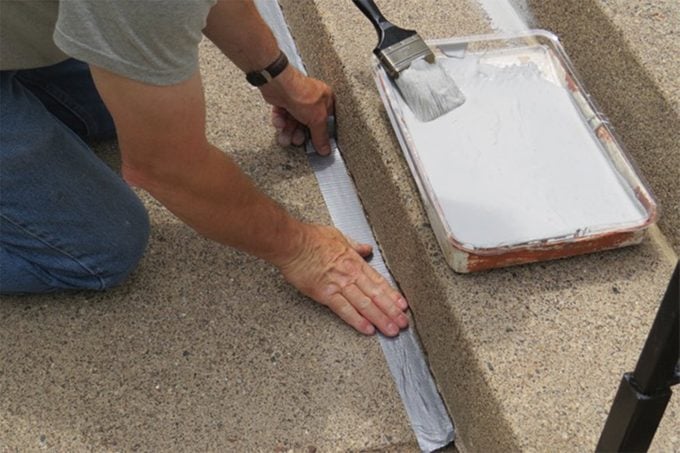
I masked any protected concrete surfaces with duct tape as it provides an excellent seal.
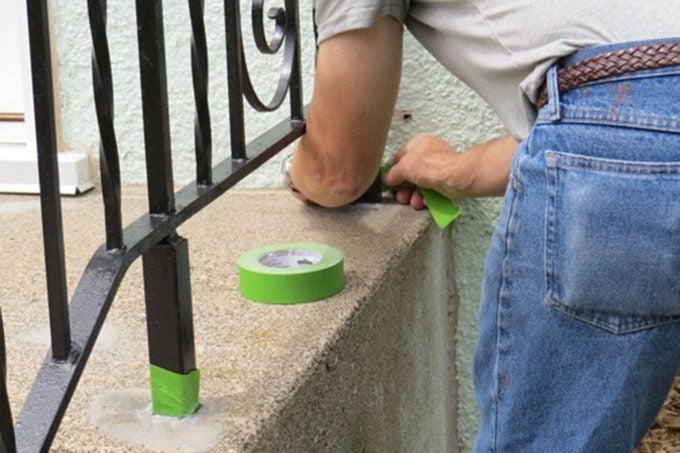
I used painter’s tape on anything else that needed protection.
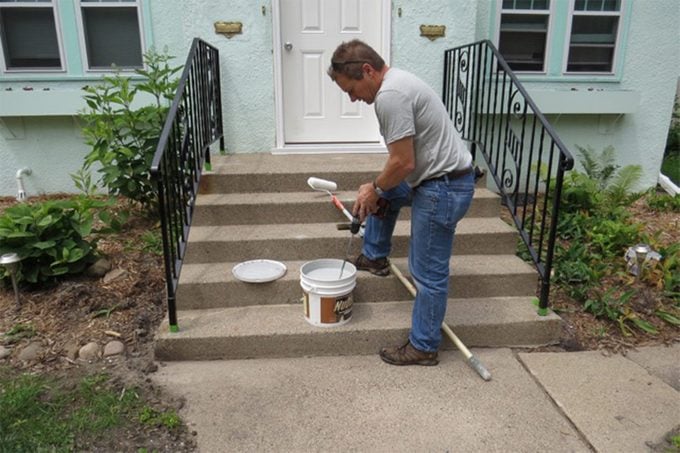
NuDECK has a fine grit texture in the paint, so I used a power mixer attachment on my cordless drill to thoroughly mix the product when I opened it. I also made sure to periodically mix the pail each time I refilled my tray.
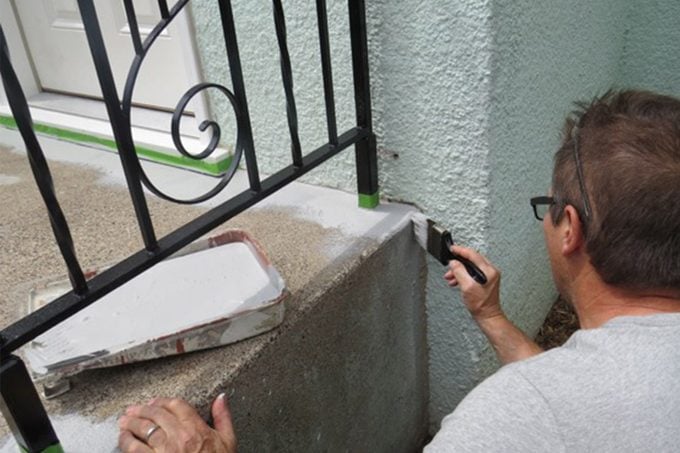
I used a nylon bristle 3” brush for cutting in along the building, the front, and the sides of the stairs.
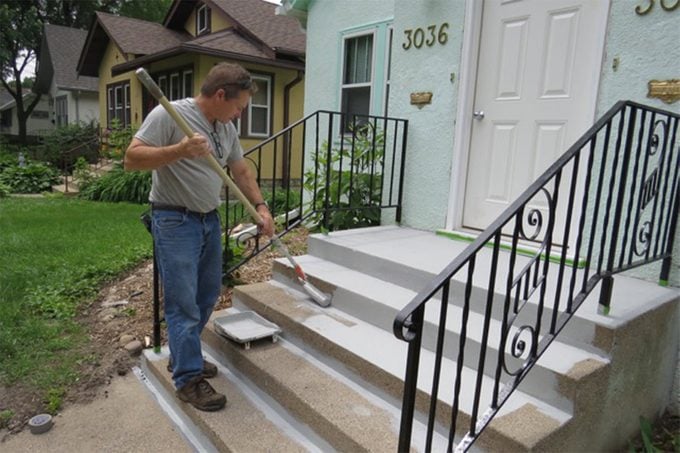
For the rest, I used a ½” nap roller and an extension pole to make it easier on my back.
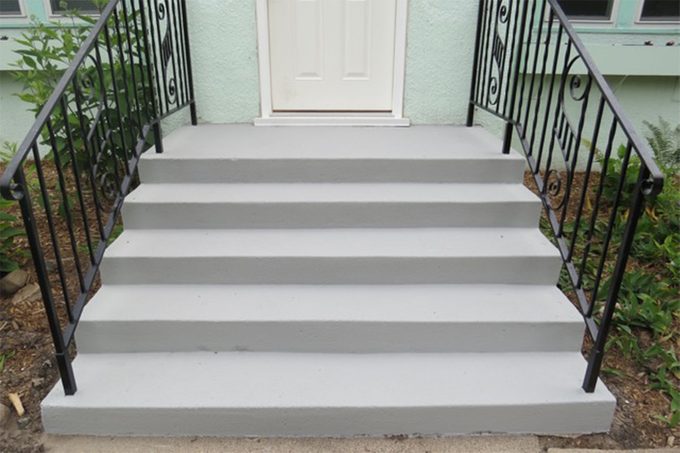
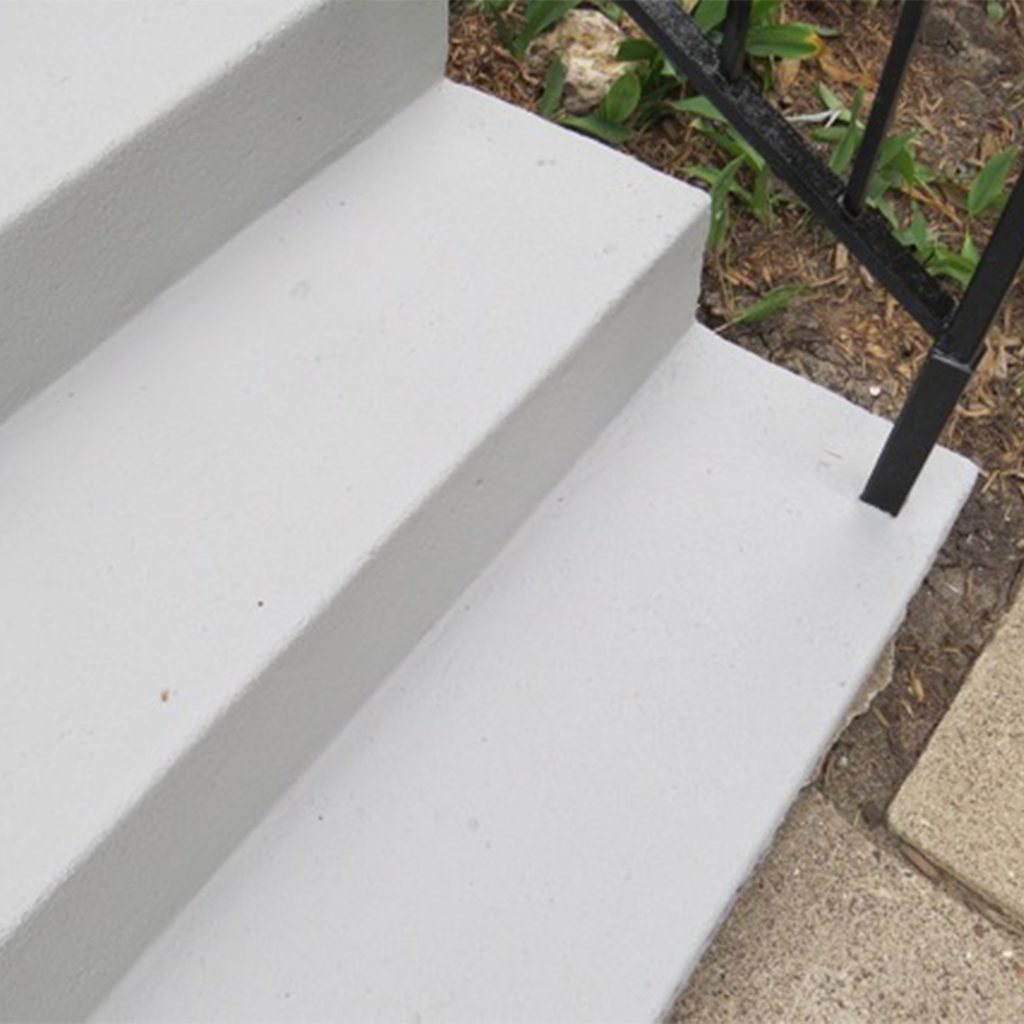
I chose Cape Cod Gray from the tint chart on the NuDECK site. Because of the porosity of this concrete, a loaded roller of paint would cover less than two square feet before needing another visit to the paint pan. I rolled in two directions so that the NuDECK thoroughly coated the surface and got in every nook and cranny. But I made sure to always finish each section by rolling across the surface from side to side. This technique results in a uniform finish when the paint dries.
My project day was partly cloudy and in the mid 70’s, so I was able to recoat in about four hours. I found that the second coat really completed the uniform sealing of the concrete surfaces, and went much quicker than the first coat. The 3.5 gallon pail was more than enough for my stairs. NuDECK cleans up easily with water, but I chose to discard the brush and roller cover after the project was finished.
Start to finish on my concrete stairs required about 6 hours of labor. This includes all prep, and the actual application.
The NuDECK coating makes my stairs pop! The paint will also protect my concrete from deterioration from Minnesota winters. A win-win for me.
Just one more success story for NuDECK!