
15 Tips for Installing Bathroom Subway Tiles

Updated: Aug. 04, 2023
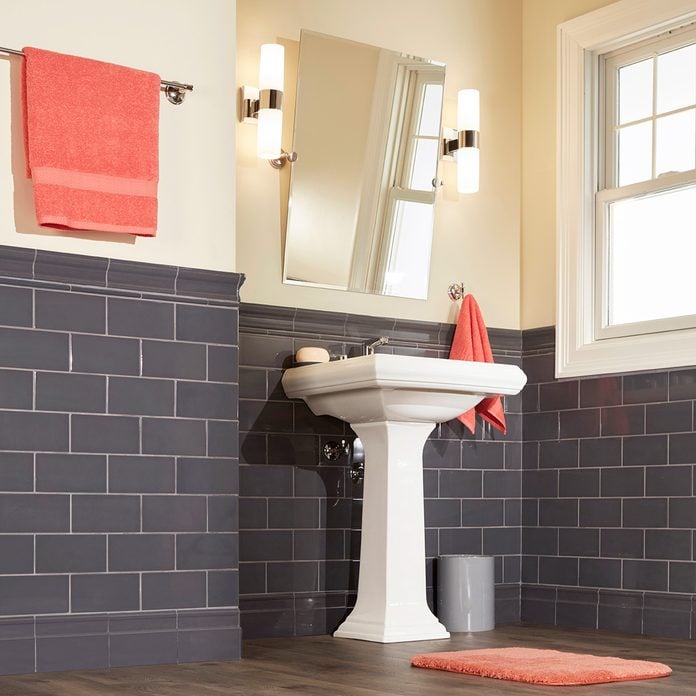
Subway tiles are a great way to give a bathroom a brand new look. Here’s our step-by-step guide to completing a successful subway tile job.
Tile wainscoting
Adding tile wainscoting is a perfect way to change the look of a bathroom. Plus, tiling a wall is much easier than most other tile jobs. Unlike floors or showers, tile wainscoting doesn’t have to withstand foot traffic or daily soaking. So you can set the tile directly over your existing walls using premixed mastic adhesive—no backer board, waterproofing or hard-to-mix adhesive needed! Here’s everything you need to know to get started adding subway tile to your remodel.
Plan the subway tile layout
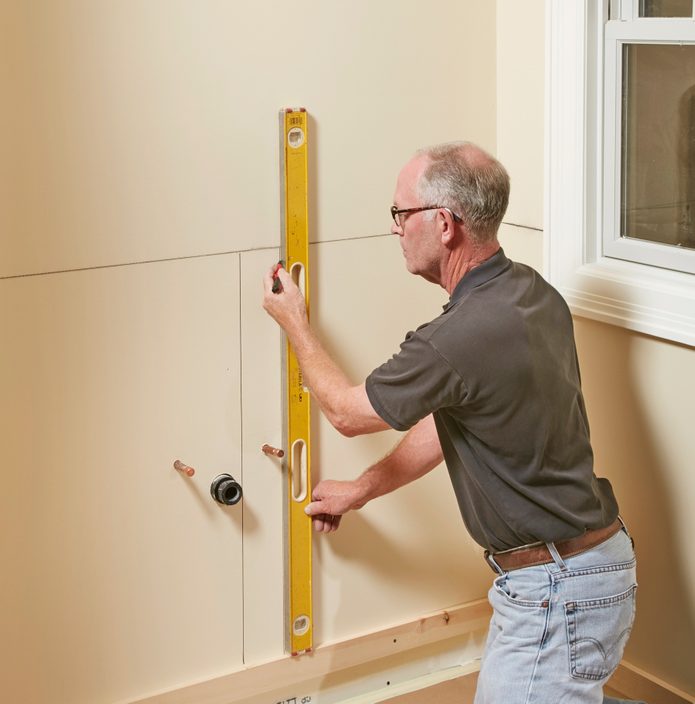
Before starting any tile project, it’s important to check that the floor is level and the walls are flat. Use a level and straightedge to see if the floor is level. If the floor slopes, find the lowest point and mark it. Then hold the straightedge against the walls in the areas you plan to tile. If you find low areas, fill them with setting-type compound to flatten the walls before you start tiling.
Another thing to check at this stage is how your cap tile will look when it butts into your window and door moldings. If the cap protrudes past the moldings, one fix is to add a strip of matching wood, deep enough to hide the end of the cap tile, around the moldings.
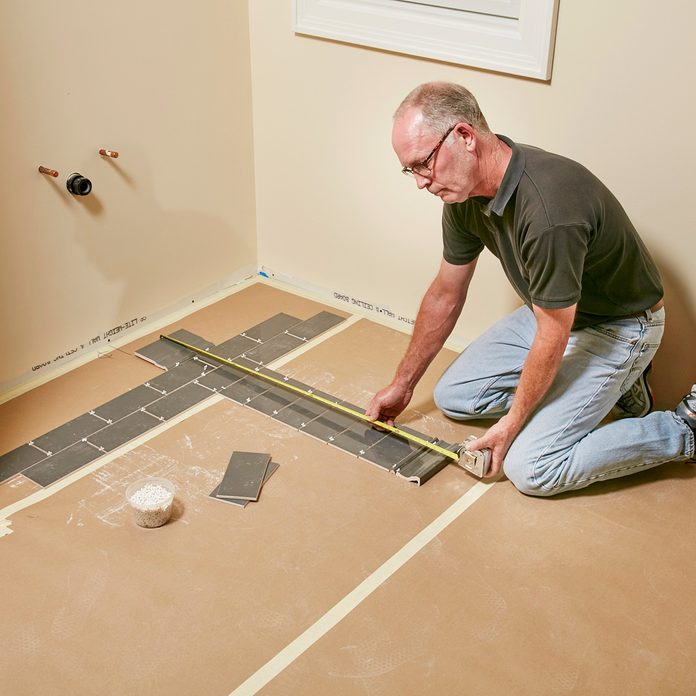
Arrange rows of tile on the floor, including the spacers. Shift the rows left or right to determine the width of the end spaces and the locations of the plumb lines. Then stack a column of tile, starting with the base and ending with the cap. Use this mock-up to determine the finished height of your wainscot.
Draw layout lines
Next, you’ll need to draw vertical layout lines for starting the tile. For a running bond (brick joint) pattern like ours, you’ll need two vertical lines, half a tile width apart.
Install ledgers to provide a level support for the first row of tile. Then draw a “stop line” 1/2 in. below the top of the tile to show where to stop spreading mastic. Mark two plumb lines, offset by half the tile width, to create a running bond pattern.
Check to see what size the cut pieces on the ends of the two rows of tile will be. If any of the cuts are skinny, it will look better if you shift the layout a quarter tile width. For our 8-in.-wide tiles, we moved the starting line 2 in. off center, and then drew a second vertical line 4 in. from the first. Shifting the layout like this increased the width of the skinny cut by 2 in., creating a better-looking final result.
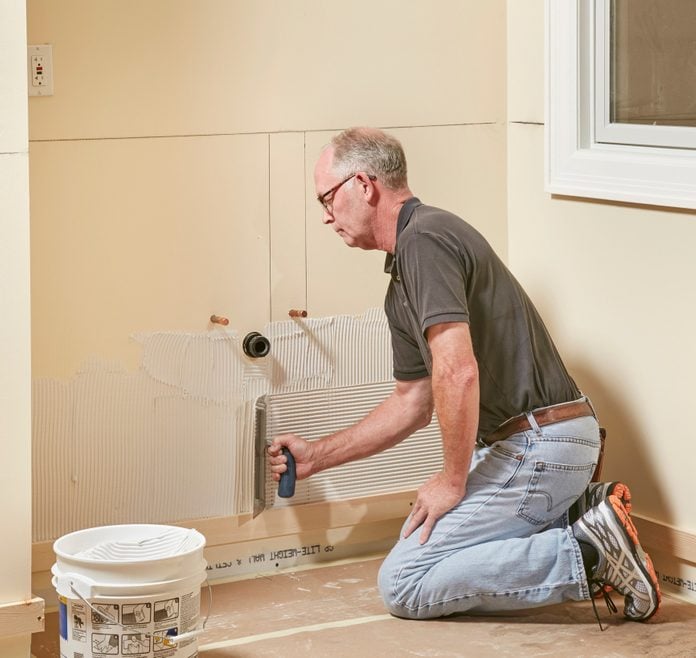
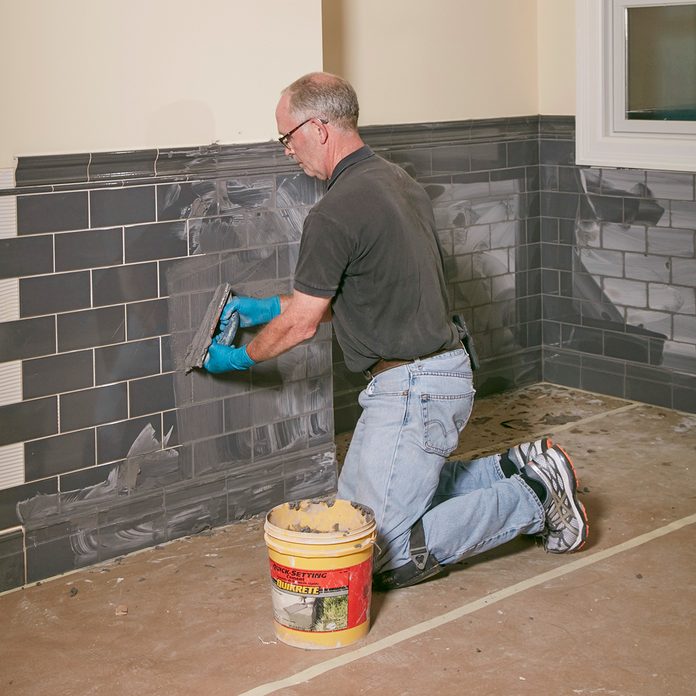
Spread the mastic
Using a 1/4 x 1/4-in. notched trowel, spread only as much mastic as you can cover with tile in about 15 minutes—usually about 10 sq. ft. If you leave the adhesive uncovered too long, it will dry on the surface and become less effective. Hold the trowel at a steep angle to make the mastic ridges as high as possible.
We used premixed water-based tile mastic and spread it with a 1/4 x 1/4-in. notched trowel. Remember, larger tiles require larger notches. Also, if you’re installing tile in a wet area, use thin-set adhesive instead. For more grouting tips, click here.
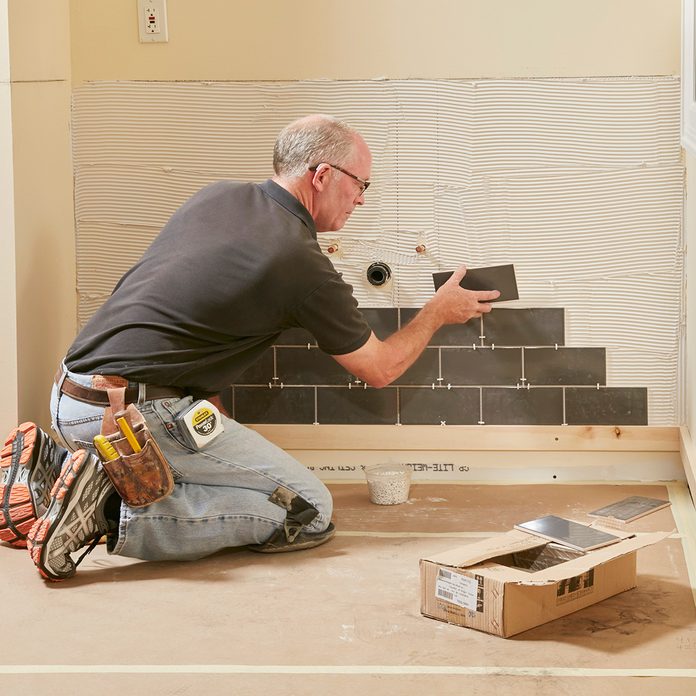
Set the full tiles
Line up the end of the first tile with one of the plumb lines and embed the tile in the mastic. Set the rest of the full tiles in the row, resting them on the ledger and separating them with spacers. Start the next row by aligning the end of a full tile with the second vertical line. Build a stair step, alternating the tile joints as shown.
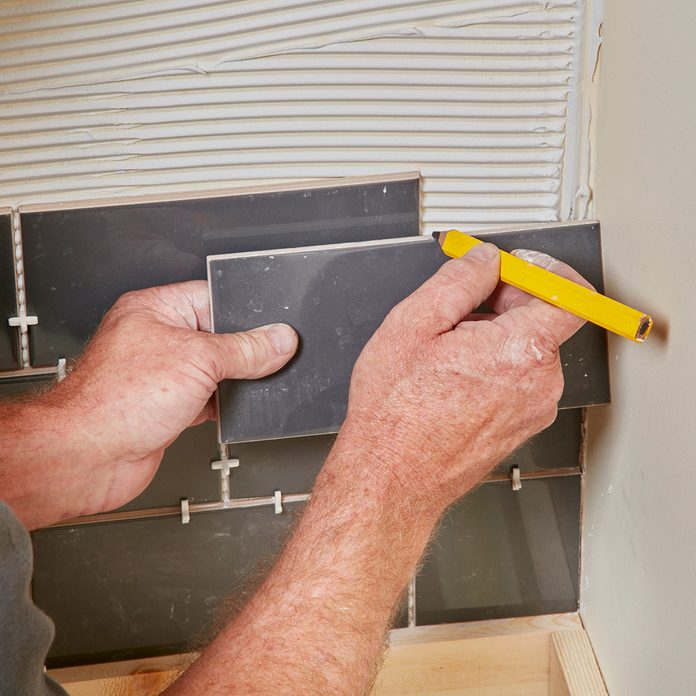
Mark the end tiles
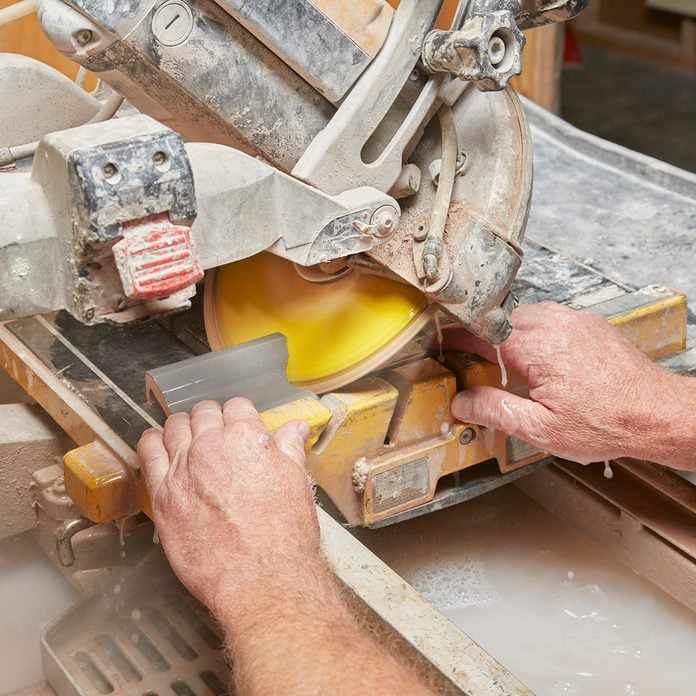
When you reach the ends, you’ll have to cut tile to fit . For glazed tile like ours, with a soft bisque core, a tile cutter is fast and convenient for making straight cuts. But if you’re using porcelain, stone or glass tile, you’ll have to cut it with a diamond wet saw instead. However, you’ll still need a wet saw if you have trim pieces to miter or notches to cut. You can rent a wet saw for about $50 per day, or buy one for $100 and up.
Hold each end tile in place and mark it for cutting. Subtract the width of the grout joint when you make the mark. Install the tile with the cut end against the wall.
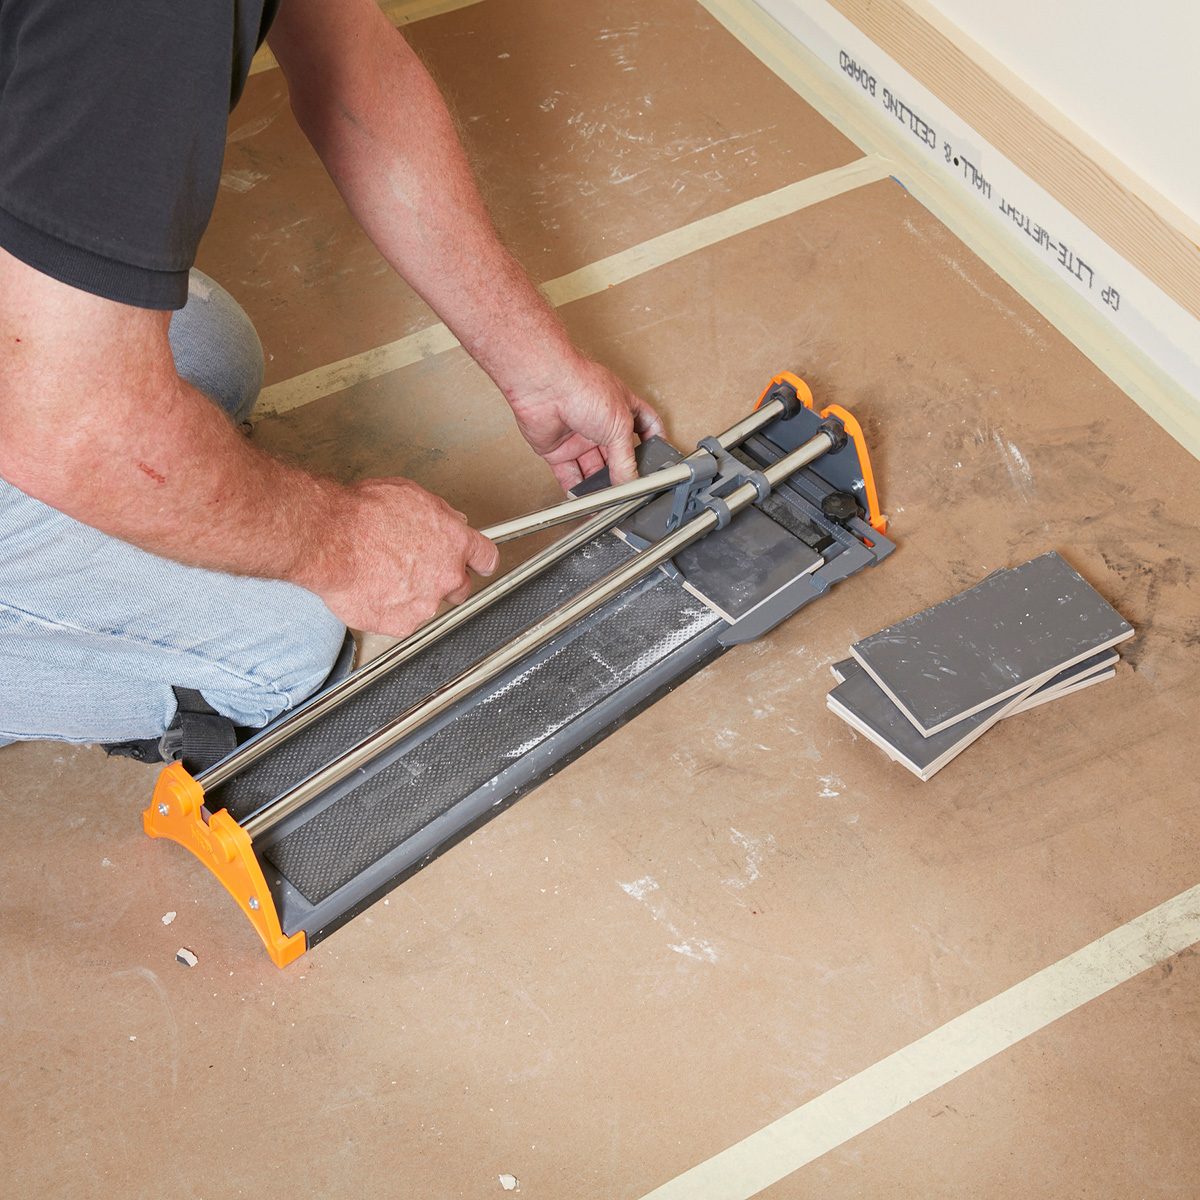
Cut the end tiles
Place the tile in the cutter with the edge against the fence. Line up the mark with the cutter. Push down gently on the cutter handle and slide the handle forward to score the tile. Then pull the handle back until the breaker is over the center of the tile and push down to break the tile along the scored line.
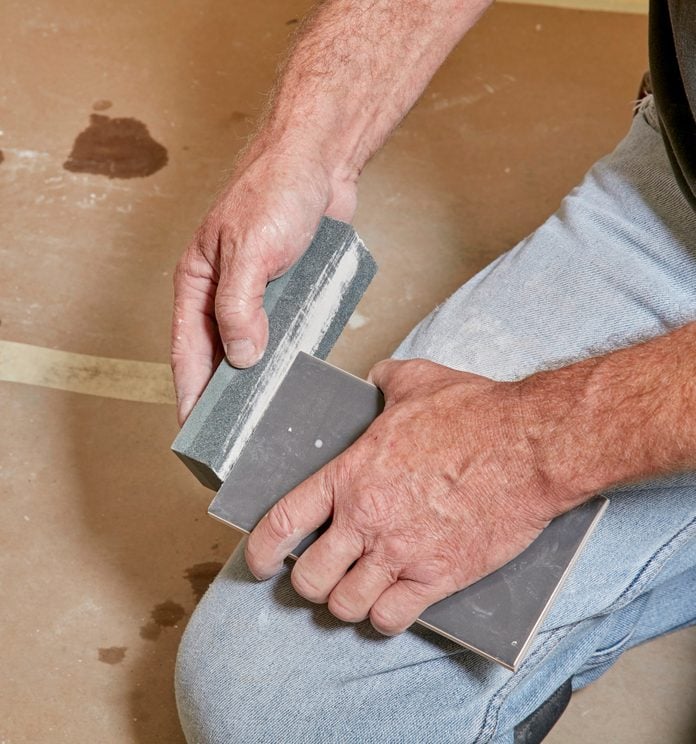
Smooth the cut end
The cutter may leave the end of the tile a little rough. Use a rubbing stone to grind off the rough edge. Several back-and-forth strokes is all it takes. You’ll find rubbing stones for about $10 where tiling tools are sold.
Miter the top cap
The inside corners of the cap pieces must be cut at a 45-degree angle where they join in the corner. Make these cuts with a wet saw tilted to cut a 45-degree bevel.
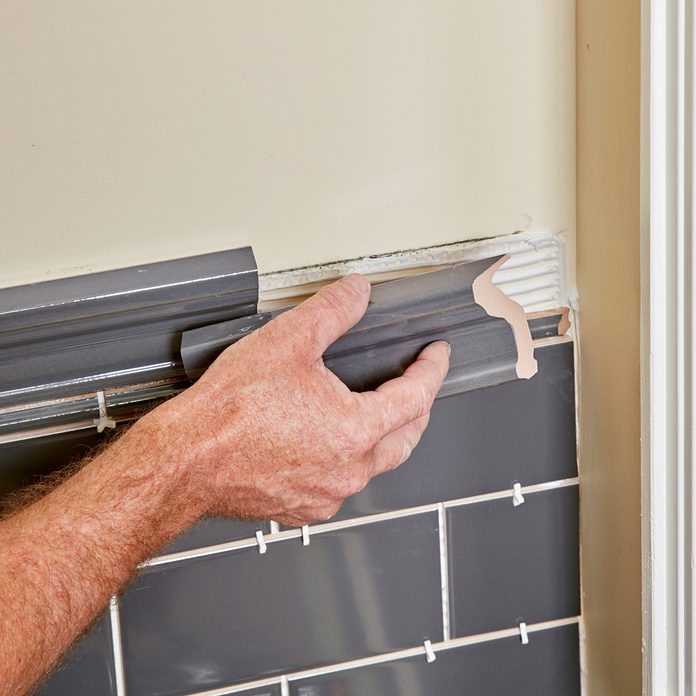
Install the mitered cap
Embed the mitered inside corner in mastic. Use spacers under the cap to create a grout joint.
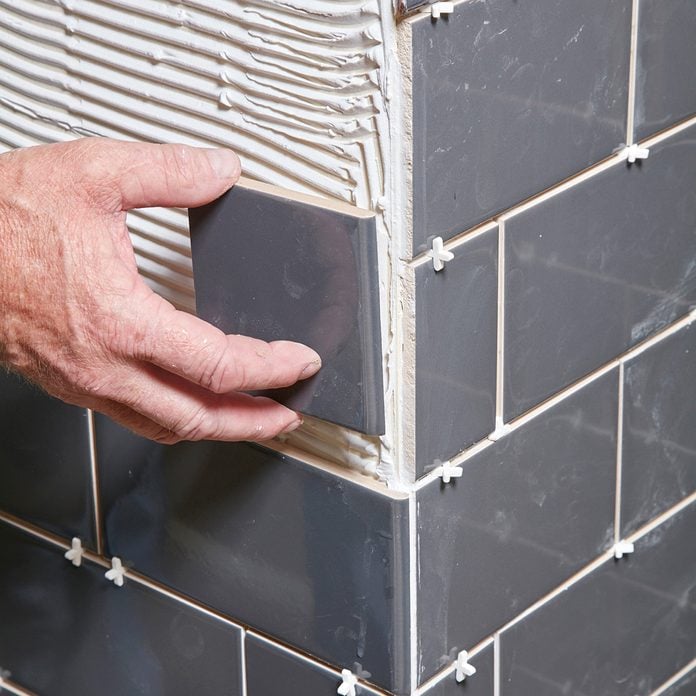
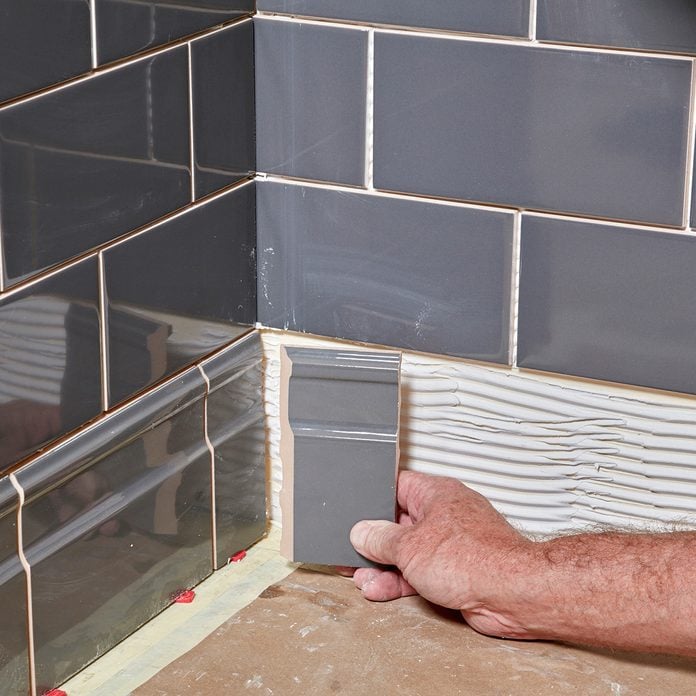
Install the bullnose
Finish the outside corner with bullnose tile. When you set the tiles on the side opposite the bullnose, make sure to cut them so they’re back from the corner the width of a spacer to allow room for a grout joint.
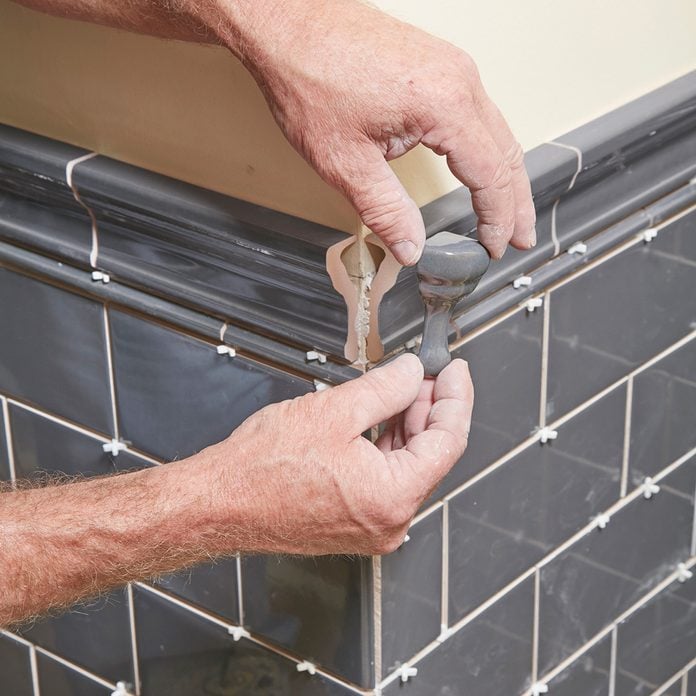
Add the corner cap tile
Spread a small amount of tile mastic on the back edges of the corner piece and press it into place. If the piece feels loose, use masking tape to hold it in position until the mastic sets up.
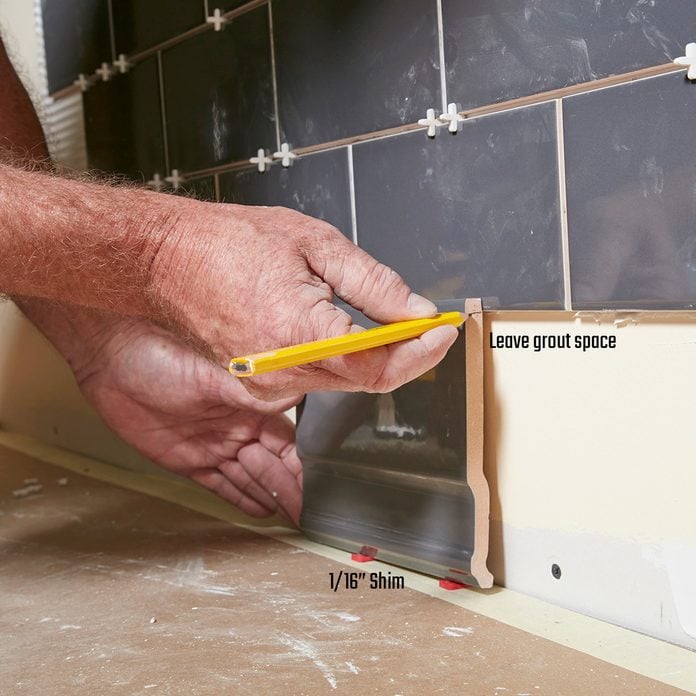
Mark the base tile
After you’ve finished installing the wall tile, let the adhesive set up for a few hours before removing the ledger boards. Then install the base tile. Remember to subtract the width of the grout joint when you make the mark. Cut the base tiles to fit, and set them in place on top of 1/16-in. shims.
After removing the ledger boards, cut the base tile to fit. Hold the base tile upside down and rest it on 1/16-in. spacers. Then mark for the cut, making sure to subtract for the grout joint. Cut the tile at the mark and install it.
Miter the base at inside corners
The base and cap style we chose was available in outside corner pieces so we didn’t have to miter the outside corners. But we still had to miter the inside corners. We used a wet saw for this. Cut 45-degree bevels on the baseboard pieces that meet at inside corners. Remember to cut your miters short by one half of the grout joint width to allow for grout. Finish up by gluing in the outside corner piece.
Grout the tile
When you’re done setting tile, let the mastic dry overnight. Then mix your grout according to the instructions on the package. Mix only enough grout to cover about one wall at a time. Spread the grout with a grout float , making sure to pack the joints completely. Wipe off excess grout with the edge of the float, working diagonally to the tile. Avoid getting grout into the inside corner joint or the 1/16-in. gap at the floor.
Wait about 15 minutes, depending on the room temperature and humidity, for the grout to begin firming up. Pressing your fingertip into the grout should barely leave a mark. Then begin working the grout with a damp, not wet, sponge. Wring out the sponge frequently in clean water in a bucket (not a sink). When all of the grout is removed from the face of the tile, and the joints are consistent and smooth, let the grout set up for an hour before polishing the tile with a damp microfiber cloth.
Finish the project by filling the inside corners with caulk that matches the color of the grout. If you have a wood floor, don’t caulk the gap at the floor.

Meet the Expert:
“Subway tile is the same but different,” says expert Dean Sorem. “In most ways, it installs just like any wall tile. But because it’s set in a brick joint pattern, some steps are a little different and a little trickier.” Dean has installed acres of subway tile, and in the following pages, he’ll show you how to get it right.