
3 Simple Landscape Edging Ideas

Updated: Mar. 21, 2024
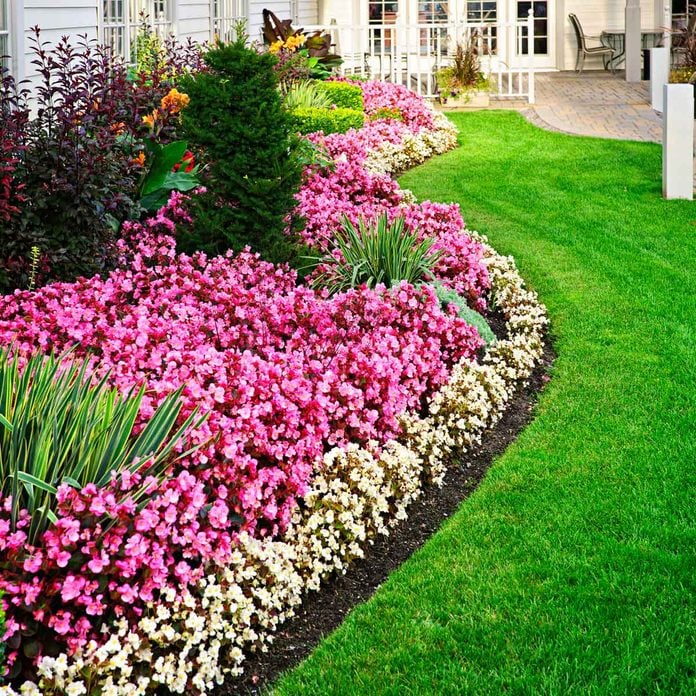
The struggle to get rid of weeds and unwanted plants in your garden and flower beds is never-ending. On top of the constant vigilance required to keep uninvited guests out of those places, there’s another step you can take: lawn and garden edging.
Why Edge Your Lawn?
Edging and borders help keep weeds and grasses from creeping into your flower beds and your garden by creating a root barrier to stop invasive plants. There are other benefits as well. It gives you lawn a nice, clean look and boosts curb appeal. It also makes it easier to trim around the various features in your yard.
These tips will help guide you for creating edges and borders using the three most popular materials for them.
Before you start, be sure to call your local utilities or 811 to locate underground lines before you dig and install all edging.

Metal Lawn Edging
The simplest and most subtle landscape borders that effectively separate your lawn from a garden are 4-in. deep strips of steel, aluminum or plastic. The metal lawn edging bends easily into smooth, graceful curves and stops the spread of grass roots.
However, painted aluminum and steel offer the sleekest, most refined garden edging look because they almost disappear against the grass and garden bed. The plastic types of garden edging have a prominent black bulge along the top edge.
All work best on fairly even terrain; if you have a lot of dips and rises, it’s easier to install a paver border.
Although aluminum and steel landscape edging cost about the same, aluminum is much lighter. It weighs about 41 lbs. per 100 ft., while steel weighs about 225. With aluminum landscape edging, you get a professional look without the heavy lifting.
Plan to set the garden border with the top edge about 1/2 in. above the soil level to maintain the lawn/garden separation and keep roots from crossing over the top. This makes the garden border almost invisible and allows you to mow right over the top. However, be aware that the top of the thin lawn edging can hurt bare feet. After cutting it, make sure you round off any sharp edges with a file.
The key to setting this garden border is to cut a clean vertical edge along the grass with a square spade. Then you can lay the garden border tightly against the edge when you stake and backfill it.
There’s no rule for shaping the edge. Simply follow the edges of your lawn, making smooth, gradual curves. To make smooth, sharp curves, bend the metal lawn edging around a circular form.
The thicker landscaping edgers better withstand those inevitable bumps and hard knocks that go with lawn mowing.

Paver Garden Border
If you’re having trouble deciding between various lawn edging ideas, consider concrete or brick pavers. They make a simple, handsome border and work well as lawn edging material too. They’re ideal when you want a wide border that keeps grass out of the garden, yet allows flowers and other plants to spill over without intruding onto the grass. You’re less likely to chop them up with the lawn mower.
Paver borders work well for straight, formal gardens but even better for informal yards with gradual curves and varying slopes. You can easily adjust them to follow the contours of an uneven yard. But they won’t fit as well on tighter curves unless you alter the design and are willing to cut them to fit with a diamond blade saw.
Concrete pavers are designed for rugged outdoor use. Brick pavers are too, but don’t confuse them with regular bricks, which are typically softer and more likely to break down.
Use a garden hose to mark the shape and gradual curves of your lawn edging. Don’t hesitate to trim the trench a bit here or there as you cut the edge to smooth curves or alter the garden bed shape. For straight borders, follow a tightly stretched string line.
Dig a 4-in. deep trench about an inch wider than the brick pattern, using a square spade. Cut the edge along the grass smooth and square. Cut landscape fabric to fit the bottom and sides of the trench and dump in about 2 in. of sand. Smooth and flatten the sand with a block of wood.
It’s important to set the front edge of the pavers about 1/2 in. above the soil in the lawn so the lawn mower can cut the grass cleanly.
You can opt to level the pavers from front to back to keep the row from dipping and rising, but it’s not necessary and on slopes might look better if set on an angle. Just make sure the top of each paver sits flush with its neighbor and that the front edges create a smooth line. You can go back later and whack them perfectly flush with a block of wood and a hammer or a rubber mallet. Set them higher or lower to fit the needs of your garden.

Raised Bed Border
A stone wall does more than make a clean border along your lawn. It’s a handsome visual statement in itself, a great way to add depth and texture to a flat, featureless yard. It’s practical, too.
When looking at paver lawn edging ideas, be sure to explore the variety of stone materials, sizes and shapes to create your ideal landscape border. It also provides good drainage, making it a great solution for low-lying, soggy gardens. And it’s a good way to terrace a sloped yard and create nice, flat gardens.
To reduce maintenance you can add a 4-in. deep trench lined with plastic edging and filled with mulch. The lawn edging keeps grass roots from creeping into the stone wall, and the mulch provides a mowing track for lawn mower wheels. With taller types of grass, you can mow right over the plastic border and cut the lawn edge cleanly. There’s no need to trim the grass.
Design your raised bed to blend into the contours of your yard like a natural feature. You can handle slopes in one of two ways. Either let your wall follow the slope of the yard for an informal look, or level the stones as we did and step the wall up or down as the slope requires to maintain approximately the same height.
The exact size of stacking stone for walls varies considerably by region. Visit a local landscape supplier to check types. For lawn edging, limit the height of your wall to two courses so you won’t have stones falling out. Measure your wall length and make a sketch.
The stone dealer will help you figure out the quantities of all the materials you need. The stone will probably be sold by the ton or pallet, and it’s heavy. Have it delivered and unloaded as close to where you’re building your border as possible.
Get started by laying out the border with a garden hose or paint. The trench width will vary depending on the width of the stone. Add 6 in. to the stone width (2 in. for the mowing edge plus 4 in. extra). Pack in and level a bed of gravel or sand.
Generally it’s best to keep the bottom row of stone an inch or so below the original soil level, but this will vary if you keep the stones level and the yard isn’t level. If you’re considering this lawn edging idea, just know that you may need to step the stones up or down, or use thinner or thicker stones depending on aesthetic and fit. There’s no rule here. Experiment when you lay the stones for the best appearance.
Lay the stones that have the most irregular faces in the first row so you can place the irregular face down in the gravel and level the top. Vary the sizes and colors for the best look. Chip off irregularities with a maul and chisel. Then add the second row. Make this row as stable as possible so the stones won’t rock and fall off. As a last resort, stabilize the stones by shoving stone chips into the gaps.
Lay landscape fabric against the back of the wall before backfilling it with top soil. That will keep the dirt from washing out through the stone. Then, install the plastic edging in front. Add organic mulch to finish up the mowing edge.
Originally Published: March 21, 2024