
Build a Backyard Waterfall and Stream
Updated: Mar. 16, 2023
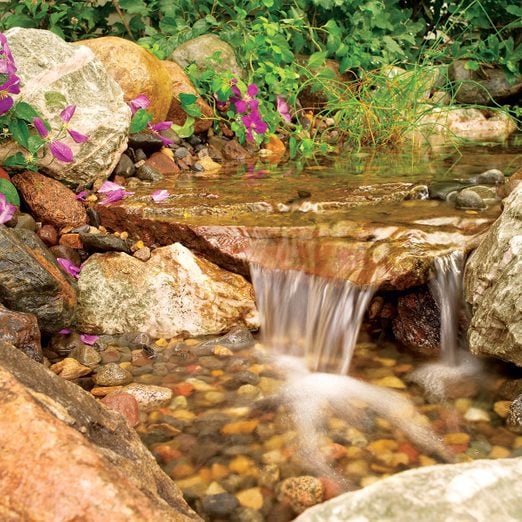
This cascading stream flows into a gravel bed, not a pond, so it stays clean with little maintenance.
Multiple Days
Beginner
$501-1000
Introduction
Create a rippling, rock-lined stream with multiple waterfalls in your backyard. Use gravel and stone filters and a heavy-duty pump to reduce maintenance and maintain water clarity.Tools Required
- Level
- Rubber mallet
- Spade
- Utility knife
- Wheelbarrow
Materials Required
- Ball valve and clamps
- Decorative boulders
- EPDM pond liner
- Field boulders
- Gravel
- Hose kit and connections
- Large waterfall pump
- PVC primer and cement
- Sewage basin (18” x 30”) and lid
- Two hole saw bits (2” and 1”)
- Underlayment fabric
- Waterfall foam sealant

We’ve all stopped, gazed and listened upon encountering a rippling brook or small backyard waterfall, to soak up the serenity that nature provides. But where is that spot when we need it most? Since you probably can’t drive and hike to a tranquil location after a hard day’s work, you can use this project to help you recreate these all-too-fleeting moments in your backyard. And you can build your stream in just two weekends.
We designed this DIY, pond-less waterfall stream to eliminate the filtering and cleaning maintenance that comes with ponds, making it one of the best backyard waterfall ideas in our opinion.
The trick to low maintenance is to let nature (layers of gravel and stone) filter the water, using an underground sump at the lower end to catch the filtered water before pumping it back up to the top of the stream. All you have to do is occasionally add water to replace what evaporates, and rainfall may handle this task for you.
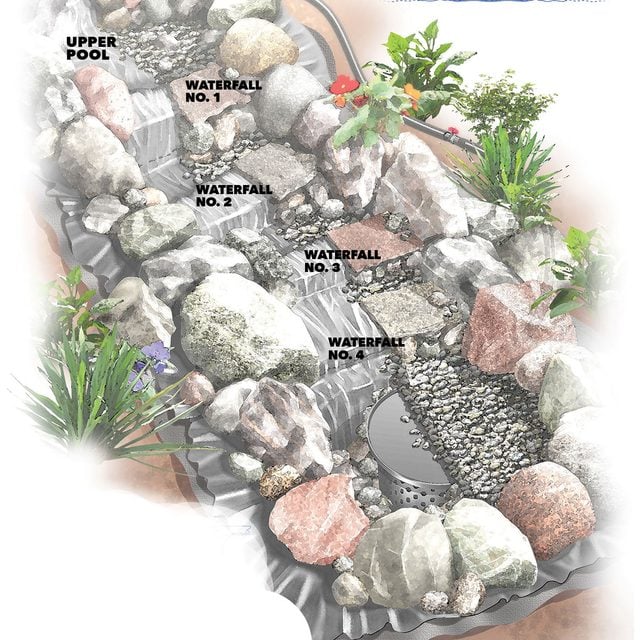
Stream and Waterfalls Layout
Use these illustrations to help you plan your water feature and learn how to build a pond-less waterfall.
Project step-by-step (15)
Select a Location
Sit in a favorite spot and visualize where a stream with waterfalls would fit into your landscape, perhaps near a patio or deck. Here are some elements to consider when selecting a location for your waterfall.
Foundation
- If your soil is easy to dig, then excavate the entire project. If digging is difficult, build your stream above ground with stones and other backyard rocks for the base.
Slope
- Not much slope is needed (minimum two inch drop per 10 feet of stream). For faster moving water or taller waterfalls, make the grade steeper, which also adds more sound.
Size
- Plan your stream size first to determine how much water the lower basin and upper pool must hold when the pump is off. Figure five gallons per linear foot of flowing stream (2-1/2-ft. wide x 3-in. deep). Our lower basin (40 gallons) and upper pool (240 gallons) easily held our 75-gallon stream capacity.
Sound
- For a quiet, babbling-brook type of sound, go with a waterfall height of two to four inches. To drown out street noise, use 10 inch and greater waterfall drops. More waterfalls equals more noise.
Location
- Waterfalls should be visible from your favorite deck, patio or inside-the-home chair. Consider a location near the bedroom if you like the sound of running water at night; you can always turn it off if it’s too loud or distracting. Make sure your pump location (lower basin) is close to an electrical source, and that you can reach the stream with a garden hose to add water as needed
For our site, we wrapped an S-shaped stream next to a ground-level deck built into an existing perennial garden. We varied the height of the four waterfalls and the width of the stream to give it a more natural look and sound. We also added a ball valve to the return water line so we could speed or slow the flow rate, and control the sound level.
Order the Stone
When you start your stone search, look under “Rock,” “Quarries” or “Sand & Gravel” online. Call to check prices and types of stone available. Go visit dealers to get exactly what you want. While there, select specific colorful accent boulders and flat stones for the waterfalls. Then have it all delivered.
Some quarries will even bag the stone by type and size, for a fee. These palleted bags take up less space on a driveway, as opposed to piles of gravel and boulders.
- For gravel (3/4-in. to 2-in. stones), figure you’ll need 1/2-ton per 10 feet of stream. We used one- to 1-1/2 tons for the upper pool and lower basin.
- For basic field boulders (six inches to 24 inches) to line the stream banks, figure 3/4-ton per 10 feet of stream. Add 1-1/2 to two tons more of larger 12-in. to 24-in. boulders for the upper pool and lower basin.
- Because we built the top half of the stream above ground, we used 3-1/2 tons of extra boulders.
- Pro tip: If you want specialty colorful accent boulders, expect to pay premium prices. Avoid limestone, as it can encourage algae growth.
CAUTION!
A few days before you plan to dig for your stream, call 811 to have underground utilities in the area located and marked.

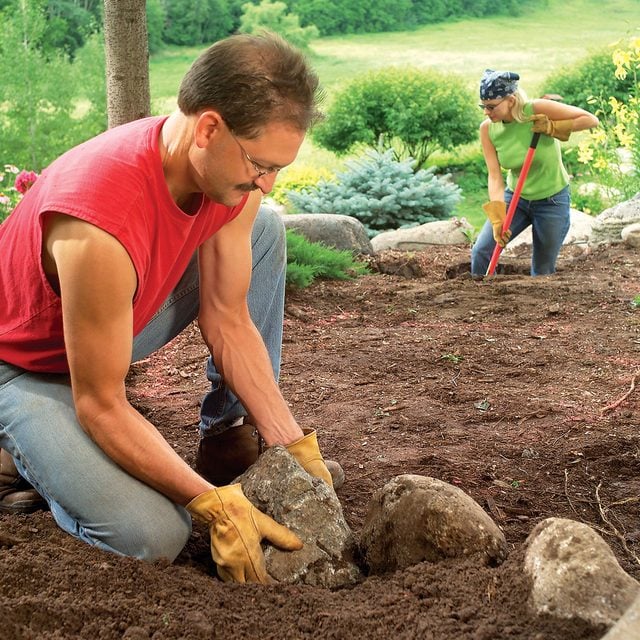
Design the Stream
- Once they arrive, haul in your boulders and stones and place them around the worksite.
- Outline the location of your stream with a garden hose, then paint a line around it. Use paint to mark waterfall locations and ideal spots for large decorative boulders.

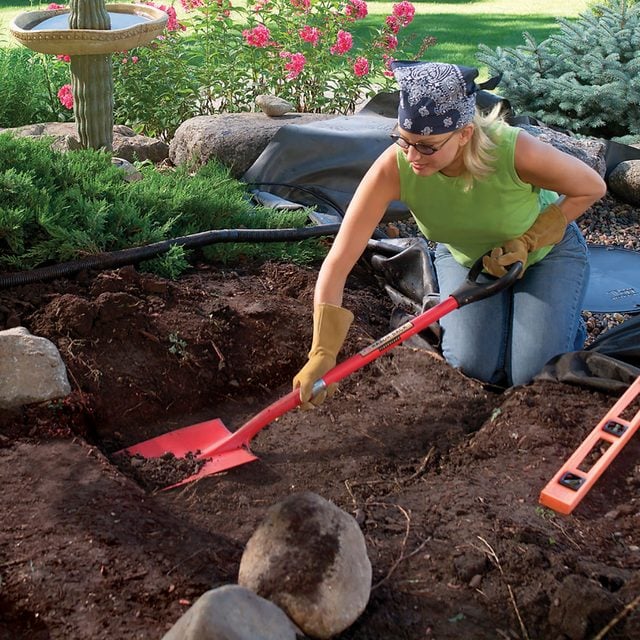
Start Digging
- Dig the lower basin for the sump basin and surrounding stone and gravel.
- Dig a square hole at least two feet wider than the basin diameter and six inches deeper than the height.
- Pro tip: This hole should be at least a foot wider than the stream.
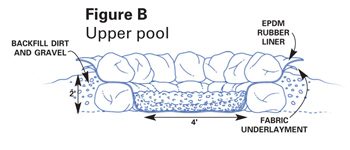
- Also build a ring of stone for the upper pool foundation and the stream banks. Place 12-in.-tall stones flat side up (if possible) so the next layer of stone will fit more securely on top.
- Pro tip: Use a rubber mallet to pack dirt and gravel tightly around the stones to hold them in place.
Prepare the Basin and Pump
- Use a two-inch hole saw bit and drill holes every four inches in the bottom third of the pump basin (Figure C and Photo 3).
- Repeat the process with a one-inch hole saw bit for the middle third, then use a 3/8-in. bit for the top third.
- Prime, cement and attach the hose adapter to the pump.

Line the Basin
- Lay the fabric underlayment and rubber liner in the basin hole, then add the pump basin with pump.
- Attach the hose, then add stone layers and the basin lid.
- Remove sharp objects from the bottom of the basin, then lay in the underlayment and liner.
- Pro tip: Calculate the size carefully and cut the underlayment first. Then cut and fit the liner so it is tucked in all corners and extends about two feet out of the hole in all directions.
- With the pump basin in place, insert the pump, connect the water line and lay it in place to ensure it will reach the top of the upper pool.
- Add layers of stone around the basin and top with the lid.

Dig the Streambed
- At each waterfall location, dig down to the approximate depth of the drop you desire or build up the fall if you’re working above grade. This gives you a streambed depth target.
- Move to the bottom of the stream and carve a two- to 3-1/2 ft.-wide streambed six to eight inches deep, sloping upward as you dig upstream to meet that streambed depth target at each waterfall.
- Dig out shallow pools below waterfalls as needed to slow the water flow.
Build Up the Waterfalls
- Since we built above ground for the upper section of the stream, we next added a level row of stones for waterfalls No. 1 and 2. Pick the height you desire. Use six-inch-tall stones to frame the banks.
- Finish compacting a gravel and dirt mixture to the inside and outside of the upper pool stones.

Spread the Liner in the Streambed
- Position the fabric underlayment and liner to extend from the lower basin to the upper pool, with slack at the base of each waterfall, because placing boulders can stretch and rip a tight liner (Photo 7).
- Place decorative boulders at the side of each waterfall, and add an extra piece of rubber liner underneath each heavy stone to protect the base liner.
- Pro tip: For stable, above-ground stream edges, backfill the edging stones with a gravel and dirt mixture and compact it.

Line the Upper Pool
- Next, lay the final piece of underlayment and liner in the upper pool so it tucks in at all corners and extends two feet out in all directions.
- Pro tip: There’s no need to tape the liners to each other. Just make sure the top liner overlaps the liner underneath it by 1-1/2- to 2-ft.
- Add the top layer of stones around the upper pool.

Build up the Waterfalls
- Set decorative boulders at each side of waterfalls No. 1 and 2.
- Once you place the decorative boulders at the waterfall locations, place all the flat spill stones.
- Apply black expanding foam sealant, designed for ponds and waterfalls, to the underside to adhere them to the rubber liner.
- Fill all gaps with stones to force water to go only over the waterfall (Photo 9).

Fill Gaps With Foam
- Apply foam sealant to all sides and to the underneath of each spill stone to create a good seal (Photo 10).
- After the foam has dried for 30 minutes, take your garden hose and run water down the stream.
- Look for any water trails (leaks) along the spill stone edges and underneath.
- Fill any leaks with more foam and repeat until all water goes over the top of the spill stones.

Add Boulders to Complete
- Add a top layer of small boulders to complete the upper pool and streambed.
- Place steppingstones in the middle of the stream and the stones below the waterfalls.
- Cover the rest of the streambed liner with gravel.

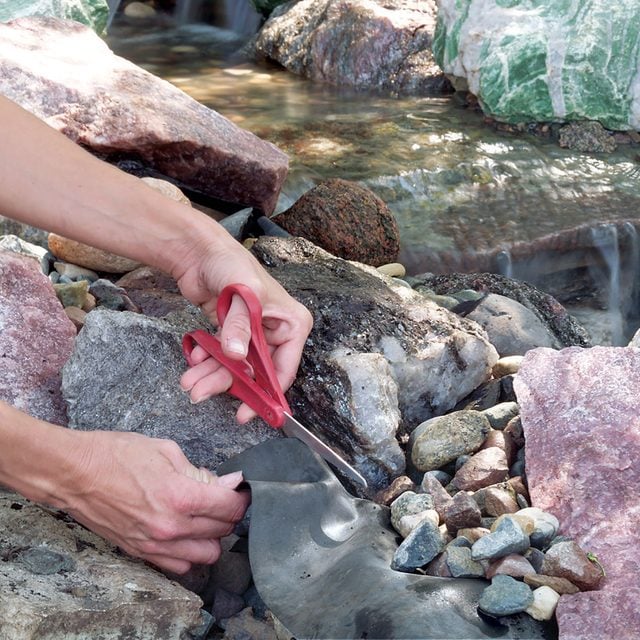
Clean the Rocks and Trim the Liner
- Spray down the entire stream area with a garden hose nozzle until the water level rises above the gravel in the bottom basin.
- Now power up the pump and direct the pump hose away from the stream.
- Keep washing down the stream and rock until the water from the pump hose runs clear.
- Insert the pump hose into the upper pool (make sure it is hidden), and finish your stream by trimming and covering any rubber liner that shows.
Pump Sizing
- Submersible pumps are rated by gph (gallons per hour) at a specific discharge height known as head or lift.
- To calculate the gph you need, figure 150 gph for each inch of your widest waterfall. Next, to figure the head/lift you need, calculate the distance your water line travels from the pump to the upper pool (measure vertical and horizontal; 10 feet of horizontal distance = one foot of vertical rise).
- Look for a high quality pump (bronze, brass or stainless steel; not a cheap sump pump) that can exceed the gph and lift you need.