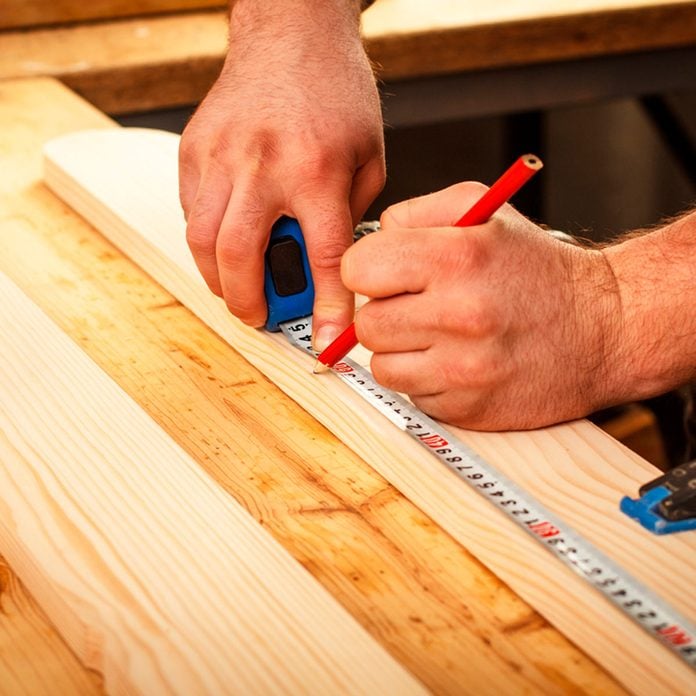
Learn and Master the Basics
Before we get too far into the hacks and tricks, let’s pause a moment to make sure we all understand the basics of marking for a cut. It’s always best practice to mark the board where the saw will make it’s first contact. For a circular saw, that’s usually at the edge of the board, while a miter saw cut should be marked in the middle of the board. When possible, mark with a ‘V’ to reduce the chances of favoring one side of the line or the other. Check out this video on marking a board before cutting with a miter saw.
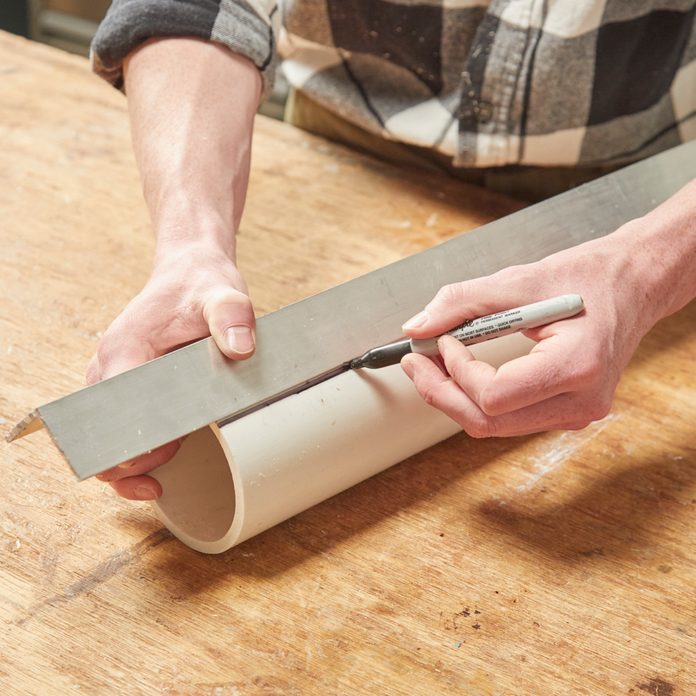
Simple Way to Mark Cylinders
It’s notoriously difficult to mark cuts on curved surfaces. Dropping a straight edge or a measuring tape on a length of tubing or PVC will give you a line to mark against, but it’s very simple to roll or shift your edge when trying to pull a mark. Use a length of angle iron to create multiple touch points on the cylinder, stabilizing the line and making it easy to draw a mark with a pencil or marker. If you need to pull a measurement on the surface, just put a tape measure or ruler on the flat surface of the angle iron. It’s a great way to make a tricky job simple!
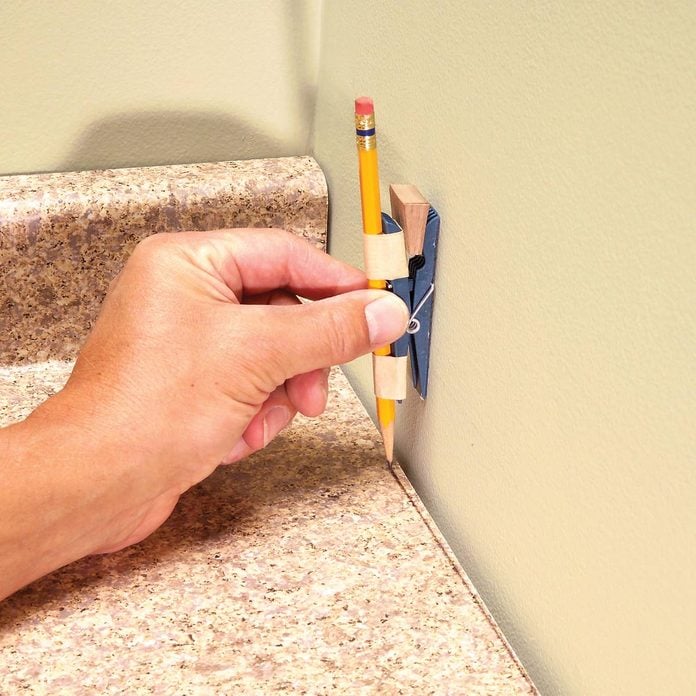
Don’t be Afraid to Hack that Tool!
There’s no shortage of specialized tools on the market, and many of them make marking quick and easy. But that doesn’t change the fact that it always seems like the right tool for your specific job is back home or still sitting on the shelf at the hardware store. That’s why it’s important to learn to not fear adapting your tools on hand to complete your project. A perfect example is this clothespin scribing tool sent in by reader Bruce Kieffer.

Tack Trim in Place While Marking
One of the easiest places to make a mistake when laying trim is when transferring measurements from wall to saw station. Eliminate that risk with this simple hack! Set the trim in place and make your mark directly on the wall where it will be installed. If the trim piece has too much wobble to hold in place, set it with a temporary brad nail. Pop the brad out the back when you remove the trim piece, and you’ll only have a tiny hole to fill during installation. Here’s a great resource for more tips and tricks for your finish nailer.
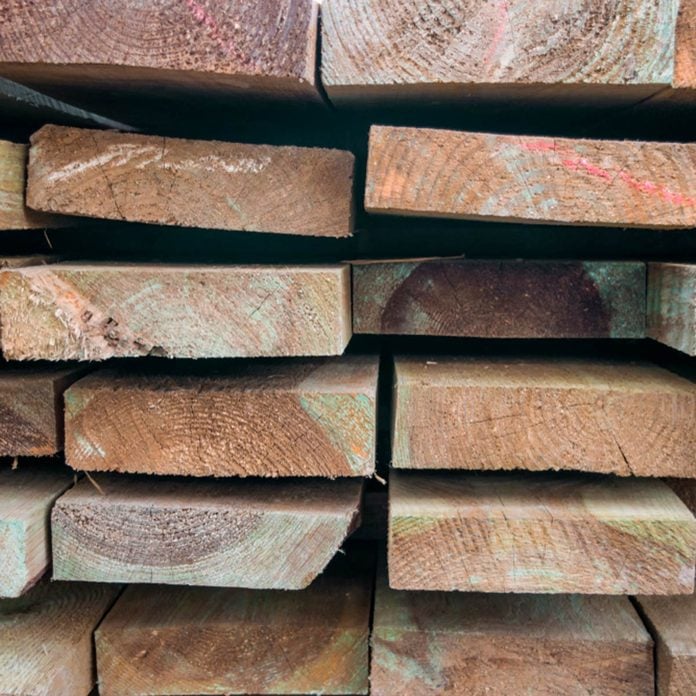
Don’t Trust Factory Edges
We’ve all been there: you’re working with a stack of fresh boards or plywood panels when you realize you need to draw a straight line to mark a cut. If you don’t have a straight-edge close at hand, you’ll likely be tempted to simply use one of the fresh boards. After all, the factory edge is straight, right?
Not so fast! While some factory edges may be straight and true, that’s far from universal. If you need a straight edge, use one that you know is accurate. It may take a little more time than simply grabbing another board, but it may save a lot of aggravation in the long run. For more saw-marking hacks, see this article: Circular Saw Tips and Techniques.

Chalk Line Mastery
One of the most important job site skills to learn is how to mark out projects with a chalk line. Used for everything from determining plum to laying out floor patterns for tile and hardwood, this amazingly useful tool is a must have for any DIY tool belt. Maybe our favorite chalk line hack is an easy tip for marking angle cuts on drywall. A slight slit in the direction of the cut is all you need to hook or wrap the chalk line around, giving you enough tension to mark your cut. This article is loaded with more tips for chalking lines on everything from plywood and gypsum board to roofing tiles.
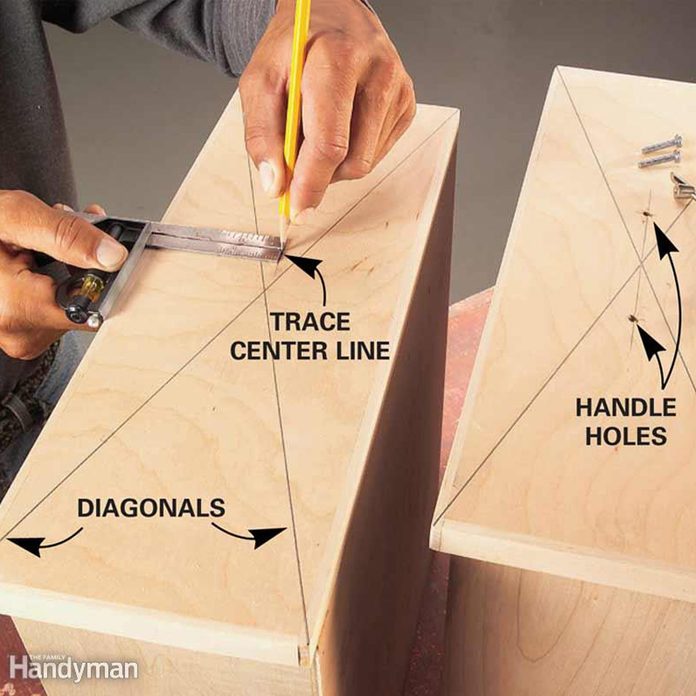
Marking Cabinet Pull Locations
Skip the repetitive measuring and remeasuring when installing cabinet drawer pulls. Your factory drawer faces should be square (but double-check per the earlier tip!) so just mark a pair of lines from opposite corners. The lines will intersect at the center of the drawer face. And with that simple hack, you’re ready to drill! And when you’re ready for more cabinet installation tips, check out this article: How to Install Cabinet Hardware.

The Right Scribe for the Job
In theory, much of woodworking and drywall installation is straightforward, simply setting flat against flat end. The reality is that flat surfaces are rare and you need to use a combination of precision cuts and the occasional artful hack in order to make uneven surfaces fit together flush. Part of that skill set is knowing not only how to scribe, but what tool to use when it’s time to do so. This might mean pulling out a specialized tool or a customized solution (like the clothespin scribe mentioned earlier) or using a standard tool for an unusual purpose, as with the woodworking compass shown here.
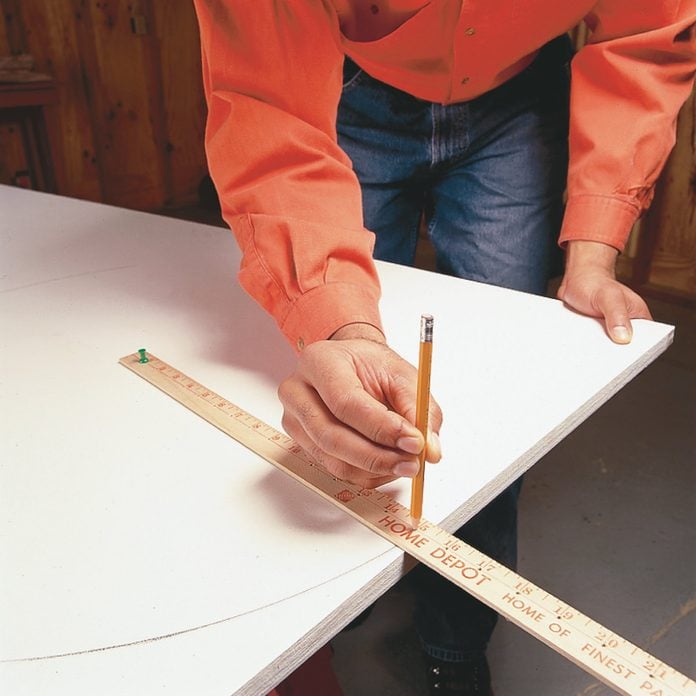
Marking an Arc or Circle
If you’ve ever struggled to mark accurate arcs and circles, then this is the hack for you! Using a standard ruler or yardstick, carefully center a 1/8-inch hole at every inch mark. Place a pin or auger through the first hole (at the 1-inch mark) where you’d like the circle or arc to be centered. Add 1 inch to the radius you want to lay out, and insert a pencil into that modified number. Use the pin as a pivot and rotate the pencil to mark the arc or full circle. Huge tip of the hat to reader Edwin Constantino for this tip!

Advanced Arcs
That last tip was great, but if you need an odd sized or uneven curve, you’ll need to push your marking game to the next level. Create much larger arcs with this hack: lay out the plan for your arc by figuring the bottom corners and peak, setting a nail or dowel at those points and at least one of the top corners. Then set two pieces of flat stock on the plan, one angled from the bottom to the peak, and the other from the peak to the opposite top corner. Fasten the two pieces of flat stock, then set a pencil in the juncture. Slide the stock pieces across the peak and bottom corner markers, and your pencil will mark a perfect arc.

Marking With a Speed Square
Most people have a Speed square in their tool kit, but very few use them to their full potential when it comes to marking cuts. One example of a quick hack: hook the notch at the end of a Speed square on a nail, and use a pencil to mark small circles. Or to mark angles, tilt the square until the angle on the square’s blade matches the angle you want. Check out How to Use a Speed Square for a detailed walk-through of this time-saver!
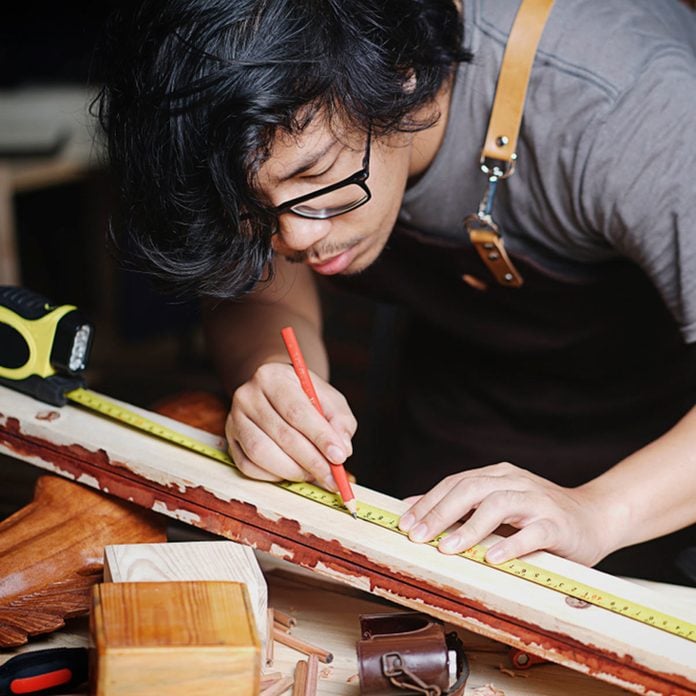
Use the Right Marker
We’ve talked a lot about the tools that help us find our marks, but now it’s time to turn our eyes to the things that literally mark our projects. A simple hack to make life easier is to keep a variety of instruments on hand.
Pencils are great for many purposes, but depending on the softness and shade of the lead, they can be too faint to see on some material. Sharpie markers work great and are easy to see, but while they may be tempting to use on surfaces such as drywall, keep in mind that if you plan to paint over the marks, you’ll likely need to seal with a special primer and possibly paint multiple coats in order to cover up those marks. Pens have a nice, narrow line and don’t need to be sharpened, but they can’t take abuse the way a trusty pencil can, and (like a marker) they can’t be easily erased. Lastly, if you are working with a gloss-finish material such as PVC or ceramic tile, consider keeping a grease pencil around so that your marking will be clear and easily removed. For more on marking tile, see How to Make Precision Cuts With a Diamond Tile Saw.
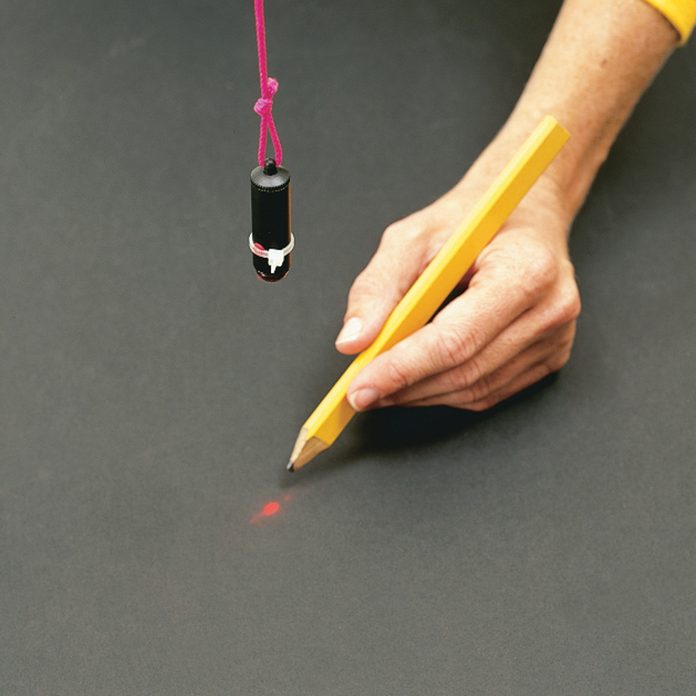
Plumbs, Bobs and Levels
Learn how to use plumbs, bobs and levels in order to make the most of your marking process. By using these tools effectively, you’ll be able to mark out your project quickly and get to the real work of assembly. And sometimes a simple hack can make things even easier! An inexpensive keychain laser can be modified into a plumb bob with a bit of sturdy string, and just like that, you’re ready to make your mark! For more detail on this topic ,our article, Plumb Bobs and Levels: An Essential Guide is a great place to start.
Smarter Graph Paper
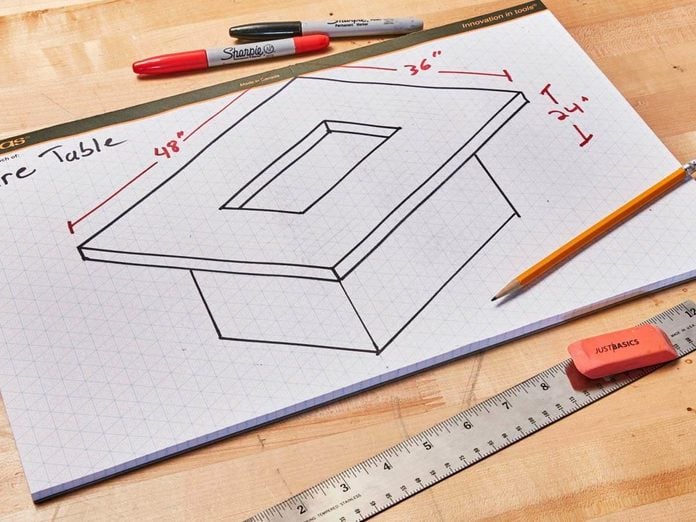
One of the best ways to make sure you have your design clear, especially if you have to convey your concept to someone else, is to draw it out. But it can be hard to transfer a three-dimensional concept onto a two-dimensional surface, even with graph paper and drawing aides. Luckily, this hack makes the planning stage go much smoother! Isometric drawing pads supplement standard graph paper grids with diagonal lines. This makes it much easier to represent the true form of your project on paper, and you don’t need an art degree to do it.
This product is especially useful when planning out a large or complicated project like a whole house remodel. If you’re in the planning stages, here are 20 helpful tips for planning a successful house Remodel.
Kerf-Width Pencil Lead
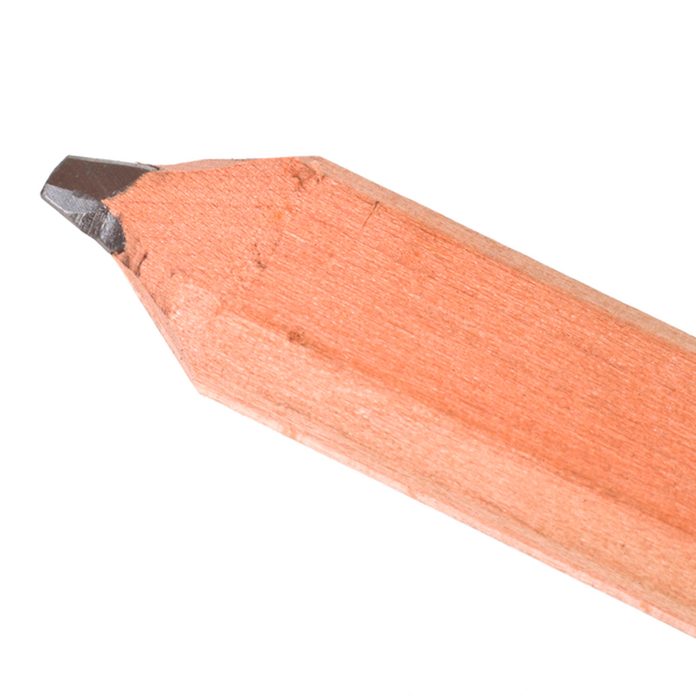
A common mistake for beginner DIYers is to fail to account for the width of the blade when factoring in cuts. An easy hack to avoid this is to trim your carpenter’s pencil to match the width of your saw blade. Make your marks on the cutoff side of your measure, and you’ll be able to see exactly how much material you’ll have left—a huge time saver when planning multiple cuts from a single board or panel. Here’s a great guide for learning how to use a circular or miter saw: How to Make Perfect Cuts With Circular and Miter Saws

Efficient Landscape Marking
When it comes time to work on your landscaping, it can be tempting to grab a shovel or hoe and break ground without adequately measuring and marking out your plan. Instead, take the time to do the equivalent of a “dry fit” that you’d do it assembling a piece of furniture. Use landscape paint to spray the outlines of your project onto the grass. It’s not permanent and will wash away with the next rain, or you can scrub or mow it out.
If your budget is extra tight, save a few bucks and use a length of hose to create a flexible boundary that can be adjusted and tweaked as you see fit. This kind of temporary marking will let you proceed with confidence and save time on your project. In fact, you’ll have so much time left over that you’ll be able to check out these eleven additional time-saving landscaping hacks!

Marking Painting Boundaries
Most people know that they can use painter’s tape to help achieve a crisp line when painting. But what if you want to do an unconventional boundary layout, maybe something with irregular edges? It turns out that you can still make life easier by using this hack from the October 2008 issue of Family Handyman. The trick is to create layers of tape to mark the boundaries, with torn edges to help feather the layers.
DIY Marking Gauge
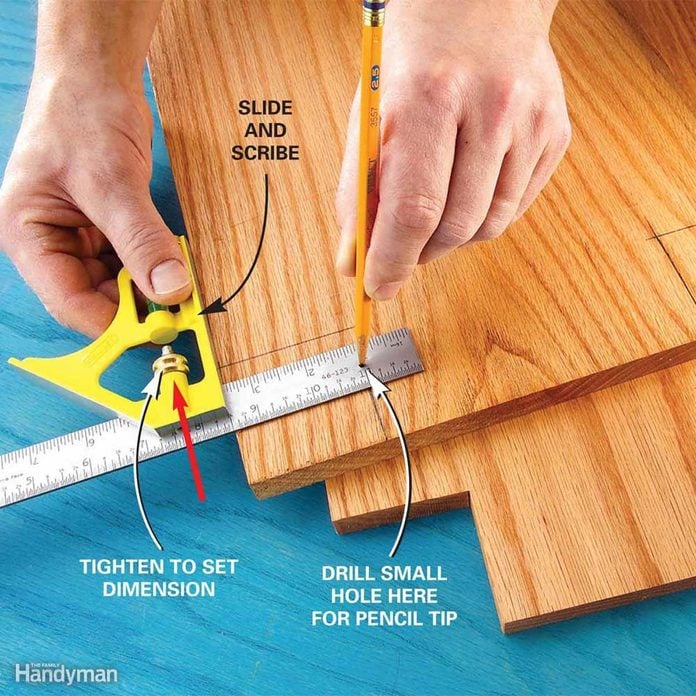
Part of the tool-modification family of tricks, this quick and easy hack will let you convert an inexpensive combination square into an efficient marking gauge.
Start by drilling a 1/8-inch hole at the 1-inch mark of the combination square. Center it exactly on the 1-inch mark, and be sure to make your hole perpendicular to the square (use a drill press if you have one). Once that’s done, you’re through the hardest part of the hack! Next, set the combination square to one inch beyond your intended measurement, then place a pencil in your 1/8-inch hole. Simply slide your square along the edge of your material, your pencil will mark a nice crisp line at the distance you need. This tip is so great it’s one of our favorites on this list of 25 Measuring Hacks all DIYers Should Know.

DIY Board Center Finder
Finding the true center of a board can be a bit finicky, but this hack makes it a snap to find and mark dead center. Using a simple piece of 3/4-inch plywood and a pair of 1/2-inch dowels, you essentially create a U shape, with a hole for your pencil in the middle. As long as the board you’re marking fits inside the dowels, you can find the middle, and run the tool (and the pencil) down the entire length. You can find a full write-up on this hack in this Family Handyman article.

Faster Crown Molding Installation with a Marking Gauge
This marking hack is part of a three-piece crown molding installation that makes the whole project simpler. By installing the center of the crown using two pieces of preset flat trim, you’ll have greater flexibility to deal with irregular walls and corners. And to get there, you’ll use a marking gauge. Measure the run and drop of the crown molding, then join two blocks to make a backward L-shape. Place this against the preset trim to position the central crown. For full details on how to make a crown molding project less of a headache, see this article on three-piece crown molding installation.
Every product is independently selected by our editors. If you buy something through our links, we may earn an affiliate commission.