
How To Fix a Sinking Office Chair

Updated: Feb. 29, 2024
If your favorite office chair keeps sinking, don't toss it. Try this easy repair. In an hour or less, it'll be as good as new.
1 hour
Beginner
$20-$40
Introduction
Can't get your office chair to stay at the right height? There's a fast, easy fix for that. Read on to learn the details.
Tools Required
- Allen wrenches
- Large Hammer or dead blow
- Work gloves
Materials Required
- Cylinder replacement kit
- Rags or paper towels
- Scrap wood
Chairs can be an expensive part of our home office investment. If you’re like me, you’ve probably owned an office chair that no longer stays at your desired seat height.
Most of us will simply throw away the chair and purchase a new one. But nine times out of ten, you can fix the chair by changing out the cylinder that raises and lowers the seat. I never considered fixing mine until I did a little research and learned how cheap and easy it was.
Manufacturers sell a complete kit with the replacement cylinder and all the tools needed to change it out for $25 to $40. Let me share with you the steps to make your old chair comfortable again. You can do this!
Project step-by-step (6)
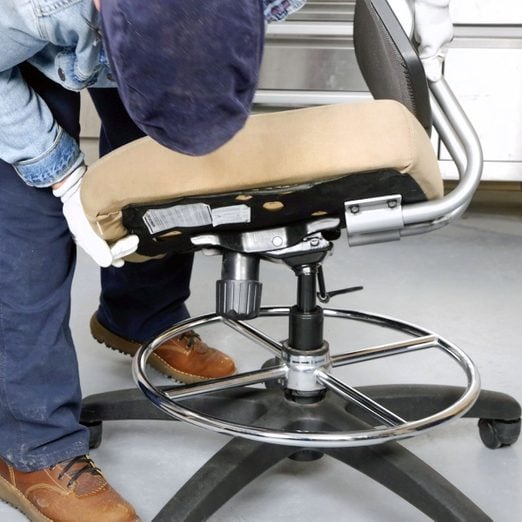
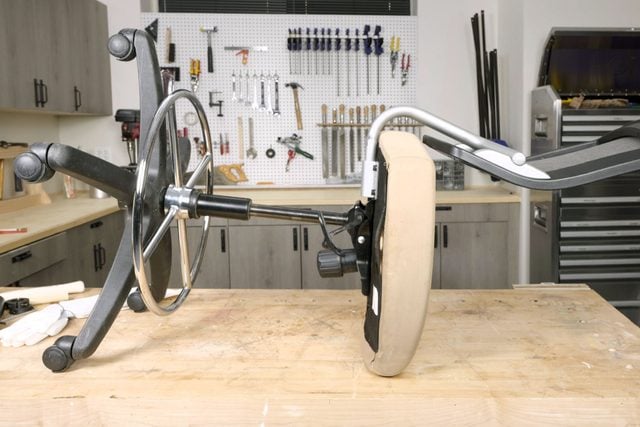
Raise cylinder/position chair
Release the pressure inside the old cylinder by using the lift lever to raise your chair to the highest position. Position the office chair on its side so it’s easy to access the bottom and get at the cylinder. Some cylinders may be so worn out they no longer move.
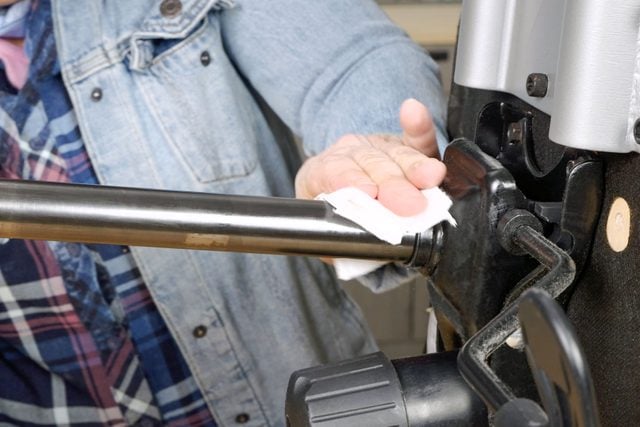
Attach shaft collars
Wipe away any grease on the shaft with a rag or napkin to ensure the shaft collars have a firm grip.
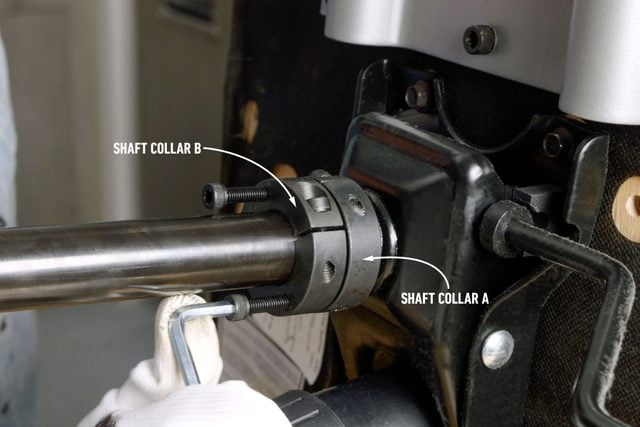
Open the two shaft collars by unscrewing and separating the two sections. Using the Allen wrench and shorter screws, secure both shaft collars to the old chair cylinder.
Slide both collars as close to the bottom of the chair seat as possible. Tighten only shaft collar B, the one closest to the base of the chair, making sure it clamps the cylinder tightly and can’t slide.
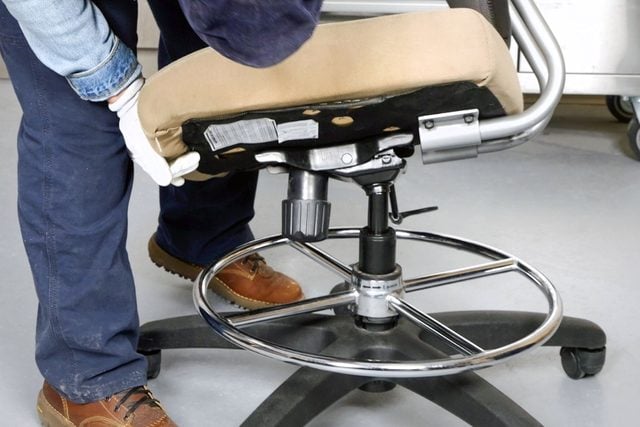
Thread in longer screws, separate seat from base
Use the two longer screws provided in the kit and thread them into shaft collar B, making sure the threaded holes in both shaft collars do NOT directly align. Tightly secure the collar furthest out from the seat. Use the Allen wrench to tighten both screws evenly.
Alternate a few turns at a time on each long screw. This will press against shaft A and start to pull and separate the cylinder from the chair seat.
If the cylinder doesn’t separate, secure collar B tighter to the shaft and repeat the process with the longer screws.
Remove chair cylinder
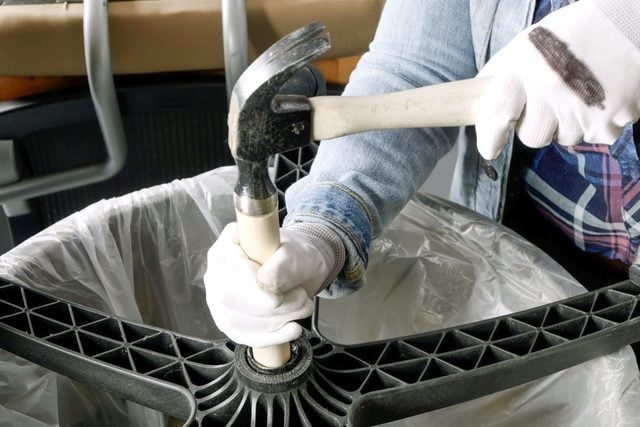
This is the hardest part of this whole project. To easily access the bottom of the cylinder and chair, I found securing the chair upside down in a large garbage can helped tremendously while separating the cylinder from the chair base.
Strike the bottom of the surface of the old shaft with the hammer until it comes apart. Don’t be surprised if you have to hit it hard, and more than once.
Pro tip: To separate the chair base from the other end of the cylinder without damaging the base, use a block of wood as a spacer between the chair and the hammer. You could also use a dead blow hammer.
Note: If the cylinder doesn’t separate easily from the base, apply WD-40 or three-in-one oil where the cylinder sits in the chair base. Let it penetrate for five minutes, then try striking it again. If it still doesn’t separate, let the lubricant work overnight until the cylinder falls out on its own.
Install the new cylinder
Pro tip: When you start this step, be sure to remove the plastic cap that covers the button on the top (thinner section) of your new cylinder before you install it.
To install the cylinder and put the chair back together, start with the base and set it on the floor right side up. Place the bottom (thicker section) of the new cylinder into the two-inch hole in the base.
With the base in place, set the seat onto the cylinder by sliding it on to the bottom of the seat. It should slide in easily. Sit on the chair to seed all the pieces into position. Then use the chair lift lever to insure it’s working properly.
FAQs
Is it common for small screws to come loose on my office chair?
Yes. The screws may come loose over time, resulting in a squeaking sound or wobbly chair. Once or twice a year, turn the chair upside down and check the metal parts to be sure they’re all properly screwed in. Grab a screwdriver and give any exposed screws a slight turn. Make sure you’ve tightened the nuts, bolts and screws.
My office chair squeaks. Is there an easy fix?
Yes. This can easily be done at home using a three-in-on lubricating oil or WD-40. Simply spray or apply a few drops to all the screws and bolts. Keep in mind, with lubricating fluids, a lot goes a long way. You’ll also prevent rust from building up, which may stiffen those moving parts. Revamp the old look by reupholstering your office chair.
The tension on the back of my office chair doesn’t move easily. Can I fix this?
Yes. The back of most office chairs feature a separate tension spring. You’ll find it under a turn-knob housing at the bottom of the seat. Lubricating the spring may relieve this tension and stop any squeaking. Loosen the turn-knob and remove it to access the spring, then lubricate it with oil.
Are all office chair cylinders the same size?
No. Most office chairs use a two-inch cylinder, but there are always exceptions. Be sure to buy right cylinder size replacement kit for the chair you have.
Originally Published: April 04, 2019