
Furnace Humidifier not Working? Replace it
Updated: Sep. 30, 2019Replacing old furnace humidifiers with energy efficient ones is better than repairing them
Remove the furnace humidifier that’s not working
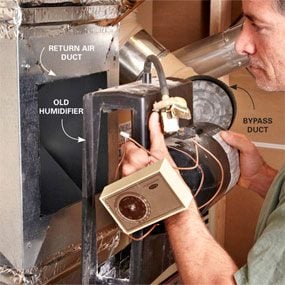
Furnace humidifiers are pretty simple gadgets. When they Stop working, the cause is usually a clogged or burned-out solenoid water valve or a bad drum motor. You can replace those parts yourself—if you can find them at an affordable price. The price of the parts for a humidifier that’s 20 years old or older can be shocking. In that case, you may be better off replacing the entire unit with a newer and more efficient model. Many of the newer models come with a digital humidistat and automatic outdoor temperature compensation (such as the Honeywell No. HE 225 DG 115; about $153 from discounthumidifiers.com). The compensation feature automatically dials down humidifier output as outdoor temps drop. That reduces any condensation on your windows.
If you can operate tin snips and read a wiring diagram, you can do the entire job yourself in about two hours.
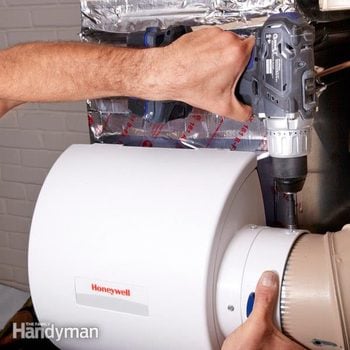
Turn off the power to the furnace and humidifier. Next, disconnect the round bypass duct (if equipped) coming into the old unit. Then turn off the water valve and disconnect the old water line. Disconnect the wiring to the solenoid valve and humidistat and remove the old furnace humidifier (photo 1).
Add humidifier to furnace by installing the new furnace humidifier

Photo 2: Cut the new opening
Slice an opening into the new metal by hammering the narrow edge of a screwdriver into it. Then jam tin snips into the “slice” and cut out and along the edges of the trace. Leave the corners for last.
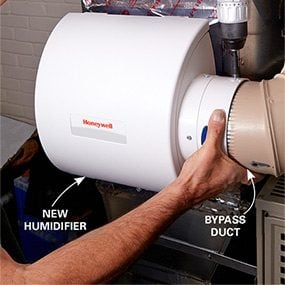
Refer to the installation manual and compare the new opening size to the old opening. If the new humidifier requires a smaller opening (most do), you’ll have to make an adapter plate. Cut a piece of sheet metal to completely cover the old opening. Attach it with No. 6 x 1/2-in. self-drilling sheet metal screws. Then trace the new opening onto the plate, making sure your lines are level. Cut the new opening (photo 2). Use caution to avoid damaging the A/C coil. Hook the bottom edge of the new humidifier onto the opening and tilt the top toward the duct. Level the unit and secure with self-drilling sheet metal screws. Then attach the bypass duct (photo 3).
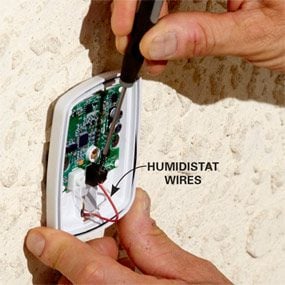
Locate the new humidistat on the return air duct. Then run 18-2 thermostat cable to a shady non-south-facing side of the house for the outdoor temperature sensor. Mount the outdoor sensor (photo 4).
Connect the water line to the solenoid valve and hook up the humidistat wiring. Turn the power back on and test the entire system.
Required Tools for this Project
Have the necessary tools for this DIY project lined up before you start—you’ll save time and frustration.
- 4-in-1 screwdriver
- Caulk gun
- Cordless drill
- Drill bit set
- Hammer
- Nut driver
- Tin snips
