
How to Build a DIY Tumbling Composter
Updated: Jan. 03, 2024
It's large, sturdy, and loaded with features, but you can build this compost barrel for the cost of a bargain model.
A full day
Intermediate
$101–250
Introduction
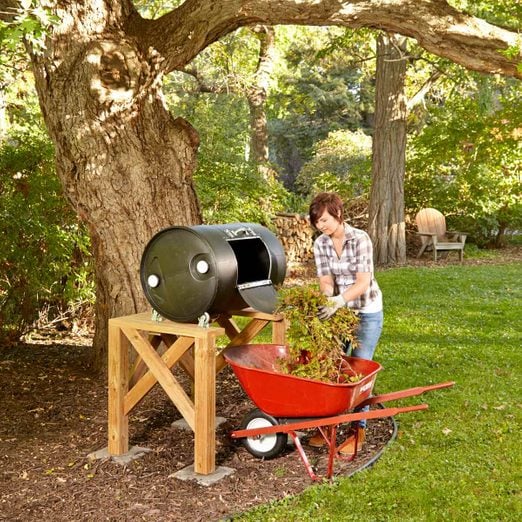
Tumbling composters are an efficient way to turn waste into healthy fertilizer. Learn how to build your own from a drum barrel here.Tools Required
- 4-in-1 screwdriver
- Clamps
- Cordless drill
- Drill bit set
- Jigsaw
- Miter saw
- Pocket hole jig
- Rivet gun
- Safety glasses
Materials Required
- 1" flat aluminum stock
- 10' 2x8 treated lumber
- 12' 4x4 treated lumber
- 3" casters
- 6' of 4" PVC pipe
- 8' 2x4 treated lumber (3)
- Exterior screws
- Handles
- Hinges
- Latches
- Nuts and bolts (stainless steel)
- Rivets (aluminum)
Project step-by-step (5)
Waste becomes compost thanks to millions of hungry microbes, which break it down and convert it to nutrient-rich fertilizer. Those microbes need oxygen to thrive, and that’s where tumbling composters come in. Turning compost over in a drum every day creates fresh air pockets in the mix, and the thorough, consistent mixing speeds up decomposition. You can accomplish the same thing by churning a pile of compost with a shovel, but a drum composter makes it much easier.
Buy or DIY?
Most tumbling composters follow the same basic design—a drum on a stand. You can buy tumbling composters online or at any garden center for as little as $150 for the smallest units and up to $400 for the large fancy rigs.
Or you can build our version of a compost barrel using a plastic 55-gallon drum. The compost tumbler drum and stand together cost about the same as low-price models on the market, but this DIY tumbling composter will be stronger, sturdier, and have more features.
It takes a full day to customize the drum and build the stand. We used rivets to speed up the assembly of the compost bin tumbler, but screws, nuts, and lock washers work as well.
How to Find a Barrel
You can ask for free, used 55-gallon polyethylene drums at places like car washes, food processing plants, and industrial manufacturers. Since beggars can’t be choosers, you’ll probably wind up with a white, green, or blue drum. If that doesn’t fit your backyard color scheme (paint doesn’t stick well to polyethylene), contact a container company and order the color you want. We ordered a black ‘tight-head’ drum (which means the top is permanently sealed to the drum) for about $50 from a local supplier.
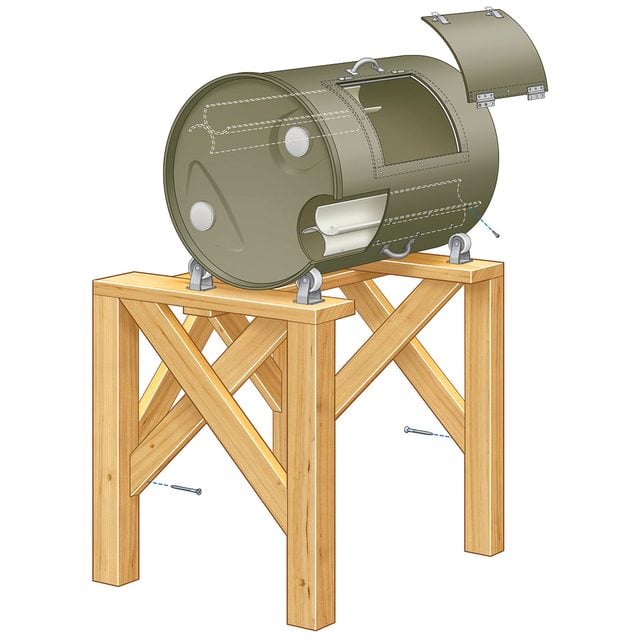
Mount the Compost Tumbler Door Opening
- Use a jigsaw to cut a door panel slightly smaller than the width of your wheelbarrow.
- Bend 1/8-in. x 1-in. flat aluminum stock around the drum to form side reinforcements for the door opening.
- Clamp the aluminum strips in place so that a 1/2-in. of the aluminum extends into the door opening.
- Fasten the strips with rivets or nuts and screws.
- Then cut flat aluminum pieces for the top and bottom of the door opening and the hinge side of the door.
- Mount the top and bottom door opening reinforcements in the same manner.
- Mount the hinges at the bottom of the door opening so the door hangs down when you empty the drum.
- Finish the door by adding the latches.

Make and Install the Stirring Paddles
- To make stirring paddles, cut an 8-ft. piece of 4-in. PVC pipe in half lengthwise using a jigsaw.
- Cut the halves to length so they’re slightly shorter than the inside height of the drum.
- Arrange two halves back-to-back then drill and screw the pieces together to form one paddle unit.
- The back-to-back design is stronger than a single ‘scoop’ and allows you to rotate the drum in either direction.
- Repeat the building process for the second paddle unit.
- Since the drum has a taper at the top and bottom, you’ll have to sand a taper onto the ends of the paddles so they fit.
- Mount the paddle units 180 degrees apart and secure them to the drum with screws, nuts, and washers.
- Finally, mount grab handles around the drum so that it can be easily rotated.
- Pro Tip: A tight-head drum comes with two threaded ‘bungholes.’ Remove the threaded caps to provide ventilation.

Assemble the Stand
- Screw the legs to the rails, then install the cross braces.
- Strengthen with diagonal struts. Cut the legs and deck boards to length according to the Cutting List. Then assemble the stand using a drill and exterior screws.

Mount the Casters
- Flip the stand upright and on one side mount two casters so they ride in the recess around the drumhead.
- Set a level on top of the compost tumbler drum and pry the drum up with a board. When the drum is level, position the last two caster, mark their locations and screw them into place.
- Add diagonal struts to prevent front-to-back and side-to-side movement when spinning the drum.

How to Use a Tumbling Composter
- Load the compost tumbler drum with yard waste and add a compost starter to get the batch cooking.
- Rotate at least once every day to mix and aerate the batch. When the compost is ready, just dump it out.
- Pro tip: Before rotating, always make sure the barrel’s bung caps are tightly attached into their respective holes to prevent any compost from leaking out.

