
How to Build a Small Greenhouse From Old Windows

Updated: Oct. 02, 2023
Make year-round gardening a reality by building a mini greenhouse from old windows.
2 hours
Beginner
$100 to $500
Introduction
Whether you want to prolong your growing season or get a jumpstart on spring planting, this mini greenhouse is for you. Start with some cedar boards and a few basic power tools, and you can knock out this outdoor project in just a couple of hours!Tools Required
- Circular saw
- Drill
Materials Required
- 1 x 2 cedar board
- 1 x 4 cedar board (3)
- 1 x 5-1/2 cedar board (5)
- 1-5/8-in. exterior screws
- Hinge screws
If you’ve ever wanted to build a greenhouse in your yard, but lack the space or commitment for a full-sized version, there’s a simple compromise: build a small one using an old window. This small window box is perfect for growing a few seasonal items, giving you a steady supply of fresh food for your table. It’s a fairly easy DIY project too, requiring just a few basic tools and materials. It’s also customizable, so you can fit it to whatever space you have or whatever materials you might have available.
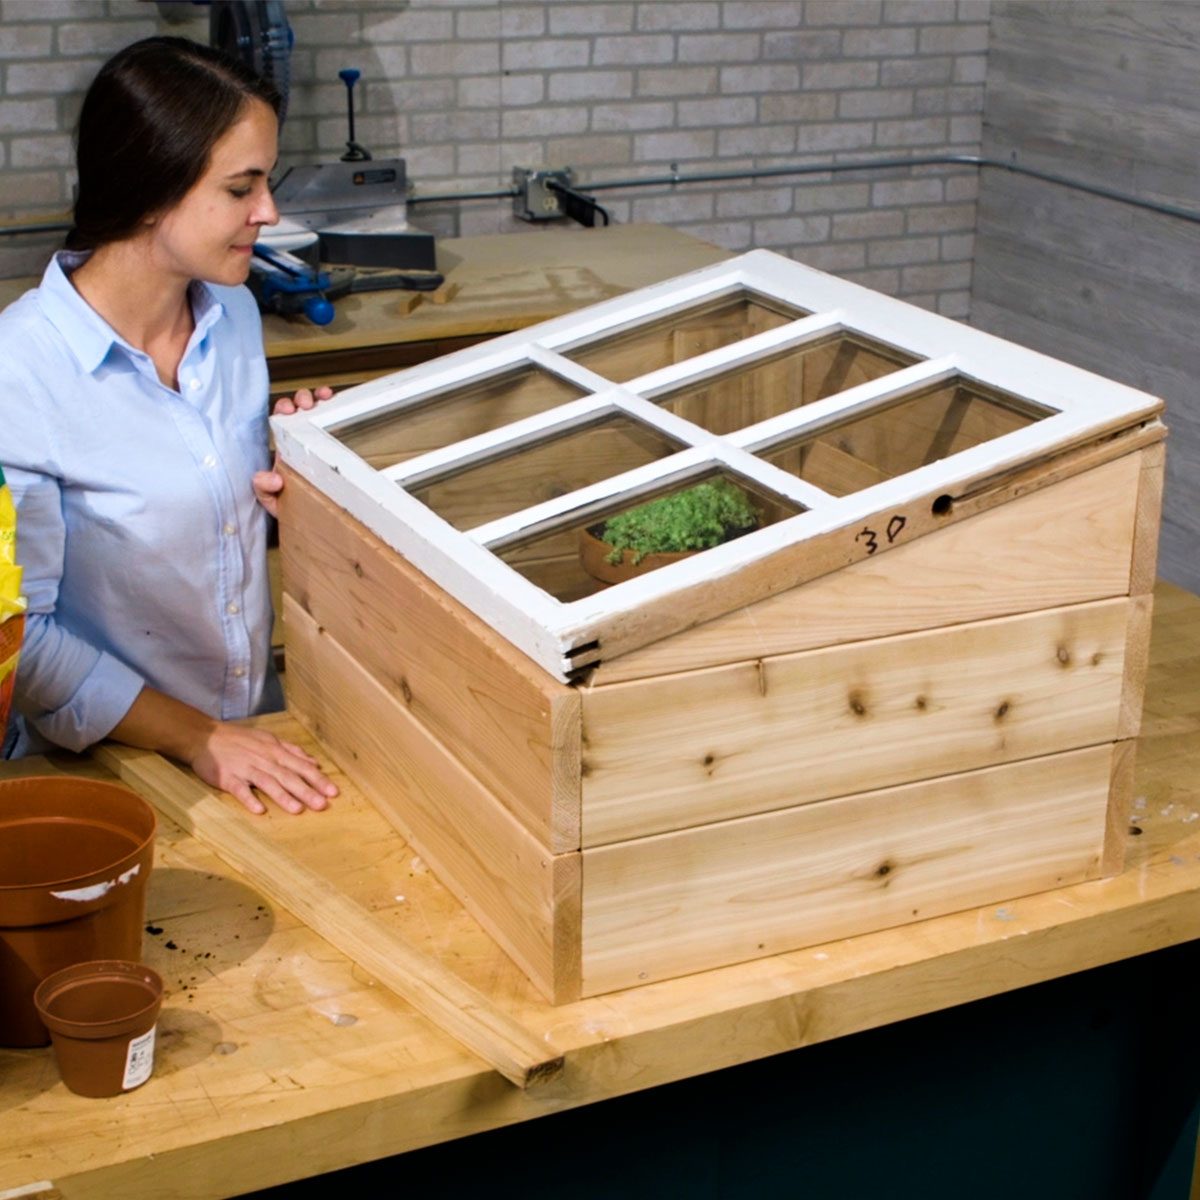
For this mini greenhouse project, we searched a local salvage yard for the perfect window. The one we purchased measures 28 x 23-1/4 in. and features a grid pattern with crackled white paint. We didn’t trim the wood window or alter it in any way for this project to preserve its vintage charm.
The following steps will show you how to build a mini greenhouse based on a window this size.
Note: The amount of wood that you will need for the greenhouse is determined by the size of the window.
Project step-by-step (8)
Cut the parts
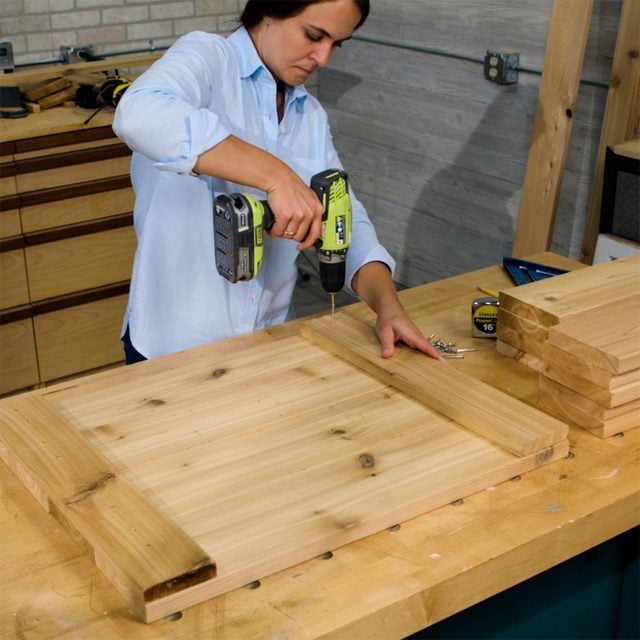
- First, cut four 1 x 5-1/2 in. boards to 25-1/4 in. for the bottom of the greenhouse box. Then rip one of these boards to 4-1/4-in. wide.
- Next, cut two front boards and three back boards to 27-1/2 in.
- Then, cut four side boards to 21 in.; the angled side pieces will be cut later on.
- Cut the following amounts and lengths of 1×4 for all brace pieces: two at 20-3/4 in. for the bottom, two at 8-3/4 in. for the front, two at 8-3/4 in. for the front sides, two at 14 in. for the back and two at 13 in. for the back sides.

Assemble the bottom of the box
- Layout the bottom pieces and the first course of front, back and two side pieces as shown.
- Screw the two 20-3/4 in. brace pieces to the bottom boards along the sides to hold them together.
- Screw the front, back and side pieces together and to the bottom.
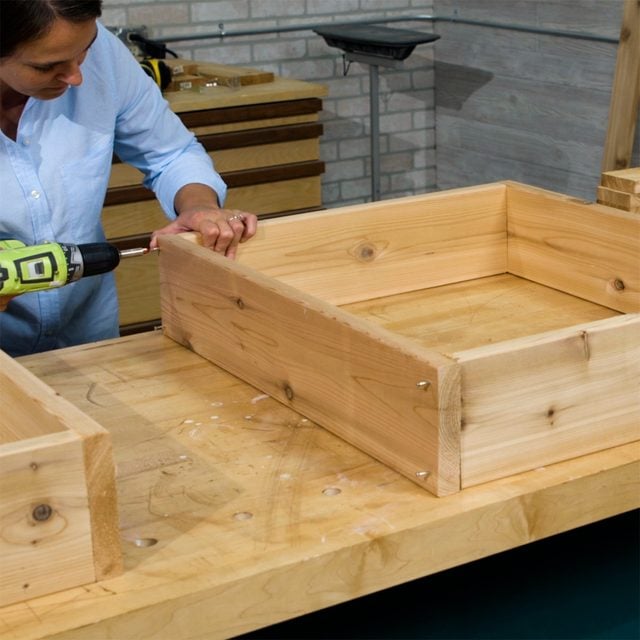
Build the second section of the box
- Separately, screw together the second course of front, back and side pieces.
- Stack the assembly on top of the first course that you created earlier.
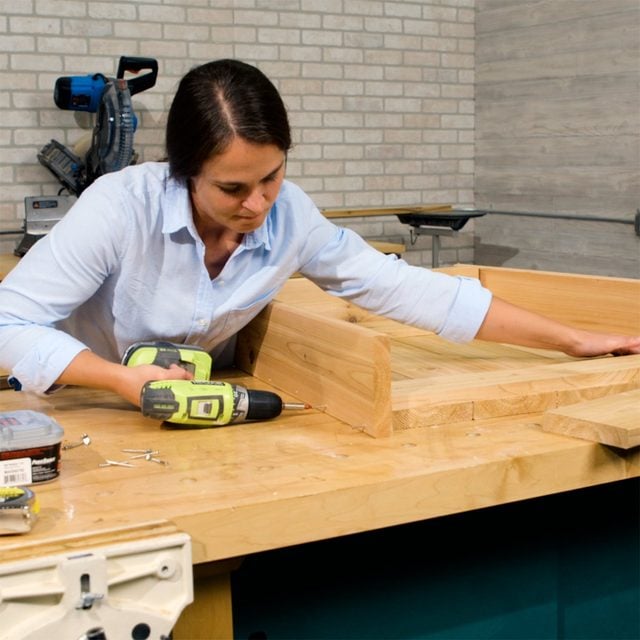
Attach front and braces to the box
- Lay the box on its side to screw on the front and front side brace pieces.
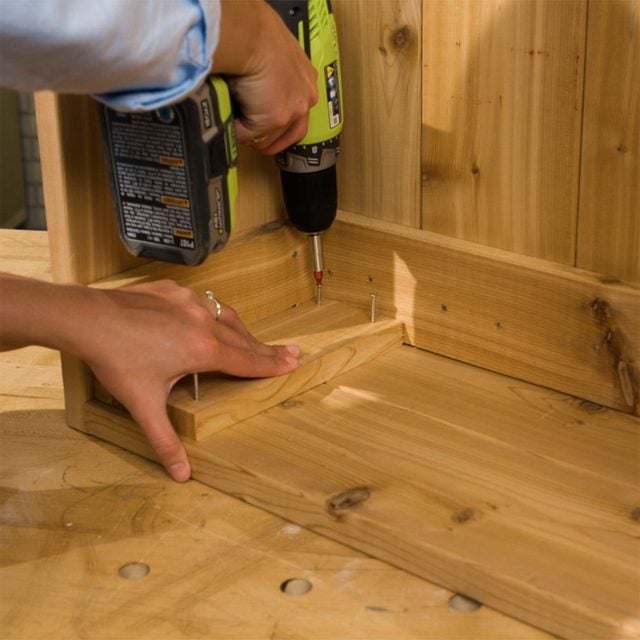
Attach third piece to the back of the box
- Turn the box so that the back is flat on the work surface; then, add the third back piece and screw on the two back braces.
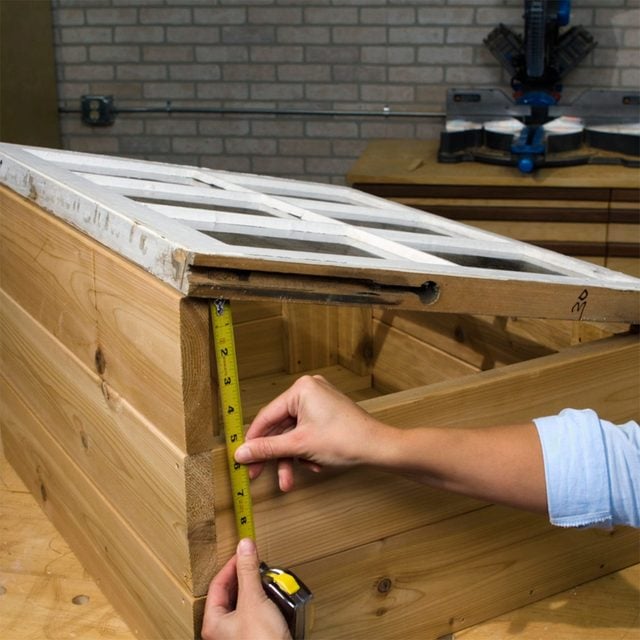
Measure and cut the angled pieces for the top of the box
It’s important to install the window lid of the greenhouse at an angle angle. That allows more sunlight to reach the plants inside, cut two angled pieces of 1 x 5-1/2 in. board.
- To find the measurements for the angled pieces, turn the box right side up and carefully place the window on top of the entire assembly, as shown.
- Measure the back, bottom and front of the openings and mark the measurements on a 1 x 5-1/2 in. board. Use a straightedge to connect the top of the back marks and the top of the front marks.
- Cut out the two pieces.
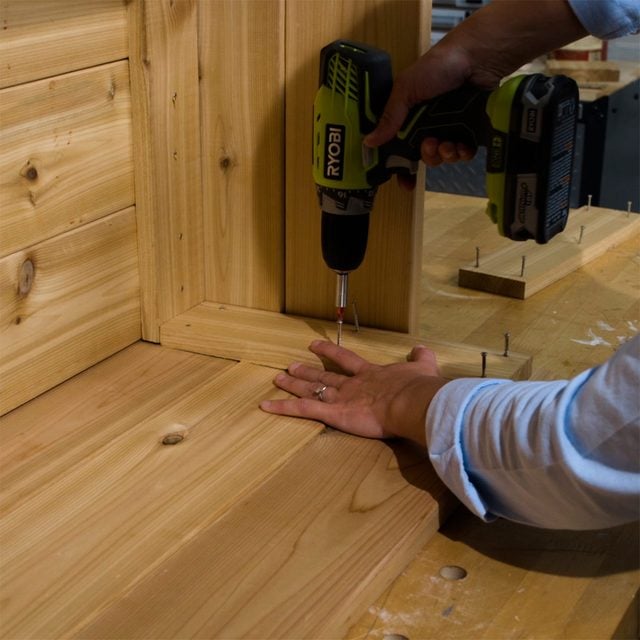
Attach angled sides pieces to the top of the box
- Carefully remove the window and screw the angled side pieces to the top back piece.
- Add the back side brace pieces to the inside of the box.
- We added screws through the small part of the angled pieces into the second course, too, for a little extra stability.

Attach the window lid to the greenhouse
The final step in the process is to add the window lid.
- First, mark where you want the hinges and screw them in place on the window.
- Place the window on the box and screw the hinges to the back.
- The last thing to do is to cut a piece of 1×2 board to fit inside the mini greenhouse. Then you can prop up the window lid as you tend to your cozy plants!

FAQ
Where to position a mini greenhouse?
Ideally, place your mini greenhouse in a spot that receives plenty of sunlight throughout the day. Most plants require at least 6 hours of direct sunlight, so choose a location with southern or southeastern exposure if possible. Ensure good air circulation to prevent fungal issues by avoiding placing the greenhouse too close to walls or large obstructions. Additionally, consider the proximity to a water source, as you’ll need easy access for watering. Proper placement not only encourages healthy plant growth but also makes it more convenient for you to care for your mini greenhouse garden.
Does a mini greenhouse need ventilation?
Yes, providing ventilation for a mini greenhouse is essential for maintaining a healthy and thriving environment for your plants. Even in smaller greenhouse setups, temperature and humidity can build up quickly, which can lead to mold, mildew, and overheating. Ventilation helps regulate these factors by allowing fresh air to circulate and preventing excessive moisture buildup. You can achieve ventilation through adjustable vents or windows in your mini greenhouse. These openings can be manually adjusted to control the airflow as needed. Proper ventilation not only promotes optimal plant growth but also prevents diseases and pests from taking hold in your mini greenhouse, ensuring a successful and enjoyable gardening experience.
What can I grow in a mini greenhouse?
You can grow a wide range of crops, depending on the size and design of your mini greenhouse. Cool-season vegetables like lettuce, spinach, and kale thrive in the controlled environment of a mini greenhouse during colder months. You can also start seeds or propagate plants earlier in the spring, providing a head start for your garden. Many herbs, such as basil, parsley, and cilantro, do exceptionally well in mini greenhouses, as do dwarf fruit trees, like citrus or figs. Additionally, exotic or sensitive plants that require specific temperature and humidity conditions can flourish in a mini greenhouse. With the right care and attention, a mini greenhouse can become your go-to space for year-round gardening and experimentation with various plant species.