How to Build a Garage Addition
Updated: Jan. 03, 2024
Create a storage nook for your lawn equipment, motorcycle, or anything else with this economical garage addition.
Multiple Days
Intermediate
$501-1000
Introduction
Create space in your garage for a motorcycle, ATV, riding mower, woodworking tools or odds and ends with this simple, wood-foundation addition.Tools Required
- Angle grinder
- Circular saw
- Cordless drill
- Dust mask
- Extension ladder
- Framing square
- Hammer
- Level
- Miter saw
- Posthole digger
- Reciprocating saw
- Safety glasses
- Socket/ratchet set
- Spade
- Stapler
- Stepladder
- Trowel
- Utility knife
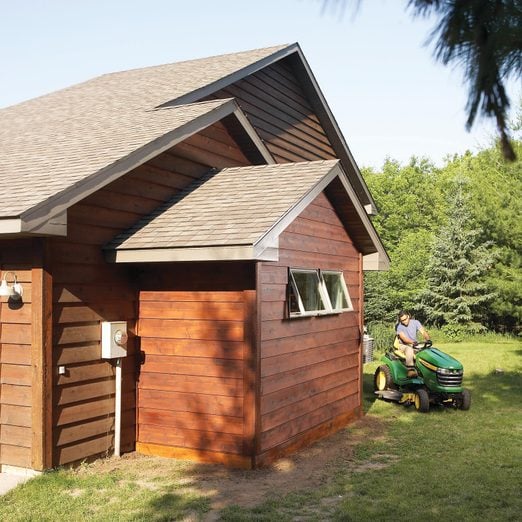
Is a packed garage keeping you from buying your dream motorcycle? Or maybe you just need a little more space for lawn equipment, bikes or your woodworking tools. A garage bump-out addition may be the solution to your overcrowded garage. If you have basic carpentry skills and experience building a deck, shed or other structure, then you can build this garage addition. You’re essentially starting with a traditional pressure-treated deck, then adding the walls and roof. In this article, we’ll focus on the tough parts of the project, like installing the beam and building the roof.
In addition to a basic set of carpentry tools, you’ll need a hammer drill to bore holes for the concrete anchors, and ladders or rented scaffolding to finish the roofing and other exterior details. While not essential, a reciprocating saw will simplify the wall tear-out.
We spent roughly $2,000 for materials for this 5 x 12-ft. garage addition. Your costs will vary depending on the type of siding, roofing and windows you choose.
With a helper, plan to spend about half a day installing the beam and a long weekend framing the addition. Then plan to spend another weekend finishing the exterior. The time it takes to complete the project will depend on whether you finish the inside as we did. Keep in mind that you can hire a siding, roofing or drywall contractor to complete parts of the project you’re not comfortable with.
Garage additions usually require a building permit. Contact your local building department to see what’s needed. Make sure to call 811 a few days before you dig the footing holes to have underground utilities located and marked.
Project step-by-step (13)
Build the Header
- Locate the center of your addition and mark the size of the opening on the bottom plate of the wall.
- Note: We centered the bump-out on the garage wall, but this isn’t necessary.
- Make the opening 7 in. narrower than the width of the addition.
- Make marks 3 in. beyond the opening marks on each side to locate the inside edge of the king studs.
- Cut king studs and nail them to the top and bottom plates.
- Note: For a 12-ft.-wide addition, the distance between the king studs should be 11 ft. 11 in. Cut the 2×10 headers to this length and nail them together with 10d nails. Nail a 2×4 to the bottom of the 2x10s to complete the header.
- Cut out the top section of the wall studs with a reciprocating saw to make a path for the new header.
- Saw the studs 11-1/2 in. down from the top plate and knock out the short stud sections with a hammer.
- Cut off the nails with a nail nipper or reciprocating saw.
- Note: You may also have to cut off a few sheathing and siding nails so they don’t interfere with the header.
- After nailing in the king studs, set the header in place on the cutoff studs.
- Wedge the header tight to the top plate by driving shims between the cutoff studs and the header at each end.
- Cut a pair of trimmer studs for each end of the header and nail them in place with 16d nails.

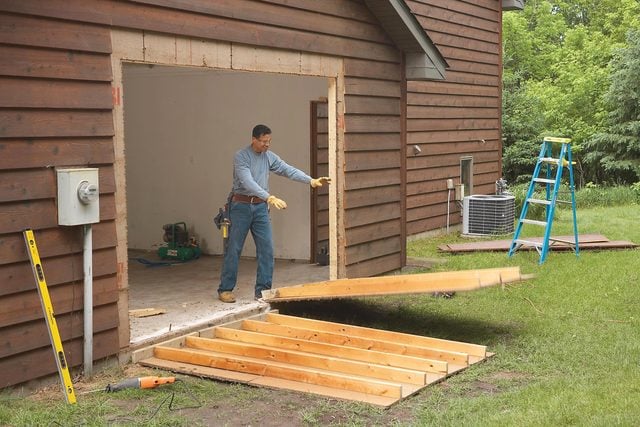
Remove the Wall
- Knock out the wall to create a new opening.
- First, cut the sheathing and bottom plate along the framed opening.
- Then cut the wall into sections and push them out.
- Pro tip: If you have vinyl, aluminum or steel siding, it’s probably easier to remove it from the entire garage wall and reinstall it after the addition is built.
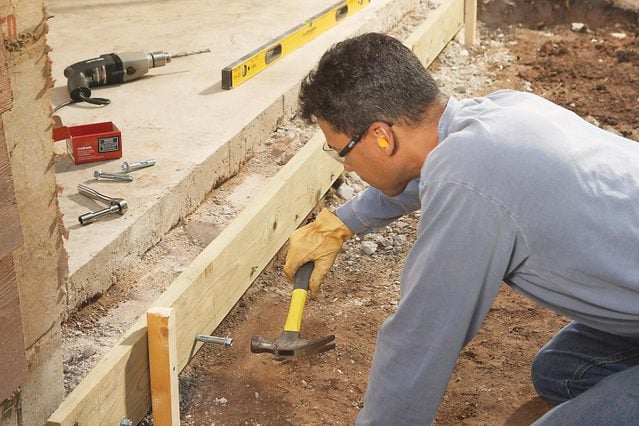
Attach the Ledger Board
- Attach the ledger board to the garage foundation with concrete sleeve anchors.
- Temporarily support the ledger with wood stakes while you drill holes for the anchors.
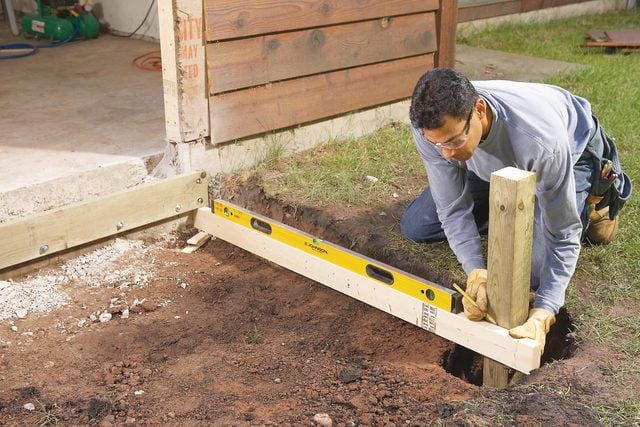
Establish the Post Height
- Mark the posts level with the bottom of the ledger and cut them off.
- Put the cutoff posts back in the holes, but don’t fill around them until you’ve built and squared the floor frame.
Build the Floor
- Start the floor frame by toenailing the joists to the ledger and nailing through the first rim joist into the floor joists.
- Install the second rim joist and nail on the joist hangers.
- Square the frame and nail the two layers of plywood to the joists.

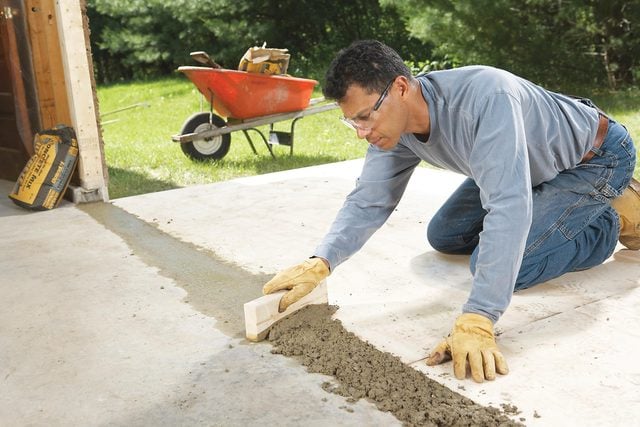
Fill Gaps
- Fill the gap between the garage floor and the plywood bump-out floor with concrete.
- Drag a scrap of 2×4 over the concrete to level it.
- Trowel it smoothly when it begins to harden.
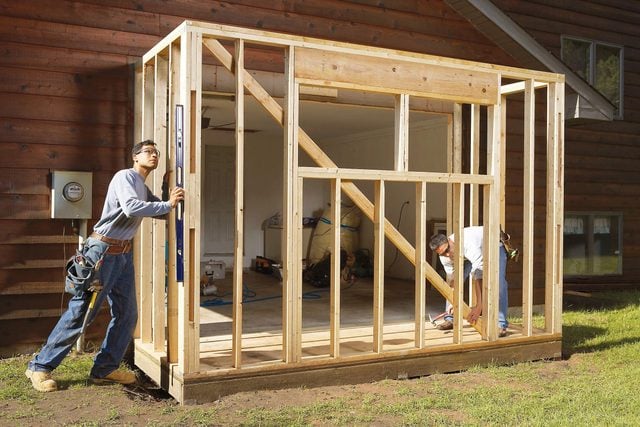
Add the Walls
- Build the walls on a flat surface like the garage floor.
- Cut the top and bottom plates for the long wall and mark the stud locations on them.
- Lay out the window opening to match the rough-opening dimensions provided by your window supplier.
- Assemble the wall by nailing the studs to the plates with 16d nails.
- Stand the wall on the platform, straighten the bottom plate and nail it to the rim joist.
- Plumb and brace the outside corners.
- Measure from the new front wall to the existing garage wall at the top and bottom on each side and cut the plates for the short walls accordingly.
- Note: If the existing garage wall isn’t plumb, this procedure will ensure that the short walls will fit correctly.
- Build the two short walls and set them in place on the platform.
- Position the walls and nail through the bottom plate into the floor with 16d nails.
- With a level, plumb the stud that’s against the garage wall before nailing it to the wall.
- Align the corner studs on adjacent walls and nail them together.
- Use a level to make sure the corner stud on the long wall is plumb and nail a diagonal brace to the inside of the wall.
- Complete the wall construction by adding the tie plates, making sure to cut them so they overlap the top plate at the corners.
Lay Out the Roof
- Make a rafter pattern by tacking a 2×6 to the garage wall, parallel to the garage roof, and drawing lines on it to indicate the center of the bump-out, the overhang distance and the bird’s-mouth cut.
- Use the pattern to mark and cut the rafters.
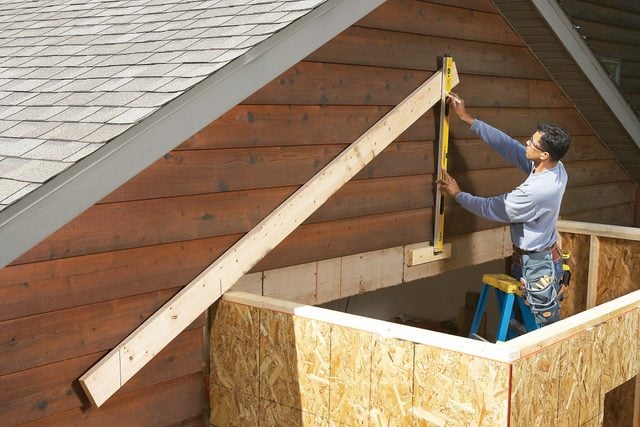
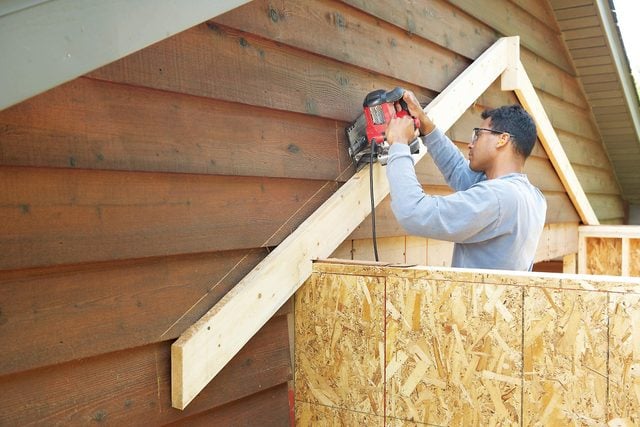
Cut the Siding
- Tack a pair of rafters to the garage wall as a guide for cutting the siding.
- Place a 2×4 spacer between the top ends of the rafters to simulate the ridge.
- Remove the rafters and pry off the siding.
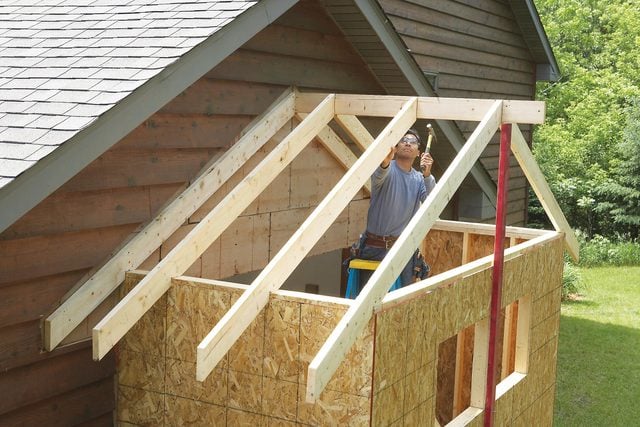
Frame the Roof
- Temporarily support the ridge while you nail the rafters to it.
- Nail through the ridge into the rafters and toenail the rafters to the tie plate.
- Then reinforce the connection between the rafters and the tie plate with metal hurricane ties.
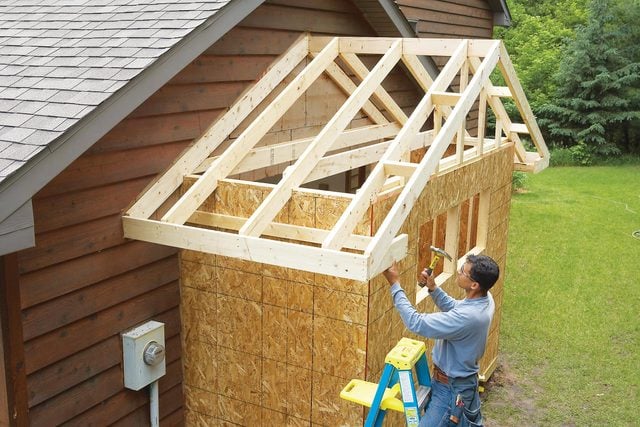
Build the Gable End
- Complete the roof frame and fill in the gable end rafters.
- Nail plywood over the roof frame.
Place Windows
- Install the windows according to the manufacturer’s instructions.
- Layer self-adhesive flashing over the nailing fins as shown, making sure each layer overlaps the one below and that the final assembly will shed water over the top of the building paper below the window.

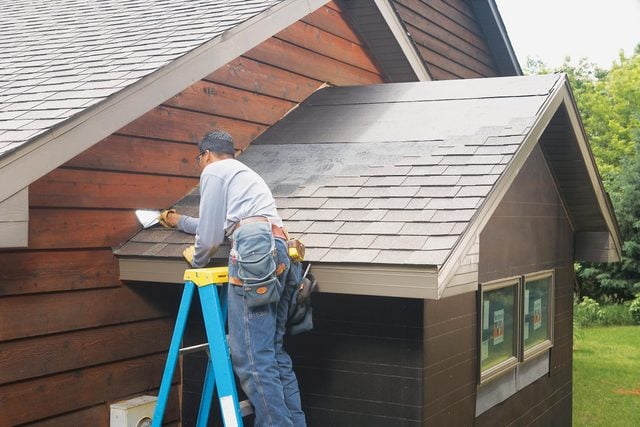
Flash and Shingle
- Install building paper and shingles according to local codes and the instructions on the shingle package.
- Slide galvanized metal step flashing under the siding and position it over the end shingle in each course.