
How to Repair Carpet: Removing Wrinkles
Updated: Jun. 30, 2017Rent the proper tools and restretch the carpet in less than an hour
Rent special carpet stretching tools and restretch loose or wrinkled carpet quickly and easily. We demonstrate the technique in four steps; you don’t have to hire a pro.
Step 1: Rent the proper tools
The holidays are coming, and even though your “favorite relatives” might not comment on those wrinkles in the living room carpet, trust us, they’ll notice. More important, if you ignore the wrinkles, they’ll wear and become permanent eyesores—even if you stretch them later. You don’t have to hire a carpet layer—fix it yourself with rental tools and our instructions. Rent a power stretcher and knee kicker for less than $40 (for four hours) at an equipment rental store. Then buy a carpet knife (not a utility knife) at any home center.
Step 2: Prepare the room and stretcher
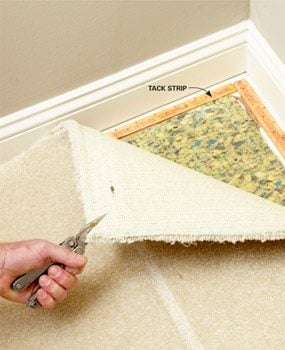
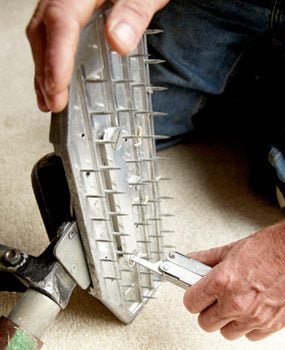
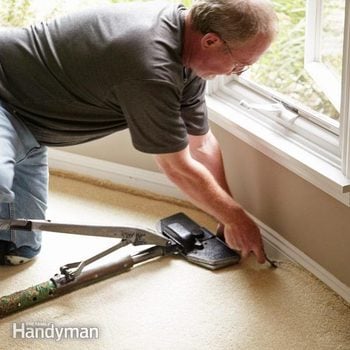
You’ll be stretching from the center of the carpet and pulling it at an angle into a corner. So move any furniture that’ll be in the path of the stretch. Loosen the carpet in the corner (Photo 1). Next, set up the power stretcher at an angle across the room. Set the tooth depth on the power stretcher based on the carpet pile depth (Photo 2).
Step 3: Stretch the carpet
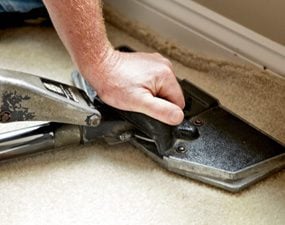
Operate the power stretcher with the lever and capture the excess carpet in the tack strip as you stretch. Use the knee kicker on both sides of the locked power stretcher to help lock the carpet into the tacks.
Step 4: Trim the carpet
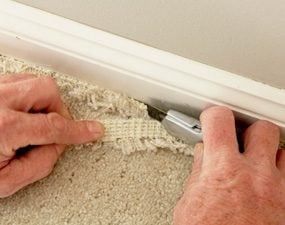
Once the wrinkles are out and the carpet is secure in the tack strip, cut off the excess (Photo 4).
Smooth Talk About Wrinkles
Professional carpet installer Steve Hoover explained how carpet gets wrinkled. “Carpet has to acclimate to interior conditions before it’s installed. That’s especially important if the carpet has been in a cold truck or exposed to high humidity. If it’s installed while it’s still cold or humid, you’re going to have wrinkling problems later on,” he said.
Improper stretching during installation is another cause. “Some installers lay the pad and carpet and secure it with just the knee kicker. Since the carpet was never really stretched, it’s going to wrinkle after it’s seen some traffic,” he added.
Steve’s advice? Make sure the installers allow enough time for the carpet to acclimate and insist that they actually stretch it with a power stretcher during installation.
Key comment: “If the carpet wasn’t stretched during installation, it’s going to wrinkle later.”
Required Tools for this Project
Have the necessary tools for this DIY project lined up before you start—you’ll save time and frustration.
- 4-in-1 screwdriver
- Pliers
- Putty knife
