
How to Replace a Fluorescent Light Bulb
Updated: Jul. 07, 2023
First step? Check the fixture for other problems.
Introduction
When fluorescent bulbs go bad, there may be a problem with the fixture. Learn simple repairs for the most common problems.Tools Required
- 4-in-1 screwdriver
- Wire stripper/cutter
Materials Required
- Bulb socket
- Replacement bulb
Project step-by-step (4)
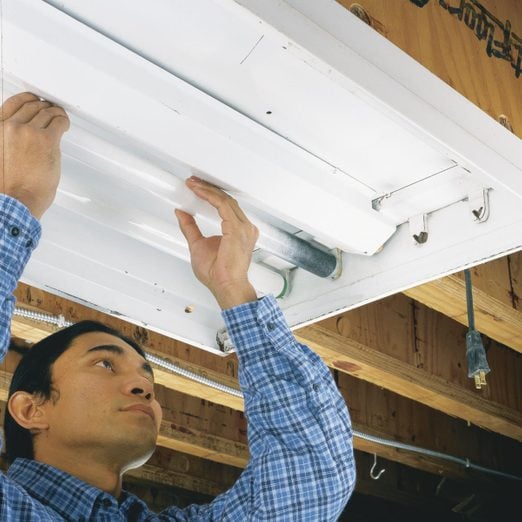
Servicing a fluorescent light: Pull the bulb
Unplug the light and twist the bulb 90 degrees with both hands. Pull one end straight down to free it from the socket and then lower the entire bulb.
Remove the end cover
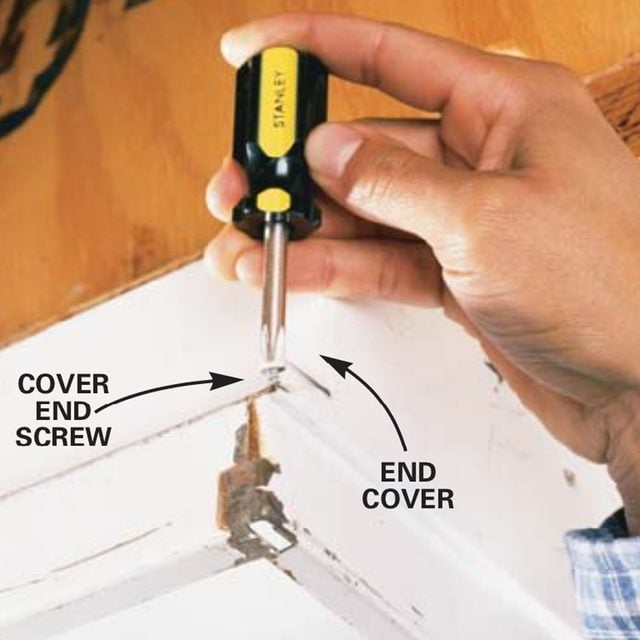
Unscrew the fixture end cover. Screw locations will vary, but double-bulb units typically have a screw on each side, and four-bulb units typically have an additional screw on the top center edge. Remove all screws and pull off the cover.
Remove the fluorescent light socket
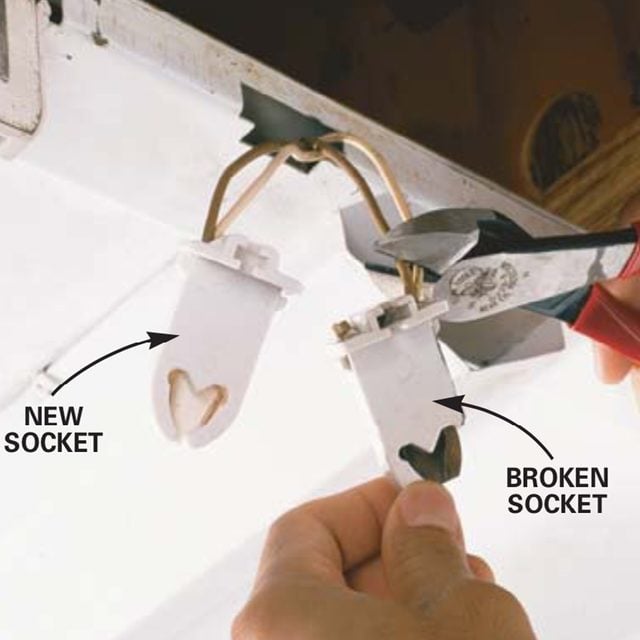
Slide out the fluorescent light socket to expose the wiring. It’s very important to keep the wiring order straight, so cut one side of the old socket wiring loose at a time. Strip the wiring back 1/2 in., then press the bare wire ends into the terminal slots on the new socket. The terminal slot works like a barbed fishhook; once a wire is pushed in, it cannot be pulled out. Repeat the process for the remaining wires and then replace the socket.
How to Change Auto Light Bulbs
Close up

Push the stripped wire into the new terminal, being careful to insert the correct wire into each terminal.
Fluorescent light fixtures are durable and virtually maintenance free, but occasionally service and repair are required. If you’ve got a fluorescent fixture that doesn’t light up, flickers on and off, or won’t hold a bulb, we’ll show you how to troubleshoot the problem. Replacement parts are easy to install and can be found at home centers and hardware stores.
If the fixture won’t light up at all, it may not be getting power. Check the circuit breaker or fuse box, and reset or replace the necessary equipment.
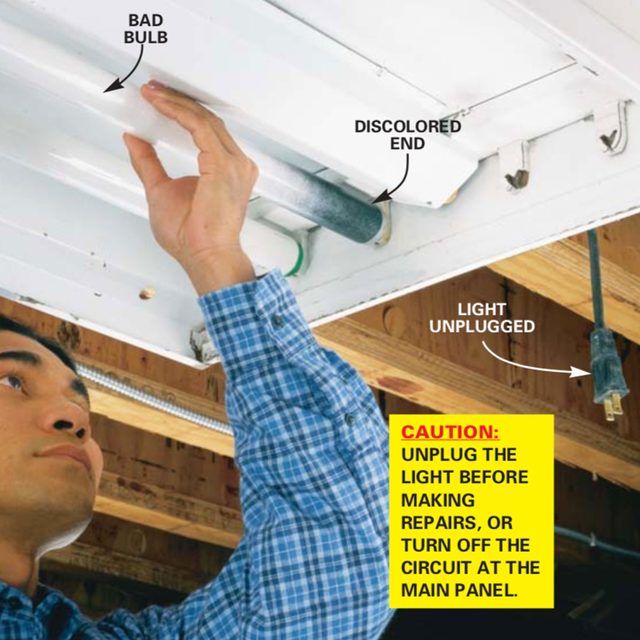
Fluorescent light bulbs typically last many years, but when one flickers on and off, or the end turns light gray to black in color, you’ll just need replacement light bulbs. Photo 1 shows how to tell if a fluorescent bulb is bad and how to replace it. Replace the bulb with the same size bulb.
Another common problem is cracked sockets, caused by bumps from other objects or stress from removing a bulb. Shut down power to the light, remove the bulbs and then open up the fixture to gain access to the broken socket (Photo 2). There will be two or four wires coming into the socket. Keep the wiring straight by swapping wires from one side of the socket at a time as shown in Photo 3.
If the fixture still doesn’t work, then the ballast is probably shot. The ballast boosts the incoming voltage to start the tubes, and then regulates the current to provide continuous light. Ballast replacement can cost as much as a new fixture, so buying a new fixture may be a better investment.
Energy Act Requires New Light Bulbs to Conserve Energy