How To Fix Wired Earbud Headphones
Updated: Mar. 08, 2024
Cheap earbuds are disposable, but don’t toss out an expensive pair. If the problem is a broken connection, you can fix them yourself with a soldering iron and electronics solder.
Introduction
Fix expensive earbuds by resoldering broken electrical connections. It's a quick and easy process.Tools Required
- Flat-head screwdriver
- Soldering iron
Materials Required
- Desoldering braid
- Electronics solder - .032-diameter
- Super glue
Project step-by-step (3)
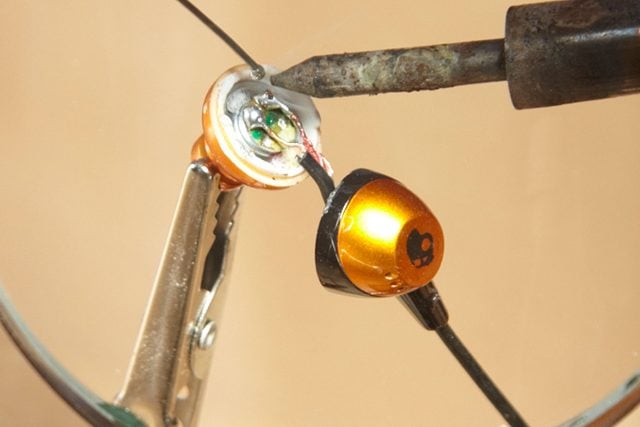
Check the Connection
First, locate the problem. If only one speaker is acting up, the problem is likely the connection in that earbud. Use a small flat-blade screwdriver to pry the earbud housing apart. Look for a wire that’s broken away from the circuit board. You may have to superglue the two pieces back together when you’re done.
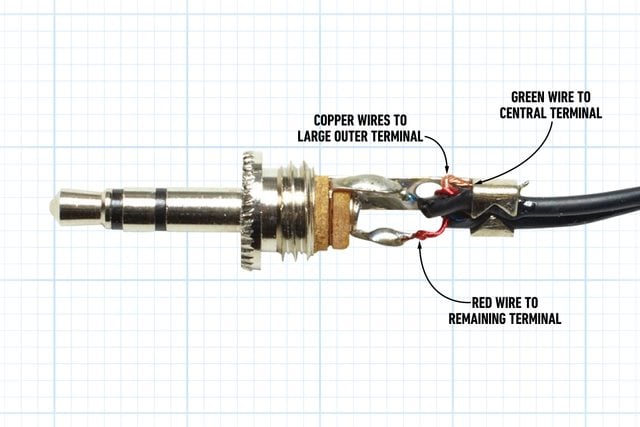
If neither channel is working, the problem may be in the plug or jack.
Desolder First
Wick up the old solder with desoldering braid for a fresh, clean start. Or use a scrap piece of lamp cord to soak up the solder.

Solder the Connection
Place the wire on the circuit board and hold it in place with the tip of the soldering iron (with .032-diameter electronics solder.). Add solder. Then remove the hot iron and hold the wire in place until the solder cools.
Allow the soldered connection to cool and then test the earbud.