
How to Adjust Storm Doors
Updated: Feb. 19, 2023Don't live with it—fix it!
- Time
- Complexity
- Cost
- An hour or less
- Beginner
- Less than $20
Straighten a sagging storm door
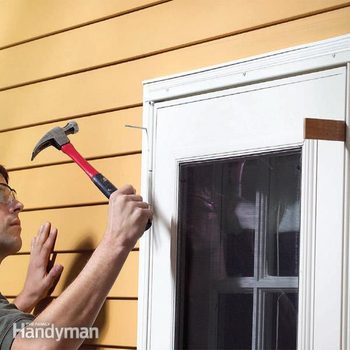
If your storm door won’t close without a firm tug—or it won’t close at all—it’s probably rubbing against the frame, wearing off the paint and grating on your nerves. Most storm doors are mounted on a metal frame that’s screwed to wood molding surrounding the door. When the metal frame on the hinge side of the door comes loose, or the molding itself loosens, the door sags and scrapes against the other side of the frame, usually near the top.
Before you grab your tools, partly open the door from the outside and push the door up and down. Watch the hinge side of the door frame. If the molding moves, secure it with extra nails (Photo 1). Start by adding a couple of nails near the top of the wood trim. Then add nails farther down if necessary. Sink the nailheads slightly with a nail set, cover the heads with acrylic caulk and touch up the molding with paint.
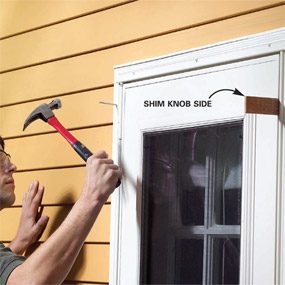
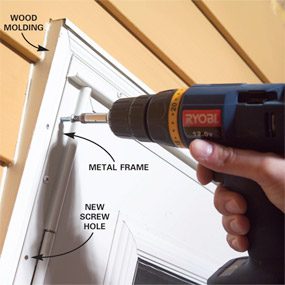
More often than not, it’s the metal frame that comes loose, not the wood trim. To fix the metal frame, buy a few No. 8 x 1-in. pan head screws. Stainless steel screws are best. Stick a shim between the door and the frame (as in Photo 1), tighten the existing screws and drill new screw holes through the frame. Press lightly as you drill the metal; you don’t want to drill into the wood molding with the 3/16-in. bit. Then drill a 3/32-in. pilot hole into the wood and add screws (Photo 2). In most cases, two or three screws added near the top of the frame will do the job. However, if you’re sure your door is beyond repair, here are the best options you can choose from; along with a quick guide to help you install your own storm door.
Required Tools for this Project
Have the necessary tools for this DIY project lined up before you start—you’ll save time and frustration.
- Cordless drill
- Hammer
- Nail set
Required Materials for this Project
Avoid last-minute shopping trips by having all your materials ready ahead of time. Here’s a list.
- 10d galvanized Finish nails
- No. 8 x 1-in. stainless steel screws
- White spray paint (optional)
- Wood filler
- Wood shims
