
Replace a Section of Sidewalk
Updated: Feb. 22, 2023
Here are three facts about concrete: It’s hard, it will eventually crack, and it’s expensive when installed by a professional.
Sponsored by Sakrete
Here are three facts about concrete: It’s hard, it will eventually crack, and it’s expensive when installed by a professional. Using rental equipment and Sakrete High-Strength Concrete Mix, I was able to complete a concrete replacement project in less than one day. Concrete work is a linear process, making the task easy to organize and execute. Do it yourself, save some money, and experience the satisfaction of learning a new skill.
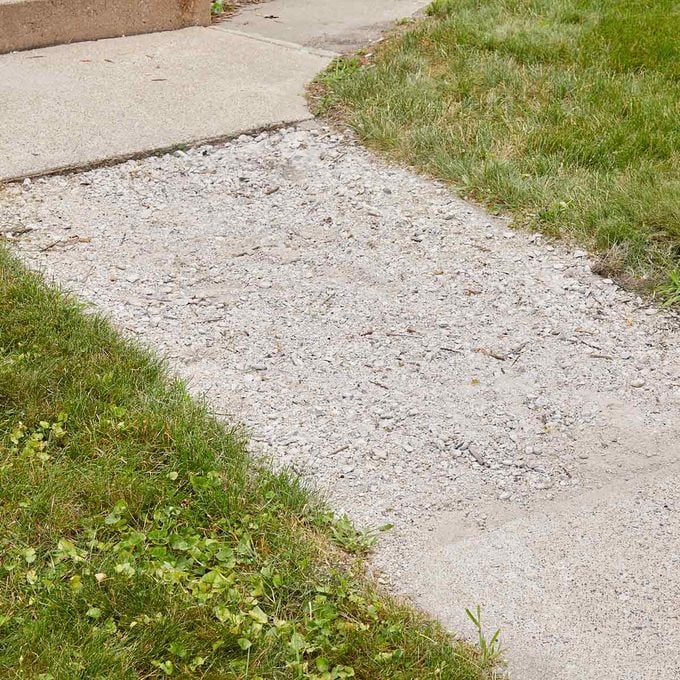
The walk that I wanted to replace was a section about 7-1/2 ft. long by 3-1/2 ft. wide. The surface of the existing concrete had deteriorated to dust and loose aggregate. This condition was either caused by too much water in the mix or exposure to heavy rain before curing. Either way, the section was disintegrating and had to go.
Sakrete High-Strength Concrete Mix comes in a variety of bag sizes. I chose the 60-lb. bags for this project. Each bag is equivalent to 0.45 cu. ft. So with my 2×4 forms, I calculated L (ft.) x W (ft.) x Thickness (.33 ft.) to determine the cubic feet of concrete required. Always purchase a few extra bags to have on hand, just in case. Once the pour is underway, running short on concrete can mean an emergency trip to the home center, and a compromised pour. “Curing concrete waits for no man.” I would rather return a few bags of unused product than come up short, especially when I’m working by myself.
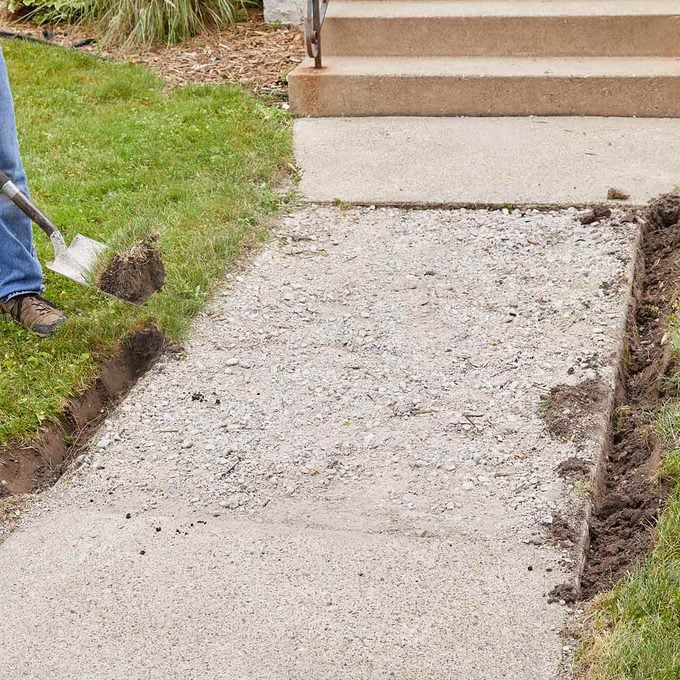
To start, I cut back the sod on both sides of the walk. I ended up with a trench that was about 6 in. wide and 6 in. deep. This trench would accommodate the wood forms in a later step.
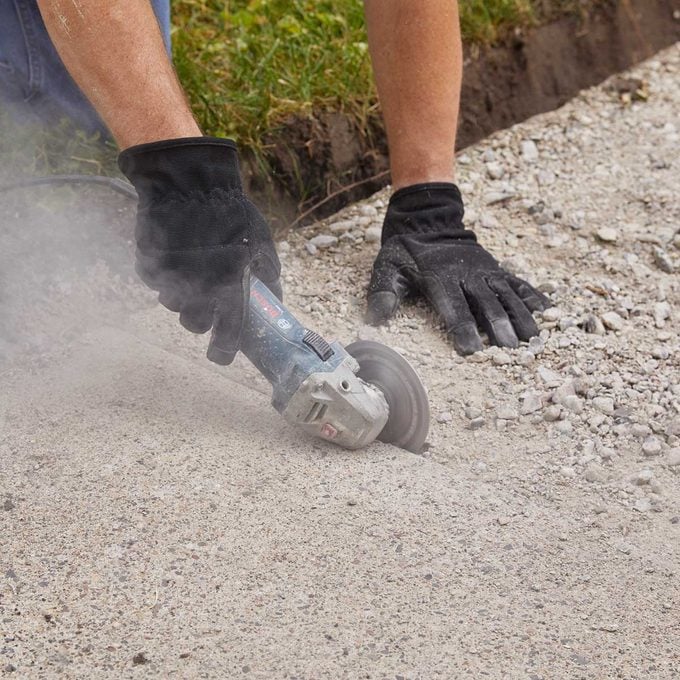
Next, I cut along the ends of the damaged section. When I later broke up the bad concrete, these cuts prevented cracks from spreading into the good sections. You can use a circular saw equipped with a masonry blade or an angle grinder as I did. (Yes, I know: I really need to put the guard on my grinder.)

I figured that the slab was the standard 3 in. or so in thickness. I soon discovered that I erred on that calculation! Breaking the slab out with a sledge and pick was arduous and time-consuming. I also discovered that the slab ranged from about 2 in. to more than 8 in. thick. A rented jackhammer would have saved me a lot of time and sweat, done the job in about an hour, and broken the slab into larger, easy-to-handle pieces. The sledge method left me drenched in sweat and then required me to move many pails of softball-size (and smaller) pieces out of the work area. Note to self: Next time, rent that jackhammer.
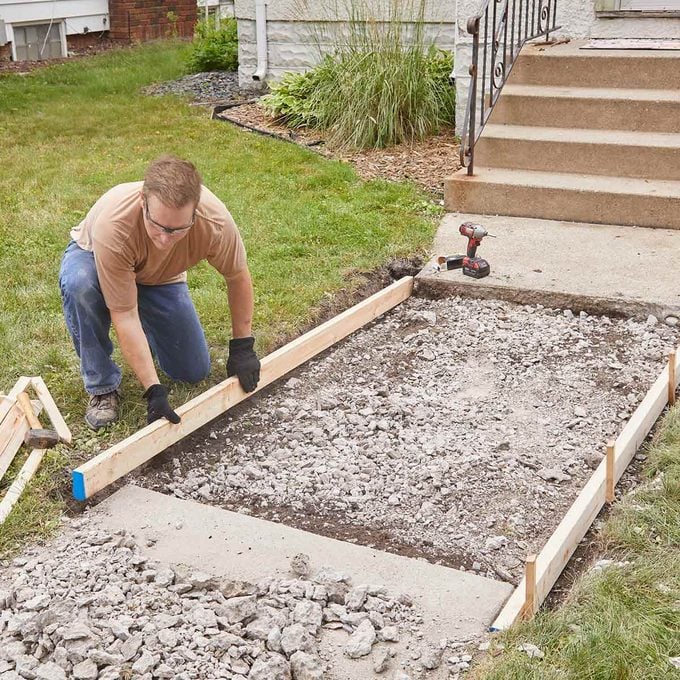
After clearing out the demolition area, I installed my 2×4 forms. Straight lumber makes every job easier, so I handpicked the lumber for the forms. In order to match the elevation of the existing walk on both sides of the new pour, I made sure the ends of the boards were even with the top edge of the existing concrete at each end of the forms.
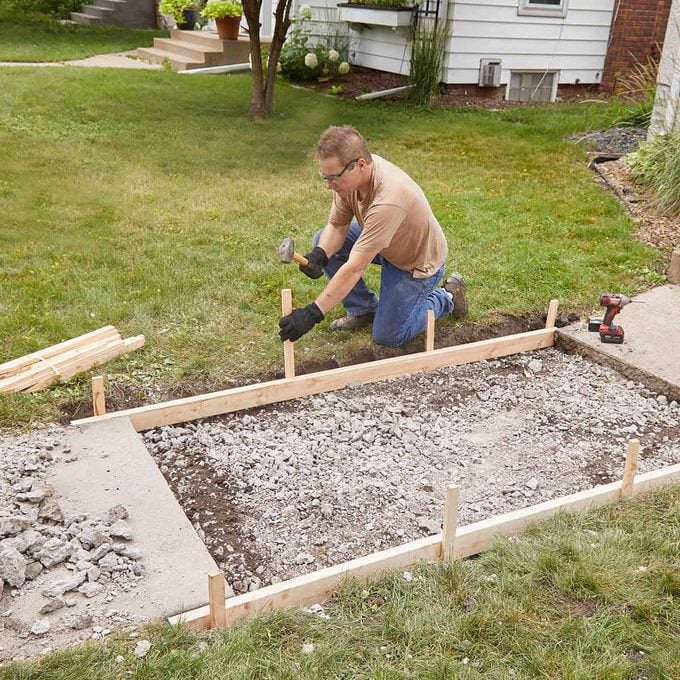
I staked the forms with wood stakes and fastened them to the forms with duplex concrete screws. I prefer the screws rather than nails because they’re easy to install, can be used multiple times and allow for quick adjustments. I don’t skimp on the number of stakes. I want the form to be held securely and to remain straight. I used four stakes per side to accomplish these objectives.
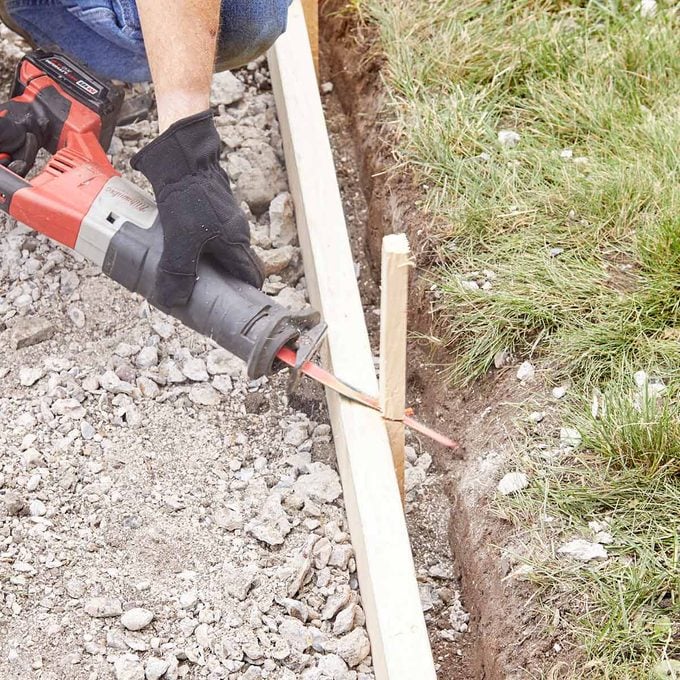
Once the forms were in place, I used a recip saw to cut the tops of the stakes flush to the top of the 2×4 forms. This would allow a clear path for my screed (a piece of 2×4 cut about 10 in. wider than the width of the forms). The screed needs to slide smoothly over the top edges of the form.
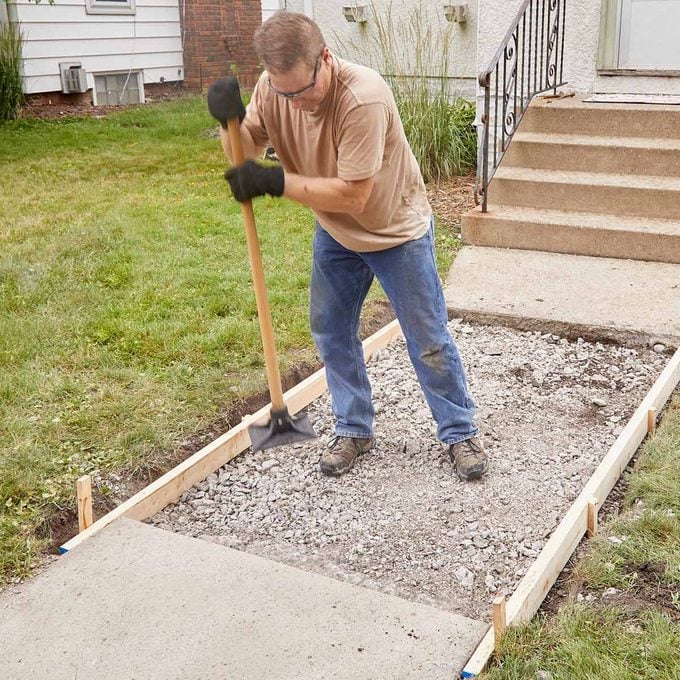
With the forms secured, I evenly distributed the stone and small concrete shards with a shovel. Then I hand-tamped the entire area to compact the base material.
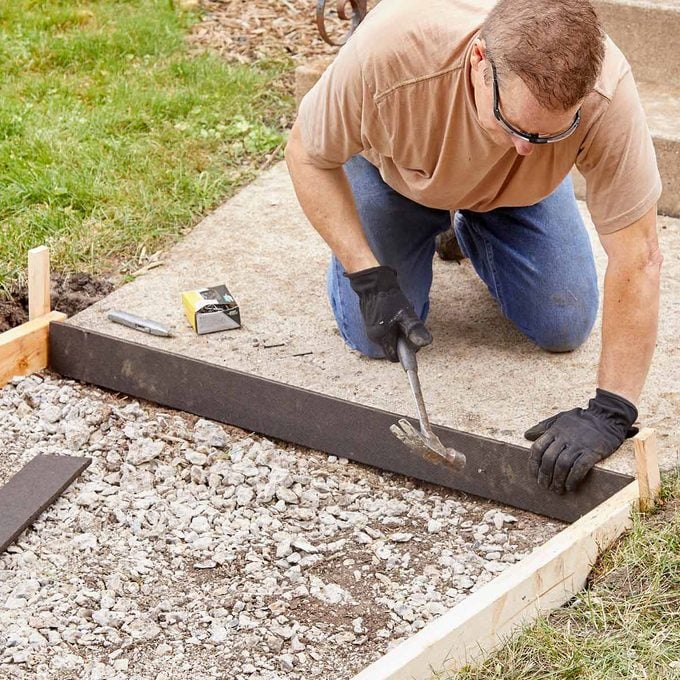
I used fiber expansion joint material on both ends to isolate the new concrete from the existing. After cutting the expansion joint strips to length with a utility knife, I tacked them in place on the existing concrete with a couple of fluted masonry nails.
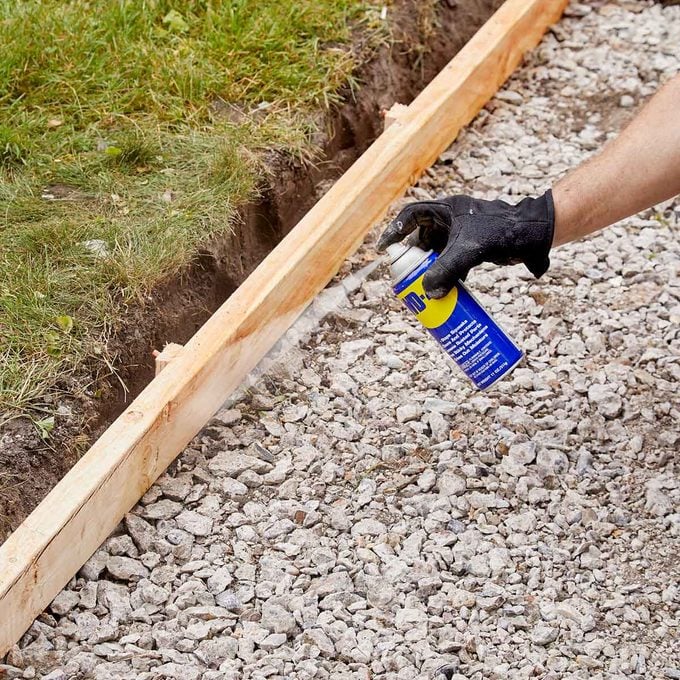
A release agent applied to the forms allows for easy removal after the concrete has cured. I used spray WD-40, but even cooking or motor oil wiped on with a rag would suffice.
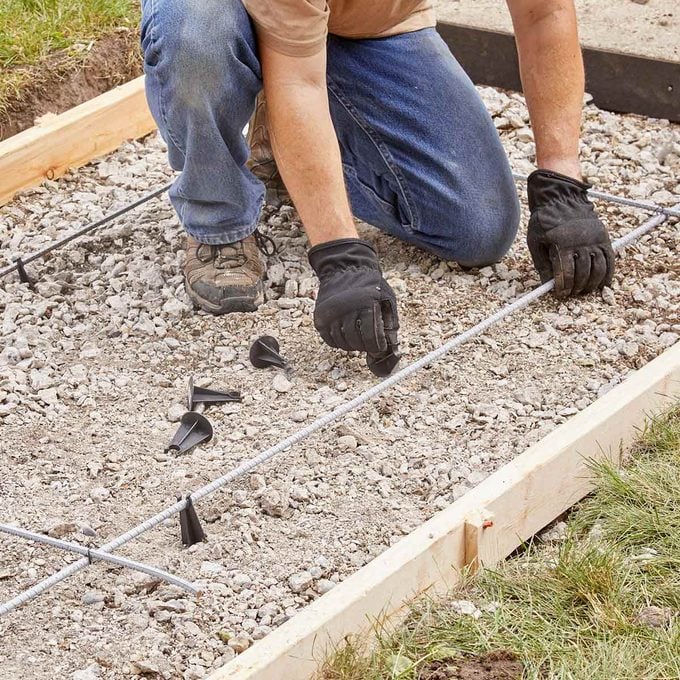
Although it’s not too common to see rebar installed in sidewalks, I’m a believer in using 3/8-in. bar to add strength and to keep the slab intact in the event of cracking. I coated the rebar with a spray primer. A few minutes later it was dry, and I cut it to length with an angle grinder. I used tie wire to secure the four pieces together in a simple grid, and laid the grid in between the forms. It’s important that the rebar be about 1-1/2 in. below the surface of the concrete, so I set the rebar on plastic chairs to hold it at the proper elevation.
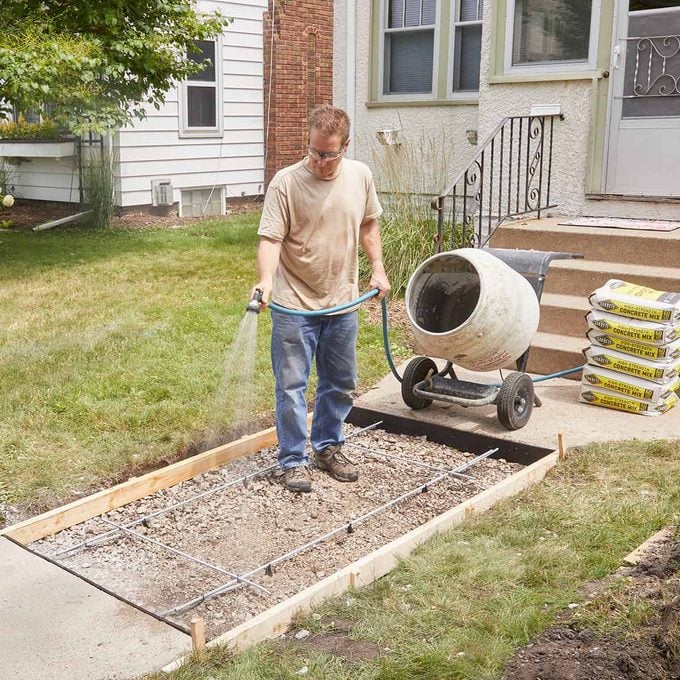
Because I was minutes away from mixing concrete, I used a garden hose to spray down the base material in the forms. The damp aggregate would prevent the concrete from losing moisture too quickly.
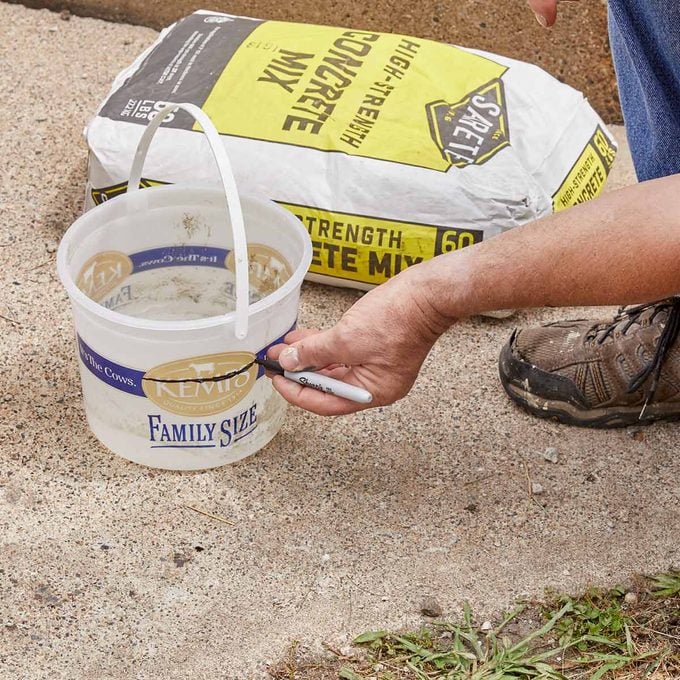
After reading the instructions on the Sakrete High-Strength Concrete Mix bag, I used a clean container and carefully measured and marked the required 2.5 quarts of water. With this marked container, I was able to achieve a very uniform mix from batch to batch.
Check out How to Properly Mix Concrete.
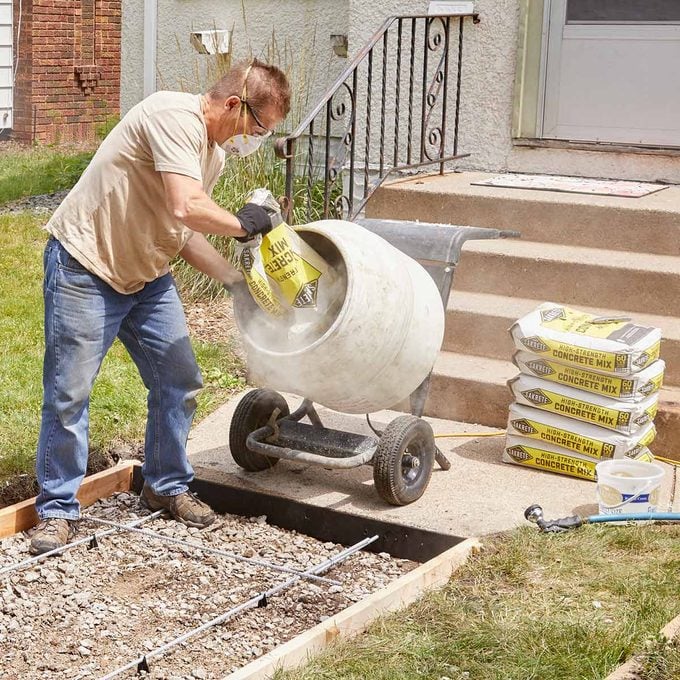
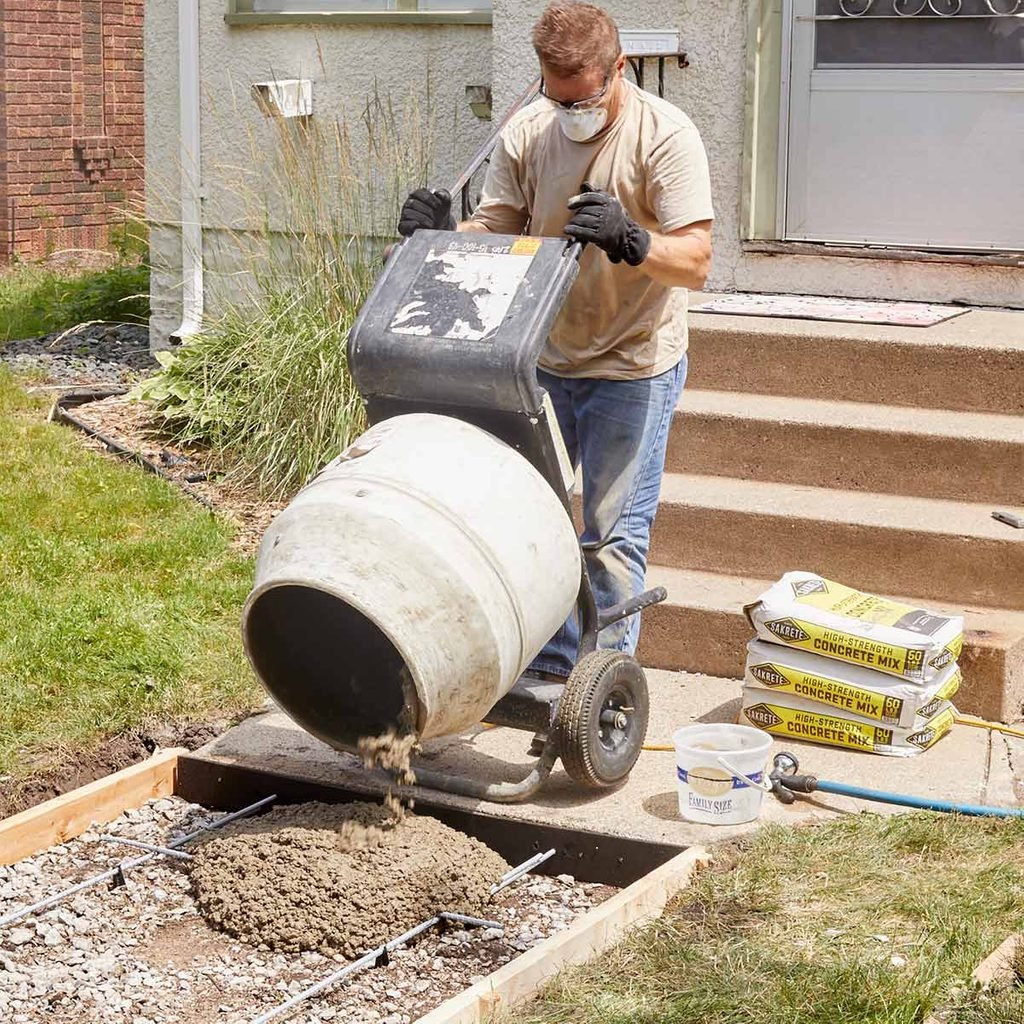
There is no better way to mix concrete on a small job than with an electric drum mixer. A mixer rents for about $50 per day and can easily be transported in the bed of a pickup. I adhere to a uniform method when mixing. I turn on the mixer and add two pails of water to the drum. Next I add two bags of Sakrete High-Strength Concrete Mix and allow the product to mix uniformly. Then I add half a container of water, then the third bag, then the remaining water. I allow this mix to blend for a few minutes. If it appears too dry, I will add up to about 1/2 cup of water, but no more than this. Excess water creates weak concrete and a poor-quality finished surface.
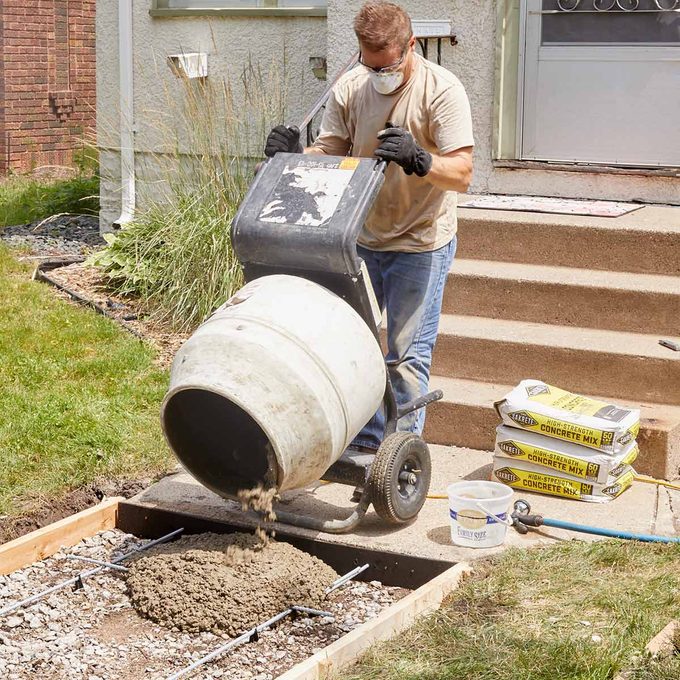
After each three-bag Sakrete High-Strength Concrete Mix batch, I dumped the mix into the work area and moved the mixer to another location around the forms. At the new location, I started the next batch, mixed it, dumped it and moved the mixer again. This allowed me to more efficiently place the wet mix in the work area, as opposed to dumping the concrete in one spot and having to distribute it with a shovel.
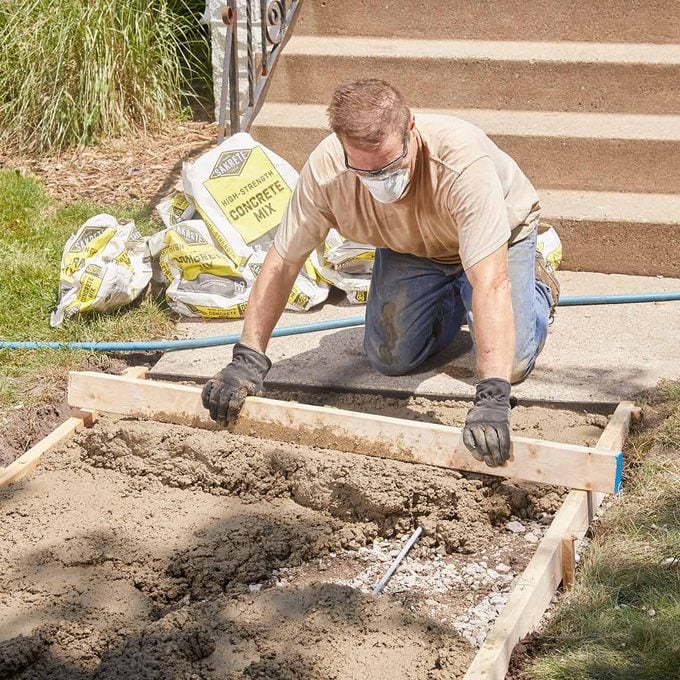
I continued mixing batches of Sakrete High-Strength Concrete Mix until the forms were slightly overfilled. I screeded as I dumped each batch, but for the final screed I secured a helper. We each held one side of the screed and with a sawing motion, back and forth, leveled the concrete with the top of the forms. When I encountered a low spot, I added some concrete in front of the screed to fill the void.

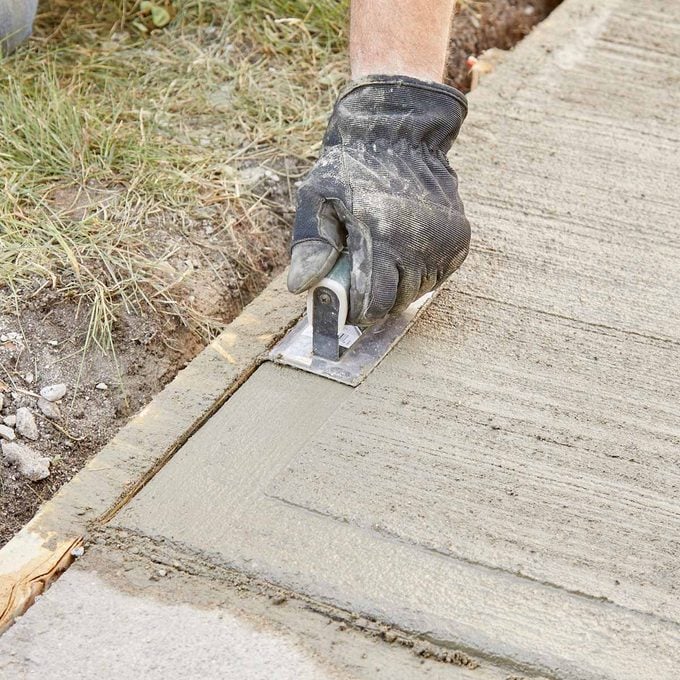
Once the forms were evenly filled, I used a magnesium float to smooth the surface and work the aggregate down into the mix. I move the float in a smooth arc, skimming across the top of the concrete, and work around the perimeter of the forms. It’s important to not overwork the concrete at this stage. I try to achieve a uniform surface, and then I step back to allow the water to disappear from the surface of the mix. The brooming in the next step will take care of any minor surface flaws.

Depending on the temperature and humidity, it may take 30 minutes or so for the surface of the concrete to appear firm (but not dry) and free from excess water. Next, I used a broom and lightly dragged it across the surface, always in the same direction. This created a slightly rough, nonslip finish.
I used a hand edger to form a rounded edge around the perimeter of the slab. Finally, I added a control joint with a hand groover at the midpoint of the slab.
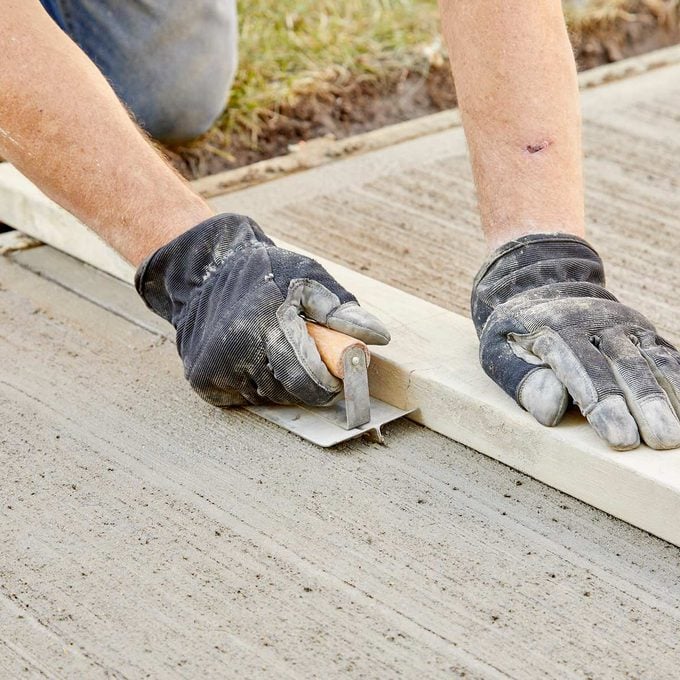
This V-groove provides an avenue to control any cracking that might occur later. When the concrete cracks, I want it to crack in the control joint, and not across the slab in a random direction.
Although I chose to edge and groove the concrete after the surface was broomed, I could have reversed the order and broomed last. It is purely an aesthetic choice. Either way is fine, and brooming as the last step is probably easier.
After an hour or so, I laid a sheet of lightweight plastic on the slab to control water evaporation. This aids in uniform curing and contributes to a strong surface finish. I leave the plastic in place for two or three days. Before leaving the site, I made sure to surround the slab with caution tape! I removed the forms the next day, replaced the dirt and sod along the edges.
To learn more, visit sakrete.com.
— Tom Dvorak, Contributing Editor