How to Build Deck Stairs
Updated: Mar. 21, 2024
Calculating the step dimensions, laying out stringers and building a sturdy set of deck stairs.
A full day
Intermediate
$200 and up
Introduction
Sure, building deck stairs can be tricky. But in this story, we'll make it easy by showing you how to estimate step dimensions, layout and cut stair stringers, and assemble the stair parts.Tools Required
- Chalk line
- Circular saw
- Clamps with a reach of at least 18 inches
- Drill/driver
- Framing square
- Hammer
- Handsaw
- Level
- Safety glasses
- Sawhorses
- Stair gauge
Materials Required
- 2x12 x 12 ft. (3)
- 2x6x 12 ft. (1)
- 3-in. deck screws
- Decking for risers and treads
Building a deck makes for a fantastic addition to any home. But it’s not going to be much use without a good set of stairs to get up and down from your primary backyard relaxation spot. The right set of stairs is also a key part of the design, connecting the deck with the rest of your property.
Building stairs might look a little intimidating to the novice DIYer, but they don’t have to be. This project will help guide you through the process, whether you’re doing it for the first time or just in need of a little refresher. Done right, your stairs and deck will last for decades. These DIY steps will also work for replacing an old set of stairs or building new ones. So grab your tools and let’s start building!
When to call a pro
Despite the fact that this article will assist you in understanding the complexities of building deck stairs, there is more to it than simply cutting deck boards and screwing them together. It is imperative that the calculations you do (and we will walk you through them) be precise and accurate, that your craftsmanship matches the same precision, and that you adhere to your local residential stair codes, which can be complicated.
That said, even if you are a seasoned DIYer, you shouldn’t hesitate to hire a professional to construct your deck stairs if you are unsure of your abilities or simply lack the time or resources.
FAQs
How to attach stair stringers to a deck?
Stair stringers are usually attached to a deck using galvanized steel stair stringer connectors or joist hangers that are fastened to the rim joists.
How wide should deck stairs be?
Building codes require stairs to be at least 36 inches wide for egress.
How many stringers for deck stairs?
Stringers should not be placed more than 18-inches on center. Therefore, the narrowest staircase allowed by code (36-inches) should have three stringers. Stairs wider than that will require four or more.
Project step-by-step (14)
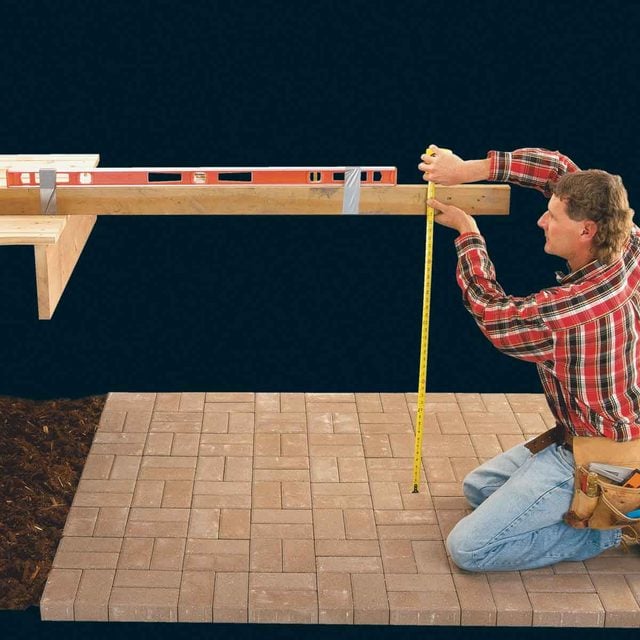
Measure the Total Rise to the Deck Landing
- Picture a stair slope in your mind to estimate about a 40-degree slope and guess at a landing point.
- Rest any straight piece of deck lumber on the deck and level it over to the landing point.
- Measure down to the ground. That’ll be the approximate height of the stairs, “X.”
How to Calculate Stair Risers
- Divide “X” by seven inches (an approximate step height) and round off the remainder, up if it’s .5 or more, or down if it’s less than .5.
- That will give you an approximate number of stair risers. The actual recommended riser height is 6-1/2 to 8-in.
- If the riser height is too tall, re-divide “X” by 8 and start again
Calculating Stair Treads
- Simply subtract one from the number of risers.
- There’s always one fewer tread than risers, as you can see in Fig. B.
- Then multiply by 10-1/4-in., the ideal tread width for two 2x6s, to get the total run.
- Measure out that distance from the deck to find the exact landing point. From this point, you can measure the exact stair height and determine the stringer and skirt length.
Find the Exact Riser Height
- Measure the exact total rise.
- Divide the height (X) by your estimated number of risers to find the exact riser height.
- The figure will usually fall between 6-1/2 and 8-in., the ideal range.
- If the riser height isn’t in this zone, add or subtract a riser and divide again. This will change the number of treads and shift the landing point, so re-measure the exact height and divide again.
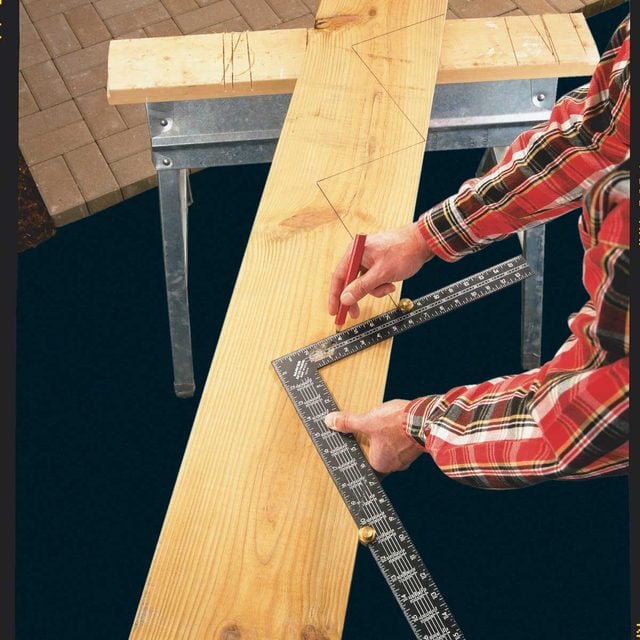
- Draw a sketch to confirm the plan in your mind and lay out the first stringer using the exact riser and tread dimensions and your framing square.
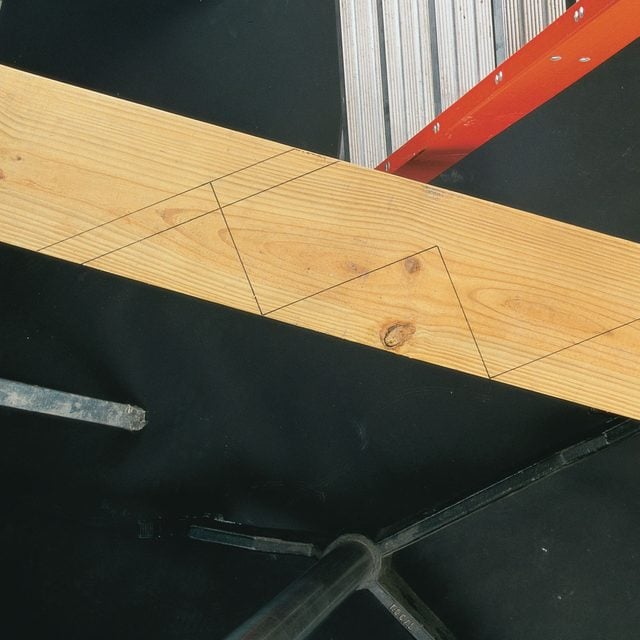
Layout the Stairs
- Clamp the stair gauges to the carpenter’s square.
- Use the narrow part of the square for clamping the riser gauge and the wider part for the 10-1/4 in. tread.
- Lay out the stairs by drawing on the outside of the square, sliding the square along until it meets the last mark you made.
- This will create a stair stringer calculator.
- In your layout, note: The top tread is 3/4-in. shorter than the other treads. The bottom riser is 1-1/2-in. shorter than the other risers.
Mark the Top and Bottom of the Stringer to Remove Extra Material
- Mark the top of the stringer to remove 3/4-in. of material to allow for the missing top riser.
- Mark the bottom of the stringer to remove the tread thickness.
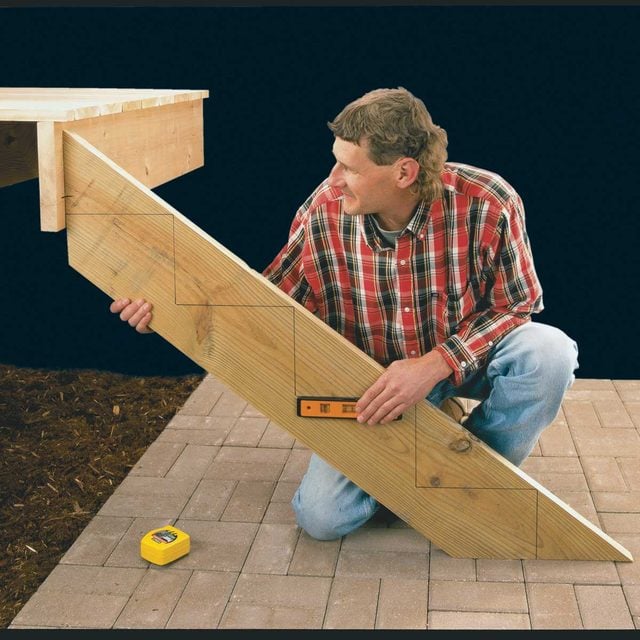
Test Fit the Stringer to Make Sure Your Stair Rise and Run are On Point
- Cut only the top and bottom of the stair stringer with a circular saw.
- Test-fit the stair stringer by placing it against the deck, and check the tread level with a small level.
- Be sure to test-fit the first stringer before you cut the others. If you made a mistake, you’ll at least be able to save the other two 2x12s.
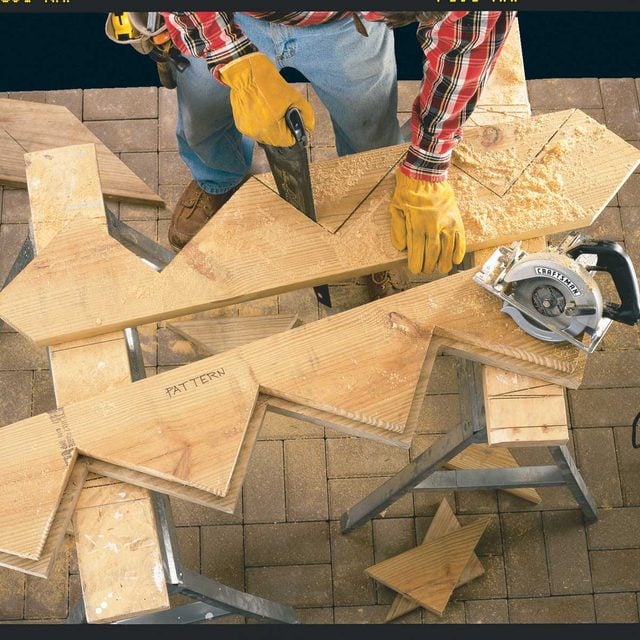
Cut Stringers for Stairs
- Cut the notches with a circular saw.
- Stop the cuts when you reach the corner of the notch and finish the cuts with a handsaw to prevent weakening the stringers.
- Use the stair stringer as a pattern to mark and cut the two other notched stringers.
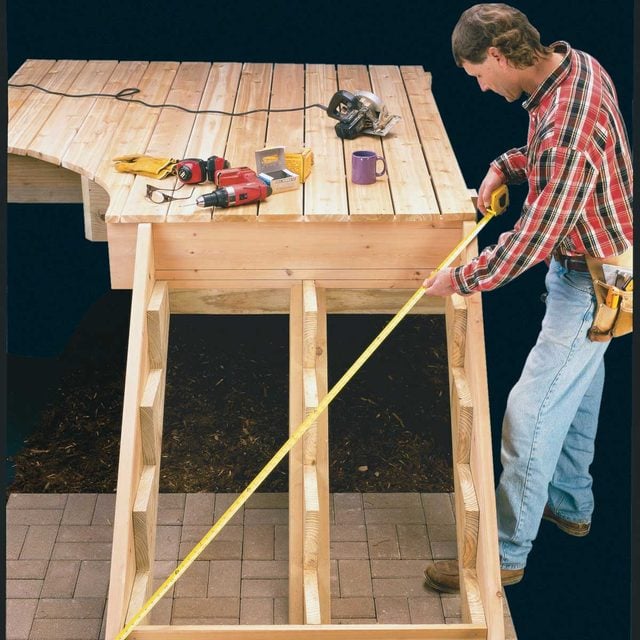
Establish a Solid Base at the Landing Point
- After you cut the stringers, use them as guides to position your landing.
- The base can be a concrete slab, a paver patio, a small deck or even a treated 2×12 leveled in over a 6-in. gravel base.
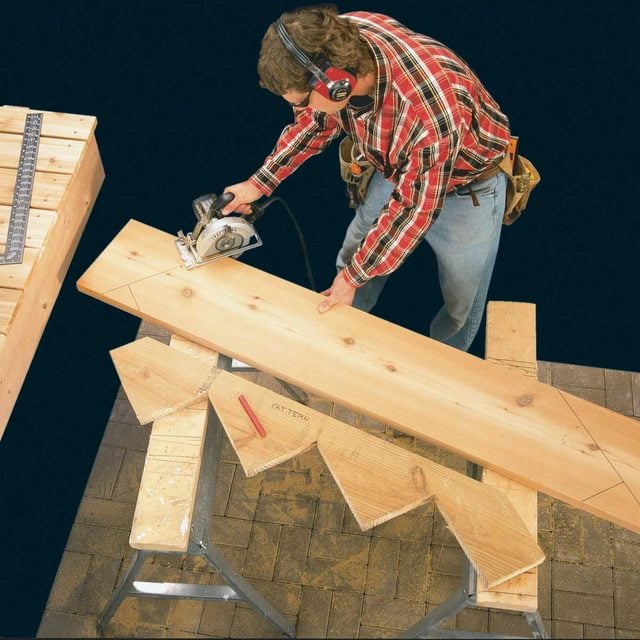
Outline the Pattern onto the Skirt Boards
- Outline the pattern onto one of the skirt boards.
- Redraw the top and bottom lines with the carpenter’s square and gauges at the original settings.
- Cut the top off so it will be even with the bottom of overhanging deck boards and cut off the end of the bottom so it’s about five inches high.
- Fasten stringers to the skirts with 3-in. deck screws spaced about every eight inches, alternating from the front and from the back.
- Nail 2×4 supports to both sides of the middle stair stringer flush with the bottom for extra support.
Attach the Skirt Boards to the Rim Joist
- When attaching stair stringers, use a level to draw two plumb lines to mark the left and right positions for the skirts and horizontal lines to mark the top tread location.
- Tack the skirts to the rim with 3-in. deck screws.
- Then screw through the back of the deck rim into the skirts with three more deck screws.
- Attach the middle stringer centered on the rim joist by toe-screwing it or using a joist hanger.

Attach 2×6 Supports
- Screw a 2×6 the width of the stringers to the backside of the stringers with two deck screws into each board.
- Screw two upright treated 2x6s to the backside of the rim and into the horizontal 2×6 with four deck screws into the rim and four more into the 2×6.
Check the Stair Assembly to Make Sure it’s Square
- Nail on the bottom riser with three 8d galvanized nails into each stringer and square the stairs by “cross-taping” the assembly and shifting it back and forth until the measurements are the same.
- The bottom riser will probably need to be ripped to height.
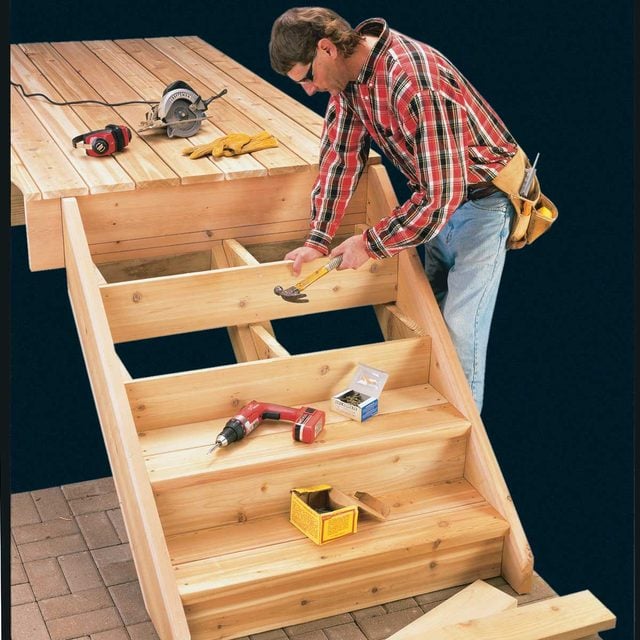
Add the Risers and DIY Stair Treads
- Nail on the second riser board and then screw on the two 2×6 bottom treads, leaving a 1/4-in. gap between the deck boards.
- Nail on the next riser, then the next tread and so on to work your way to the top of the stairs.
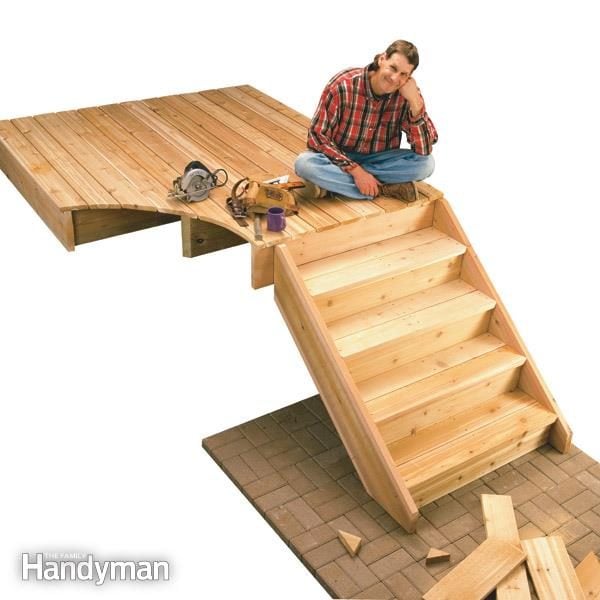
- Once the deck stairs have been constructed, give yourself a pat on the back, but make sure they remain unused until a proper stair railing has been installed.