How to Transform a Room With Simple Wall Panels
Updated: Feb. 17, 2023
Panel a wall in one weekend for less than $100
Multiple Days
Intermediate
$51–100
Introduction
Want to bring the look of traditional paneled walls to your bedroom or living room? For very little money you can completely transform the appearance of your house with inexpensive strips of MDF.Tools Required
- Air compressor
- Air hose
- Brad nail gun
- Caulk gun
- Circular saw
- Clamps
- Cordless drill
- Dust mask
- Level
- Miter saw
- Orbital sander
- Paint roller
- Paint tray
- Paintbrush
- Putty knife
- Safety glasses
- Shop vacuum
- Stud finder
- Utility knife
Materials Required
- 2-in. brad nails
- 4-in. masking paper
- 4x8 x 1/2-in. MDF
- Paint
- Panel adhesive
- Sandpaper
- Spackling compound
- Stain-blocking primer
- String
- Wood glue
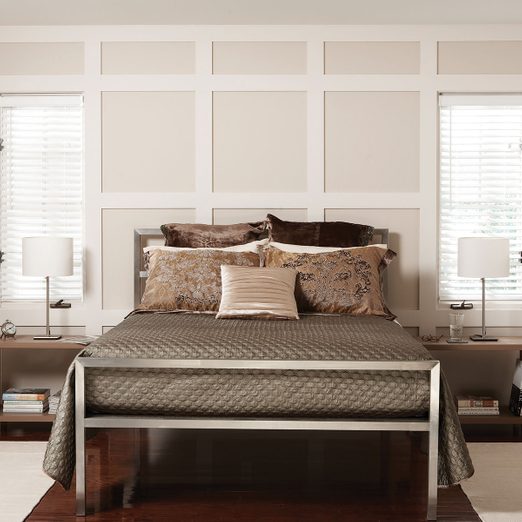
Creating a new look for one wall or a whole room is as easy as nailing boards over the drywall— just layout an attractive grid pattern and go to work. You’ll be done in a weekend.
Here’s a simple method for creating an elegant paneled wall without the expense of solid lumber or the skill of a master carpenter. We fashioned this paneled wall by nailing strips of inexpensive MDF (medium-density fiberboard) directly over the drywall. The square-edged strips are easy to join, and the smooth MDF surface makes a perfect surface for a flawless paint job.
Project step-by-step (14)
What is MDF and Why Should I Use It?
MDF (medium-density fiberboard) is a pressed wood product that offers several advantages over solid wood for a project like this. It’s less expensive than solid wood, and the smooth surface looks great painted. Unlike strips of lumber, which can be bent or twisted, strips ripped from MDF are perfectly straight, simplifying installation, and the material is flexible enough to conform to slightly wavy walls.
MDF isn’t perfect, though. It’s heavy and the 4 x 8-ft. sheets are hard to handle without help. Some stores will cut it into smaller pieces for you. Also, the dust generated by cutting and sanding MDF is so fine that it’ll drift and settle on everything in sight unless you take special precautions. Collect the dust with a vacuum or dust collection system if possible. Otherwise, try to do most of your cutting outdoors.
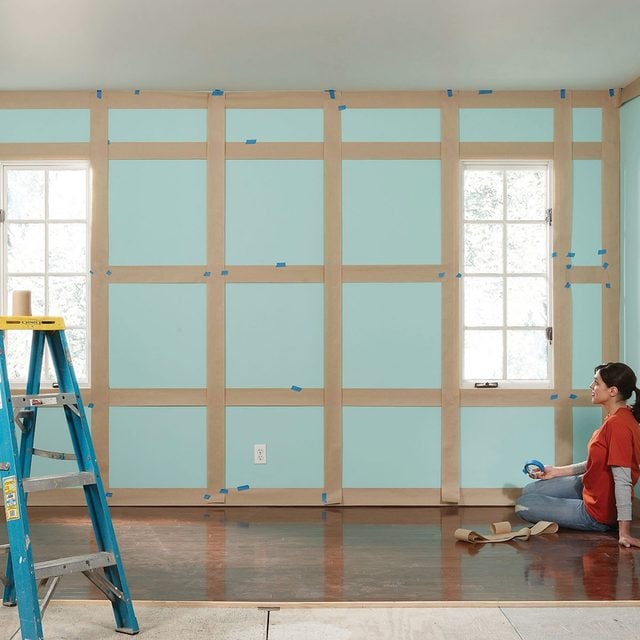
Tape a Mock-Up To the Wall
Start by prying off the baseboard and the window and door trim. Slip a wide, stiff putty knife behind the pry bar to spread out the pressure and prevent damage to the drywall. With the moldings out of the way, tape up 4-in. wide strips of masking paper to simulate the look of the MDF strips. If you can’t find 4-in.-wide masking paper at the home center or paint store, cut a wider roll to 4-in. with a miter saw.
Taping the Mock-Up
- Start by placing strips at the top, bottom and sides.
- Run vertical strips along the windows and doors.
- Line up horizontal strips above doors and windows.
- Add a horizontal strip under windows too.
- Now divide the remaining spaces to create an attractive grid.
- When you’re happy with the arrangement, make a dimensioned sketch to guide you later. Then count the number of 8-ft.-long strips you’ll need to complete the project.
- Pro tip: You’ll get twelve 3-7/8-in.-wide by 8-ft.-long strips from every 4 x 8-ft. sheet of MDF.
If you’re going to change the wall color, patch imperfections in the wall with spackling compound. Even if you’re not changing the color, sand, and paint before applying the MDF strips. You’ll have to do some touch-up painting later, but at least the bulk of the work will be done. This is especially important if you’re going to paint the MDF strips a different color than the wall.
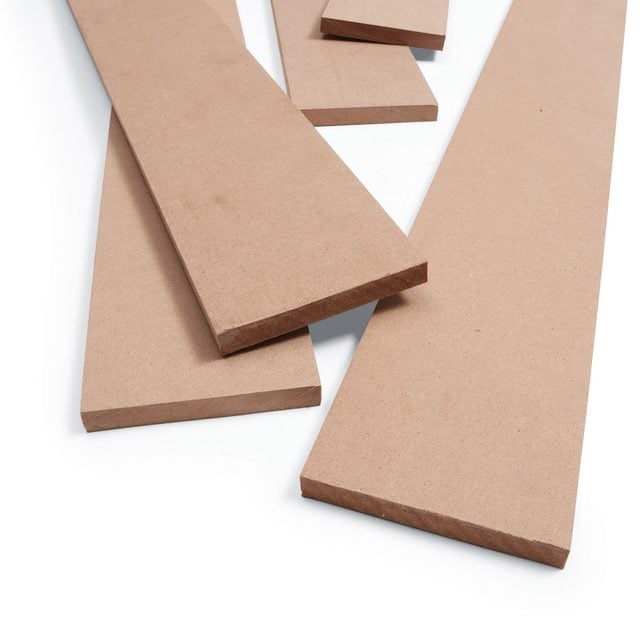
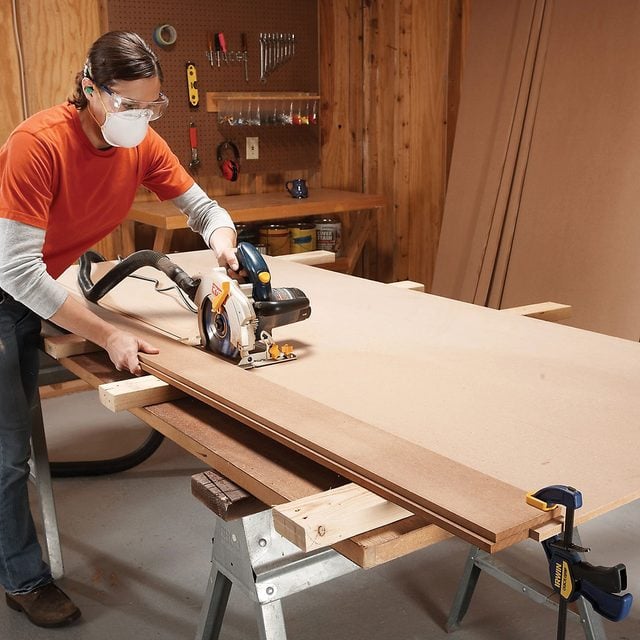
Cut MDF Into Strips
Cut straight, uniform strips of MDF fast using a circular saw cutting guide with a stop on the underside.
- Start by cutting a 6-in.-wide strip from the edge of a sheet of MDF.
- Cut another strip 4-in. wide to use as a stop.
- Position the stop and screw it to the bottom of the guide so that you can cut 3-7/8-in.-wide strips by running the edge of the saw base against the guide. With this setup, you won’t have to measure for each strip. Just reposition the guide and clamp it to the MDF sheet after each cut.
- Pro tip: Sawdust from MDF is very fine and will cover everything in sight if you’re not careful. Cut outdoors if possible. Otherwise, put an exhaust fan in the window and use a shop vacuum to collect dust from power tools. Make sure to wear a dust mask and safety glasses when cutting.
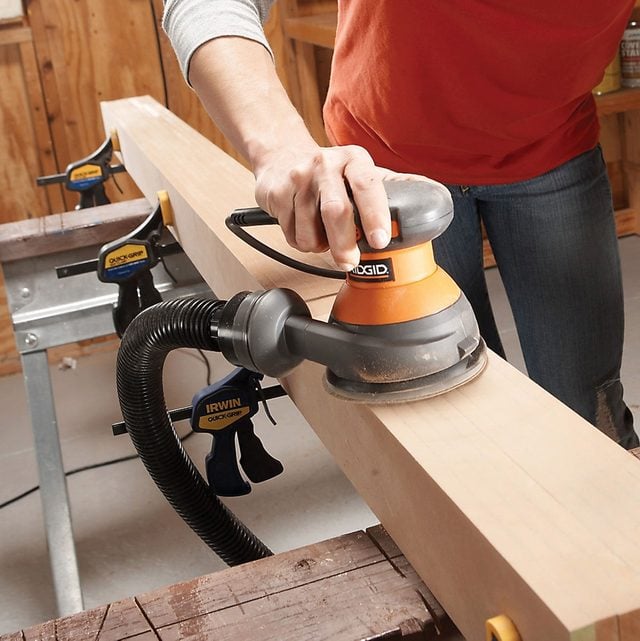
Sand Edges
After ripping the strips, sand the edges to remove saw marks.
- Clamp a bunch of the strips together and sand all of the edges at once to speed up the job and avoid rounding over the corner.
- Pro tip: We used a random orbital sander and 80-grit paper.
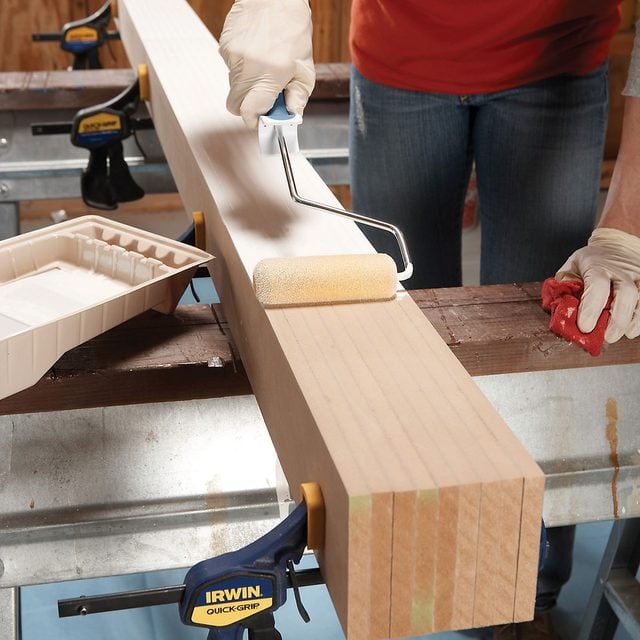
Paint Edges Before Installation
Prime and prepaint the edges to avoid fussy brushwork later. Make sure your stain-blocking primer is a solvent-based type, not water-based.
- Roll on a coat of primer, let it dry, and sand lightly.
- Roll on a coat of paint.
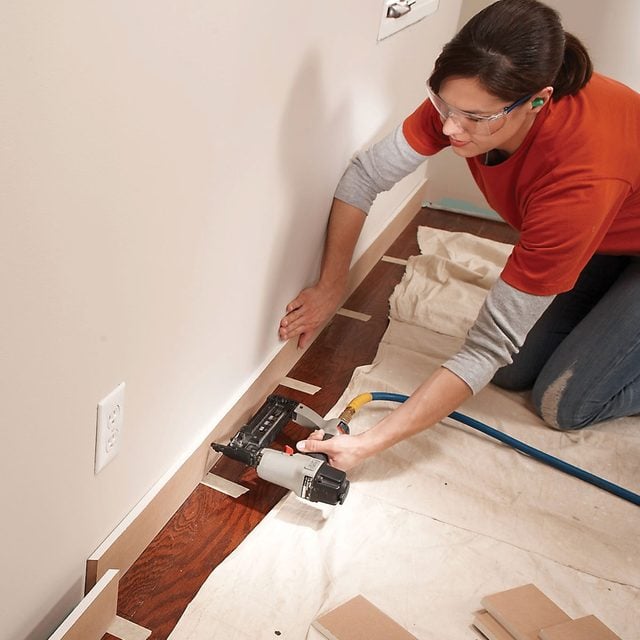
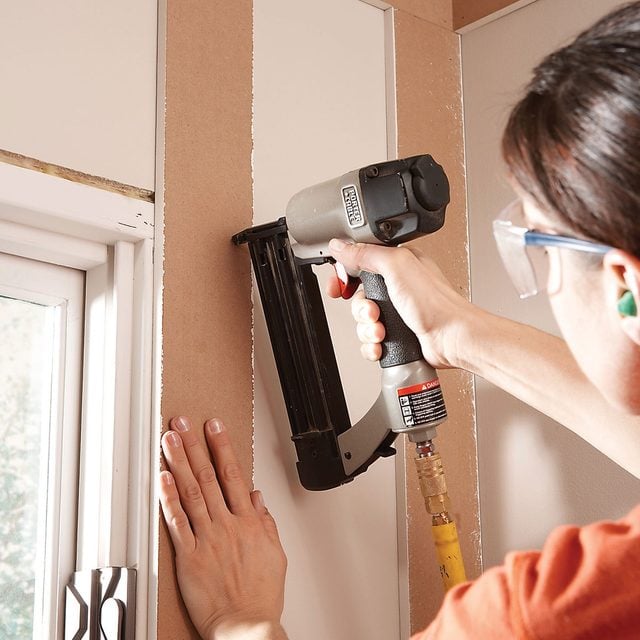
Nail Base and Ceiling First
Start by locating the studs.
- Look for drywall screws or baseboard nail holes as a clue to stud locations (or use an electronic stud finder).
- Stick pieces of masking tape to the floor to mark the locations.
- Cut MDF rails (horizontal strips) to fit along the floor and ceiling and nail them to the studs with 2-in. brads.
Splice the Ends
- Join the ends with 30-degree bevel cuts.
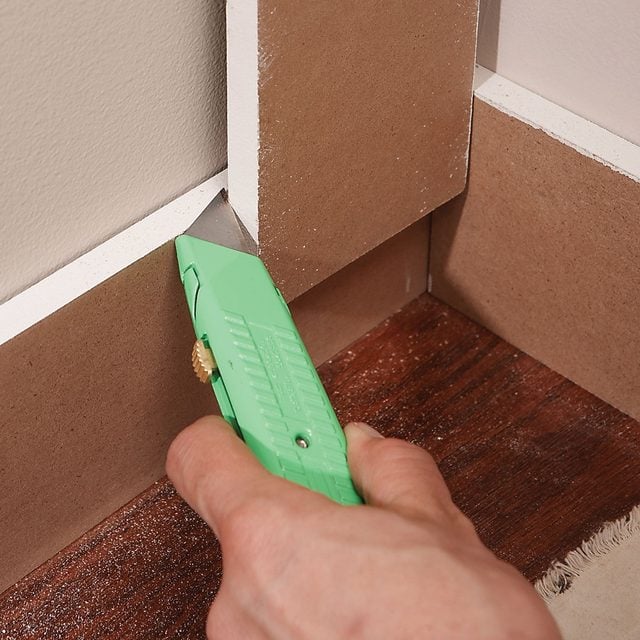
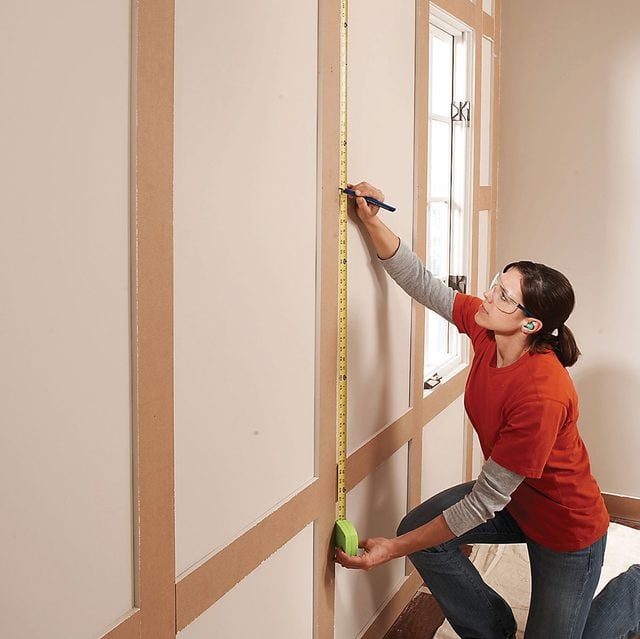
Mark Stiles for Cuts
- Hold stiles (vertical strips) in place and mark them to length with a utility knife rather than a pencil.
Mark in Place
- Use a utility knife to create fine, precise cutting marks.
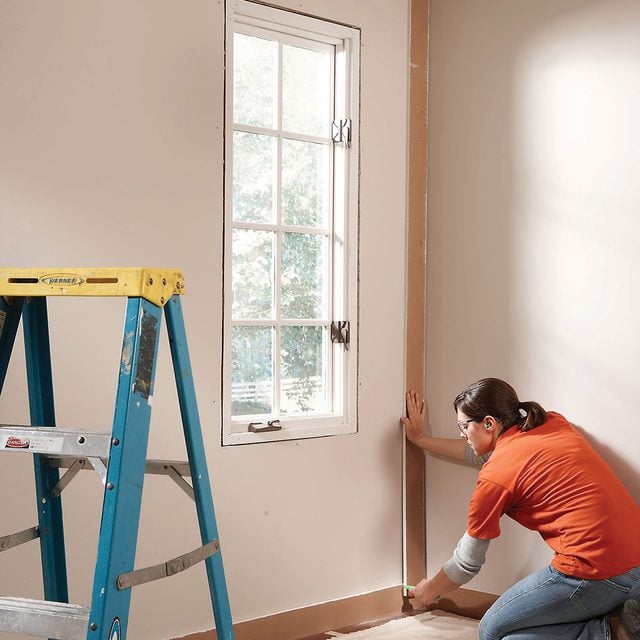
Install Stiles Around Windows and Doors
First, install the stiles next to any windows or doors.
- Pro tip: Leave a 1/4-in. reveal around windows and doors.
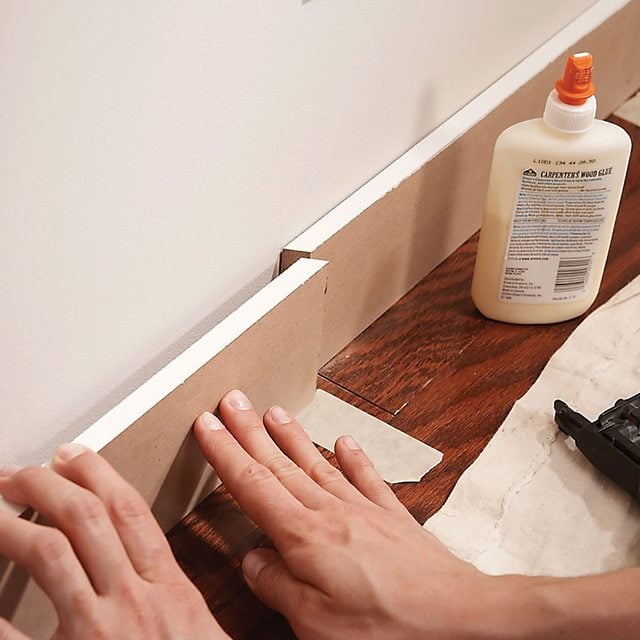
Fasten Stiles With Panel Adhesive
Determine the positions of the remaining stiles by dividing the space evenly according to your original layout.
- Hook your tape measure on the left side of the farthest left stile and measure to the left side of the farthest right stile.
- Divide this measurement by the number of spaces you want. The result will represent the distance from the left edge of any one stile to the left edge of the next stile.
- Mark the locations on the bottom and top rails, then cut the remaining stiles to length and tack them to the wall with glue and brad nails.

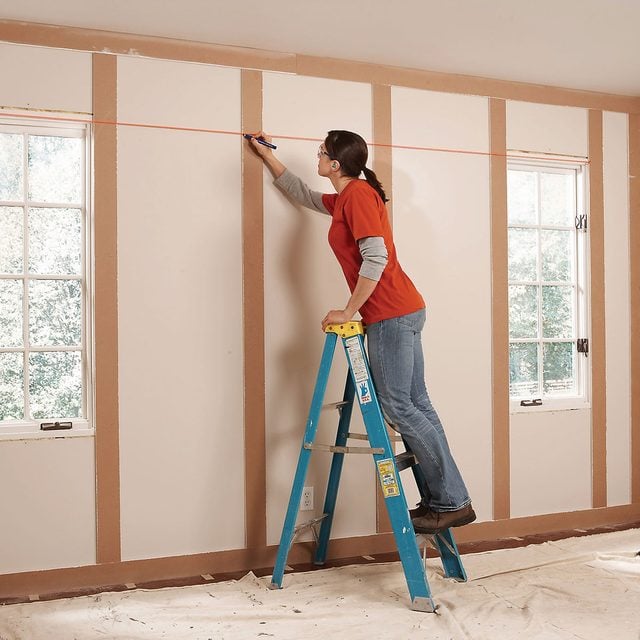
Install Rails
Mark the position of any rails above and below windows. Use a string to align the marks with the windows.
Fill In the Rails
Divide the remaining space and mark the location of the rails on the stiles. Cut the rails and nail them to the studs.
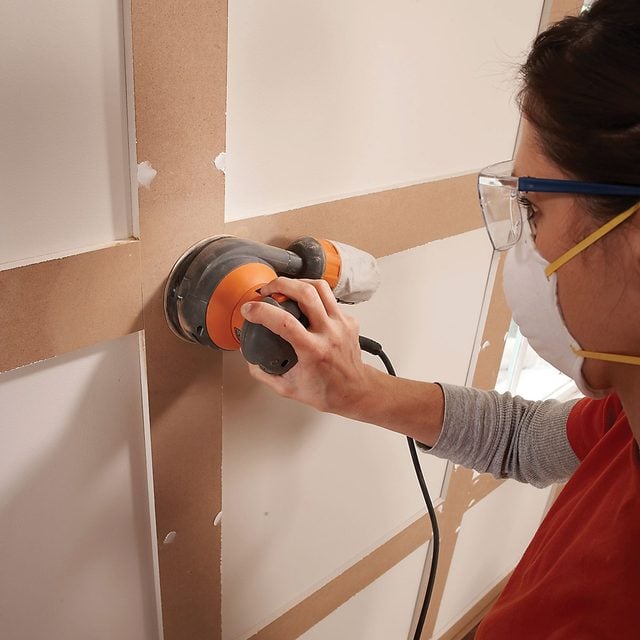
Fill and Sand the Holes
- Fill the nail holes and other imperfections with spackling compound.
- Let it dry and sand it smooth.
- Pro tip: Nail holes may require two coats of spackling.
- Where they intersect, sand the MDF strips flush with an orbital sander.
- Caulk the cracks where the MDF meets the side walls and ceiling.
- When you’re done filling, sanding, and caulking, roll or brush a coat of stain-blocking primer (again, make sure you’re using a solvent-based type, not water-based) onto the face of the MDF strips.
- Finish the job by painting the face of the MDF strips and touching up the wall paint.