
How to Change the Oil in Your Car in 4 Simple Steps
Updated: Jan. 08, 2024
A DIY oil change can be quick, tidy and you'll save big.
An hour or less
Beginner
Less than $20
Introduction
Learn how to change your own oil quickly and without getting too dirty. You'll save money and extend the life of your car by thousands of miles.Tools Required
- Rags
- Rubber mallet
- Safety glasses
- Wrench set
Materials Required
- Container for used oil
- Engine oil
- Oil filter
- Oil filter gasket
Changing the oil in your car is something that any DIYer can do. Although changing the oil might appear rather “duh,” there are still a lot of folks doing it wrong, making it an ugly chore. An oil change is the most important task you can do to make your engine last. We’ll teach you how to change your oil and extend oil life.
An oil change isn’t complicated — you probably did it yourself years ago. But with oil change shops charging more and more, it’s time to get back under the car and start saving big bucks. Plus, you won’t be pressured into buying overpriced add-ons like wiper blades and PCV valves every time you go in for a oil change.
Project step-by-step (7)
Buy the Right Oil and Oil Filter
While it might seem like a money-saver, an economy oil filter is typically only good for around 3,000 miles. To extend oil life, use better quality filters if you go more than 3,000 miles between oil changes. Here, find out how much an oil change costs.
- Pro tip: Before you head off to the auto parts store, consult your owner’s manual for the type and weight of oil specific to your vehicle. It’s especially important to follow the carmaker’s recommendations for oil viscosity.
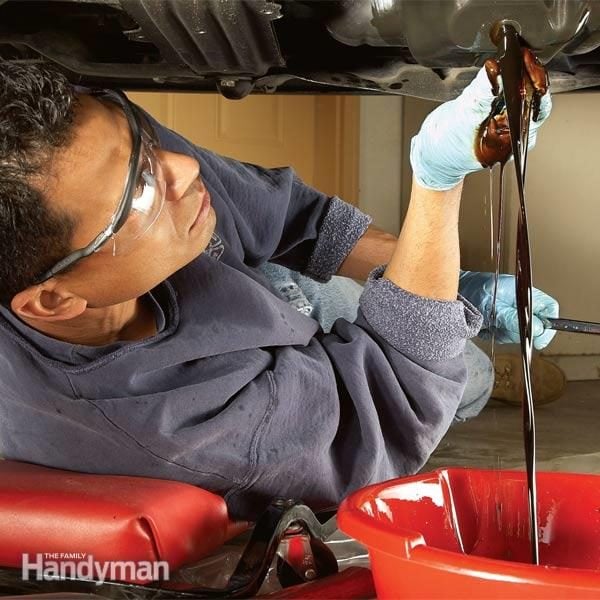
Pull the Oil Plug
- Start by spreading plastic sheeting on the ground. Then drive your car on top of it. By doing so, oil spills will no longer need to be cleaned up on your garage floor since you can simply toss the entire sheet when you are done, or keep it for the next change if you have a spill-free session.
- Jack up the car, set the jack stands in place, and lower the car.
- Pro tip: If you’re on asphalt, place squares of plywood under the jack stands for support.
- Unscrew the plug and quickly pull it out and away from the oil stream. Clean the drain plug and install a new gasket (if required).
Remove the Oil Filter
- Crank off the old oil filter and make sure the rubber gasket comes with it. If not, peel it from the engine.

Oil Filter Wrenches
- Different oil filter wrenches work best for different cars. Select the one that gives you the most room to maneuver.

Add Fresh Oil
- Refill the engine using a funnel and recap the bottle (to prevent spills) before you toss it into the recycling bin.

Recycle the Old Oil
- Pour the used oil into a large jug.
- Fill the engine and run it until the dashboard oil light goes out. Wait a few minutes, then check the dipstick and add oil if needed. An another easier way to change oil is by using an oil extractor pump.

Additional Oil Changing Tips From the Experts
- If the engine is cold, start it and let it run for five minutes to warm the oil. If it’s hot, wait at least 30 minutes to avoid getting burned.
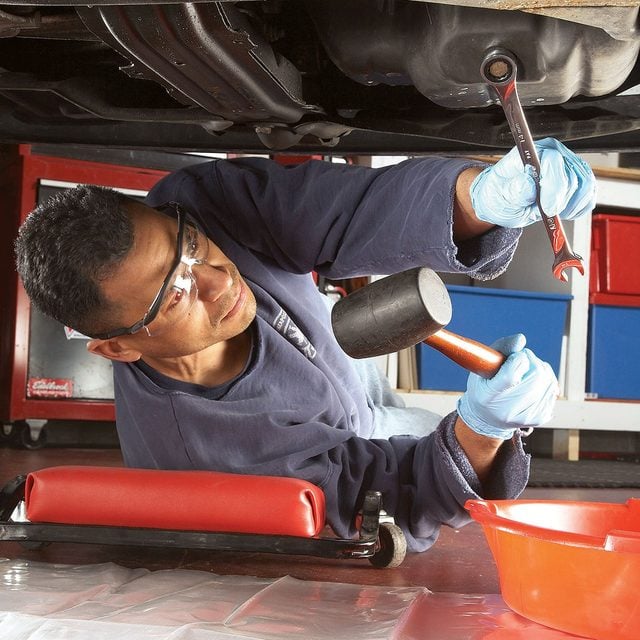
- Never use an adjustable wrench or socket on the drain plug. Use the properly sized box-end wrench, usually metric, for the plug.
- Always use jack stands. Never work under a car that’s supported by a jack only.
- Use new oil to coat the oil filter gasket before spinning it on.
- Always hand-tighten the filter. Never use a filter wrench.
- Find an oil/oil filter recycling center near you by visiting earth911.com or doing an internet search.
- Line up all the oil bottles you’ll need for the fill so you don’t lose count along the way.