
How To Overwinter Geraniums

Updated: Apr. 19, 2024
Before the first frost arrives, save your favorite geraniums using one of these time-tested techniques.
If you’ve perused any magazines or shopped a local boutique in the last year, you probably noticed houseplants are popping up anywhere and everywhere.
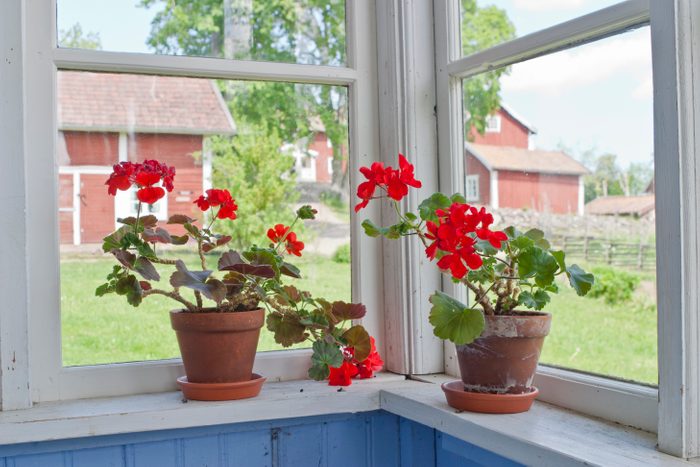
What do geraniums have to do with houseplants? You might be surprised to learn that scented geraniums were one of the very first houseplants ever grown in the United States, as early as the 1820s. It was very in vogue to collect and display potted geraniums along windowsills, where the sun would warm their scented leaves and perfume the air.
If you use the tips we’ll share with you here, the geraniums in your front porch pots today could become your next houseplants. Wouldn’t it be nice to enjoy their bright blooms and fragrant foliage all winter long?
On This Page
What Kind of Geranium Should You Overwinter Indoors?
Before we start, let’s define what kind of geranium we are discussing. Flowers that are commonly called “geraniums” bear a botanical name of Pelargonium. You might also hear them called zonal, scented, ivy leaf or Martha Washington geraniums.
Most people grow them as annuals, but they are perennial in U.S. Department of Agriculture Plant Hardiness Zones 10 and warmer — very warm climates like southern California. They are not the same as the hardy perennial whose botanical name actually is Geranium. You wouldn’t grow those garden plants as a houseplant or overwinter them indoors.
Why Would You Overwinter a Geranium?
There are several reasons why people have been overwintering geraniums indoors for more than a century.
You might want to save yours because you’re worried you won’t find a particularly beautiful cultivar again next year. It could also be fun to try and take cuttings to start new geraniums and save on expenses. Geraniums are so hardy that some families have been passing them down as family keepsakes for decades.
Let’s take a look at how to overwinter geraniums successfully.
Three Ways to Overwinter Geraniums Indoors
There are three ways to overwinter geraniums indoors: as a houseplant, a dormant bare root or cuttings. Which one you choose depends partly on how much space you have indoors, and also what temperatures you can accommodate. Here’s a closer look at each technique.
Overwintering geraniums as houseplants
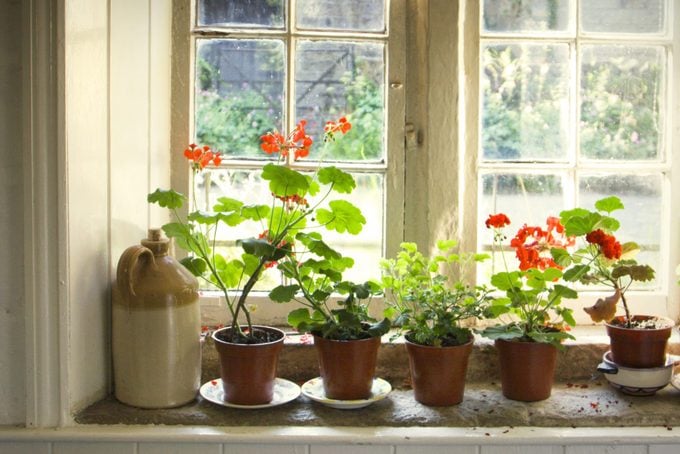
Choose this method if you wish to save the whole potted plant and have plenty of space near a window that receives bright, direct light. Geraniums like it cool in the winter — 55 to 65 F is ideal — so a drafty west-facing window would be ideal to overwinter your potted geranium.
To avoid bringing in unwelcome pests from outdoors, wash the foliage thoroughly with your hose and repot the plant into fresh potting soil. You could also spray the foliage with insecticidal soap, available online and at most garden centers and hardware stores. If there are any signs of insects or disease on the plant, don’t risk bringing it inside. Only healthy plants have a good chance of overwintering indoors.
Keep the soil moist but not damp during the winter. No supplemental humidity is needed. If the stems start to stretch, pinch them back so the plant stays relatively small over the winter. When spring arrives, you can begin to fertilize again and move the plant back outside once temperatures are consistently above 50 F.
Overwintering geraniums as dormant bare root plants
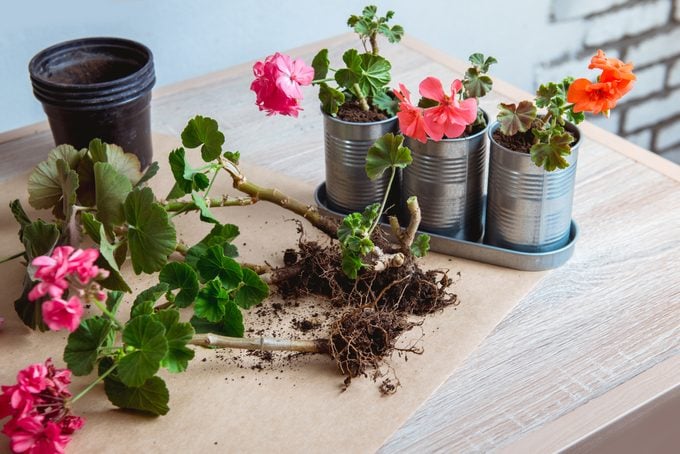
This is the most common method of overwintering geraniums, but you’ll need a dark, dry spot that stays about 50 F all winter for it to work.
Step 1: Before frost, dig up your geranium and shake the soil off the roots. Let the plant sit and dry for a few days before storing to prevent mold from growing. The roots should be dry before you go to the next step.
Step 2: Store the roots in a dark, dry location that doesn’t dip below 45 F all winter. 50 F is ideal for storing geranium roots. You can store them by:
- Hanging the plants upside down from the rafters — this is the way it’s been done for generations;
- Wrapping them in newspaper or a paper bag and putting them on a shelf;
- Placing them in a cardboard box.
Step 3: Check the roots about once a month for mold, black leaves or soft stems. Remove any unhealthy parts of the plant and roots. Most of the stems should stay firm all winter. If they’re getting too wilted, soak them in water and let them dry again before re-storing.
Step 4: About six weeks before your last frost date, revive your geraniums by cleaning them up, cutting the stems back to healthy green growth and planting them back into fresh potting soil. Bury the stems two nodes deep, where the new roots will form. Keep the plants slightly dry until you see new growth appear in one to two weeks, then keep the soil moist until the plants are large enough to plant back outside.
Overwintering geraniums as cuttings
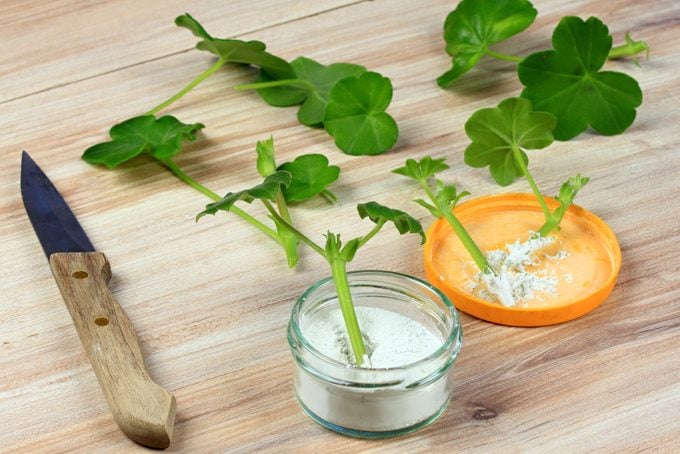
This is a good method to try if you are limited on bright windowsill space or if you are afraid that bringing in your whole potted plant might also invite in unwelcome pests. It’s also a good way to make more geraniums from the one you have.
To take cuttings, you’ll need:
- A sharp knife.
- Rooting hormone, sold online, at most garden centers and hardware stores.
- Small plastic or terra–cotta pots, or repurpose a roasted chicken takeout container with a clear domed cover.
- Clear plastic bags for tenting over the pots, if you’re not a chicken eater.
- Well-drained rooting media like perlite, vermiculite or coarse sand.
- Water.
To take a cutting, use a sharp knife to remove three to four inches from the tip of the stem. Snip off most of the leaves, leaving just a few near the top. Dip the cut end of the stem into the rooting hormone, then stick it into the pot of moistened rooting media. Insert it just far enough to be self-supporting.
After all your cuttings have been planted, create a mini greenhouse effect by tenting clear plastic bags over the pots and securing them with rubber bands, or setting the top back on the takeout container. Place them in bright (but not direct) light, near a sunny window. Check your cuttings periodically to make sure the soil remains evenly moist.
In about six to eight weeks, the cuttings should start to form roots. Once they are at least one inch long, transplant the cuttings into three to four inch containers filled with standard potting soil and set them in direct sun. When they have grown to be the size of the geraniums you would buy at the store and all threat of frost has passed, it is safe to plant them outdoors.
Follow these tips and you will have plenty of geraniums to enjoy year after year!
Originally Published: September 03, 2021