
How to Buy and Install LED Lights

Updated: Jul. 17, 2023
LED lighting can add a cool, modern aesthetic to any entertainment space. Here's everything you need to know to buy and install them.
Our editors and experts handpick every product we feature. We may earn a commission from your purchases.
LED strip lights can add bright light to your desk or countertops and add amazing colorful light to a rec room, boat, or camper. You can get ready-to-stick LED strips at an electronics store, but they are pricey and can’t be wired together. Buying the components separately gives the flexibility to put them anywhere. Figuring out what components you need is the hardest part.
If you decide against the convenience of an all-inclusive LED light kit, there are some products to purchase and some considerations to be made about what you want the lights to look like:
What You’ll Need to Install LED Lights
- Power source ($20): This transformer takes the 120 volts from an outlet and brings it down to 12 volts to power the lights.
- Controller ($17): Allows you to control the color and brightness of the lights with a remote or smartphone app. Wire connections are made with set screws. If you only want to turn the lights on or off, you can replace the controller for a switch. Don’t forget to check out our tips for wiring LED lights.
- 5 wire 22 ga low voltage cable ($.45/ft): Available with two, four, five or six color-coded 22ga wires, depending on the configuration of the LED strips.
- Solderless wire clamps ($1.50): The clamp pierces the wire to make the connection and holds it in place. It’s important to get a clamp that will accept the number of wires your LED strip requires.
- 16ft RGBW LED strip light strip ($65): Comes in many configurations of colors and sizes, some weatherproof, and varying brightness. The strips can be cut to size along the contacts and more than one length can be connected. They have an adhesive backing to make securing the lights simple.
- Aluminum Channel ($10): An aluminum channel and frosted cover gives a clean look to exposed light strips.
What to Consider When Buying LED Strips
There are many configurations of LED light strips, with options for voltage output, weatherproof or not, RGB, RGBW, RGB+CCT, and each with a variety of color temperatures. What does it all mean and how do you choose?
- 12V or 24V? Match the voltage of the LED strip to the voltage of power source (battery or transformer).
- Weatherproof or not? If the lights are going to be exposed to moisture or weather, get a weatherproof strip.
- Color code:
- RGB (only colors).
RGBW (colors and white).
RGB+ CCT (colors and white, with the ability to change from cool to warm white temperature).
- RGB (only colors).
- How many wires?
- RGB lights require four wires.
- RGBW requires five wires.
- RGB+ CCT requires six wires
- Controller or no controller? To change the lights, you need a controller. Be sure to get one with the same number of wires your lights require.
How to Install LED Strip Lights
Step 1: Cut LED Strip to Length
Determine the length you need and cut the strip through the copper contacts. It’s important to cut right on this line to maintain the connection.

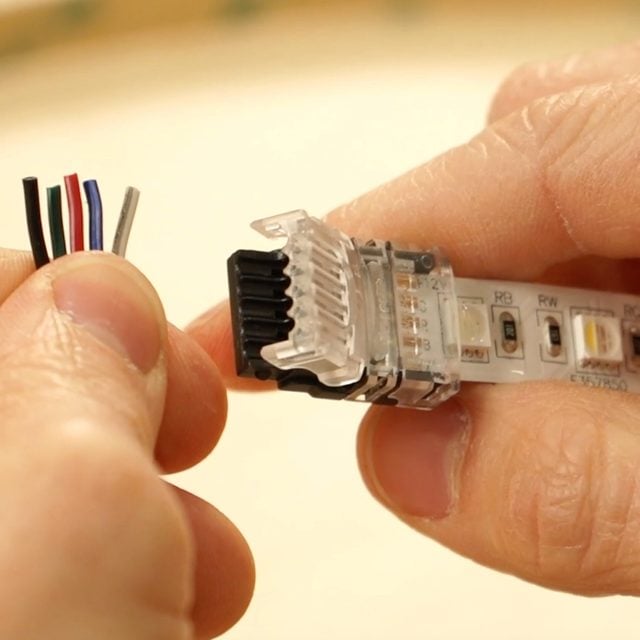
Step 2: Connect the Cable
Connect the wires to the strip with a solderless clamp. Push the strip into the short end of the clamp, then match the colored wire with its corresponding letter on the LED strip at the other end of the clamp. They may not be in the same order so you may have to do some rearranging. Pinch the clamp tight, no need to strip the wires.
Step 3: Attach the Controller
The controller gives you the ability to change the color or dim the lights. If you’re are using color-changing lights, you need a controller. Strip the colored wires and align each with the corresponding port in the controller. Tighten the screw to clamp them into place.

Step 4: Mount the Lights
Peel away the adhesive backing and stick them wherever you need light. If the lights won’t be completely hidden, use an aluminum channel. The channel is made to accommodate different sized LED strips and comes with a frosted lens that really give this combo a finished look.


Step 5: Power Up the Lights
If you are adding LED strip lights to a 12-volt system like a boat, trailer or car, you will connect the positive and negative 12 volt leads to the controller. If adding them to your home, plug a transformer into the controller, then the transformer into an outlet.

Originally Published: April 17, 2020