
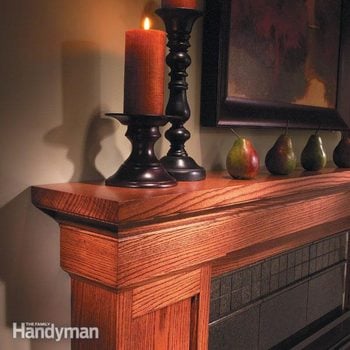
A Full Guide to a Proper Wood Stain Finish
Updated: Nov. 07, 2023Follow these four steps (no shortcuts!) and you'll get a perfect finish every time
- Time
- Complexity
- Cost
- Multiple Days
- Beginner
- $51–100
Step 1: Project overview
In this article, we’ll show you a simple three-day process that’ll give you great results every time. We’ll show you how and when to sand, using the correct sanding products. (It’s not the tedious, mind numbing job you might think it is!) Then we’ll tell you how to apply stain evenly and without blotches on all the surfaces. Finally, we’ll show you the best ways to get a smooth satiny surface with a sanding sealer and wood varnish.
We’ll limit our staining techniques to methods that work well on coarse-grained woods, such as oak, ash and walnut. Achieving an even, blotch-free finish on fine-grained woods like cherry, maple, birch, pine and fir requires extra steps we won’t cover here.
Wood finishing isn’t complicated, but it does require patience and attention to detail. It pays to get each step right the first time. Going back to correct mistakes is time consuming, and it’s nearly impossible to achieve blemish-free results.
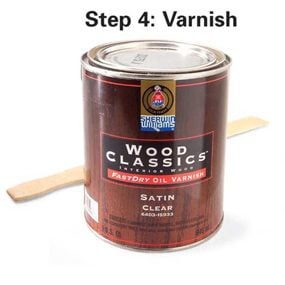
We recommend finishing your wood with oil-based stain (see “Test the Stains”) and wood varnish (alkyd) with a compatible sanding sealer beneath it. These finish types are the easiest to apply. Don’t confuse alkyd varnishes with polyurethane ones. Polyurethane finishes are tough and have their place, especially on high-wear, water-prone surfaces like tabletops and hardwood floors. But they’re less forgiving to use. Alkyd wood varnish, on the other hand, is easier to sand, which is an advantage if you have runs or drips or would like to apply a second topcoat.
You’ll likely have two sheen choices—gloss (shiny) and satin (flat)—but don’t be afraid to mix equal quantities of gloss and satin if semi-gloss is the look you’re after. Few home centers carry alkyd wood varnishes, so you’re better off shopping at a paint or woodworking supply store. Read the labels carefully: You’ll find that just about every can on the shelf will be a urethane-type finish.
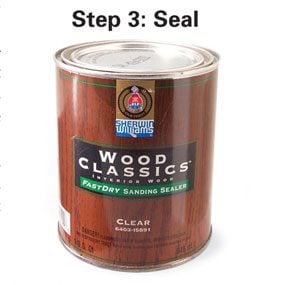
A sanding sealer is the perfect foundation for the wood varnish topcoat. It’s formulated with more solids than conventional clear coats, making it very easy to sand. And wood varnish adheres better to a well-sanded, sealed surface. Pick a sealer that’s designed for the overlying varnish, preferably of the same brand. If you use a sanding sealer that’s incompatible with the wood varnish, the surface may crinkle or even flake off.
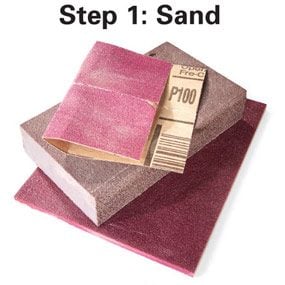
Step 2: Begin by sanding
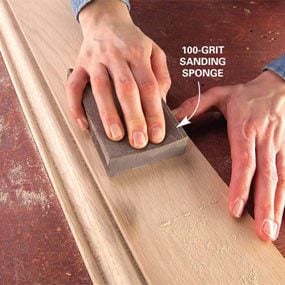
Photo 1: Sand with the grain
Sand flat surfaces with a 100-grit sanding sponge, in the direction of the grain, until you eliminate imperfections and rough areas.
A good finish starts with sanding the bare wood with a 100-grit sanding sponge and/or paper. This step is crucial for achieving a uniform wood surface that’ll absorb stain evenly. It also smoothes out surface imperfections, which might show through the clear coat. Your goals are to eliminate the sawmill “burnish” (shiny surface left by the planer), smooth off any standing rough wood fibers and sand out any blemishes. Blemishes can include dirt, fingerprints, machining imperfections and label residue. Don’t sand with finer grits at this stage or you’re likely to end up with uneven stain.
The sanding tool you select depends on the profile and size of the trim you’re finishing. For large areas or deep imperfections like chatter marks (washboard textures) from the mill planers, use a random orbital sander. It’s aggressive and cuts and smoothes quickly.
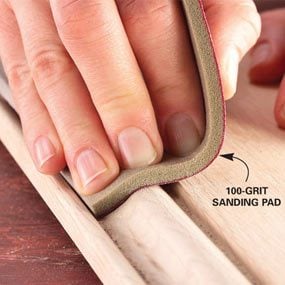
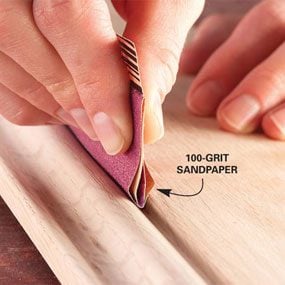
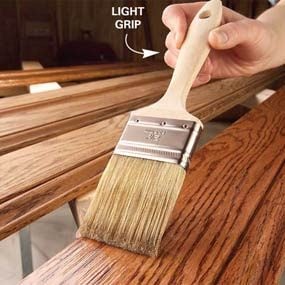
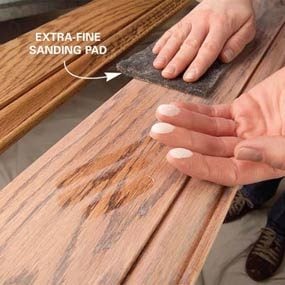
For hand-sanding, use a sanding sponge for flat areas (Photo 1), a sanding pad for curves (Photo 2) and a folded piece of sandpaper for tight crevices (Photo 3). Always sand in the direction of the grain and sand every square inch whether you think it needs it or not. Your fingertips and eye will tell you when enough is enough. But look closely with good light before you call the job finished. Otherwise, imperfections like scratches caused by cross-grain sanding or chatter marks will become painfully obvious when you start staining. Another common problem is burn marks. Sometimes extra elbow grease will be needed to eliminate those. This may sound like a lot of work, but believe me, if you use fresh paper and sponges, the sanding goes fast.
Must-Have Finishing Supplies
High-quality finishing supplies take the pain out of staining. An investment in good tools and accessories will greatly speed up the job and increase the quality of your finishing work.
- Sanding supplies. Buy 100-grit (medium) products for sanding the raw wood and either 240- or 280-grit (extra-fine) sanding paper, sponges and pads for sanding between clear coats, depending on the profiles you’re sanding.
- Brushes. Buy two 2-1/2-in. china-bristle brushes (natural bristles). Use them for staining, dry brushing (Photo 6) and applying the clear finishes. Don’t buy cheap brushes. If you take care of it and clean it well, a top-quality brush will last for 20 years or more. A cheap brush is more likely to leave brush marks and bristles in the finish.
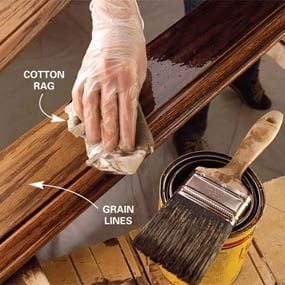
- 100-percent cotton painter’s rags. Buy a box at a home center. Don’t use old bed sheets or clothes that contain synthetic fibers. They may leave behind dyes and won’t absorb stain nearly as well.
- Gloves. A box of disposable gloves will protect your hands from solvents, and you won’t have to struggle with putting on reusable ones after coffee breaks.
- Mineral spirits. Buy a 1-gallon can to clean brushes and to thin stain if needed.
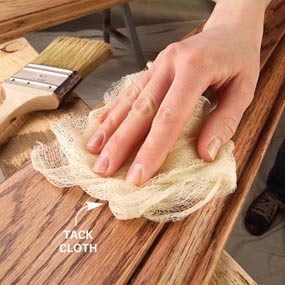
- Tack cloths. Find tack cloths in the paint department. Use them to eliminate the last specks of dust after you sand between coats.
Step 3: Clean the room
A clean work area is crucial for a smooth, blemish-free finish. If you have the option, sand the wood outdoors or in a room that’s separate from the finishing area.
If you’re forced to sand in the finishing area, wait several hours after sanding before cleaning the room, to give the dust a chance to settle out of the air. Vacuum the floor and any nearby work surfaces. Then damp-mop those surfaces too. Avoid sweeping—it just stirs up more dust. If there are rooms overhead, declare a moratorium on overhead foot traffic during finishing. Otherwise dust on the underside of the floor will rain down on wet finishes. Or do your clear-coat work after everyone’s gone to bed. If you’re working in a room that’s heated or cooled with forced air, warm or cool the area a few hours ahead and then shut off the system until clear finishes are applied and become dry to the touch. That’ll keep ventilation fans from stirring up more dust or bringing it in from other rooms.
Caution:
Spread out stain-soaked rags and let them dry before disposing of them in a waste container. Piles of damp staining rags are a spontaneous combustion hazard.
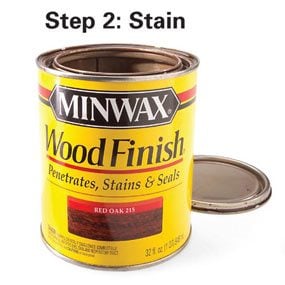
Step 4: Brush on the stain and wipe it off fast
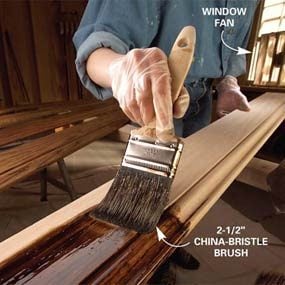
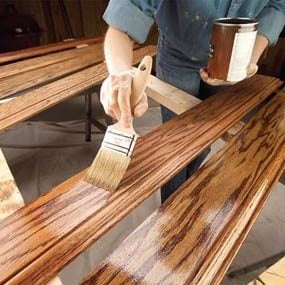
Photo 4: Brush the stain
Saturate the wood with stain by brushing a liberal coat quickly over the entire surface.
The key to getting an evenly stained wood surface is to saturate the wood thoroughly and then wipe the stain off evenly. Start by stirring the stain. Scrape the stir stick across the bottom and pull up any settled solids, then work them into the solvent until they’re all dissolved. (Use the same method to mix the sanding sealer and the wood varnish later.) The best application method is to simply dip a natural-bristle brush into the stain and brush it right onto the wood (Photo 4). Rags are messy and waste stain. Don’t skimp when you’re applying stain—more is better. Here are a few tips to lighten stained wood.
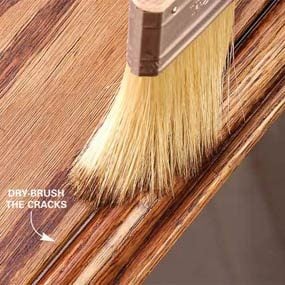
Wipe off the stain with clean cotton rags in the same order you put it on. The idea is to let it soak into all areas of the wood for about the same amount of time (Photo 5). Wipe with light, even pressure. You’ll know if you wipe too lightly because you’ll leave streaks. Refold wiping rags frequently so you have dry cloth for most strokes, and grab a new rag whenever one gets soaked. Next, “dry-brush” any cracks or crevices that the rag couldn’t reach by dragging a dry brush through them (Photo 6). Wipe off the bristles on a rag or newspaper between strokes to keep the bristles dry and to avoid smearing. Don’t waste time. It doesn’t take long for stain to start drying, and it becomes sticky and hard to remove. If the stain gets tacky before you can wipe it off, simply apply more stain to soften it and then wipe it off again.
Finally, closely examine the surface for smudges, brush marks and blotches. Look for swirls left by rags and wipe them down again. These marks are easy to miss but you will see them after finishing, so examine the surface carefully.
If you spot areas in the finish that seem too light, add more stain. Let it sit for a couple of minutes and then wipe it off again. Work quickly; as the stain dries, it will smudge. Lighten dark areas by rubbing them lightly with a rag dampened with paint thinner. Make these color tune-ups for each piece right after staining. It’s easiest to make color corrections while the stain is still damp. Let the stain dry overnight before you start the finish coats. If you’re unhappy with grain lines that are too dark compared with the surrounding wood (Photo 5), restain and wipe the whole surface and let it sit overnight again.
Test the Stains
Oil stains are the finish of choice among pros because they’re forgiving and easy to apply. Avoid “fast-drying” stains. You’re better off with ones that require at least overnight drying time. Getting the best wood stain color usually requires stain mixing, so buy a few different 4-oz. cans in the color family you’re interested in.
Sand extra trim, cut it into 3-in. pieces and start experimenting. Mark all the pieces with the colors you use to keep them straight. You can lighten stain easily by diluting it with paint thinner. It’s not unusual to use mixes that are 25 percent or even 50 percent paint thinner. But measure carefully so you can replicate your results on a larger scale. Next, finish the samples with the same sealer and varnish coats you plan to use, to get an accurate finished look.
Trying to match a stain that’s on existing trim is difficult, especially if the trim is more than a few years old. Even pros rarely attempt it themselves. The best bet is to bring a sample of the finish you want to match, along with raw wood samples, to a paint store that offers a color-matching service. You may have to shop around a bit. As a last resort, find a furniture refinisher that’s willing to help.
Step 5: Brush on a sanding sealer
Brush on the sanding sealer in the direction of the grain until the whole surface is coated (Photo 7). Shine a strong light on the wet surface to highlight areas you might have missed (they’ll be dull). Then add more finish wherever it’s needed. Immediately “tip-off” the wet finish by stroking the entire surface from end to end with long, light, overlapping strokes of the wet brush (Photo 8). That’ll further even out the coat and help eliminate brush marks. Work quickly; sanding sealers dry fast. If you wait too long before tipping off, you’ll leave brush marks. If you see brush marks after tipping off, leave them and sand them out later. Lastly, look carefully at the edges to find any drips and smooth them out with the brush. Leave the wood lying flat during the finish application and while it dries afterward. That’ll minimize runs and sags and help finishes to “level out” so brush marks will disappear.
Step 6: Sand the sealer before varnishing
After the sealer dries, lightly sand the surfaces with 240- or 280-grit (extra fine) sanding pads or paper. You’ll know it’s smooth enough when you see a fine dust on all the surfaces and they’re smooth to the touch (Photo 9). The sanded surface should be uniformly dull. Shiny streaks or spots indicate missed spots.
Sand carefully, especially near sharp corners. It’s easy to sand through the sealer and the stain to leave exposed raw wood. If that happens, just retouch with more stain to even up the color. There’s no need to reseal small areas. Use a shop vacuum fitted with an upholstery brush to remove most of the dust. Remove the remaining dust by wiping the surfaces with a tack cloth (Photo 10).
Step 7: Finish up with oil-based wood varnish
Brush on the wood varnish and tip it off with the same techniques you used for the sanding sealer (Photo 8). If you’re working in a clean room and did a good job of sanding the sealer, one coat will be plenty. Trim doesn’t receive much wear or abrasion, so you don’t need a tough, thick finish. But if you have dust specks, brush marks or other imperfections, don’t try to pick them out of the wet finish. Let the finish dry overnight. If there are only a few specks, pick them out with your fingernail. If there are a lot of specks, resand and add another coat. Either way, specks in the finish mean the room is still dirty. Clean the room more thoroughly or find another, cleaner place to work for the next coat. To add another coat of wood varnish, prepare the surface as you did after the sanding sealer, including sanding the finish with extra-fine sanding grits, dusting the surfaces and wiping everything down with a tack cloth. Then add another topcoat of varnish. Learn how to do wood trim work.
Required Tools for this Project
Have the necessary tools for this DIY project lined up before you start—you’ll save time and frustration.
- Sanding block
Sanding pad
Required Materials for this Project
Avoid last-minute shopping trips by having all your materials ready ahead of time. Here’s a list.
- Cotton painter's rags
- Disposable gloves
- Mineral spirits
- Sanding pads
- Sandpaper
- Tack cloth
