How To Make Your Own Barn Wood
Updated: Mar. 10, 2022
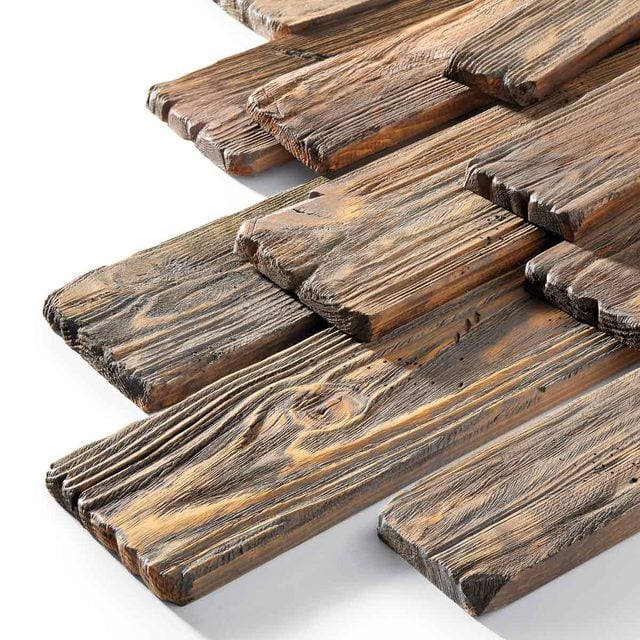
It’s easy to do, looks authentic and saves you a fortune!

Introduction
Whether you’re creating a rustic interior or adding aged wood accents to a modern decorating scheme, barn wood is a popular choice. And the good news is you don’t have to pick through piles of splintery old lumber or pay exorbitant prices for the look of barn wood. You can easily transform inexpensive pine boards into rustic boards that are almost indistinguishable from the real thing. In this story we’ll give you a recipe for doing just that.Tools Required
- Angle grinder
- Awl
- brush knot cup
- Claw Hammer
- Paint roller
- Utility knife
Steps to Make DIY Barn Wood

Project step-by-step (10)
Anchor the Boards
- Tack the board to sawhorses with 6d finish nails.
- Pro tip: Clamps will get in the way of the grinding process, which is why we nail the boards to sawhorses.
- Note: The steps shown here are to distress one side of the boards. If both sides of the boards will be visible, flip the board over and repeat the steps.
Grind the Edges and Ends
- With the grinder spinning inward, make random gouges on the edges of the board.
- Round over the sharp factory edges.
- Grind the ends of the boards to look weathered.

Erode the Surface
- Remove some of the soft wood from between the growth rings (darker wood grain) by running the cup brush along the board.
- Pro tip: Follow the grain pattern. The growth rings are harder and will remain, while the brush will wear away the softer wood between them.

Make Realistic Wormholes
- Punch groups of “wormholes” in a random pattern with the awl.
- Elongate some of the holes by tipping the awl down after punching.
- Space groups of holes 6 to 12 inches apart.

Add Dents
- Make dents with a hammer claw or almost any blunt tool, metal pipe, or even a chain.
- Group dents in random patterns along the board.

Carve Out Splits
- Carve out the soft wood along the grain to simulate a crack or enlarge an existing crack.
- Make fake cracks on the ends of boards, or along the edges.

Make Saw Blade Marks
- Sweep the grinder across the board in a series of arcs to create the look of old, rough-sawn lumber.
- Pro tip: Add this pattern to a few of your boards for variety.

Apply the Finish
When you’ve completed the distressing steps for all of the boards, follow the wood staining process shown in the photos below. Don’t worry if the finish looks a little different from one board to the next. Variation will add to the authentic look. When you’re done with the stain rags, hang them over the edge of a bucket or garbage can to dry before disposing of them. Wadded-up, stain-soaked rags can spontaneously combust. Your boards will look most authentic without a clear coating, but if you need a more durable finish, let the stained boards dry overnight before brushing on a coat or two of polyurethane. Choose a flat or matte sheen to retain the weathered look.
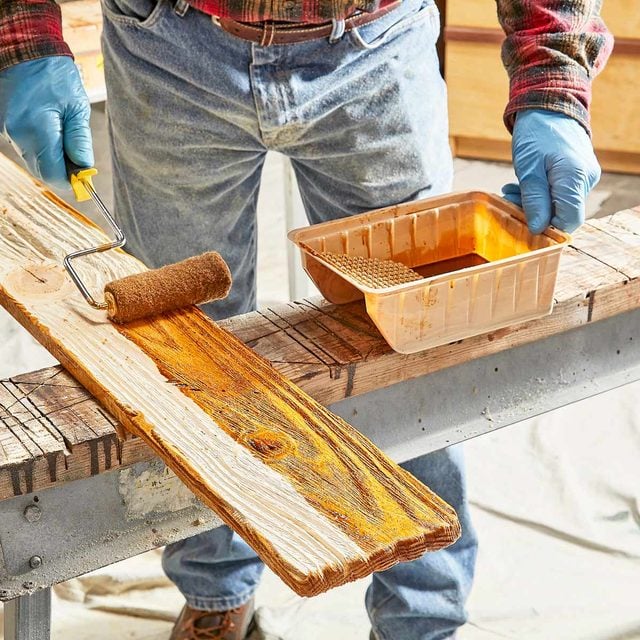
Start With a Base Coat
- Roll on the first coat of stain. Cover the board entirely.
- Wipe off the excess with a cotton rag.
- Let this coat dry about five minutes before moving on to the next layer of stain.
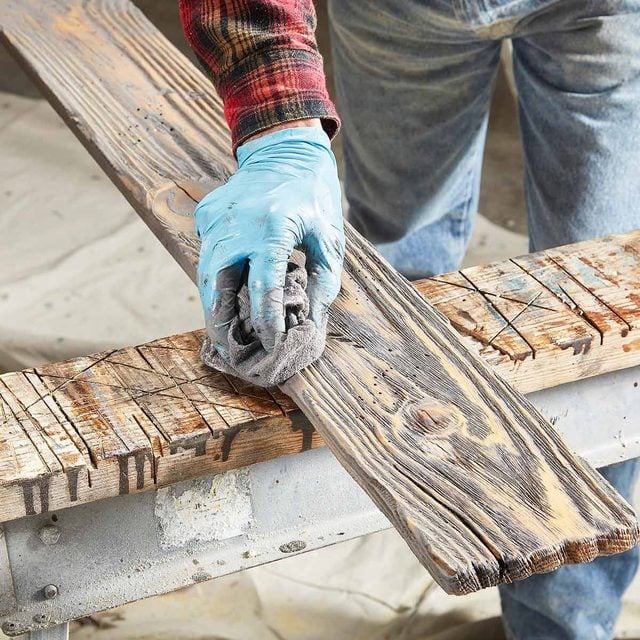
Dab on Dark Stain
- Dip a wadded cotton rag into the dark stain and apply it to the board in random patches.
- Spread out the patches with the rag to create an uneven layer of dark stain.

Finish with Gray Stain
- With a separate cotton rag, wipe on a coat of gray stain.
- Note: This coat can be more consistent than the dark coat.
- Wipe off excess stain with a dry cotton rag until you achieve the aged look you desire.
- Pro tip: If you want the additional protection of a clear finish over the stain, let the stain dry overnight before brushing on a coat or two of flat polyurethane finish.