
Ratchet Rebuild
Updated: Jun. 30, 2017Easy fix for a broken ratchet
Finding and fixing the problem
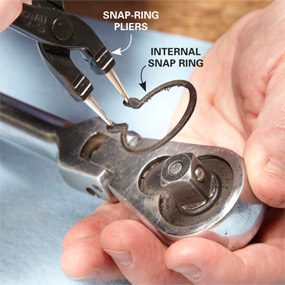
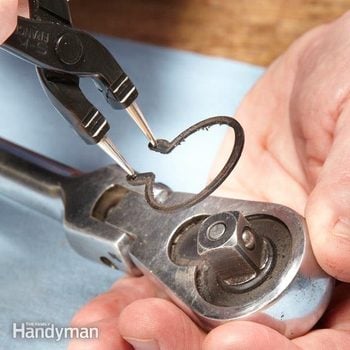
Photo 1: Remove an internal/external snap ring
Jam the prongs of the snap ring pliers into the holes on the snap ring. Then compress the internal snap ring and lift it out of the retaining slot. Change the pliers over to external mode to expand an external snap ring.
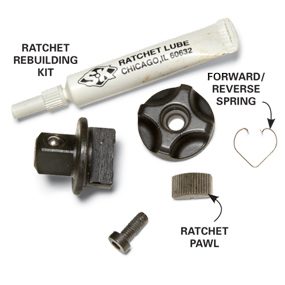
Ratchet rebuilding kit
You can find inexpensive rebuild kits for most ratchets with an online search.
Got a ratchet that’s jammed, rusted or won’t switch directions? Don’t toss it, rebuild it. In most cases, you can slap yours back into shape with just a good cleaning and new grease. But if you’ve broken a spring or a pawl, you’ll need to buy a rebuilding kit. A rebuild kit for most major brands costs about $10. To find one for yours, just enter the ratchet brand and model number in a search engine, or try ebay.com.
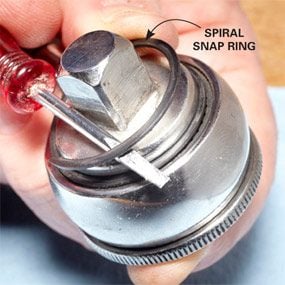
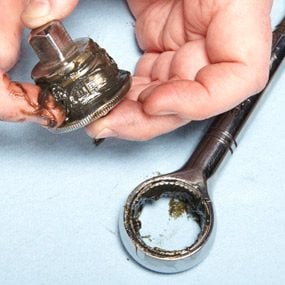
Before you buy a kit, disassemble the ratchet to assess its condition. Use a combination snap ring pliers (one brand is Tekton No. 3578; available through our affiliation with amazon.com to remove the internal or external snap ring from the ratchet head (Photo 1). Or use a small flat-blade screwdriver to remove a spiral snap ring (Photo 2). If your ratchet doesn’t use snap rings, it’ll come apart with either a hex wrench or a screwdriver.
Throw a towel over the ratchet (to capture flying springs) and slide the entire ratchet assembly out of the head. Clean the parts with brake cleaner and an old toothbrush. Remove any rust with a rust removal chemical. If the spring ends are intact and the pawl teeth are sharp, you can reuse them. If not, buy a rebuild kit. Then apply a light coating of wheel bearing grease to all the parts. Don’t use engine oil; it’ll just drip out. And don’t pack the head with grease—that’ll prevent the pawl from reversing. Then reassemble (Photo 3).
Required Tools for this Project
Have the necessary tools for this DIY project lined up before you start—you’ll save time and frustration.
- 4-in-1 screwdriver
- Wrench set
Required Materials for this Project
Avoid last-minute shopping trips by having all your materials ready ahead of time. Here’s a list.
- Brake cleaner
- Ratchet rebuilding kit
- Rust removal chemical
- Wheel bearing grease
