Water Softener Resin Replacement: A How-To Guide
Updated: Jan. 25, 2024
Do it yourself and save on the service fee.
Introduction
Diagnose a bad resin bed problem and replace the resin bed in your water softener. Do it yourself and avoid the expensive service call.Tools Required
- 4-in-1 screwdriver
Materials Required
- Gravel
- New resin
- Riser tube
Diagnosing a resin bed problem
If your water softener doesn’t put out any soft water or it regenerates and runs out of soft water quickly (in just a day or so), you probably have a damaged resin bed. A water-softener resin bed normally lasts 10 to 15 years. But iron in well water and excessive amounts of chlorine in city water can “kill” a resin bed. So how do you know if your resin bed has “checked out”?
Simple. Check to see if your water softener is using up salt at its regular rate. If it is, and you have no soft water, the resin bed has probably become saturated with iron deposits or been damaged by chlorine and can no longer be regenerated by the brine. If it isn’t using much or any salt, the problem is most likely a bad valve head, meaning the resin bed isn’t getting recharged with brine water at all.
First, try using iron removal chemicals to clean the water softener resin bed. If cleaning doesn’t work, you’ll have to replace the water softener resin.
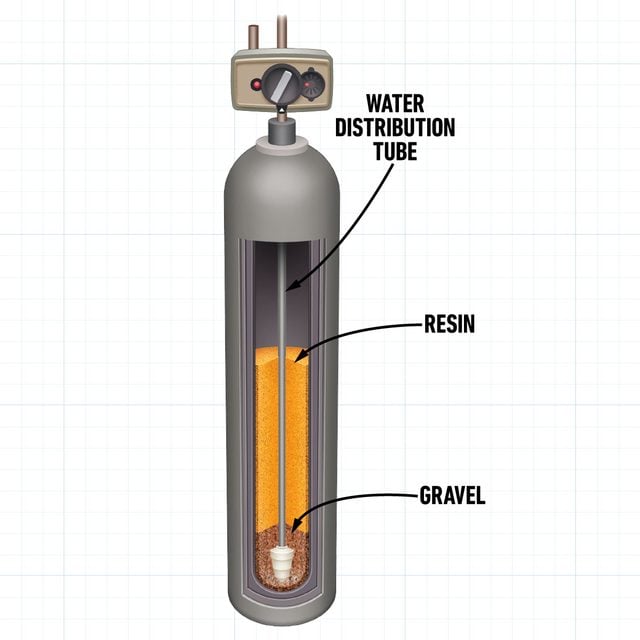
How a water softener works
Hard water enters the valve head and flows down through the water softener resin, exchanging hardness ions for sodium ions. The soft water flows up the riser tube to your plumbing fixtures.
Start the resin replacement process by measuring the resin tank to determine how much new resin you’ll need. Then contact a local water treatment company or shop online for the right high-quality resin (avoid the cheap stuff) for your particular application. Also remember to purchase a resin funnel, a new riser tube and gravel if it’s recommended for your system.
Next, rotate the softener valve to the bypass position (or turn off the main water valve). Turn the dial on the valve head to start a manual regeneration (that’ll bleed off internal water pressure). Then disconnect the softener from the plumbing and electrical.
Project step-by-step (5)
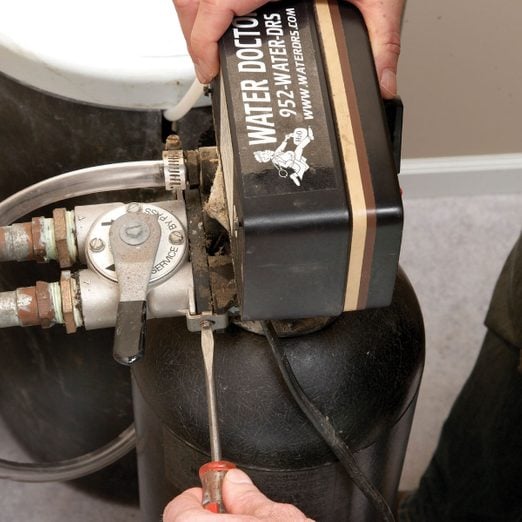
Unhook the unit
Remove the fasteners that hold the valve head to the bypass valve and pull the unit away from the plumbing. Pay attention when removing any O-rings or seals so you can reinstall them in the right place.

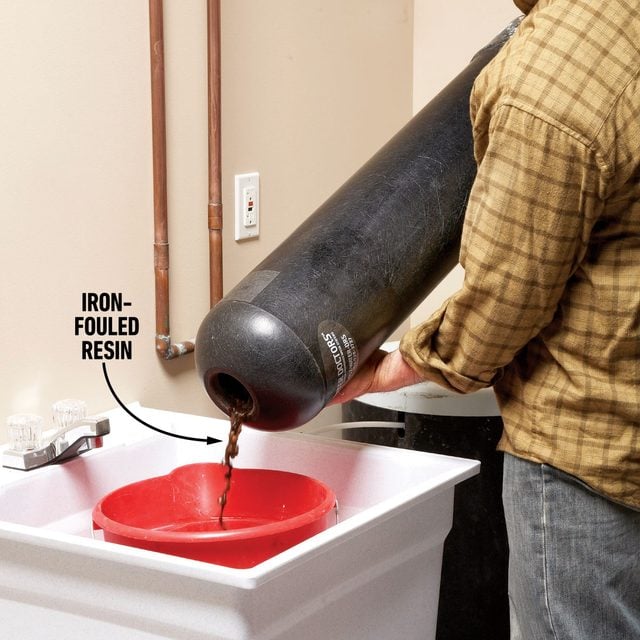
Dump and rinse
Pour the water, resin and gravel into a self-draining bucket or tub. Remove the old riser tube and rinse out all remaining resin.
Add new resin
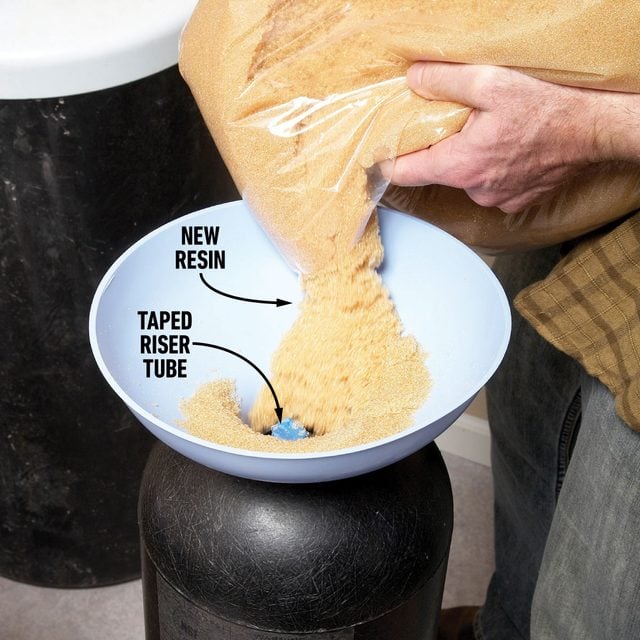
Before you install the new resin, cut the new riser tube to the same height as the old one and insert it into the water softener resin tank.
Tape off the riser tube and position the funnel. Pour in the gravel and shake the tank to help it settle. Then have a friend help you pour the new resin into the funnel. It makes a huge mess if it spills.
Check for leaks
Reinstall the valve head and reattach the unit to the bypass valve. Turn the valve back to the “in-service” position and check for leaks. Enjoy the soft water.
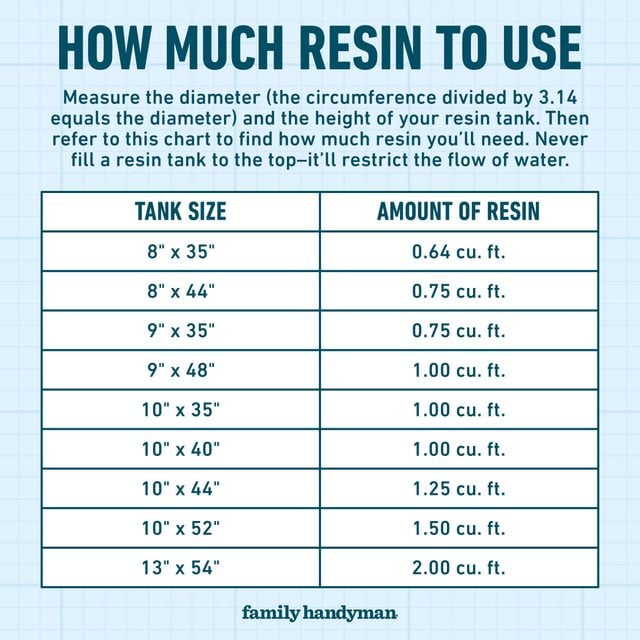
How much resin to use
Measure the diameter (the circumference divided by 3.14 equals the diameter) and the height of your water softener resin tank. Then refer to this chart to find how much resin you’ll need. Never fill a resin tank to the top—it’ll restrict the flow of water.