
Fix a Water Softener
Updated: Oct. 31, 2023
Try these three solutions when your water softener begins to fail
Introduction
You can often fix water softeners by checking the brine tank for salt problems or simply cleaning the resin bed or several other key parts. All are easy to do and you might avoid the expensive service call.Tools Required
- 4-in-1 screwdriver
- Bucket
Overview: Check the Control Settings
Is your soft water not so soft anymore? You can often fix the problem yourself. However, if you have an older softener (20 years or so) and none of these fixes work, it may need replacement ($500 and up).
All softeners, whether they have one or two tanks, work the same way. As cold water flows through the resin tank, the mineral content—the hardness—is removed because the minerals stick to thousands of resin beads. When the softener recharges, the flow of fresh water is stopped while salty water from the brine tank is sucked into the resin tank, where it dissolves the accumulated minerals and is flushed down the drain.
Before you tear apart your softener, check the control settings—especially after a long power outage. The timer clock has to show the right time so that the resin tank is cleaned and recharged when no one is using water (usually early morning).
Also, make sure the hardness setting is still correct—well water hardness can change over time. Bring a small container of your water to a water softener dealer for a water hardness test, then check the results against your settings.
Note: Set the water supply to “bypass” before working on the softener. And run the hot water after you turn the softener back on to flush out any hard water.
Project step-by-step (5)
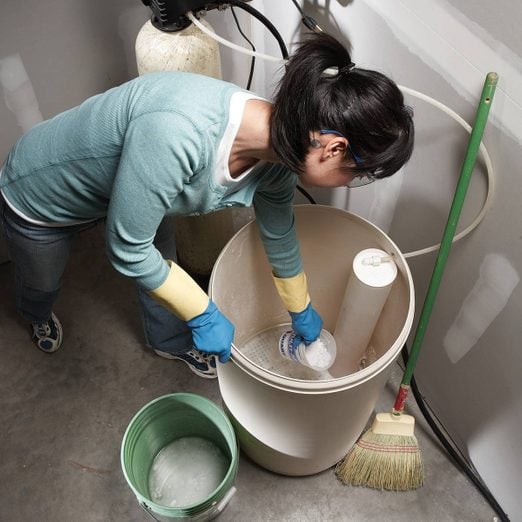
Look for salt problems
Check for salt problems in the brine tank. Start by pushing a broom handle down into the salt to break up water softener salt bridges (like a dome), blocking salt from dropping to the bottom of the tank. If too little salt gets dissolved, the resin bed won’t get clean and the water won’t get softened.
Also, when the salt level is low (or at least once a year), check for a crust of salt mush at the bottom. This thick salt paste doesn’t dissolve well, reducing the salinity of the brine solution, and needs to be removed.
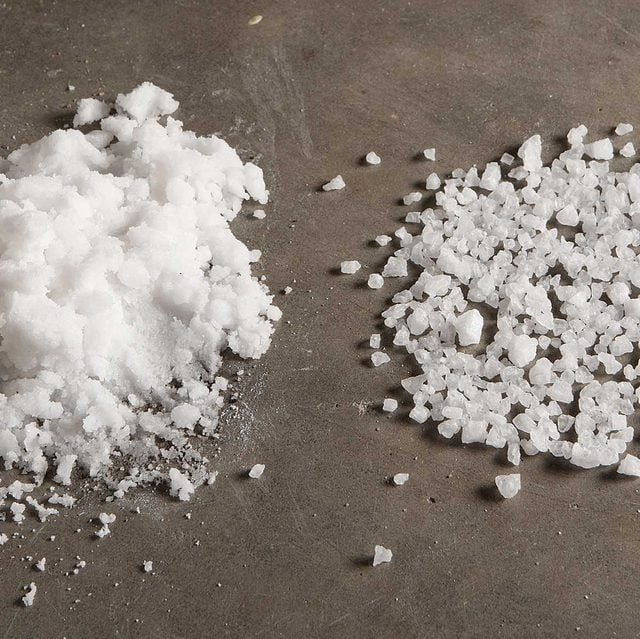
Don’t use rock salt; it contains dirt and other impurities that can clog the softener.
Remove Salt Mush
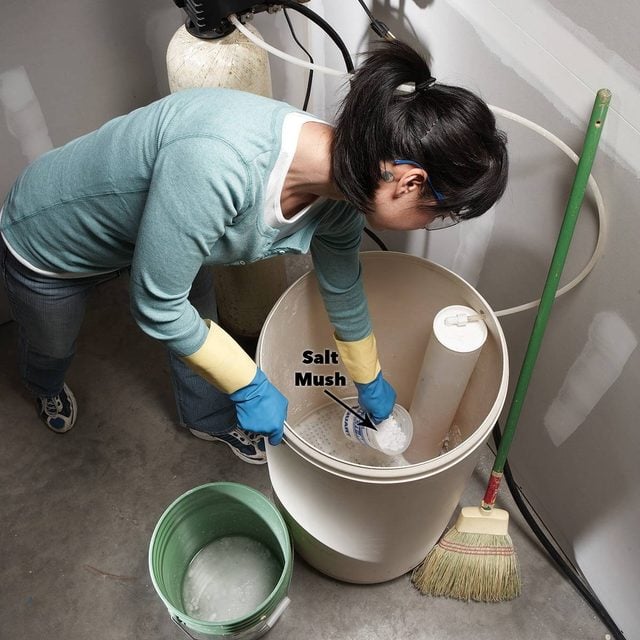
Scoop out the mush at the bottom of the tank, then pour in hot water to dissolve the rest before regenerating the system.
Clean the Resin Bed
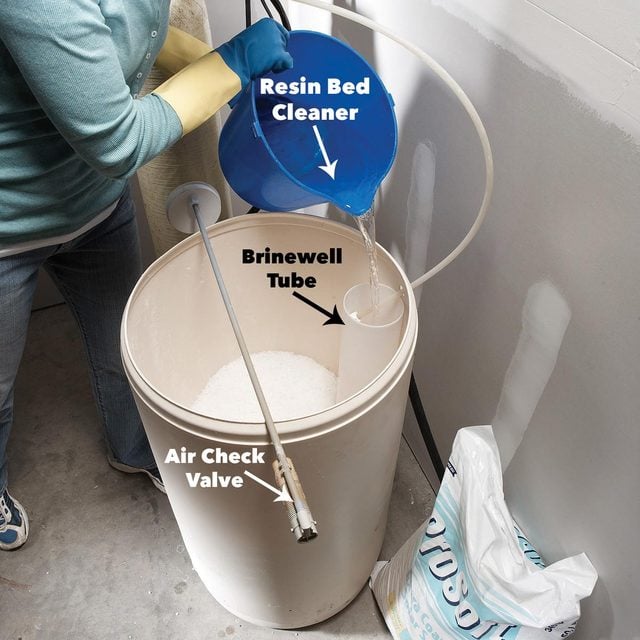
Clean the resin bed twice a year with resin bed cleaner (available at water softener dealers) if you have “clear water iron” (dissolved iron makes a glass of water turn cloudy or rusty after sitting for several minutes). Otherwise, the resin bed won’t remove the iron.
To clean the resin bed, pour diluted resin cleaner into the brinewell tube. Lift out the air check valve (or brine valve assembly) and clean it in warm water.
Remove the Venturi Assembly Parts
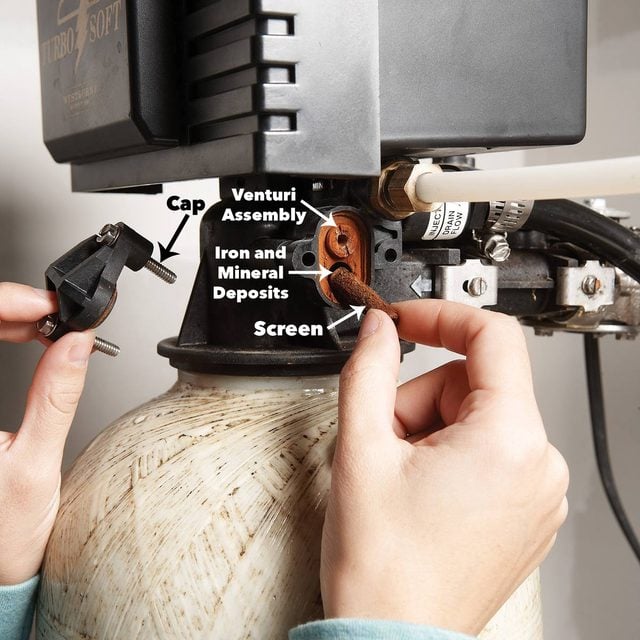
Remove the cap that covers the venturi assembly and filter screen and carefully remove the parts.
Clean the Parts
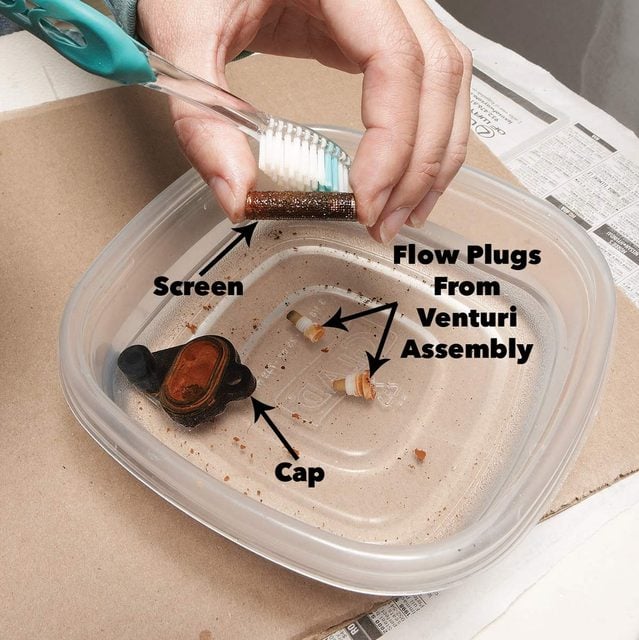
The salty water flows through these parts from the brine tank to the resin tank. If the screen and nozzle get clogged by sediment, the resin bed won’t be cleaned and the water will stay hard. Gently clean dirt and mineral deposits from the screen and from the venturi assembly parts in a pan of warm water.
A water softener removes minerals from water; that means cleaner laundry, a longer life for water-using appliances, less mineral buildup on plumbing fixtures and lots of other benefits.