
Fix a Leaky Shutoff With a Supply Valve Piggyback
Updated: Jul. 29, 2019An easy alternative to shutting off the main water supply
Thread the repair valve on—quickly!
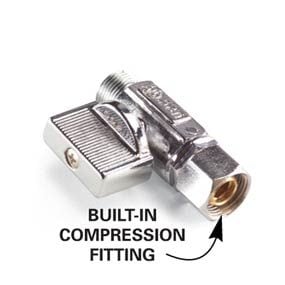
Repair valve
Piggyback the repair valve onto the old supply valve by threading on the compression fitting.
A shutoff valve that leaks when it’s turned off should be replaced, but if the shutoff is hard to access or if turning off the water supply to the whole house—or all the units in a condominium—is inconvenient, you can sidestep the problem by installing a special repair valve on top of the old supply valve. Valves are available at home centers or online. Once the new valve is in place, simply leave the old valve in the full “on” position and use the new valve whenever you need to shut off the water. The repair valve has a built-in compression fitting on one end that attaches directly to the top of your old valve. The supply tube attaches to the other end. The new valve’s “ball” design means you’ll never again have to deal with a shutoff problem.
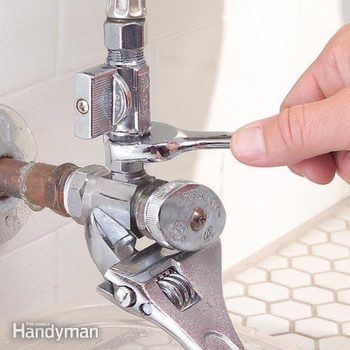
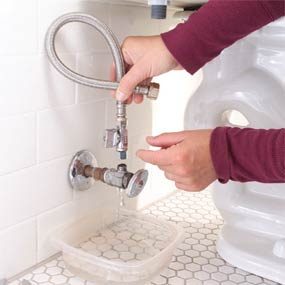
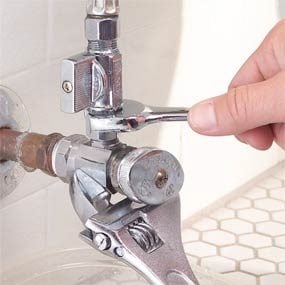
Follow this procedure to install the new valve: Shut off the old supply valve (hint: loosen the packing nut slightly). Water will leak out, so place a bowl under it. Then unscrew the old supply tube. Quickly swap in the new repair valve in the open position on top of the old valve. Tighten the compression fitting, then shut off the new valve. Open the old valve all the way and tighten the packing nut. From that point on, ignore the old valve and use the new one to turn off the water.
Required Tools for this add a valve project
Have the necessary tools for this DIY project lined up before you start—you’ll save time and frustration.
- Adjustable wrench
- Wrench set
Required Materials for this add a valve project
Avoid last-minute shopping trips by having all your materials ready ahead of time. Here’s a list.
- Shutoff repair valve
