
How To Clear Clogged Drains

Updated: Apr. 18, 2024
Is your drain clogged? If it's a sink, bathtub or shower drain, you can clear it yourself with this guidance from the Drain Whisperer.
An hour or less
Beginner
Less than $20
Introduction
It's a safe bet that, as you're reading this, there is at least one drain clogged in your immediate neighborhood. The next-door-neighbor could have a slow-draining bathtub, the house on the corner might have a stopped sink or there could be a toilet that doesn't flush on the next street over. I get out my toolbox and help clear clogs whenever anyone asks, and I've gotten pretty good at it, but I'm nowhere near as good as the Drain Whisperer.
That's the nickname Tyler Pittenger has earned from his colleagues at Maryland-based Service Force Plumbing. "Drain cleaning is an art, and many plumbers aren't that good at it," says Roy Barnes, co-owner of Service Force. "When I get a good one like Tyler, I definitely will make use of him." Pittenger agreed to be a consultant for this primer on drain cleaning methods, so we're also going to get a chance to make use of him and his knowledge.
What Causes Clogged Drains?
The most common scenario is something obstructing water flow, such as hair, congealed grease or some hard object inadvertently dropped in the drain. More severe clogs may be caused by large obstacles or even tree roots in the sewer. Blocked vents can also make a drain clogged by restricting the air needed for water to flow.
What's the Easiest Way To Unclog a Drain?
"Your basic plunger is a good first step," says Pittenger. Plumbers tend to have their own methods, but they agree on two things: water flows downhill and plunging, done properly, can remove 90 percent of clogs. It's safer — and more effective — than pouring chemicals in your drain that can damage the pipes.
When Should You Call a Plumber To Clear a Clogged Drain?
When a clog develops in a main sewer or waste line, it usually affects more than one fixture. Such clogs are often too deep to reach with conventional augers, and you need a "snake and camera guy" like Pittenger to find the clog and bust it up.
Tools Required
- 4-in-1 screwdriver
- Cable-tie drain cleaning tool
- Drain auger (snake)
- Plunger
- Safety glasses
- Slip joint pliers
Materials Required
- Enzyme-based drain cleaner
- Rubber gloves
Project step-by-step (7)
Pull out debris by hand
Start your drain-cleaning procedure by manually removing as much debris from the drain as you can. Sometimes the clog is in plain sight, like a wad of hair and scum stuck to the stopper in bathroom sinks.
- Remove the stopper. Sometimes, you can pull the stopper straight out, but in bathroom sinks with pop-up stoppers, you must disconnect the stopper from the lift lever that controls it. To do this, go under the sink cabinet, locate the nut that holds the lever to the drain tailpiece, unscrew it with your fingers or with pliers and pull the lever out. This frees the stopper.
- Remove debris manually. You’ll often find hair and soap scum twisted around the flange on the bottom of a pop-up stopper, so pull that off. Go inside the drain with your fingers or a cable-tie removal tool such as a Zip-It tool to get as much of the rest of the debris as possible. Pittenger advises: “Be careful not to be too aggressive with cable-tie tools, as they can get caught or break off inside the drain and multiply your problem.”
Pro Tip: There are several types of bathtub stoppers, all requiring different removal procedures.
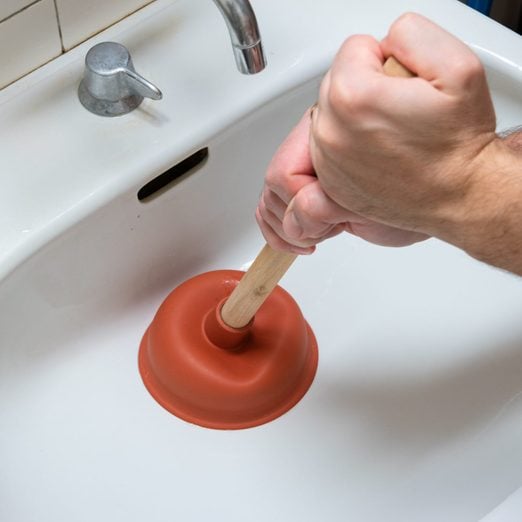
Reach for the plunger
Use a dome-shaped plunger with a flat bottom for sinks, bathtubs and showers. You can expect some splashing, so wear rubber gloves and safety glasses. Here’s how to plunge a sink, bathtub or shower drain:
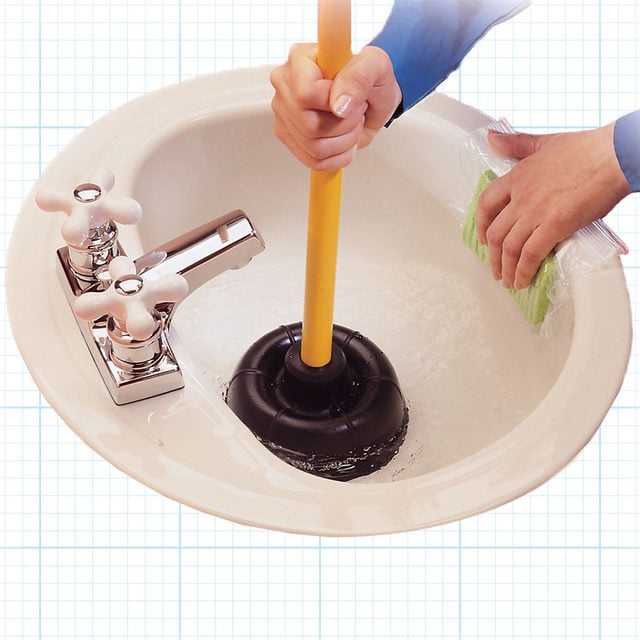
- Fill the sink, tub or shower with enough water to cover the plunger, and make sure the dome completely covers the drain hole. “You may need to remove the overflow cover (using a screwdriver) and block the hole with a towel or plastic bag to keep the suction focused on the clog,” says Pittenger.
- Make your first plunge a light one. Initially, the dome is full of air. A hard thrust will force the air back around the seal and blow water all over the room — and you!
- Always use a quick back-and-forth motion with a plunger to create push-and-pull suction to dislodge the clog, advises Pittenger. Stick with it, plunging 15 to 20 times if necessary.
- Add water as needed to keep the dome covered. Otherwise, air will get into the drain, and trying to force air through the drainpipes won’t generate much pressure.
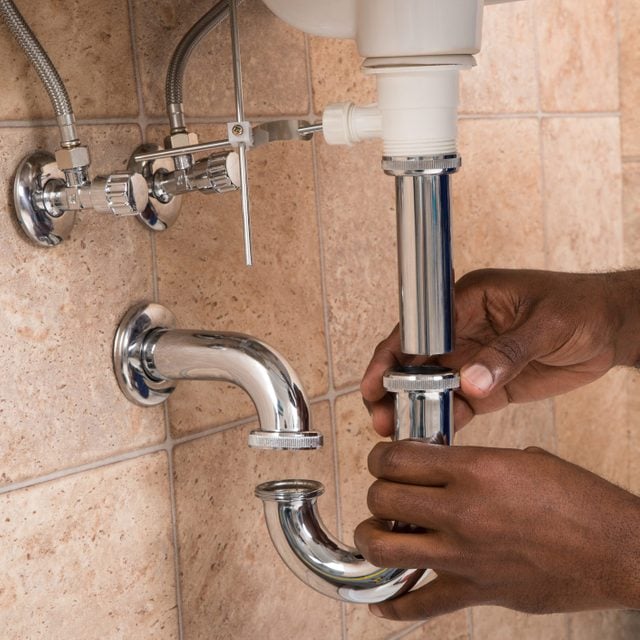
Disassemble the P-trap and snake the drain
Take the P-trap apart and clean it manually if plunging has no effect. Sometimes an object or debris like plaster or congealed grease has gotten lodged there. You can disassemble the trap by loosening and removing the two large compression nuts on the curved section using slip-joint pliers, putting a bucket under the trap to catch water and removing that section. This option is only available for sink drains with exposed traps.
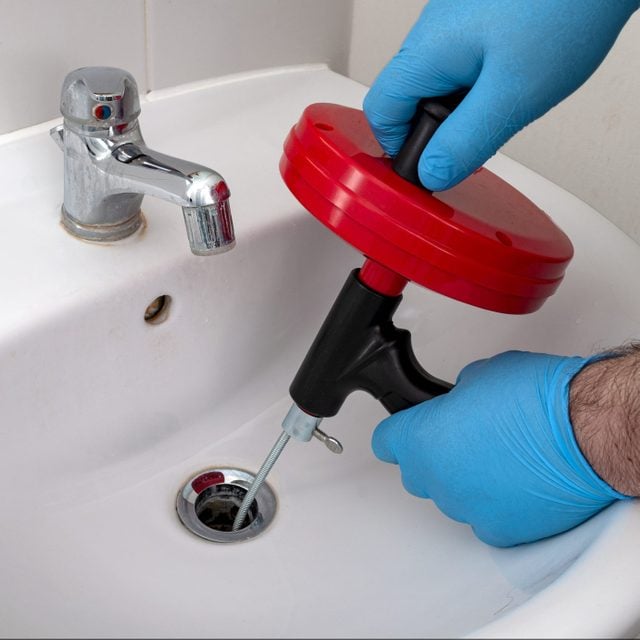
If the drain is still clogged, remove the trap again and use a plumbing auger (a snake) to clear debris from the waste line inside the wall:
- Uncoil the snake and lay it out straight, then shove it firmly into the drain while twisting it at the same time to get around tough corners.
- Turn the handle clockwise when you feel resistance to make the head bite into obstructions. Then pull back slightly. If you feel resistance, you’ve hooked into something. Pull it out.
- Stick with it. If the snake continues to make progress (extend deeper into the drain), it’ll slowly chew through tough stuff. You won’t know for sure whether you’ve solved the problem until you reassemble the drain and run water through it. So run the snake in as far as you can.
- Wipe the goop off the plumber’s snake with a rag as you pull it out.
Pro Tip: Some plumbers recommend drain bladders for stuck drains. A drain bladder is a small rubber bag that blows up like a balloon when you fill it with water. If you use one in a backed-up drain, a bladder can develop much more clog-busting force than a plunger.
Pittenger, however, recommends bladders only for outdoor drains. “There is no way that tool is not making a big mess, and that is exponential if a homeowner has never used one before. It is not a tool we would use.”
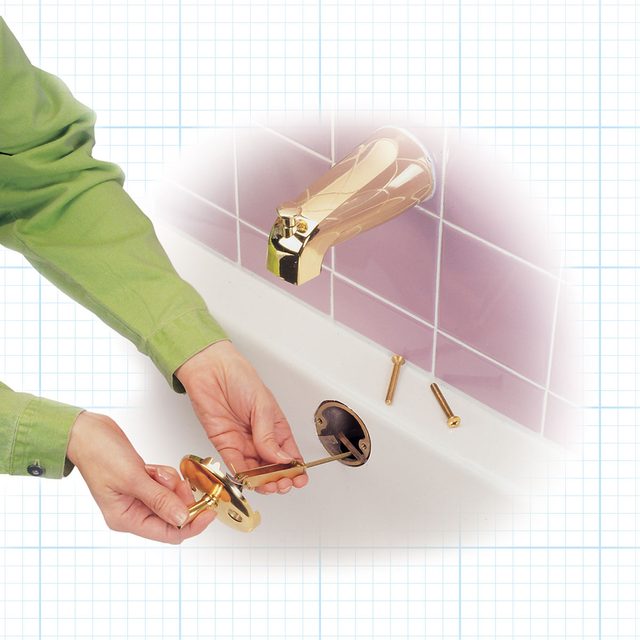
Clear bathtub clogs
You can clear most bathtub clogs by pulling hair out from the drain opening, but when you’ve got one deeper in the pipes, you need a snake. You can insert it through the drain opening, but Pittenger cautions that there’s a “T” where the drain meets the overflow tube, and you risk going up the overflow tube and not down into the drain. It’s usually more effective to snake through the overflow tube.
- Remove the overflow cover plate, using a screwdriver, and pull out the linkage. It may be covered with hair, so clean it off. That may be all you need to do to clear the drain.
- Insert the drain through the overflow hole. It should reach to the P-trap and beyond. “Don’t push it,” Says Pittenger. “Be gentle, or you risk getting the snake stuck or tied up in a knot, and once that happens, you’re calling a plumber.”
- Remove the P-trap and clean it as a last resort.
Troubleshoot repeat offenders
Some drains are just stubborn and get clogged repeatedly. The problem may be because the pipes are lined with grease or soap and keep snagging hair. A good solution for this is an enzyme-based drain cleaner. It digests organic materials that cause clogs, and while it may work slowly, it’s safer for the pipes and for septic systems than caustic drain cleaners that contain sodium hydroxide or sulfuric acid.
If none of your drain-cleaning efforts are successful, the problem may be blocked vents, which require their own method of unblocking.
A less common problem is that the drain pipes don’t have the required slope of 1/4 inch per foot. You can measure this yourself on exposed pipes, but if you suspect this problem in pipes hidden behind walls, your best bet is to call a plumber to diagnose and correct them.
FAQ
Is it okay to use chemicals to unclog a drain?
Caustic and acidic chemicals can definitely dissolve clogs, and enzymatic drain cleaners can too, although more slowly. Always try to plunge before introducing caustic or acidic chemicals, because if you plunge afterwards, you could get skin burns. If the caustic chemicals don’t work, they pose a danger to anyone who disassembles the P-trap or tries to use an auger, so be careful.
What substances can damage drain pipes?
Caustic and acidic chemicals such as those found in conventional drain cleaners (sodium hydroxide and sulfuric acid) generate enough heat as they work to melt plastic drain pipes. They can also corrode metal pipes. Plain bleach is also corrosive (and generally ineffective against clogs), and it releases toxic fumes inside the pipes that can be dangerous if inhaled.
How do you dissolve hair in a drain?
My preferred way is to pour in some enzymatic drain cleaner, such as Green Gobbler, wait a few hours, then pour in some more. Wait until morning, then flush the drain with hot water.
About the Experts
- Tyler Pittenger is the “snake and camera guy” for Service Force Plumbing, based in Rockville, Maryland. His drain-cleaning expertise has earned him the nickname Drain Whisperer among his co-workers.
- Roy Barnes is co-owner of Service Force Plumbing together with his partner Hendrik Vandepoll. He has been in the business for more than 30 years and is familiar with all aspects of the plumbing trade.
Originally Published: November 14, 2017