
11 Pro Tips for How To Paint Trim

Updated: Apr. 04, 2024
Walls tend to take center stage when painting, but trim is important, too. These pro-approved tips are the key to perfectly painted trim.
Walls, windows, floors and doors have a few things in common. First, they’re all surrounded by trim. And they’re also subject to daily wear and tear that can take a real toll on your home’s appearance. Think of trim as the framework that lets the rest of your home shine, almost like a framed piece of art.
“Trim borders everything and makes the whole space look cleaner,” says Todd Berry, a pro painting project coordinator. That’s why homeowners should take care of trim showing obvious signs of damage.
Luckily, painting trim is something almost every homeowner can handle, according to Steve Hester, a painting company vice president. As long as the homeowner follows directions and takes their time to complete the task properly, he says, they’re more than capable of painting trim. Those who feel unsure of their ability and patience should reach out to a professional.
If you’re ready to take on a DIY trim painting project, read these 11 pro tips first.
On This Page
About the Experts
Todd Berry is project coordinator at Emerald Painting in Kaneohe, Hawaii.
Steve Hester is the vice president of Hester Painting & Decorating, servicing the Chicago metropolitan area.
Nick Slavic is the owner of Nick Slavik Painting and Restoration Co. in New Prague, Minnesota. He has more than 25 years experience as a professional painter.
Take Proper Safety Precautions
If you’re not sure if the paint currently on your trim is lead-free, test it. “If the home was built prior to 1978,” Hester says, “you should follow the Environmental Protection Agency’s rules for lead paint safety.”
Once you know your trim paint is lead-free, you can paint it without worry.
Start By Washing the Trim
After basic floor and furniture protection and site prep to contain dust and odors, Slavic says, “We typically wash trim before sanding. Grease and grime on the trim can gum up sandpaper.”
Next, Sand the Trim
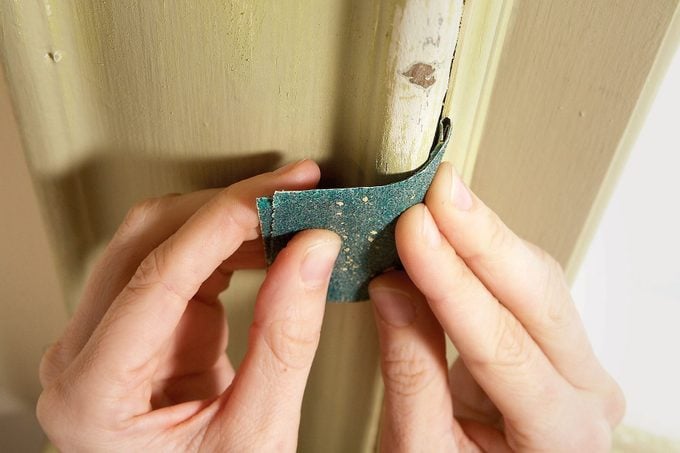
Berry says most homeowners can stick to 220-grit sandpaper. But if your trim is in really rough shape, start with 80-grit before moving on to 100-grit for smoothing and blending in the areas with layered paint. Then go over all the wood with 120 grit.
“Giving it a proper sanding will make sure the surface is smooth,” Berry says. That makes it easier to apply the paint evenly, which can cut down on the time to finish the project.
Properly Prime the Trim
“I’m a firm believer that trim should be primed first, then caulked,” Slavik says.
Hester says you should always prime raw surfaces before caulking or patching. Berry agrees, adding oil primer is the best choice for raw wood trim you’re likely to find in new builds.
“We prime everything, or do an adhesion test to determine if priming is needed,” Slavik says. “When trim painting fails, it usually fails with adhesion.” He also recommends oil-based primer.
Fill Any Holes and Dents
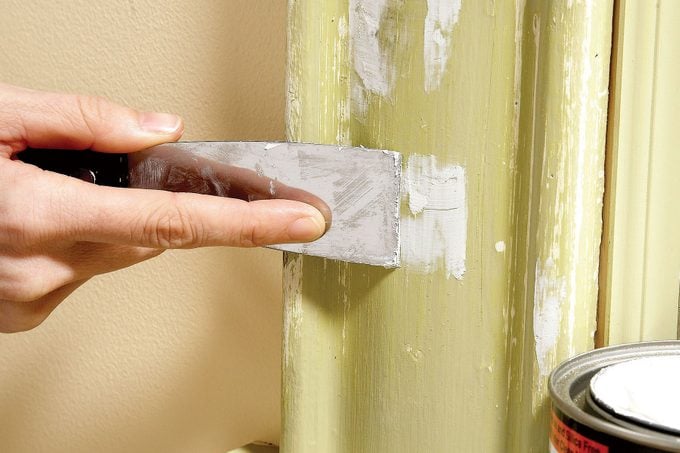
To repair large dents or gouges on edges vulnerable to abuse, use a hardening-type two-part wood filler. You can purchase wood filler online, buy it at a home improvement or hardware store, or take a stab at making your own.
Fill smaller dents and holes with spackling compound. Because spackling compound shrinks as it dries, you’ll need a second and possibly a third coat.
After each coat, shine a light across the woodwork to highlight depressions and ensure you didn’t miss any spots. Once you’re satisfied, let the filler dry and sand it smooth.
Caulk to Avoid Gaps and Cracks
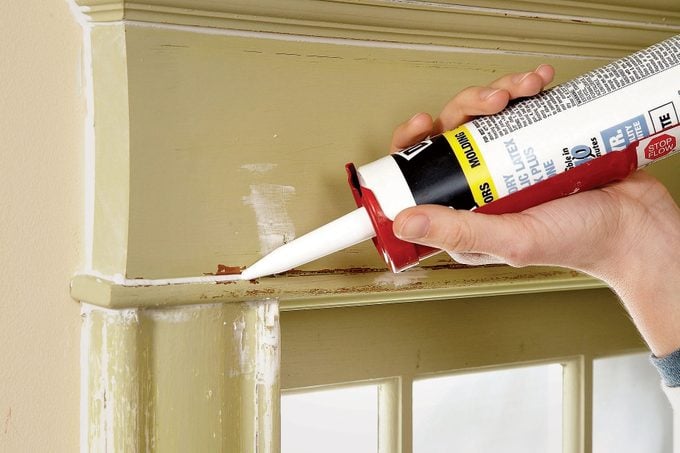
“If there are any cracks or nail holes, that’s when you’ll want to start caulking,” Berry says. “Sealing those cracks can protect your trim from things like water damage in the future and make the paint job last longer.”
Use latex (acrylic) caulk or a paintable latex/silicone blend. Make sure to cut the caulk tube tip carefully to create a tiny hole. Fill all the small cracks first. Then, if you have wider cracks, recut the tip to make a larger hole.
Move the gun swiftly along the cracks to avoid excess caulk buildup. If necessary, smooth the caulk with your fingertip. Keep a damp rag in your pocket to clean caulk from your finger and keep the tube tip from gumming up. If caulk piles up in corners, remove the excess with a flexible putty knife.
If you’ve never caulked before, follow these expert-approved tips.
Choose the Right Paint
Most pros prefer oil-based paint on trim for two reasons.
First, it doesn’t dry as fast as water-based paint, which gives you more time to brush. And oil-based paint levels out better than most water-based paints, leaving a smoother surface with few visible brush marks. But because water-based paint is more environmentally friendly, less stinky and easier to clean, it’s often a better choice for DIYers.
Berry says most homeowners he works with choose a gloss finish for their trim because it’s easier to clean. Hester recommends higher end products with a satin enamel or semi-gloss finish, particularly from Benjamin Moore or Sherwin-Williams. Slavik notes he and his painters prefer water-based enamel because oil-based enamel isn’t readily available.
Paint From a Separate Bucket or Pail
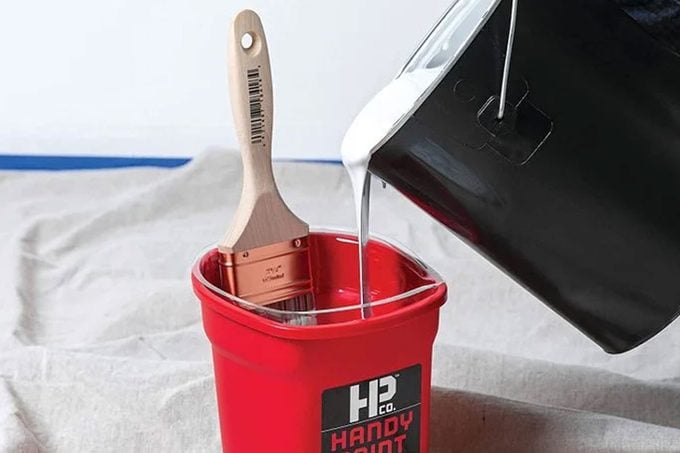
Berry says it’s essential to work out of a different bucket or pail so you can easily bump or slap the brush against the side to remove excess paint. Paint gallon cans straight from the store are filled so close to the brim that it’s nearly impossible to do that.
Placing a small amount of paint in a pail also lets you easily load the bristles of the brush by dipping them about one inch into the paint. The extra control is essential when painting smaller areas like trim.
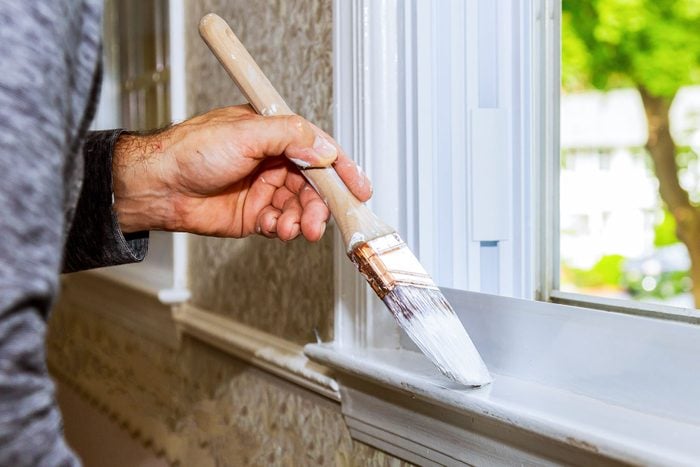
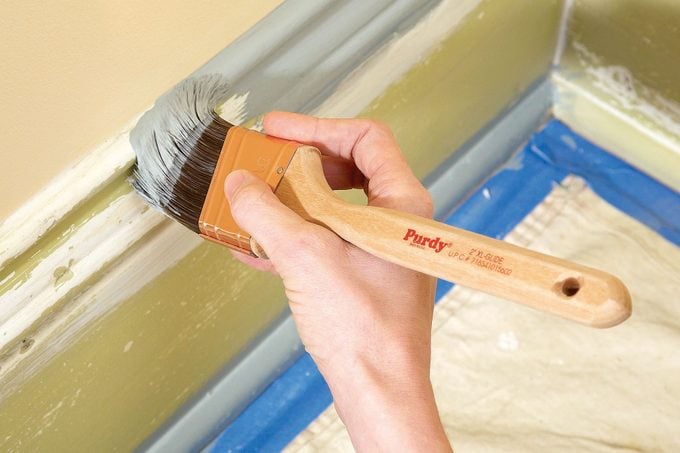
Use the Proper Brushstrokes to Paint Precisely
After years in the painting industry, Hester has one main suggestion for homeowners: Paint with precision.
“To keep paint from dripping or running on your trim, you need to put on an even coat of paint,” he says. “Don’t overload the brush with material. If there is a need for another coat, then add a second coat. Don’t try to make it cover in one coat because that can lead to runs.”
Start with cutting-in the edges
Cutting-in is a skill that takes practice to master, but it’s worth the effort.
To cut in, first load the brush. Then wipe off most of the excess paint by gently scraping the bristles on the edge of the paint bucket or pail.
Start by pulling the brush along the edge, but keep the bristles about 1/4-in. away from the wall or ceiling to deposit some paint on the wood. Now return with another brushstroke, this time a little closer. Sneaking up to the line like this is easier than trying to get it perfect on the first try.
At the end of the stroke, arc the brush away from the cut-in line. Cut in a few feet, then fill the middle using the lay-on, lay-off technique described in the next section.
Lay-on, lay-off technique
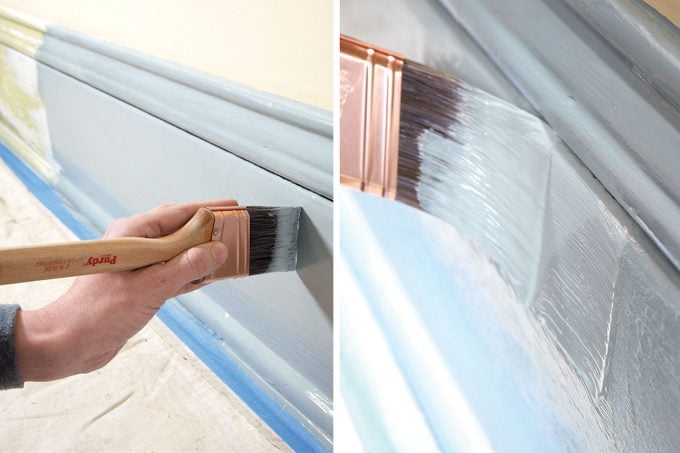
To avoid visible brushstrokes, load your brush with paint, then quickly unload on the surface with a few back-and-forth brushstrokes. This is called “laying on” the paint. Repeat until you’ve covered a few feet of trim with paint. Don’t worry about how it looks yet.
Now, without reloading the brush, drag the tips of the bristles over the wet paint in one long stroke to “lay off” the paint.
Start in the unpainted area and drag into the previously painted trim. Sweep your brush up off the surface at the end of each stroke. Areas wider than your brush will require several parallel laying-off strokes to finish.
When you’re done laying off a section, move on and repeat the process, always working quickly to avoid brushing over partially dried paint. Try to complete shorter pieces of trim with a continuous laying-off brushstroke.
Don’t Brush Across an Edge
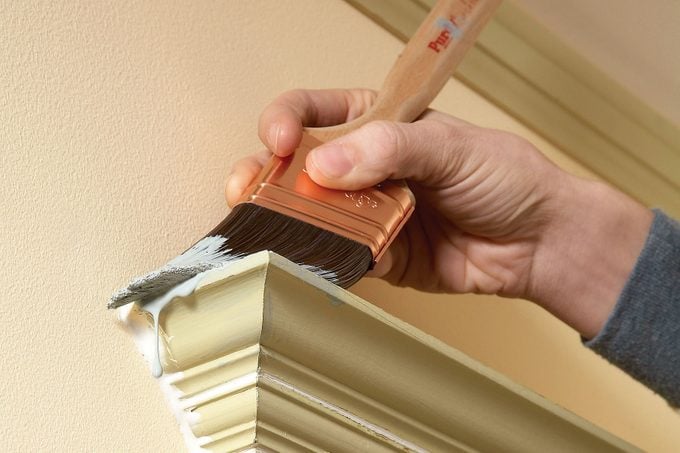
Brushing across an edge wipes paint from the bristles and creates a heavy buildup that will run or drip. Avoid this by brushing toward edges whenever possible.
If you must start a brushstroke at an edge, align the bristles carefully as if you’re cutting-in, instead of wiping them against the edge. If you accidentally get a buildup of paint that could cause a run, spread it out right away with a dry paintbrush, or wipe it off with a damp rag or your finger.
Air Out the Area
Try to air out the space you’re painting between coats and when you’re finished. “If everything is closed up your home will smell like paint,” Berry says. “People with breathing issues or respiratory illnesses could be affected.”
Originally Published: February 23, 2024