
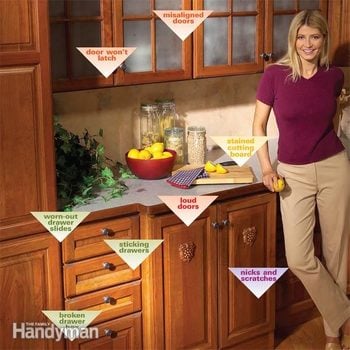
10 Simple Kitchen Cabinet Repairs
Updated: Feb. 01, 2023Quick and easy ways to make your cabinets look and work like new again!
- Time
- Complexity
- Cost
- An hour or less
- Beginner
- Less than $20
Clean a yucky cutting board
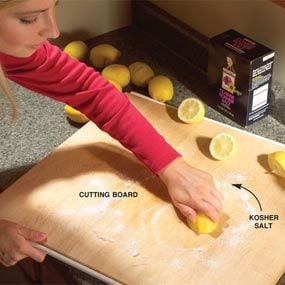
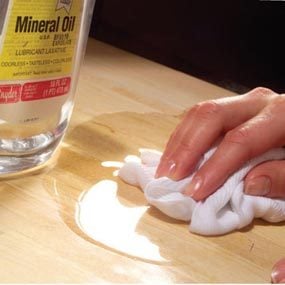
If you love the convenience of your pullout wooden cutting board but don’t use it because it’s stained and grungy, try this chef-approved, two-step process. Simply scour the board with a lemon and a pile of kosher salt, then apply mineral oil.
The coarse kosher salt is an excellent abrasive, and the citric acid kills bacteria. When the stains are gone, rinse the board and let it dry. Mineral oil helps prevent the wood from absorbing stains.
Adjust hinges on misaligned doors
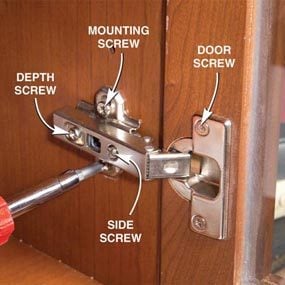
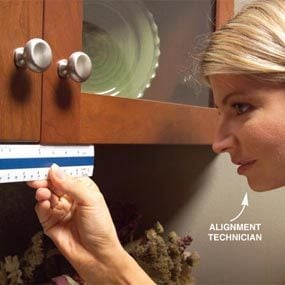
If your cabinet doors are out of whack and you have European-style hinges, you’re in luck. Euro hinges are designed for easy adjustment. Don’t let their complex look scare you; all you have to do is turn a few screws, and any mistakes you make are easy to correct. The Euro hinge shown here adjusts in three directions. Others adjust in two directions. Either way, it’s a trial-and-error process: You make adjustments, close the door to check the fit, then adjust again until it’s right.
First:
If the door isn’t flush with the doors next to it, adjust the depth screw. This screw moves the door in or out. Some depth screws move the door as you turn them. But with most, you have to loosen the screw, nudge the door in or out and then tighten the screw. If your hinges don’t have depth screws, start with the side screws.
second
If the door is crooked—not standing parallel to adjacent doors or square with the cabinet—adjust the side screw. This moves the door from side to side. In some cases, you have to loosen the depth screw slightly to adjust the side screw.
third
If the door is flush and parallel with other doors but too high or low, use the mounting screws to raise or lower the mounting plates. Loosen the screws at both hinges, slide the door up or down and tighten the screws. Some mounting plates adjust by turning a single screw.
Adjust or replace bad latches
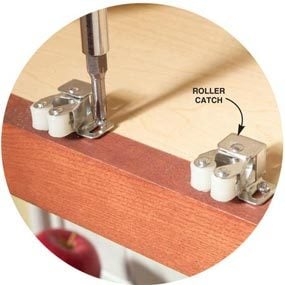
Most newer cabinets have self-closing hinges that hold the doors shut. Others have magnetic or roller catches. A catch that no longer keeps a door closed is either broken or out of adjustment. Catches are fastened with two screws, so replacing a damaged catch is simple.
Adjustment is just as simple, but you might have to readjust the catch a couple of times before you get it right. Loosen the screws, move the catch in or out, and tighten the screws. If the door doesn’t close tightly, try again.
If you have a door that’s slightly warped and won’t lie flat against the cabinet, try adding a magnetic catch at the trouble spot. Often the magnet is strong enough to pull the door in tight.
Add bumpers to banging doors
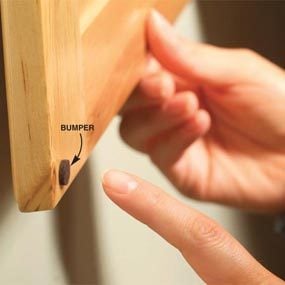
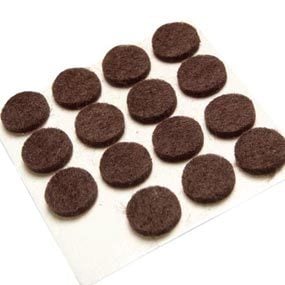
Tired of listening to those cabinet doors bang shut? Peel-and-stick door and drawer bumpers are the solution. Make sure the back of the door is clean so the bumpers will stick, then place one at the top corner and another at the bottom.
Replace worn-out drawer slides
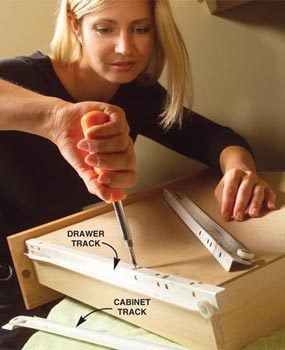
If you find that slides are bent, rollers are broken or rollers won’t turn even after lubricating, replacement is the best solution. To keep the project simple, buy new slides that are identical (or almost identical) to the old ones. That way, replacement is an easy matter of unscrewing the old and screwing on the new.
Remove a drawer track and a cabinet track and take them shopping with you. Whether you have pairs of side-mounted slides (as shown here) or single, center-mount slides, there’s a good chance you’ll find very similar slides at a home center. If you can’t find them, check with a cabinet materials supplier (in the Yellow Pages under “Cabinets, Equipment and Supplies” or online).
Lubricate sticking drawers
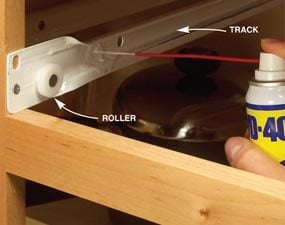
A few minutes of cleaning and lubricating can make drawer slides glide almost like new. Start by removing the drawers so you can inspect the slides.
You can remove most drawers by pulling them all the way out, then either lifting or lowering the front of the drawer until the wheels come out of the track. Wipe the tracks clean and coat them with a light spray lubricant. Also lubricate the rollers and make sure they spin easily.
Repair a broken drawer box
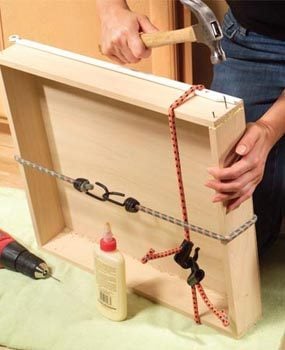
Don’t put up with a broken corner joint on a drawer. Fix it before the whole drawer comes apart. Remove the drawer and then remove the drawer front from the drawer box if possible. Most fronts are fastened by a couple of screws inside the box. Wood glue will make a strong repair for kitchen cabinets where there’s wood-to-wood contact at the joint. If the wood at the joint is coated, use epoxy instead of wood glue.
Glue loose knobs
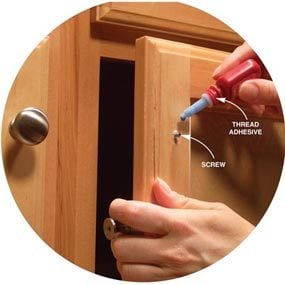
Any handle or knob that comes loose once is likely to come loose again. Put a permanent stop to this problem with a tiny drop of thread adhesive like Thread Lok. Don’t worry; if you want to replace your hardware sometime in the future, the knobs will still come off with a screwdriver.
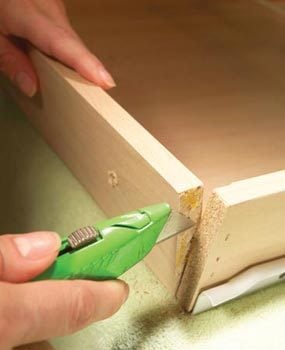
Fill stripped screw holes
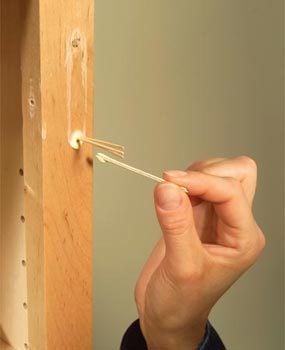
When cabinet doors, catches or drawer slides aren’t working right, step one is to make sure the screws are tight. If a screw turns but doesn’t tighten, the screw hole is stripped. Here’s a quick remedy:
Remove the screw and hardware. Dip toothpicks in glue, jam as many as you can into the hole and break them off. Either flat or round toothpicks will work. If you don’t have toothpicks handy, shave splinters off a wood scrap with a utility knife. Immediately wipe away glue drips with a damp cloth. You don’t have to wait for the glue to dry or drill new screw holes; just go ahead and reinstall the hardware by driving screws right into the toothpicks.
Touch up nicks and scratches
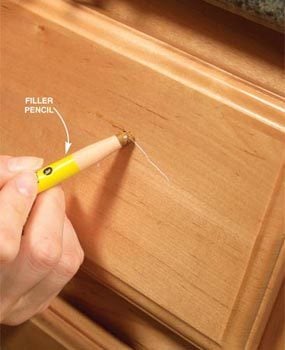
If you have shallow scratches or nicks, hide them with a stain-filled touch-up marker. Dab on the stain and wipe off the excess with a rag. But beware: Scratches can absorb lots of stain and turn darker than the surrounding finish.
So start with a marker that’s lighter than your cabinet finish and then switch to a darker shade if needed. For deeper scratches, use a filler pencil, which fills and colors the scratch. If the cabinet finish is dingy overall and has lots of scratches, consider a wipe-on product like Old English Scratch Coat. These products can darken the finish slightly, so you have to apply them to all your cabinets.
Required Tools for this Project
Have the necessary tools for this DIY project lined up before you start—you’ll save time and frustration.
- 4-in-1 screwdriver
- Cordless drill
- Hammer
- Utility knife
Required Materials for this Project
Avoid last-minute shopping trips by having all your materials ready ahead of time. Here’s a list.
- Door bumpers
- Drawer slides
- Filler pencil
- Finish nails
- Kosher salt
- Lemon
- Mineral oil
- Spray lubricant
- Stain marker
- Thread-lok
- Wood glue
