How to Set Up a DIY Home Alarm System
Updated: Mar. 21, 2024
Install a reliable security system in just one day. DIY home security systems will help to protect your home and your family.
A full day
Beginner
$501-1000
Introduction
Install a dependable wireless security system and save hundreds by doing it yourself. The wireless modules are easy to install with basic tools. Complete the system in a single day.Tools Required
- 4-in-1 screwdriver
- Drill bit set
- Drill/driver - cordless
- Hammer
- Pry bar
- Wire stripper/cutter
Materials Required
- Wireless security system
Big Savings with a DIY Home Security System
The wireless home security systems of 20 years ago were notoriously unreliable. They produced so many false alarms that many homeowners stopped using them. That’s all changed. Today you can buy DIY home security systems that have professional-grade wireless security equipment that’s extremely reliable, easy to install, and affordable. Basic DIY home security systems start at about $225 and top out at $800 or so. If you add wireless smoke/heat detectors, plan to spend about $1,300 for DIY alarm systems. That’s still about half of what a professional alarm company would charge. Monitoring service, which notifies the police or fire department, can cost $40 or more per month. But if you shop around, you can get it for about $10 per month.
We’ll show you how to plan your DIY home security system so you can get it up and running in a single day. Plus, we’ll show you how you can save money on equipment and neaten up the DIY alarm systems installation at the same time. Home security installation is easy. You just mount the transmitters at doors and windows and connect a control panel to phone lines and a power supply. All you’ll need are basic tools for a home security system DIY project — a drill, screwdrivers, wire stripper, and a small pry bar.
Project step-by-step (12)
Save $100s Now—And $30 Every Month
Installing a wireless DIY home security system can be as easy as mounting transmitters on doors and windows and connecting a control panel to your phone line. You’ll save $300 to $600 in parts and labor costs. Better yet, you’ll avoid an expensive long-term monitoring contract with a home security company. Instead, you can shop around and choose any monitoring service you like. That will save you about $30 every month — forever.
Window Transmitters vs. Installing Motion Sensors
Some alarm installers recommend eliminating window transmitters and installing motion sensors instead. These sensors are similar to the motion detectors that turn on outdoor floodlights. That approach can cut costs, but we don’t recommend it. Motion sensors cause the majority of false alarms. Worse, they detect burglars only after they’ve entered your home. That can create a dangerous situation where you come face to face with a burglar in your hallway. Door and window transmitters are the only way to detect break-ins immediately.
Don’t let anyone convince you that motion detectors alone are a substitute for them. Glass-breakage sensors are available too, but are optional. Most burglars only break glass in order to unlock a door or window. Then, when they open the door or window, a standard transmitter will detect the entry.
Plan the Best DIY Home Security System
To figure out how many transmitters you need for your DIY home security systems, start by sketching all of the doors and windows on the ground level of your home. Number each opening, beginning with the front door and moving in a clockwise direction. Be sure to include the garage service door if you have an attached garage. Then count only the upper-level openings that can be reached without a ladder (burglars rarely use ladders). Don’t forget to count the patio door on an elevated deck.
Fire poses a greater danger to your family than burglary. So you may want to add wireless smoke detectors (about $90 each) to your security system. That way, the alarm panel will notify your monitoring service of a fire condition and the service will call the fire department. You’ll need a minimum of one wireless smoke detector on each floor. Add a smoke detector in each hallway leading to a bedroom, and one in each bedroom. If you have a gas furnace, water heater or clothes dryer, install one rate-of-rise (ROR) heat detector over each of these appliances and wire them into a transmitter.
Next, decide what kind of control panel you want. There are two types: A “cabinet-style” panel consists of a keyboard that mounts near the door and a circuit board that mounts near your phone interface. A “self-contained” panel is a single unit that mounts near the door. This one-part panel is easier to install but has one weakness. An intruder entering through the door can tear it off the wall before the panel finishes notifying the monitoring service. With a two-part panel, the circuit board keeps working even if the keypad is disconnected. With either type of panel, you’ll need a special phone jack (called an “RJ31X”) to connect the panel to your phone lines.
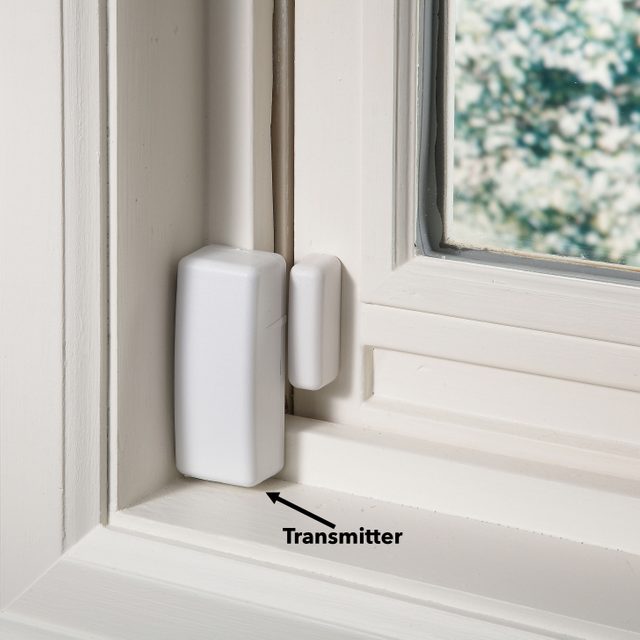
How the Best DIY Home Security System Works
When a burglar opens a door or window, the transmitter senses a loss of contact with the magnet and sends a signal to the panel. The panel places a call to the monitoring service, which then contacts the police or fire department. The monitoring service can also call you or anyone else you’ve listed as “first contacts.”

Don’t Forget the Permit
Most cities require permits for do-it-yourself alarm systems (about $25 per year). Contact your city licensing department to get one, then stick it to a window in or near the front door. If you don’t, your first false alarm may get you a fine plus a stern lecture from the police.
Shop Online
You won’t find professional-quality alarm equipment at a local electronics retailer. Instead, fire up your computer and search for “security alarms” or “security systems.” Look for suppliers that carry multiple brands and models so you don’t get locked into home security equipment that’s not right for you. In addition to a good selection, look for a supplier that offers free system programming and technical support. Make sure the supplier doesn’t require a high-cost, long-term monitoring contract. Before you place an order, call the supplier and discuss your plan. The staff will help you develop a materials list and program the alarm panel appropriately. Ask to have the components labeled for each zone.
Select a Monitoring Service
DIY home security systems don’t have to be connected to a monitoring service that calls the police. They can simply trigger an alarm siren. But don’t dismiss the importance of alarm monitoring. Crime statistics show that burglars aren’t scared away by sirens. They know it will take at least three to five minutes for neighbors to call the police and just as long for police to respond to the call. A home security system monitoring service can contact the authorities much faster. Insurance companies understand the importance of faster police/fire notification, and many offer discounts to offset some of the monitoring costs. So check with your insurer.
Alarm installation companies typically charge you $40 per month with a three-year minimum contract for alarm monitoring. By installing your own do it yourself security system and dealing directly with a monitoring service, you can save at least $360 per year. Simply search the Internet for “alarm monitoring.” Make sure the company is UL (Underwriter’s Laboratory) listed.
If you’ve switched to digital phone service or Voice Over Internet Protocol (VoIP), make sure the monitoring company is equipped to handle those types of calls. If not, it may provide other means of transmitting an alarm signal, such as Internet, cellular, satellite, or radio communicators. Ask how much the additional equipment costs and if there are any additional service fees.
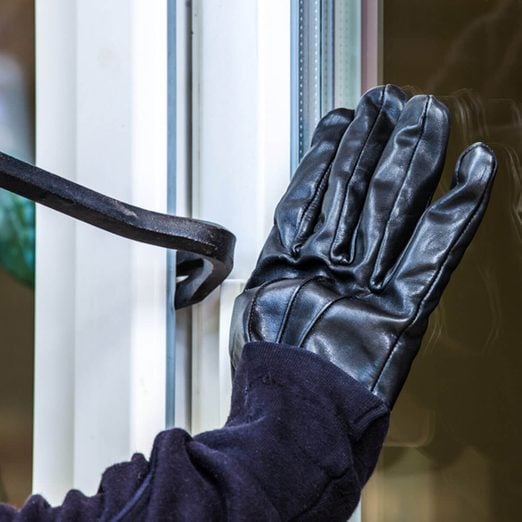
Scare Off Crooks
Burglars want easy pickings, not challenges. So be sure to let them know that your home is protected by an alarm system. Post yard signs, window stickers, and your alarm permit so no crook can mistake your home for an easy target.
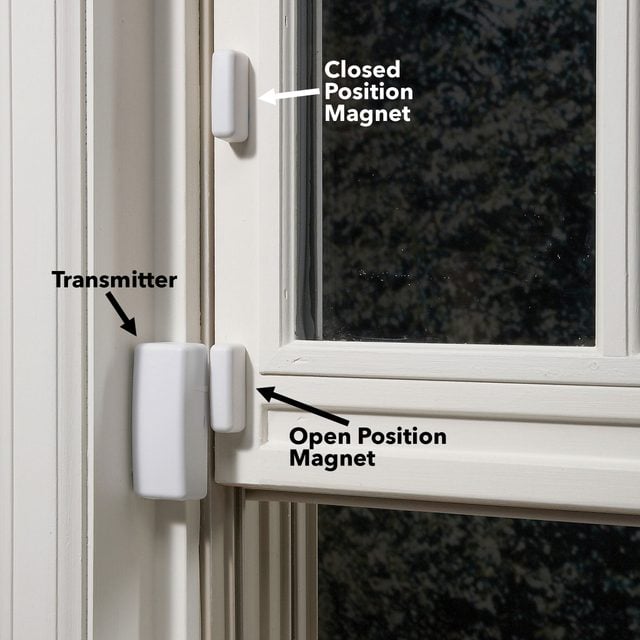
Get Fresh Air — and Security
If you have double-hung windows, mount the transmitter and a magnet 6 inches above the sill. Then mount a second magnet near the bottom of the sash. That way, you can leave the window open a few inches and still turn on the do-it-yourself security system. If a burglar opens the window farther, the alarm will activate.
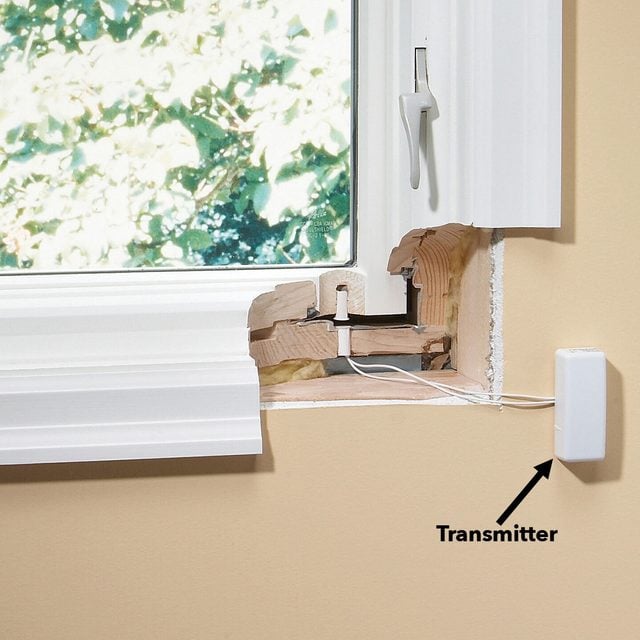
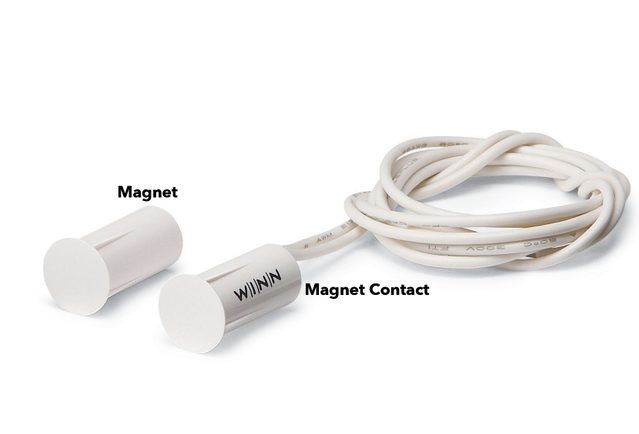
Use Hidden Magnets in Casement Windows
Plunger contacts can make casement windows harder to open or close. Instead, use “recessed” magnetic contacts. Just drill a hole in the sill near the side of the window that opens. Mark the location on the sash and drill another hole for the magnet. Then drill an angled hole at the edge of the side trim. Use a bent coat hanger to hook and “fish” the wires out toward the transmitter.
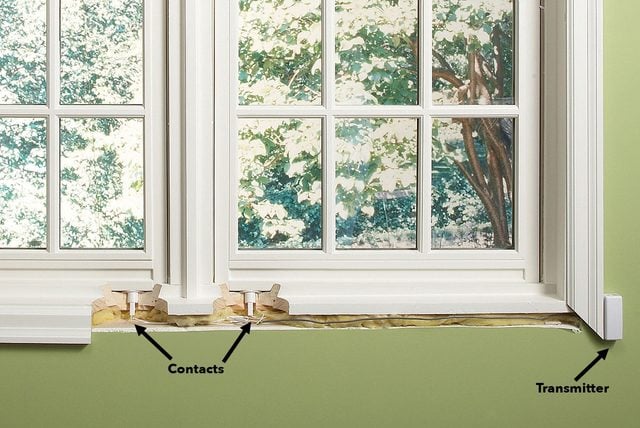
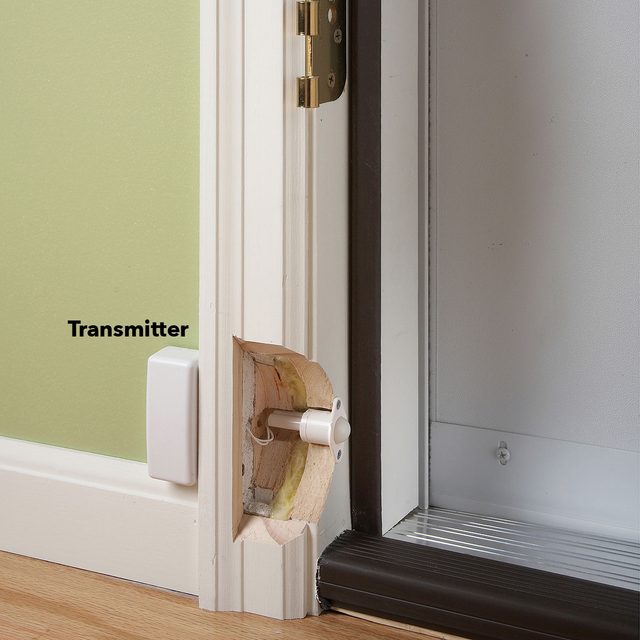
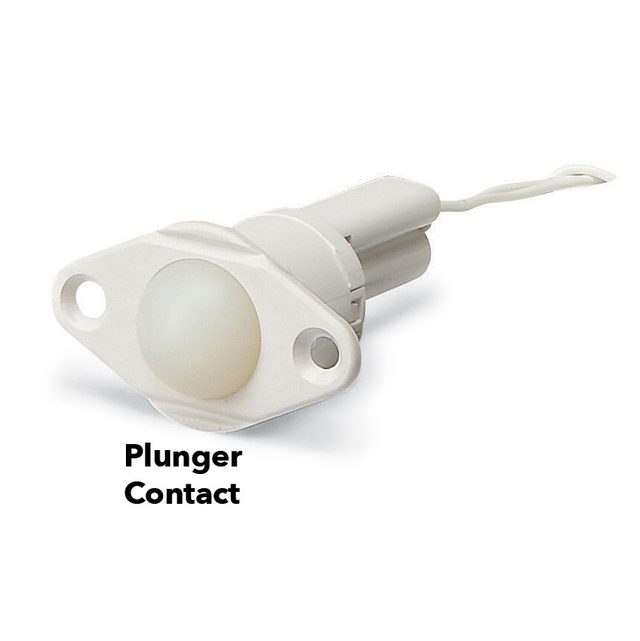
Get a Neater Look With Hidden Contacts
If you don’t like the look of transmitters and magnets, use “plunger” contacts on doors, double-hung windows, and sliding patio doors. The plunger is a simple mechanical switch that triggers when pressure against it is released. When a door or window opens, the plunger triggers a separate transmitter, which then sends a signal to the control panel. To install a plunger, drill a hole for the plunger and another hole in the drywall for the wires. If you paint it to match the wall, the transmitter will be barely noticeable.
Use One Contact for Multiple Windows
If you have banks of windows, you can connect all the contacts (whether they’re the plunger or magnetic type) to a single transmitter. On a bank of three windows, that saves you about $60. Plus, you get a neater look. The catch is that you have to remove the bottom piece of trim so you can run wires under the sill.