
How to Fix a Gas Grill
Updated: Sep. 28, 2023Broken BBQ? No problem! Rescue your old, broken grill in five easy steps.

- Time
- Complexity
- Cost
- A full day
- Beginner
- $51–100
Step 1: Remove the cooking grate and rock grate
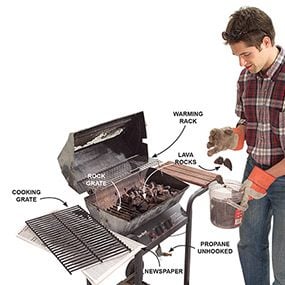
Renovating a grill involves three steps. You clean grease and grime off the gas grill. Repaint oxidized and faded parts with high-temp paint, and replace worn-out parts (get replacement parts at most home centers). Your grill may not look exactly like the one we show in the photos, but the components will be similar. Here’s everything you need to know about cleaning grills with grill bricks.
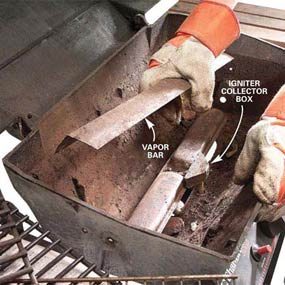
Start by removing the cooking grate, warming rack and lava rocks as shown in Photo 1. If the lava rocks are more than a year old or saturated with grease, replace them with new lava rocks or ceramic briquettes. The rock grate holds the lava rocks or briquettes above the burner. Under the rock grate there will be either a vapor bar or flame spreader, which protects the burner from dripping grease. Remove the rock grate and expose the burner as shown in Photo 2. The burner will be held in place with screws or retaining clips hooked into the venturi tubes.
Caution!
Before doing any work on a broken BBQ, disconnect the gas supply or propane tank, and wear gloves to protect your hands from incredibly dirty grease stains.
Step 2: Test the igniter
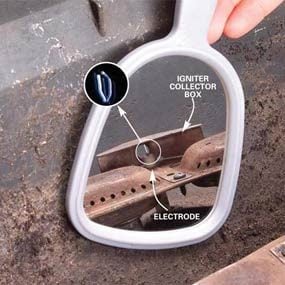
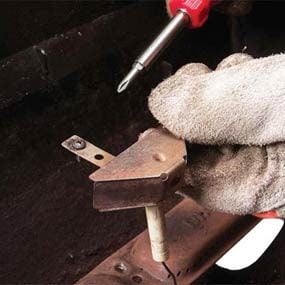
Photo 3: Check the igniter
Hold a mirror behind the igniter collector box and push the igniter button several times. If you see a spark, the igniter is good. If not, replace it (Photo 5).
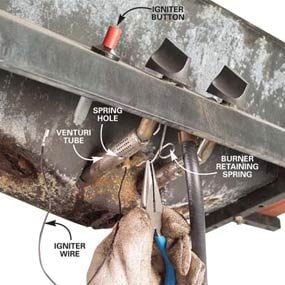
Photo 4: Unhook igniter wire
Pull the igniter wire off the end of the igniter button. Unhook the burner retaining springs from the venturi tube holes with a pliers.
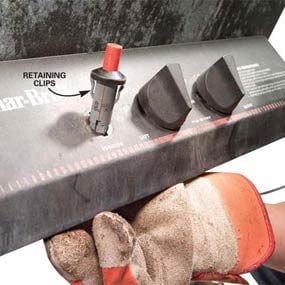
Next, test the igniter electrode for a spark (Photo 3). When you push the igniter button, the electrode in the collector box sparks and ignites the gas. If the igniter wire sheathing has worn off, cover the exposed spots with electrical tape and retest. Most igniters fail because the spark never makes it to the electrode. If the igniter doesn’t work, replace the entire igniter assembly. Photo 4 shows how to disconnect the igniter wire and remove the retaining clips from the venturi tubes, which carry gas from the control panel to the burners. Remove the igniter collector box from the burner (Photo 5) and the igniter button (Photo 6) from the control panel.
Step 3: Remove and clean the burner assembly
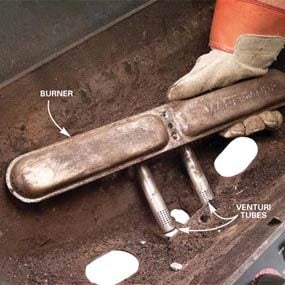
Photo 7: Remove the burner
Pull out the burner, sliding the venturi tubes free from their mounting slots. If the burner has heavy rust or is rusted through, replace it.

The burner assembly is the heart of the grill. Remove and clean it as shown in Photos 7 – 9. If the burner or venturi tubes have excessive rust and the burner holes are rusted through, replace the burner assembly. These assemblies can be expensive.
Step 4: Scrub the barbecue grill body
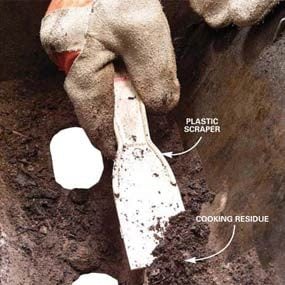
Photo 10: Scrape the interior
Loosen cooking buildup from the grill hood and body with a plastic putty knife. Scrub the inside of the grill with soap and water.
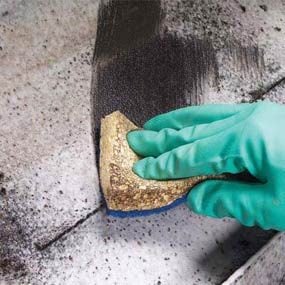
Photo 11: Scrub the interior
Remove stubborn interior buildup with an oven or grill cleaner. Work outside so you don’t breathe the cleaner fumes.
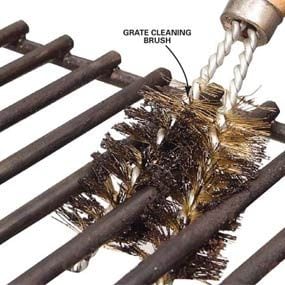
Once you pull out all the parts, remove grease buildup from the body (Photo 10). Remove stubborn grease film with an oven or grill cleaner (Photo 11). Clean the viewing glass with a glass cleaner. Dislodge buildup from the cooking grate with a wire brush or the special grill cleaning brush shown in Photo 12. You can also opt for the steam-powered Grand Grill Daddy grill cleaning brush.
Degrease and Sand Before Painting
Spread degreaser inside the cover and burner area and over the entire exterior. Then scrub the entire grill with a brush. Make sure you remove grease from all the crevices. If you have a power washer, soak the grill with degreaser and then blast off the grease and loose paint. Rinse it with water and let it dry in the sun.
Sand pitted and corroded areas with 80-grit sandpaper. Use a wire brush in the crevices to remove surface rust and chipping paint. Then switch to 120-grit sandpaper and sand the entire grill and cart.
Step 5: Restore the wood slats
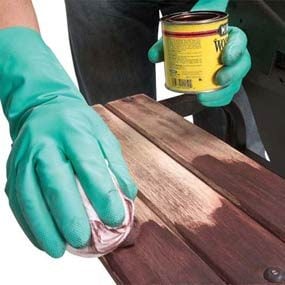
Scrub down the wooden slats with sandpaper, and recoat them with a matching stain (Photo 13).
Paint the grill
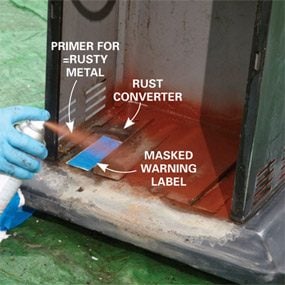
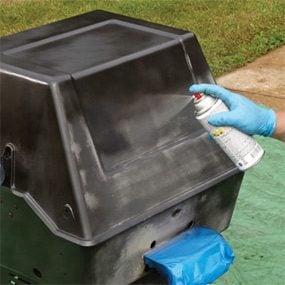
After sanding, wipe the entire grill with a tack cloth. Pretreat the worst rust spots with a rust converter product. Once that dries, prime the rusty areas and bare metal with a primer for rusty metal. Let the primer dry. Then spray-paint it. Let the paint dry for the recommended time. Then install the burners and grates and any replacement parts and get grilling.
Required Tools for this Project
Have the necessary tools for this DIY project lined up before you start—you’ll save time and frustration.
- 4-in-1 screwdriver
- Cleaning brush
- Gloves
- Mirror
- Needle-nose pliers
- Orbital sander
- Plastic scraper
- Rubber gloves
Required Materials for this Project
Avoid last-minute shopping trips by having all your materials ready ahead of time. Here’s a list.
- High temperature paint
- Metal primer
- N95 dust mask
- Oven cleaner
- Rust converter
- Sandpaper
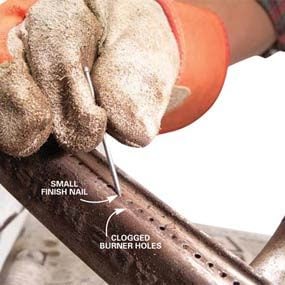
- Small finish nail
- Wood stain and finish
