
Build a Garden Archway
Updated: May 07, 2019
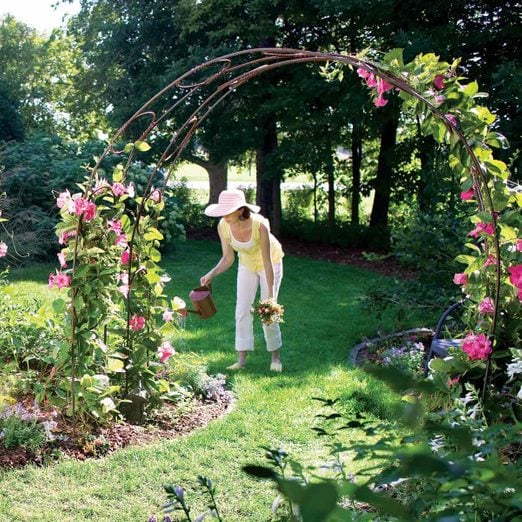
Make this charming metal garden arch climber from $25 of steel-no welding required!
A full day
Beginner
$51–100
Introduction
You can make this metal garden arch trellis from just $25 of steel rebar. And you won't have to weld a thing. We'll show you how to bend the arches and attach the decorative circles with wire. When you're done, cover it with climbing plants for an attractive addition to your garden.Tools Required
- Chalk bottle
- Clamp
- Conduit bender
- Hacksaw
- Marker
- Rubber mallet
- String
- Tape measure
Materials Required
- 18-gauge copper wire
- Cable ties
- One 1/2-in. x 10-ft. length of rebar (for stakes)
- Plastic garage door stop molding or other stiff but bendable material
- Two 1/2-in. x 20-ft. lengths of rebar (for arches)
- Two 3/8-in. x 20-ft. lengths of rebar (for circles)
Getting Tools and Materials for Building a Metal Garden Arch
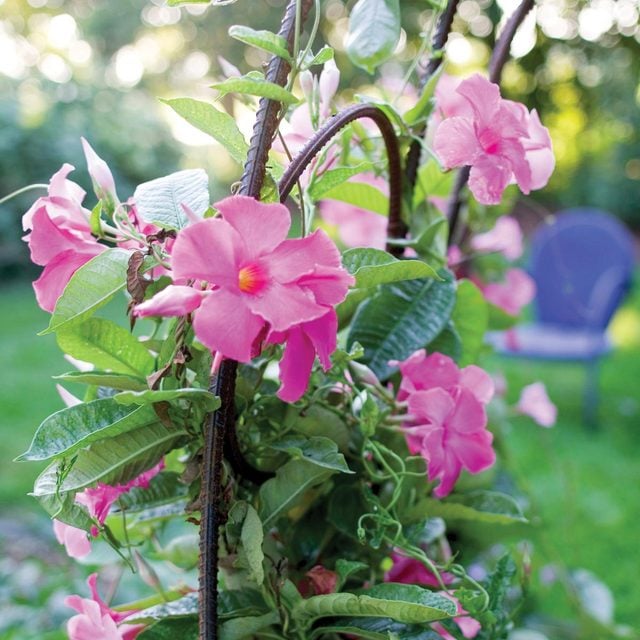
Looking for a garden feature that’s low cost and easy to assemble? Then this archway trellis is perfect for you. We made it from inexpensive steel “rebar” that you can find at any home center. Once the trellis is covered with climbing plants, the steel disappears and you have a dramatic entryway into your garden.
In this story, we’ll show you how to create smooth bends in rebar and how to assemble the trellis. You’ll need a few simple tools, including a conduit bender ($30) for tight curves and a hacksaw for cutting the bar to length. In the “fun-to-buy-tools” department, you may want to pick up an angle grinder ($50) and a metal-cutting blade for quicker rebar cuts. And don’t forget to buy a pair of heavy leather gloves to build the garden arch.
Allow a full day to build your first trellis. Once you’ve mastered the process, you should be able to build a second one in less than half a day. Rebar itself is relatively inexpensive: A 20-ft. length of 1/2-in. costs about $7 and 3/8-in. about $4. The main problem is getting your 20-ft. lengths home. Rebar is floppy, not stiff. One trick is to buy a 16-ft.-long 2×4, attach it to your roof rack and then lash the rebar to it. (Be sure to attach a red flag to each end of it.) Otherwise, delivery costs vary from $50 to more than $100.
Project step-by-step (11)
Figure A: Rebar Arched Trellis
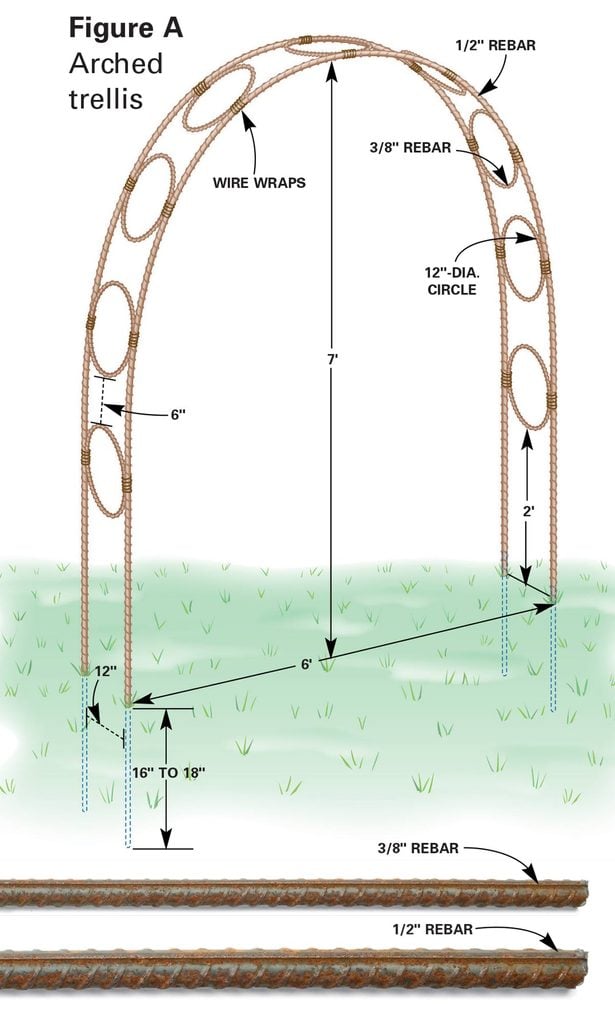
Our design is about 7 ft. high and 6 ft. wide is made of two 20-ft. lengths of rebar that you bend into arches. You then simply join the arches with rebar circles, lashing them together with wraps of copper wire. No welding needed-and there’s no maintenance of the garden arch. The materials for our trellis cost less than $25. For comparison, a welded metal or high-end vinyl trellis costs several hundred dollars. You’ll need rebar in two sizes: 1/2-in. for the arches and 3/8-in. for the circles.
For Metal Garden Arch, First Cut the Rebar into Stakes
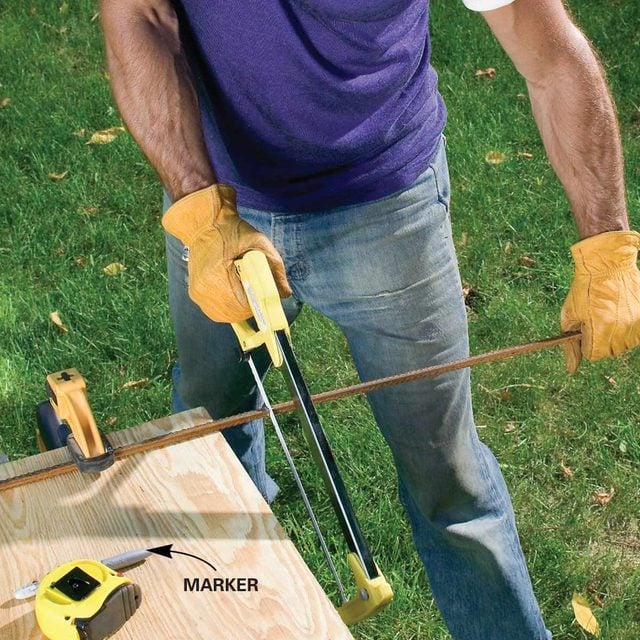
To create that swooping arch from the 1/2-in. rebar, make a simple bending jig on the ground. Cut the 10-ft. length of 1/2-in. rebar into ten 10-in.-long stakes. Saw about two-thirds of the way through with a hacksaw, then snap off the stake.
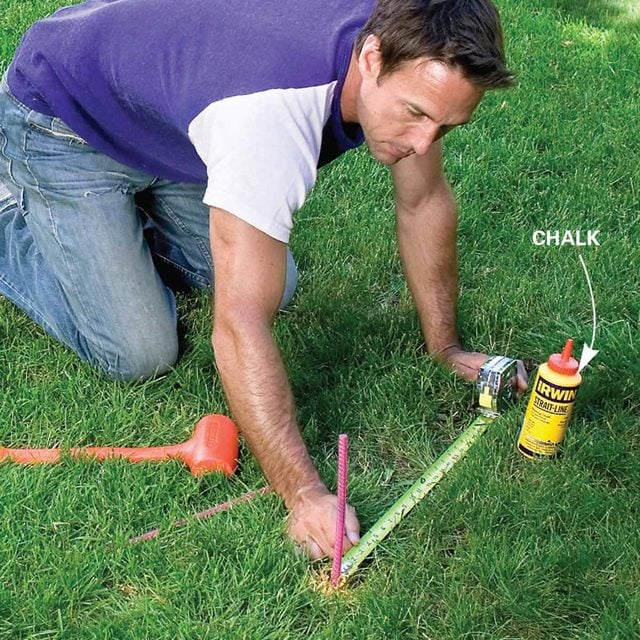
Use Chalk to Make an Arc
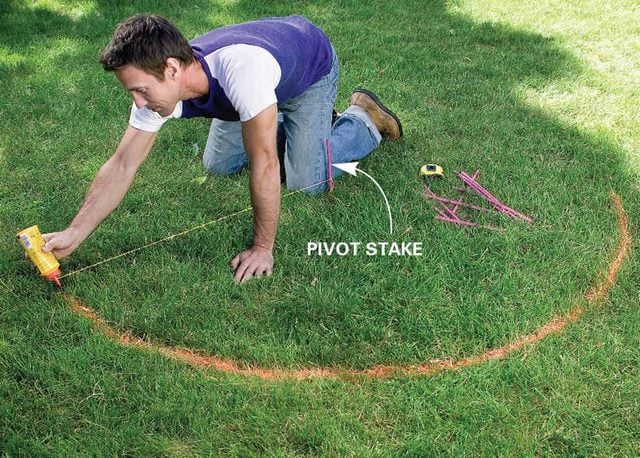
Drive one rebar stake into the ground and tie a 3-ft. string to it. When you pull the string taut, you create a compass and can mark a smooth arc with chalk. Mark a 3-ft.-radius arc on the lawn using the string to guide the chalk bottle.
Drive Stakes in the Arc
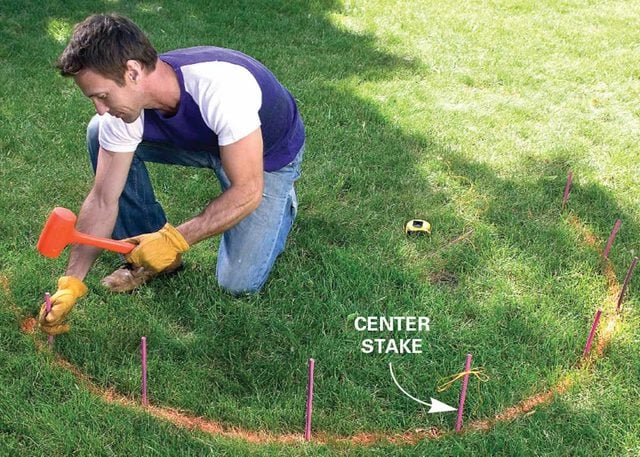
Space nine stakes evenly around the semicircle, and drive them down about 5 in. Mark the middle stake with a string.
The 3-ft. radius makes an arch that will span 6 ft. You can make it larger or slightly smaller if you want. But we found that bending 1/2-in. rebar into a 2-ft. radius is difficult.
Bend the Rebar into Shape

Rebar may kink when you bend it, so we inserted a cushion (a 9-ft. length of plastic garage door stop molding; available at home centers) between the rebar and the stakes to soften the bend. You can use some other firm but flexible item, like vinyl siding or a strip of flexible hardboard to cushion the rebar as well.
To bend the arches, hold the rebar at the ends while you bend it to keep the arch smooth. With a helper, center the rebar on the middle stake and push the ends around the semicircle. Overbend it slightly; the ends will spring back a bit when you release them. Don’t worry about that; the arches will form the correct radius when you set them in the ground.
Create Circles With a Conduit Bender
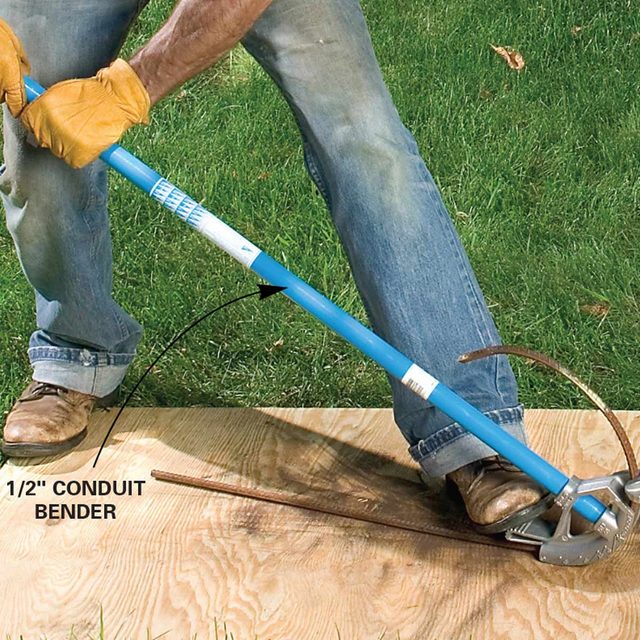
We linked the arches together with circles bent from the 3/8-in. rebar. Cut the rebar into 4-ft. lengths and bend into a circle them with a 1/2-in. conduit bender (available in the electrical department of any home center or hardware store).
Work on a solid surface and simply fit one end of the rebar into the lip of the bender. Then form the curve by pulling the handle and pressing down on the tool with your foot. Shift the bender and continue the bend until you have a complete circle. The circle will have a 12-in. diameter. Cut off the extra rebar. Don’t worry if the circles aren’t perfect. Minor imperfections will be minimized when you wire them to the arches and hidden when your greenery grows. Repeat until you have nine circles.
Assemble the Garden Arches and Start the Holes for the Anchors
Now find the ideal spot in your yard for the trellis and lay out the footprint. Position the anchor holes for the trellis 6 ft. apart and 12 in. between arches. Drive in stakes to start the holes, then pull them out.
Stick the Trellis in the Ground
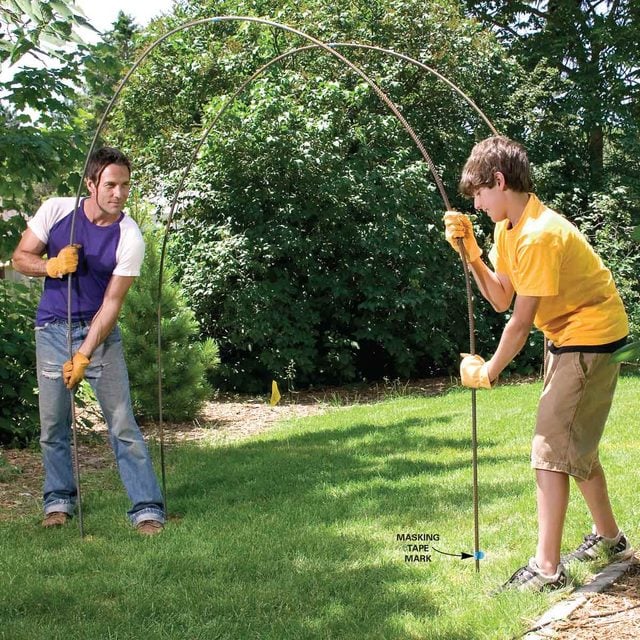
To keep it sturdy and stable, you have to sink each arch end about 18 in. into the ground. Measure up each leg and wrap tape at the 18-in. mark as a depth guide. With a helper, press the ends of the two arches into the ground. Drive a stake partway down to get started, or use a 3/4-in. steel pipe as a holder.
Tie the Circles to the Garden Arches
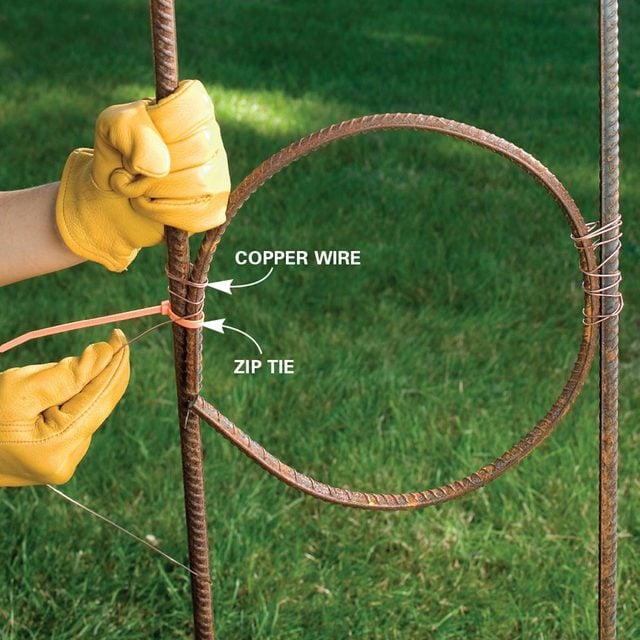
Then add the 3/8-in. rebar circles. Position the first circle about 2 ft. up from the bottom of your arch. Any lower and you may be inviting little feet to use the trellis as a makeshift ladder. Use cable ties to temporarily secure the circles in place, with the cut ends against one arch. Later you’ll cover these sharp edges with the wire wrap. Space the remaining circles evenly around the arch. They’ll be about 6 in. apart. The cable ties allow you to easily reposition the circles for the best appearance before you wire them into place.
To bind the circles, simply wrap the copper wire around the arch/circle joint. There is no special technique here. About 2 ft. of 18-gauge solid copper wire will do. Just keep the binding tight and extend it about 2 in. along the joint for good stiffness. And tap the wire ends down flat to the rebar with a hammer. Once you attach the circles to the arches, your trellis is ready to shepherd creeping vines upward, adding height and dimension to your outdoor space.
A Solution for Hard Soil
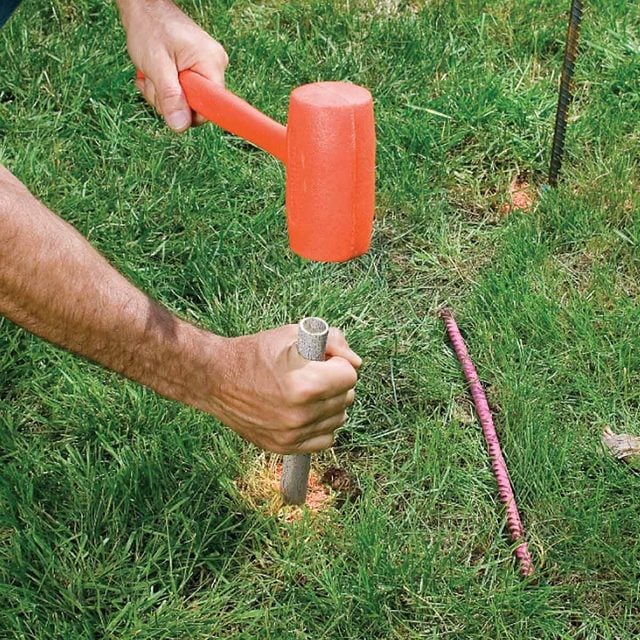
If you have hard soil, you won’t be able to push the arches directly into the ground. Instead, you’ll have to plant the rebar arches in a pipe.
Drive an 18-in. length of 3/4-in. galvanized pipe most of the way into the ground as shown. Pull out the pipe and poke the dirt from the inside of the pipe until it’s open. Then push the 3/4-in. pipe back into the hole and drive it down until it’s flush with the ground. Now, simply insert the arch ends in the pipe.
For this Outdoor Arch, Don’t Worry About Imperfections
Chances are your rebar arches will look a bit irregular at first. Don’t panic. Once you push them into the ground, they’ll look more balanced. However, they may never be perfect. Resist the temptation to fix them. A little pressure here, a little push there and the next thing you know, you’ve got a lopsided mess on your hands.
It’s better to soldier on and attach the rebar circles-the trellis will come together nicely. Bumps that were driving me wild eventually vanished beneath the greenery.
Gardening is more rewarding when your efforts meet with success. These 10 gardening tips will help make that happen.